Organizations
Organizations are the basic container into which all scenarios, users, and data belong.
Organizations usually represent a company that is a Make customer or partner. Each organization has a separate pricing plan and is billed separately. This means that you can also monitor your operations and data consumption for each organization separately.
Each organization allows you to select the geographical location of the data center, where the organization's data will be stored and processed. Currently, Make supports two data center locations:
United States (US)
European Union (EU)
Note
The geographical location that you select for an organization does not represent where your company or your users are located, but where the data center that stores and processes your data is located.
Make recommends that you select the location closest to you to ensure low latency.
Warning
You cannot change the location of the data center after you create the organization.
Creating organizations
Any user can create their own organization, even if they already are a member of another organization.
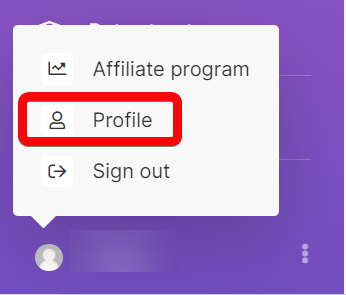
Click your user name in the left menu, and then click Profile.
In the Organizations tab, click Create a new organization.
Fill in the details of the new organization. Note that Region represents the location of the data center that will store and process your data. Country represents your physical location but is currently not used by Make in any way.
Make creates your new organization. By default, the pricing plan for the organization is set to Free. The organization contains one team, called My team.
Adding users to organizations
To add users to an organization, you must be the owner or an admin of the organization. For more details about roles, refer to Organization roles.
Go to the Organization tab and select your organization.
Click on Users.
Click Invite a new user.
In the dialog that opens, fill in the details of the user:
Email - the invited user's email address .
Name - the name of the user. The user can change their name after they accept the invitation.
Team
Note
You must select at least one team for the user to be able to work with Make.
Note - your custom message that appears in the invitation email.
Click Save.
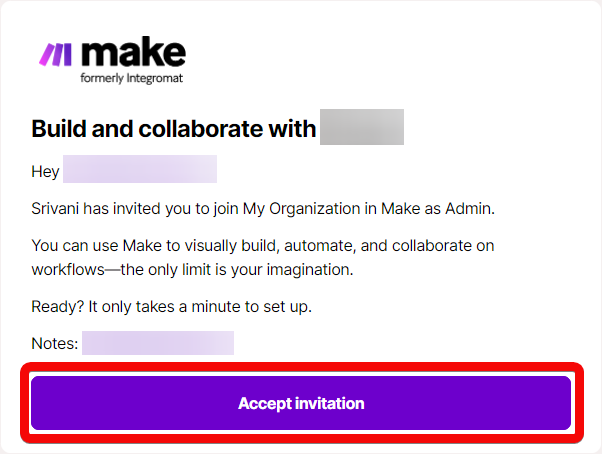
The user receives an invitation email where they can accept the invitation by clicking Accept invitation button.
When the user accepts the invitation, the system adds them to the organization. The system also adds the user to the selected team with the team member role. More about teams.
Note
The invitation expires in 7 days. If the invited user does not accept the invitation, use the following steps:
Remove the invited user from your organization. See the section below.
Use the above procedure to send a new invitation.
Removing users
To remove users from an organization, you must be the owner or an admin of the organization.
Go to the Organization tab and select your organization.
Click on Users.
Use the dropdown menu in the Role column to select Remove.
The user disappears from the list and a message briefly appears confirming the change.
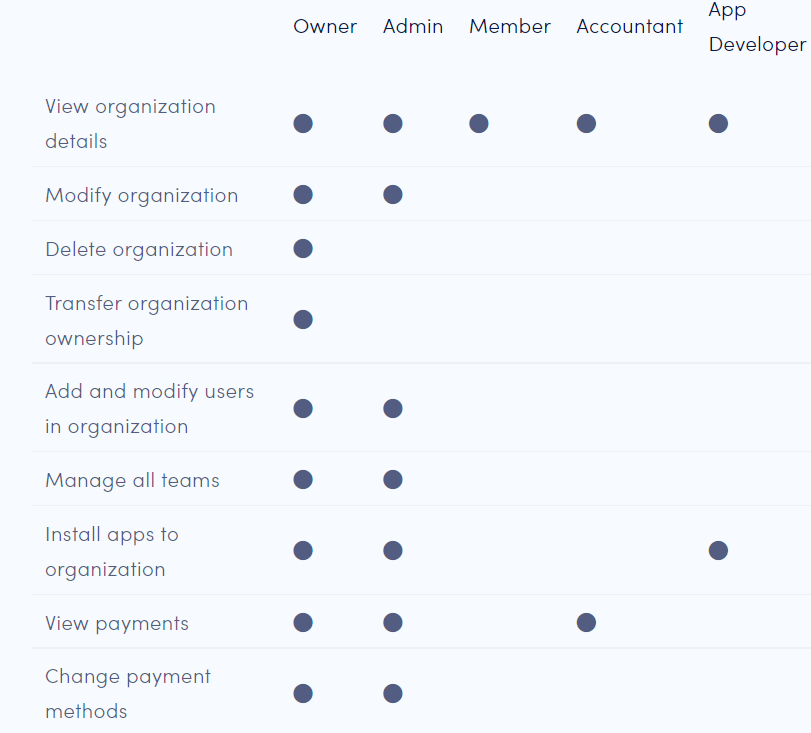
Organization roles
Make provides a two-level permission model. All users are members of at least one organization and one team. The permissions that users have are determined by the organization role and team role that they are assigned to.
The following table describes actions that members of different organization roles can perform.
For information about team roles, read the article about teams.
Switching organizations
If you are a member of multiple organizations, you can change the active organization in the left menu. All items in the menu represent items that belong to the currently selected organization.

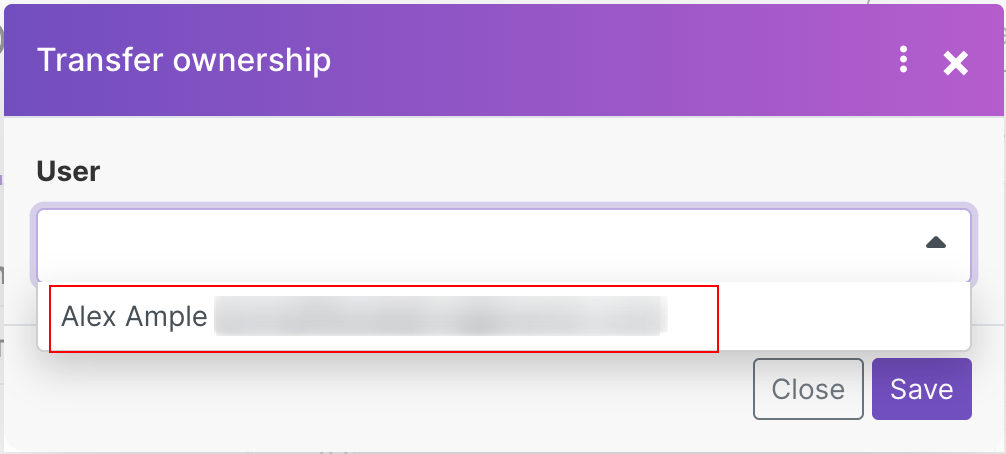
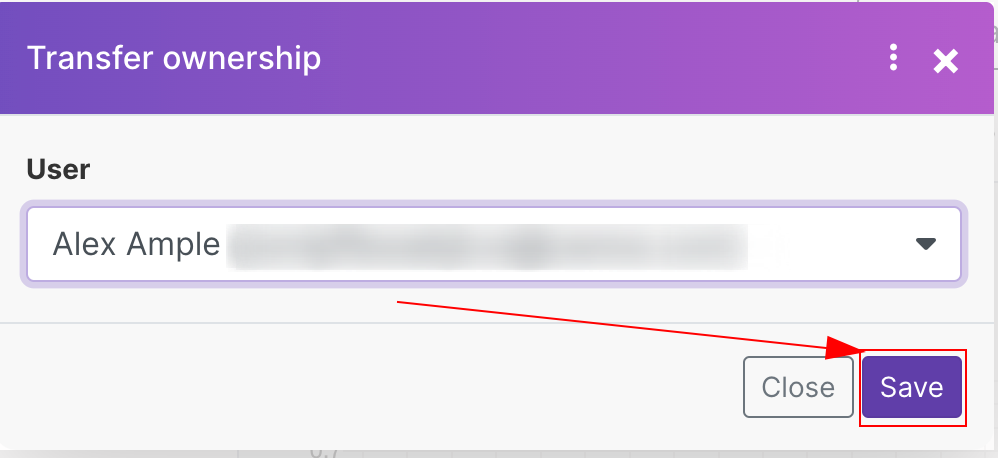
Transfer ownership
When you create an organization, you automatically become the owner of the organization. Organization owners can manage and access all teams in an organization. An organization can have only one owner. If you are the owner of an organization, you can transfer ownership to any member of your organization.
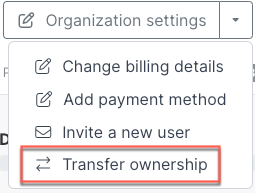
Go to your Organization dashboard by clicking Organization in the left sidebar.
Next to Organization settings, click the drop-down arrow to expand the drop-down menu.

Select Transfer ownership.
Use the drop menu to select the organization member you want to be the owner of the organization. All organization members appear in the menu. You may need to add someone to your organization. Once a new member accepts the invitation, you can transfer ownership to them.
Click Save.
A purple pop-up appears confirming that ownership is transferred successfully.