Single Sign-on
Single sign-on (SSO) allows you to use your own provider of user account management, authentication, and authorization services to register and log in to Make
Make supports the following protocols:
Open ID Connect (OIDC)
SAML 2
Make supports the following identity providers (IdPs):
You configure SSO for each of your organizations separately.
You can prevent your organization members from accidentally creating their own self-service accounts by claiming a domain. After you set up SSO, claim your email domain so Make can recognize your new users. Any new user who signs in with your claimed email domain gets a prompt to use SSO. See our article on domain claim for more information about claiming a domain and provisioning options.
Enabling single sign-on using Open ID Connect (OIDC) and SAML 2.0
Warning
Double-check your SSO configuration before you click Save on the SSO settings page. When you click Save, Make enables SSO with the settings you provided. You will be logged out immediately. You won't be able to log in with your Make credentials anymore.
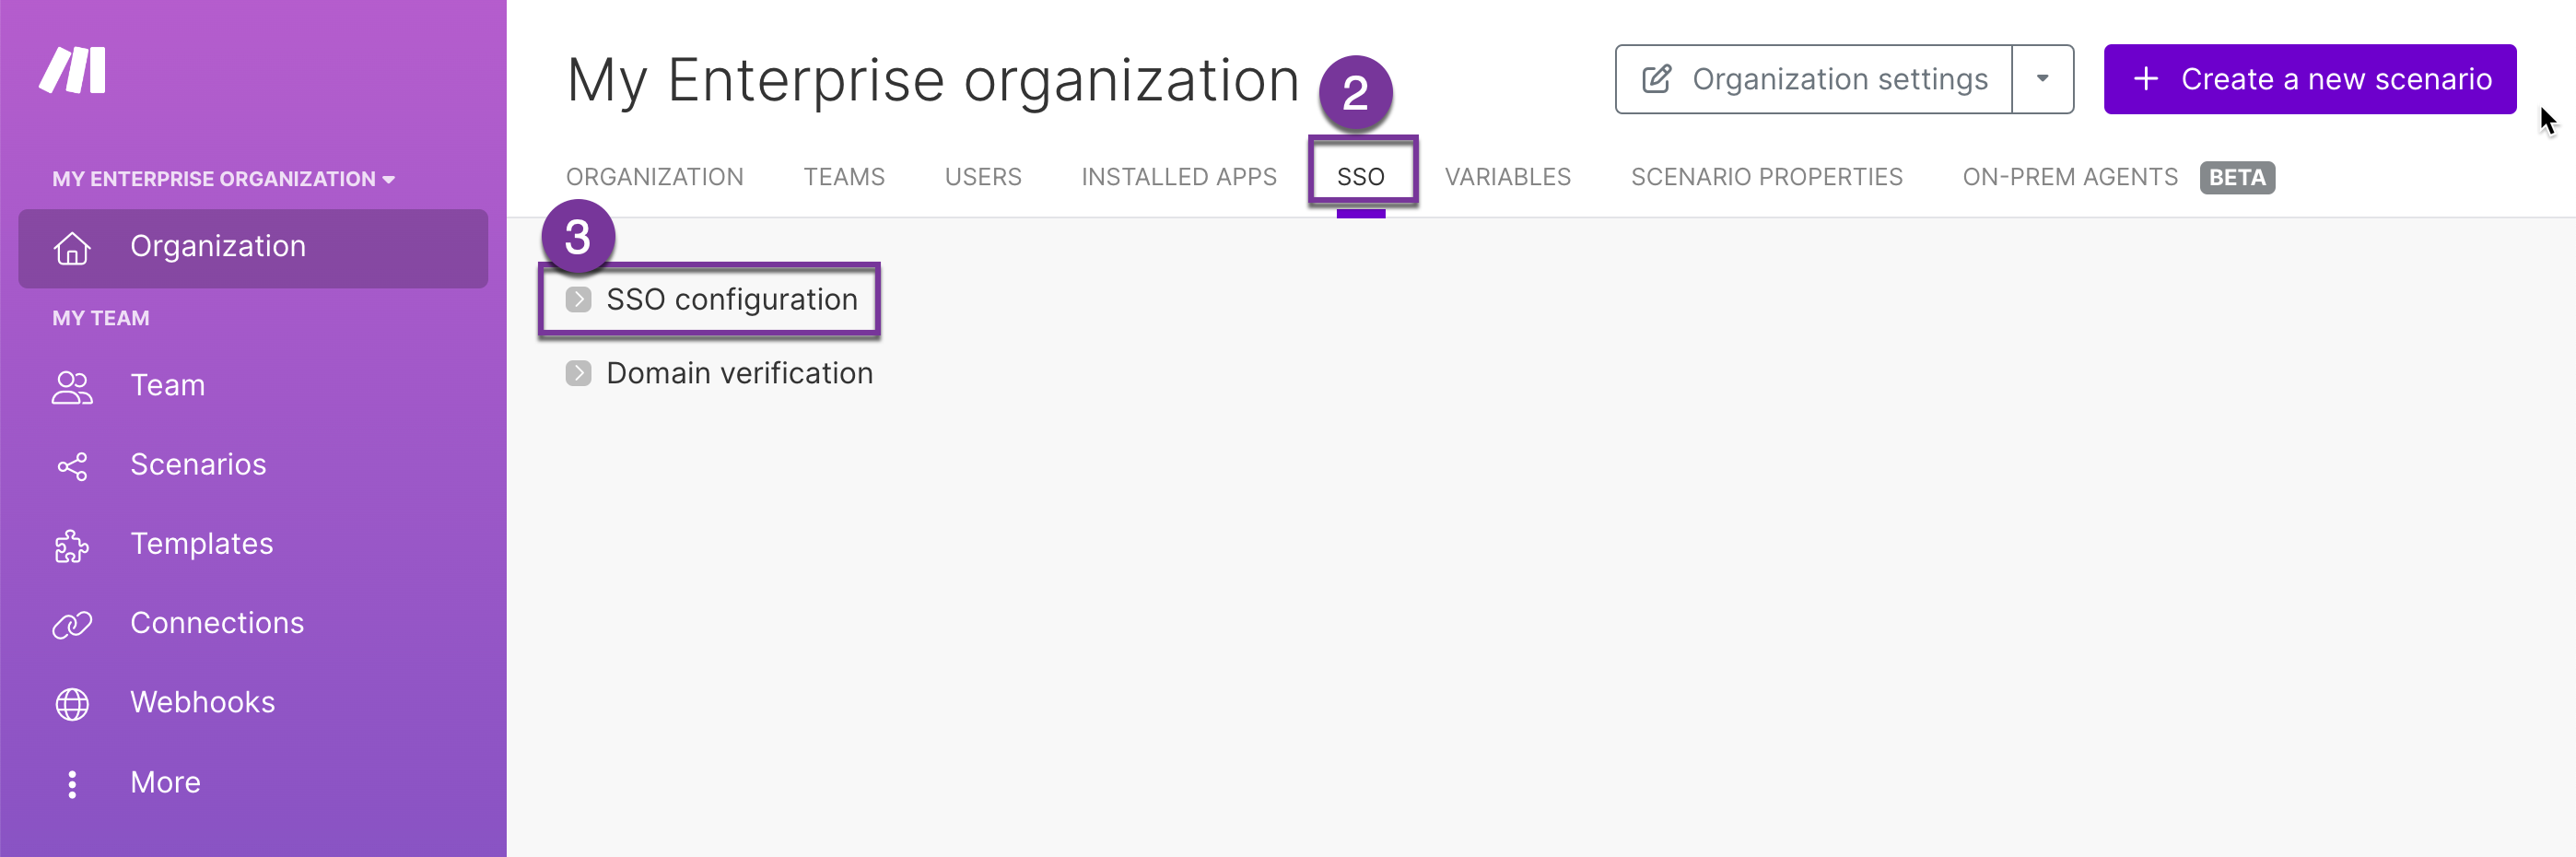
Log in to Make.
Go to your organization dashboard and click SSO.
Click SSO configuration.
Enter a Namespace. You can enter any text that describes your organization. Users will need to enter your organization's namespace on the SSO login page. Namespace must include only lowercase characters and dashes.
Select an SSO type.
None - default option indicating that SSO is turned off.
Oauth2 - select Oauth2 for Open ID Connect.
SAML
Fill in the protocol-specific information as described in either the Open ID Connect or SAML section of this article.
Under Team provisioning for new user, select which teams new users who log in will become members of. You can choose to not add new users to any team.
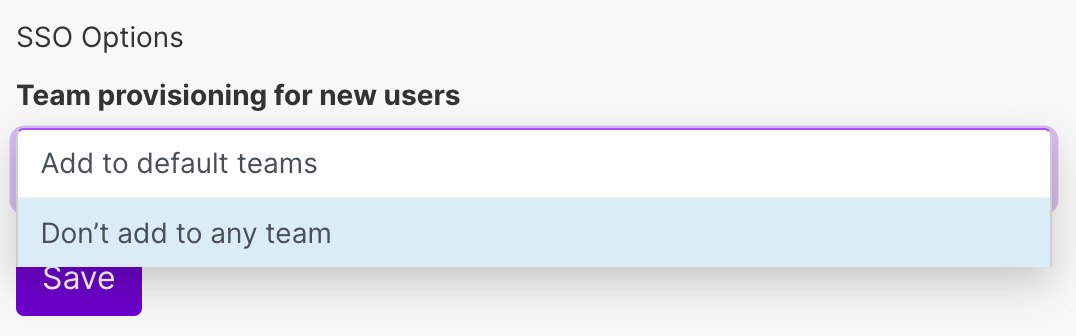
Note
If you do not select a default team, users logging in through SSO will not be able to access any data. This is because all types of data within Make must belong to a team. If a user does not belong to any teams, they cannot work with Make. Read more about teams.
Click Save.
Make enables SSO with the settings you provided and logs you out immediately. You can now log in with your SSO provider credentials. At the same time, you receive an email with a one-time link, which you can click to disable SSO.
Important
When logging in using SSO for the first time, you must use an account that is the owner of the organization and has the same email address as the account that you used to configure SSO. Make sure that you assign the same email address to the user in your identity provider.
The following fields appear once you select OAuth 2.0 from the SSO menu:
Field | Required | Description |
|---|---|---|
User Information URL | required | URL obtained from your identity provider. Example: |
Client ID | required | Obtained from your identity provider. Sometimes called Application ID. |
Token URL | required | URL obtained from your identity provider. Example: |
Login scopes | optional | Parameters used when accessing your identity provider. |
Scopes separator | optional | The character used between scopes, such as a space or a comma. If your separator is a space, use the spacebar on your keyboard. |
Authorize URL | required | URL obtained from your identity provider. Example: |
Client secret | required | Obtained from your identity provider. |
IML resolve | required | Because both Make and your Identity provider use attributes such as username and email, you need to map these attributes using IML. For Open ID Connect:
|
Redirect URL | optional | The location where the identity provider sends the user once successfully authorized and granted access. Must be unique to your application/instance. |
The following fields appear once you select SAML 2.0 from the SSO menu:
Field | Required | Description |
|---|---|---|
Service provider certificate | required | Make provides certificates for you. Click For more information, see our article on SAML certificate management. WarningAt least one certificate must be active. If there is no |
Identity provider certificate | required | An x.509 certificate created and stored by your IdP, for example, Google, Okta, or Microsoft Azure Directory. You can enter this information in the following ways:
|
IdP login URL | required | Also called an authorization URL. The IdP login URL is available from your IdP, for example, Google, or Okta. The IdP metadata typically contains this information in XML. The IdP metadata is usually downloadable from your Identity provider. |
IdP logout URL | optional | A URL created by your IdP to enable Single Log Out (SLO). Leave this field empty to disable SLO. |
Login IML resolve | required | Because both Make and your Identity provider use attributes such as username and email, you need to map these attributes using IML. |
Redirect URL | optional | The location where the identity provider sends the user once successfully authorized and granted access. Must be unique to your application/instance. |
Allow unencrypted assertions | optional | Your IdP may not support SAML 2.0 assertions with encryption. Check with your IdP to determine whether you need to enable this option. |
Allow unsigned responses | optional | Your IdP may not support a signed SAML 2.0 response. Check with your IdP to determine whether you need to enable this option. |
Sign requests | optional | Your IdP may require a signed SAML 2.0 response. Check with your IdP to determine whether you need to enable this option. |
Audience | optional | Optional field to define the intended target. Typically this is a URL but can also be formatted as any string of data. |


SAML certificate rotation
For more information on rotating your service provider certificate, see our article on SAML certificate management.
To support a broad choice of identity providers (IdPs), Make lets you map values related to identifying users. The IML resolve maps the values from your IdP to Make's internal values by using IML, a JavaScript-based function notation. Your IML resolve must be specific to your IdP. You must map the following properties:
| You can map this to any valid email. CautionAliases and alternate email suffixes can create problems. Be sure to map the most appropriate email in your IML resolve. |
| Used as the user's name in the application. You can reuse email for this property. If left blank creates a user without a name that must be updated later. |
| External user ID Can be |
Example
In the following example, the resolve maps the following values:
Make | Your IdP |
|---|---|
|
|
|
concatenated together |
|
|
{
    "email":"{{get(user.attributes.email, 1)}}",
    "name":"{{get(user.attributes.firstName, 1)}} {{get(user.attributes.last}}
    "id":"{{user.name_id}}"
}Microsoft Azure supports both Open ID Connect (OIDC) and SAML 2. Perform the following steps to connect Make with Azure Active Directory.
Open ID Connect (OAuth 2.0)
Log in to your Azure Portal and open Azure Active Directory.
Open App registrations and click New registration.
Give the registration a name.
Fill in the Redirect URL.
Find the Redirect URL In Make > Organization > Settings after you select an SSO type.
Click Register.
Note down the Application (client) ID.
Paste this ID into your Make settings.
Go to Certificates and secrets and click New client secret.
Paste the secret value into your Make settings.
Go to Overview and click Endpoints.
Paste the OAuth 2.0 authorization endpoint (v2) into the Authorize URL field in Make settings.
Paste the OAuth 2.0 token endpoint (v2) into the Token URL field in Make settings.
Paste the following into the User information URL in Make settings.
In Make, set up Login scopes and Scopes separator:
Login scopes: openid, profile, email
Scopes separator: space
In Make, paste the following into User information IML resolve. This tells Make how to map user information received from Azure to information in Make database.
{"id":"{{id}}","email":"{{mail}}"}
Logging in using SSO
When Make is configured to use SSO, users don't use the default sign-in form. Instead, they use the dedicated SSO sign-in options.
Click Sign in with SSO.
Enter the namespace you chose for your organization.
Log in using your identity provider and consent to Make's access to your user data.
The user is now logged in. If the user was not assigned to your organization before, the system creates a new users account for them and assigns them to the selected default team.
Note
If a user with the same email address already existed in the organization before you configure SSO, they will not have access to the organization's data. To solve this, delete the user from the organization and ask them to log in again using SSO.