Apple iOS
The Apple iOS modules allow you to monitor events performed by your Apple iOS device and/or perform various actions using your Apple iOS device.
Getting Started With the Apple iOS App
Prerequisites
Apple iPhone or iPad
Make App for iOS installed on your device.
In order to use the Apple iOS app with Make, it is necessary to have the Make for iOS app installed on your device. To install the app, please follow the download instructions, and install the app from the App Store.
https://apps.apple.com/us/app/integromat/id1177073656
You need to log in and register the device with your account. You can only log in by scanning a QR code or manually entering a code into the app. You create the code in your browser when you pair your app with your account on the Devices tab. Once paired, the app shows a list of functions available for your mobile device.
The module dialog fields in bold in the scenario editor are mandatory!
Adding Your Device to Make Account
To use the Make for Apple iOS app, you need to add your Apple iOS device to your Make account.
To add your Apple iOS device to your Make account, please see the Devices documentation article.
Setting Up the Make for iOS App
Before you can create a scenario using the Apple iOS app modules, you need to set your Make for iOS app to allow access to your device's corresponding functions.
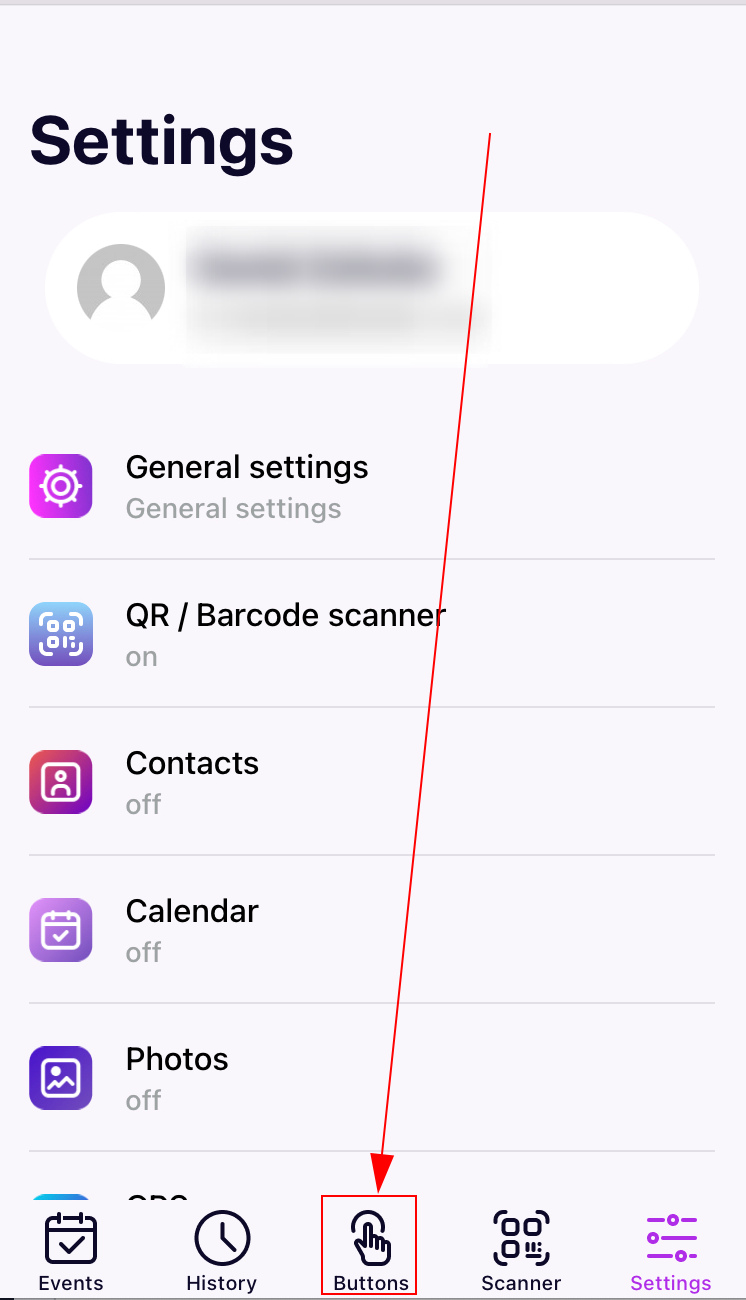
Open the Make for iOS app and tap Settings.
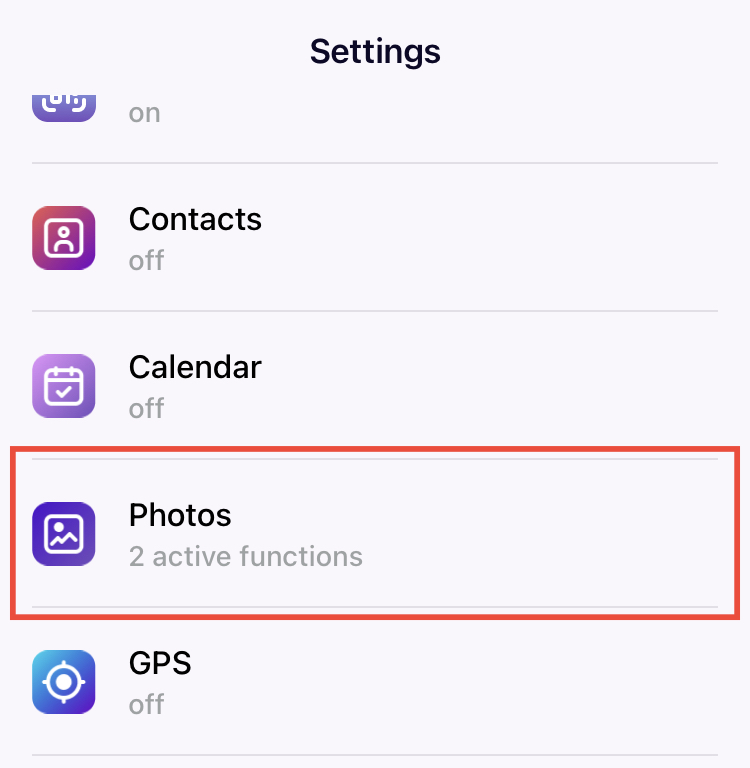
Tap the function you want to use in your scenarios. For example, Photos.
Enable or customize the configuration and tap Setting.
You can now see the active functions listed under the function title.
 |
Using the app
The app is designed to run in the background and perform selected functions. On the main screen, you can switch between two lists: Events and History. The Events include a list of captured events that have not yet been sent to the server. The History contains all events that have already been sent to the server and those that generated an error when being sent. By clicking on an event, you can view its details, including errors that have possibly occurred.
The app synchronizes events automatically. The synchronization is performed in the shortest possible time interval supported by the operating system. Although for Android devices, events are sent immediately, for iOS devices it can take several hours to send events. The automatic synchronization also occurs every time you open the app. To start the synchronization manually, drag the list of events down.
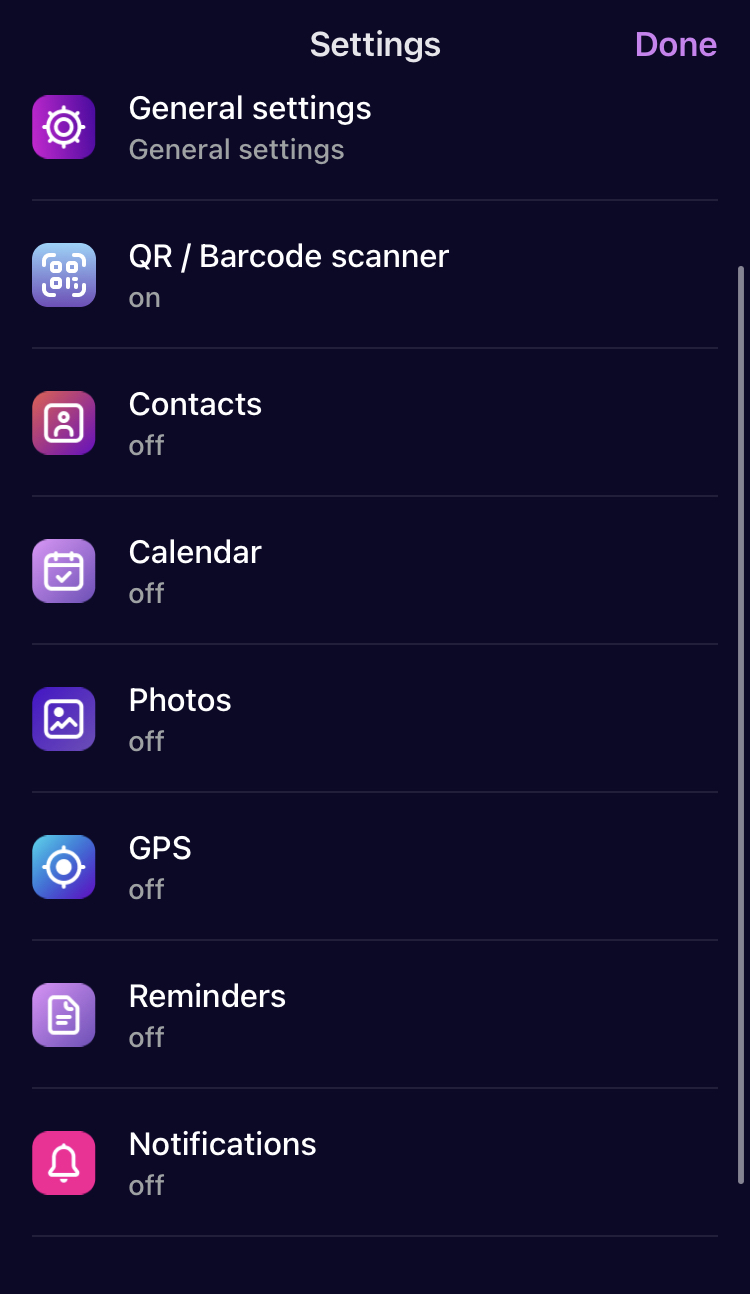
General Settings
Synchronize events in the order they were created | This option allows you to keep the synchronization order even if the scenario is not available. No new events are processed until the first event in the queue is processed. |
Send photos only over WiFi | When enabled, photos will be sent only when your device is connected to the Internet via WiFi. This prevents high data consumption when connected via the mobile data network. |
Contacts
Send changes in contacts to Make | This function allows you to trigger the Watch contacts module in your scenario when the contact is added or updated on the device. |
Allow Make to import contacts to the device | This function allows you to use the Create a contact module in your scenario to create a contact in your iOS device. |
Send All | Tap the button to send all contacts from your device to the Make scenario. |
Calendar
Allow Make to import events to the device | This function allows you to use the Create a calendar event module in your scenario to create a new calendar event on the iOS device. |
Send new events to Make | This function triggers the Watch a calendar module in your scenario when the calendar event is added or updated on your iOS device. |
Send All | Tap this button to send all calendar events from your device to the Make scenario. |
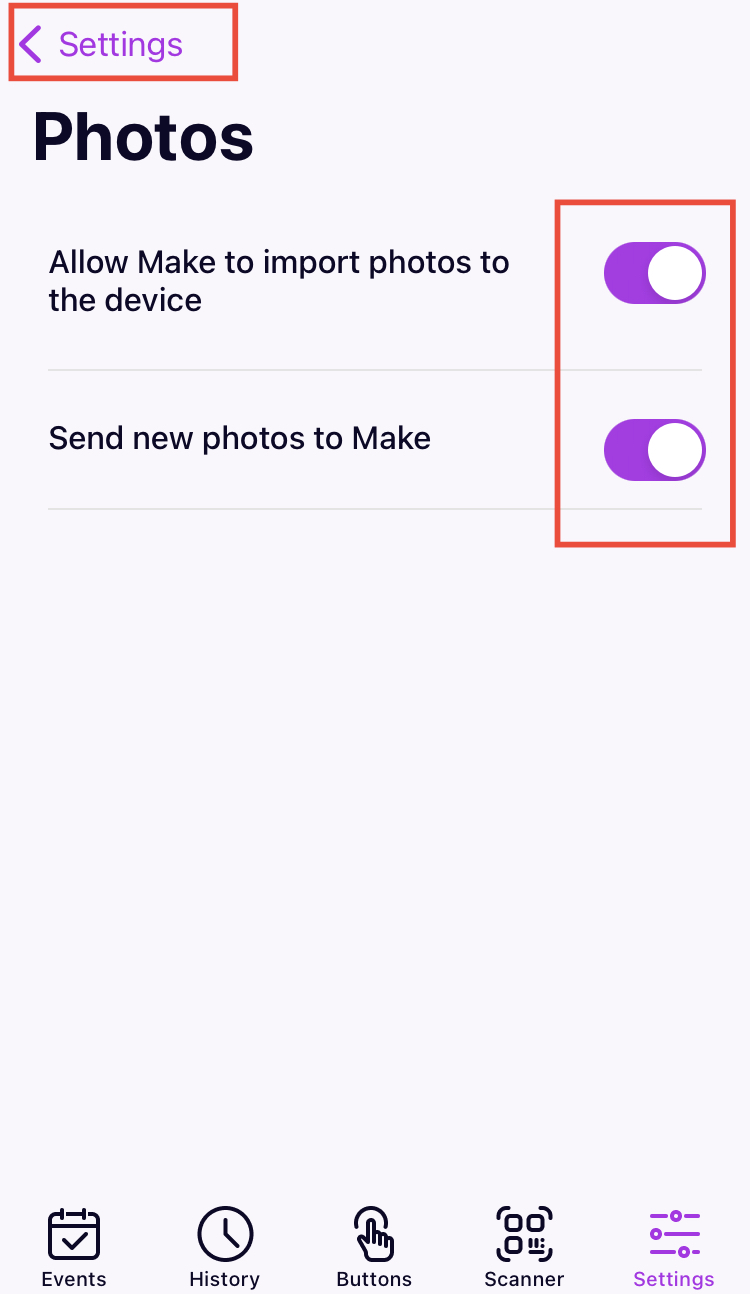
Photos
Allow Make to import photos to the device | Enable this option to use the Upload a Photo module. |
Send new photos to Make | When enabled, every time a photo is taken, the app sends the photo to Make and triggers the Watch photos module. |
GPS
Triggers
Track GPS location | Activate this function to trigger the Watch entrances to/exits from a geofence areamodule when the device enters and/or leaves the specified area. NotePlease note that you may have to spend a couple of minutes outside/inside the geofence area to trigger this function. | |
Areas | Set the area you want to watch.
|

Reminders
Allow Make to import reminders to the device | This function allows you to use the Create a reminder module in your scenario to create a new reminder on the iOS device. |
Send new reminders to Make | This function triggers the Watch reminders module in your scenario when a new reminder is added or updated on the device. |
Notifications
Actions
Allow notifications | This function allows you to use the Send a push notification module in your scenario to send a push notification to the selected device. |
Running a scenario using the Make for iOS app
You can trigger a Makescenario by tapping a button you create in the Make for iOS app.
Creating a button in the iOS app
Open the Make for iOS app.
Tap Buttons.
Tap My first button.
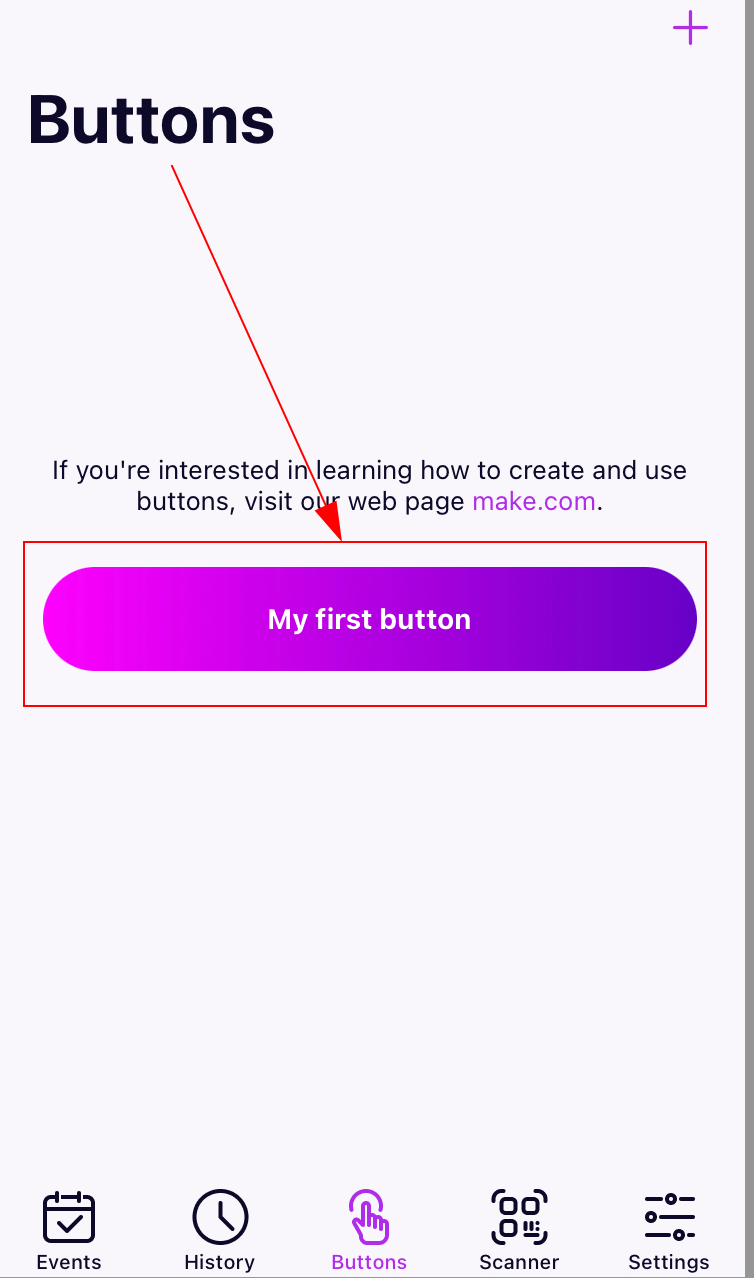
Enter the name for your button and ID (you will need this for your Make module), and specify the button properties, if needed.
Save the button by tapping the Save option in the top-right corner.
Go to the Makescenario, and add the Watch Button module to the first position in your scenario.
Select the device where you have created the button, and enter the ID of the button.
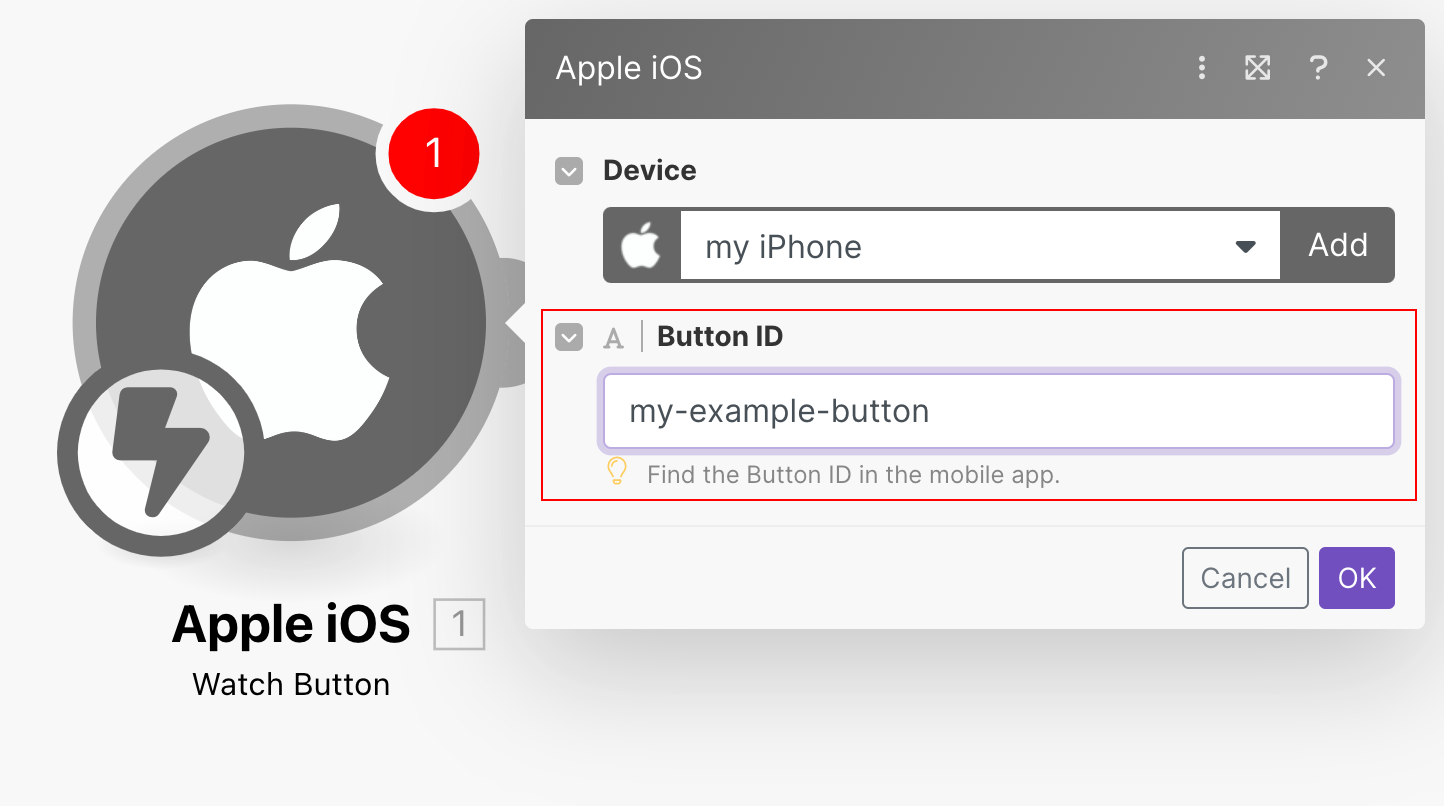
Go back to your Make for iOS app, and tap the button you have created.

Tapping the iOS button triggers the Watch Button module. Check the Events tab in the app to confirm whether you tapped the button.
Placing the Button on Your iOS Screen
Swipe right on your Home screen to view widgets.
Scroll down and tap Edit.
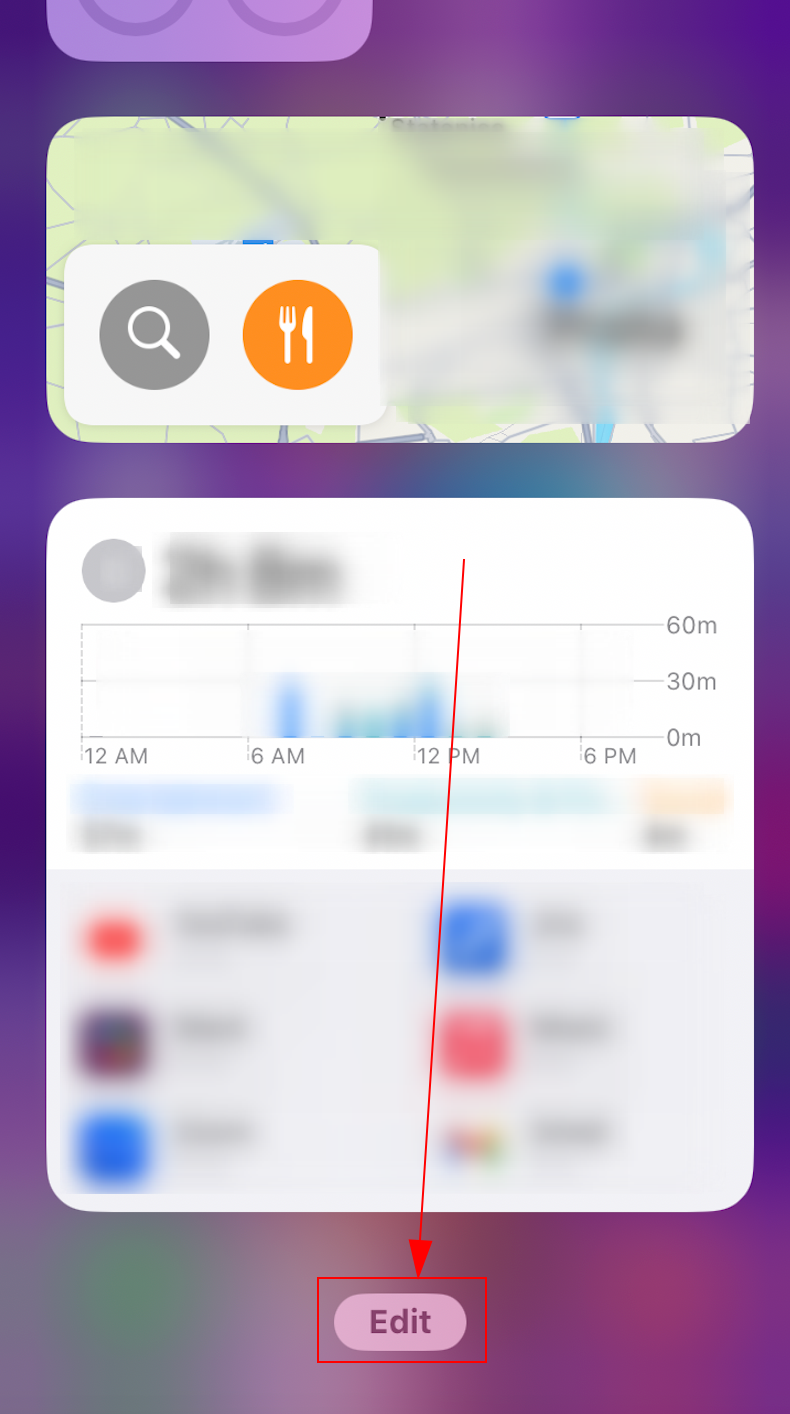
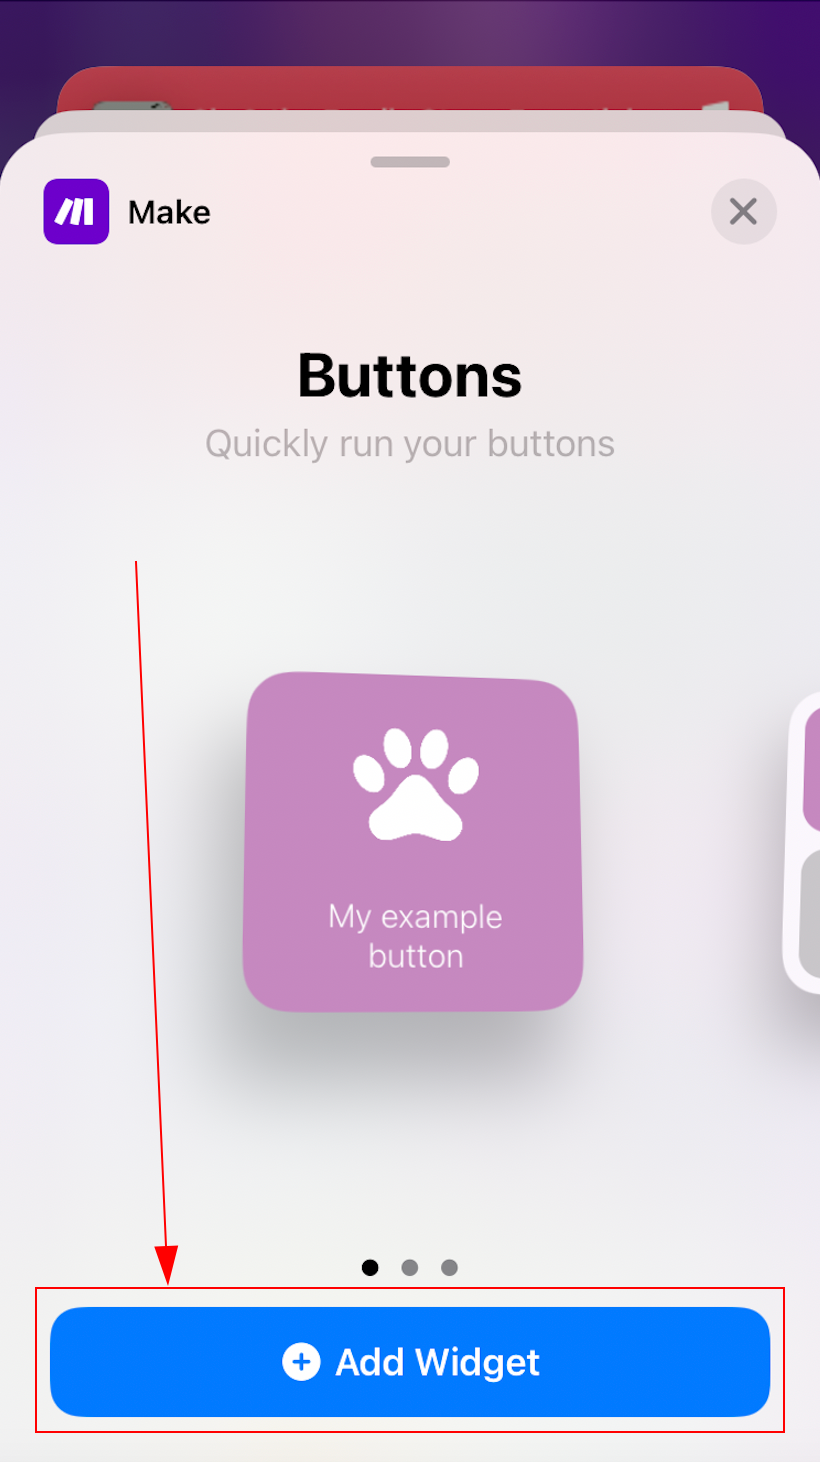
Tap + in the upper right corner and search for 'Make'.
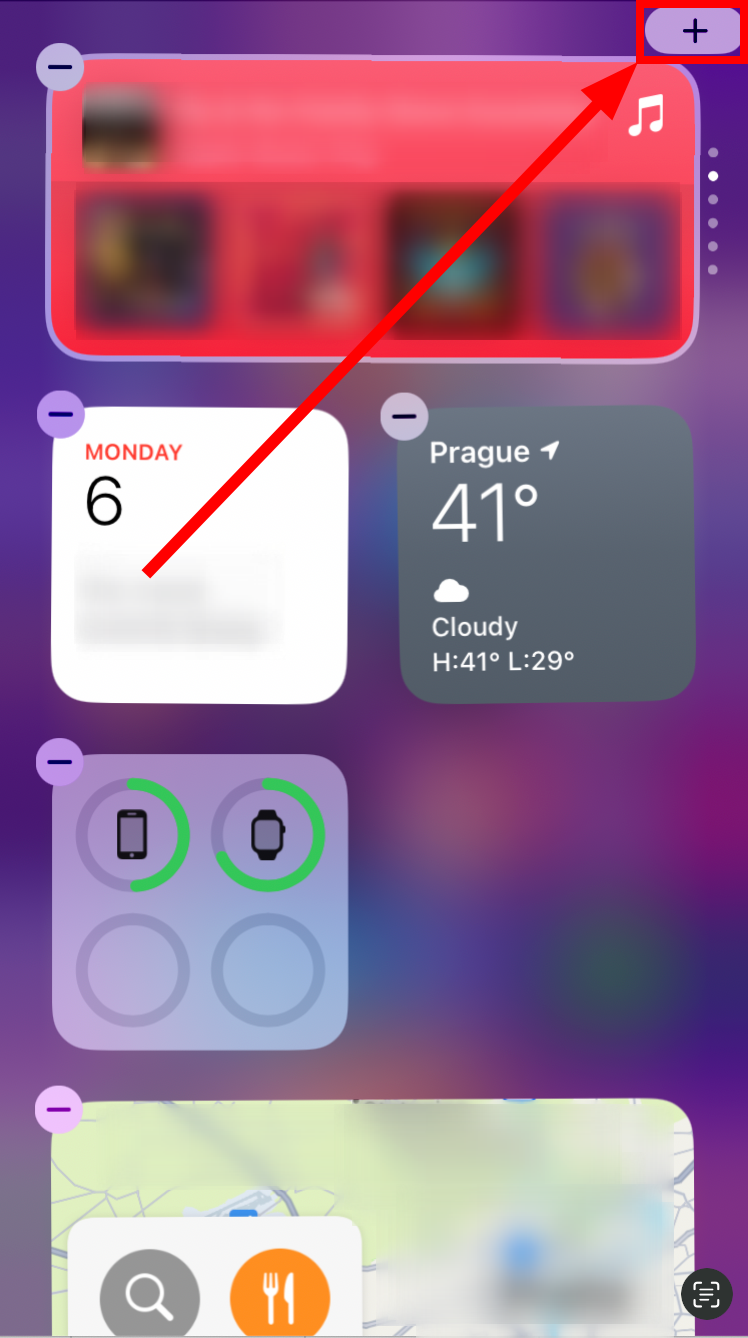
Search for Make and find the widget you want on your screen. You can choose between 1, 4, or 8 buttons by swiping left.
Confirm your selection by tapping + Add Widget.
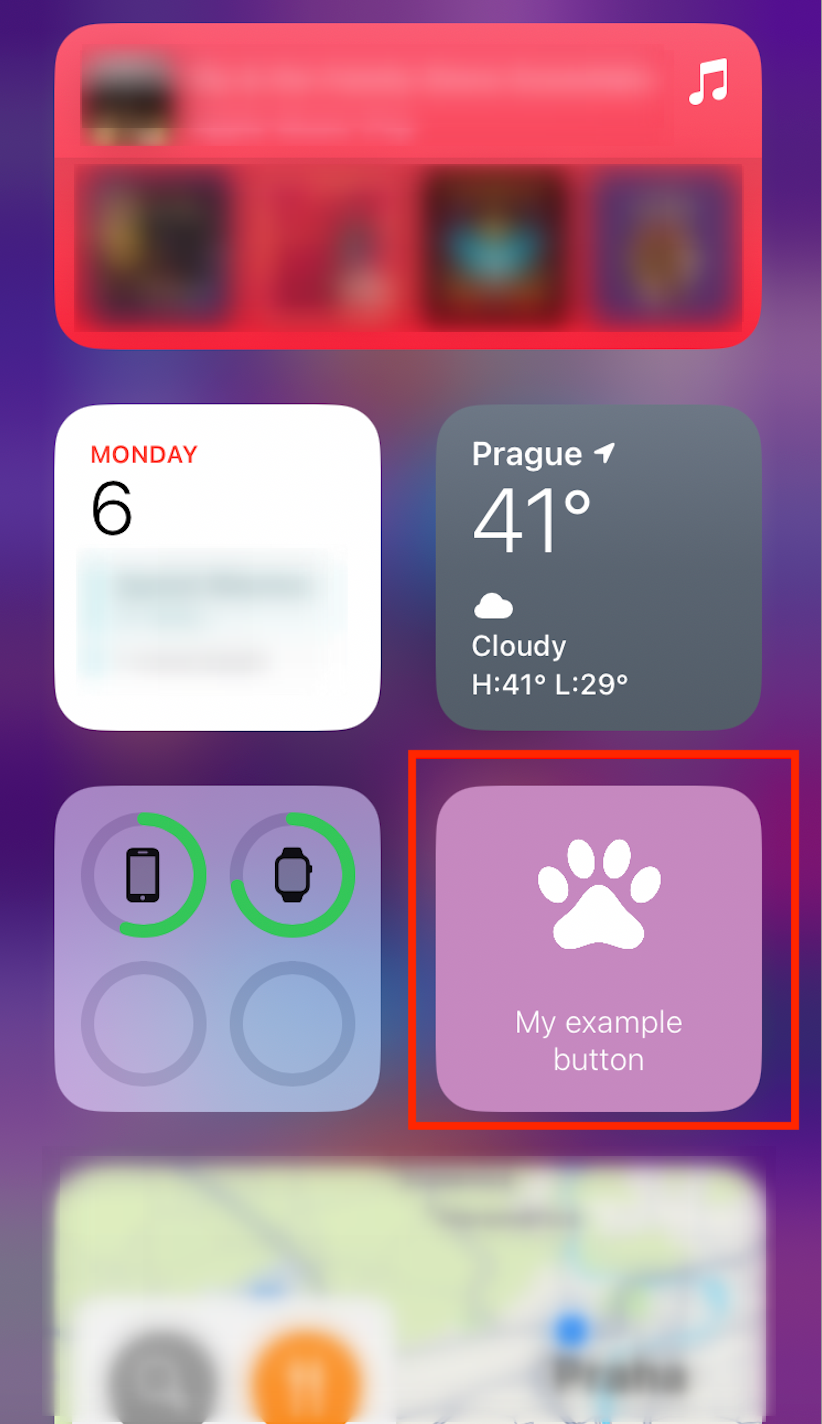
Press the Home button.
The button now appears on your screen and is available for your scenario.
 |
You can also place your button on your Apple Watch.
Security
Traffic between the mobile device and Make is secured by the Transport Layer Secure (TLS) encryption protocol. The authorization is based on a client certificate that is generated automatically when you log on. The certificate’s private key is generated on the device and securely stored in the System Keychain.