JIRA Cloud Platform
With JIRA Cloud Platform modules in Make, you can watch, create, update, retrieve, search, list, assign/unassign, and delete issues, issue comments, issue links, watchers, custom field options, components, project visions, and users and make API calls.
To get started with JIRA Cloud Platform, create a JIRA account at atlassian.com.
Note
Refer to the JIRA Cloud Platform API documentation for the list of available endpoints.
Connect JIRA Cloud Platform to Make
To connect JIRA Cloud Platform to Make, you must first create an API token.
To do so, follow these steps:
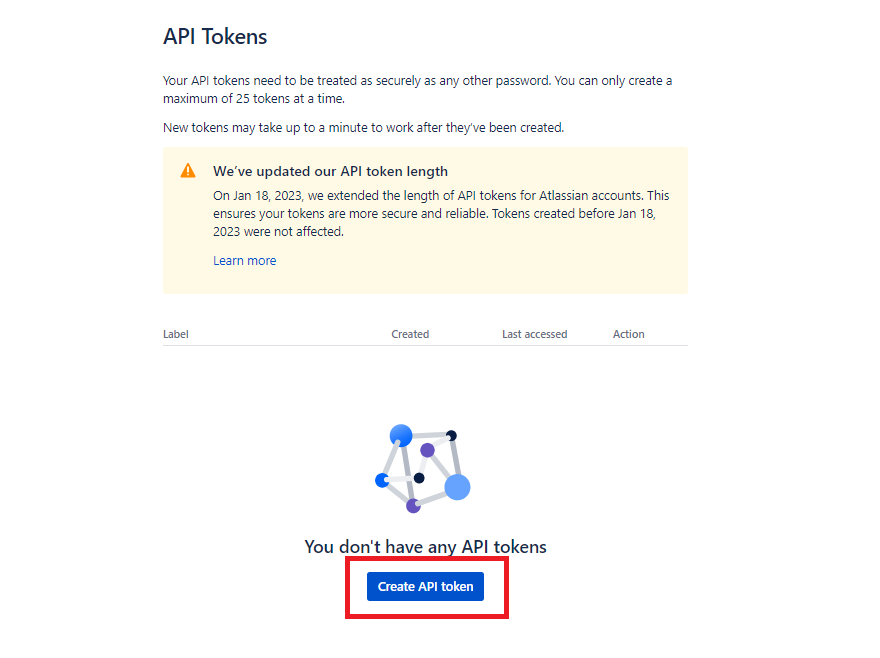
Go to https://id.atlassian.com/manage/api-tokens and log in.
Click Create API token.
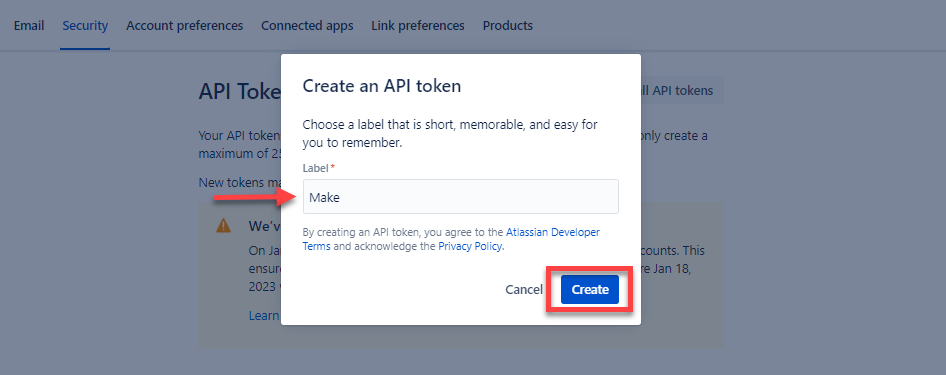
Enter a Label for the API token and click Create.
Click Copy and store your generated token in a safe place as you will not be able to view the token again after closing this dialog.
Log in to your Make account and add a JIRA Cloud Platform module to a scenario.
Click Add next to the Connection field.
Optional: In the Connection name field, enter a name for the connection.
Fill in the Service URL and Username and paste your API Token from step 4.
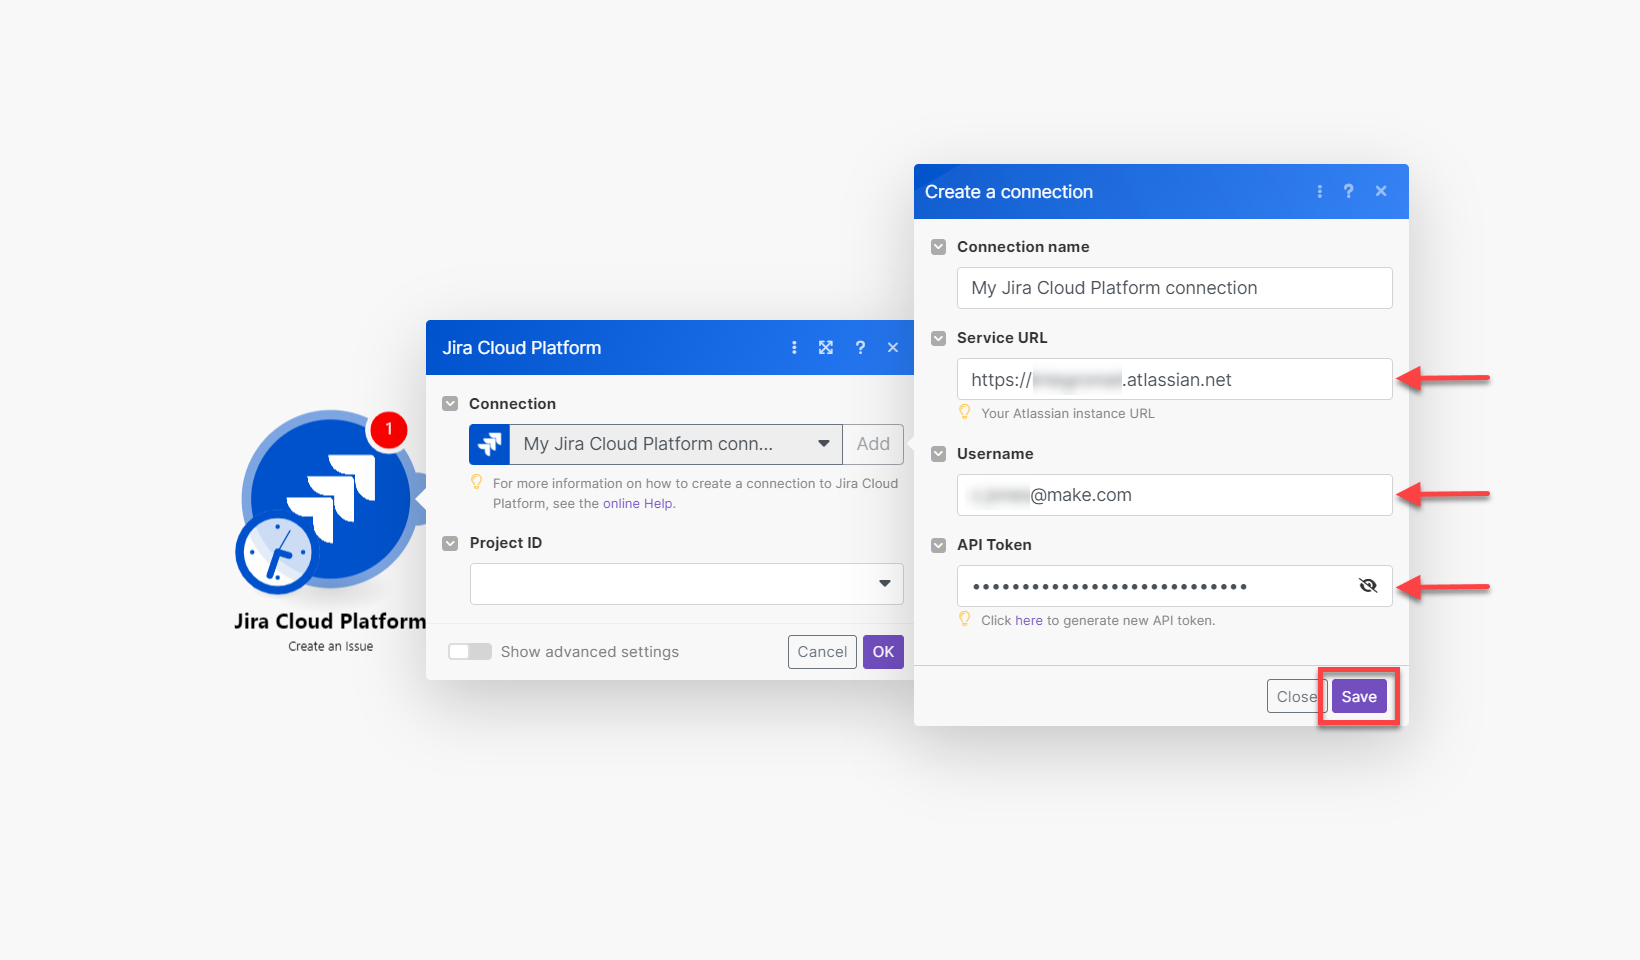
Click Save.
You have successfully established the connection. You can now edit your scenario and add more JIRA Cloud Platform modules. If your connection needs reauthorization at any point, follow the connection renewal steps here.
Set up JIRA Cloud Platform Webhooks
This app uses webhooks to trigger a scenario when an event occurs instantly. Follow the steps below to set them up.
Note
Your JIRA account must have Administer Jira: Global permissions to create webhooks.
Go to your Make account and open the JIRA Cloud Platform Watch Issues Instant Acid module in a scenario.
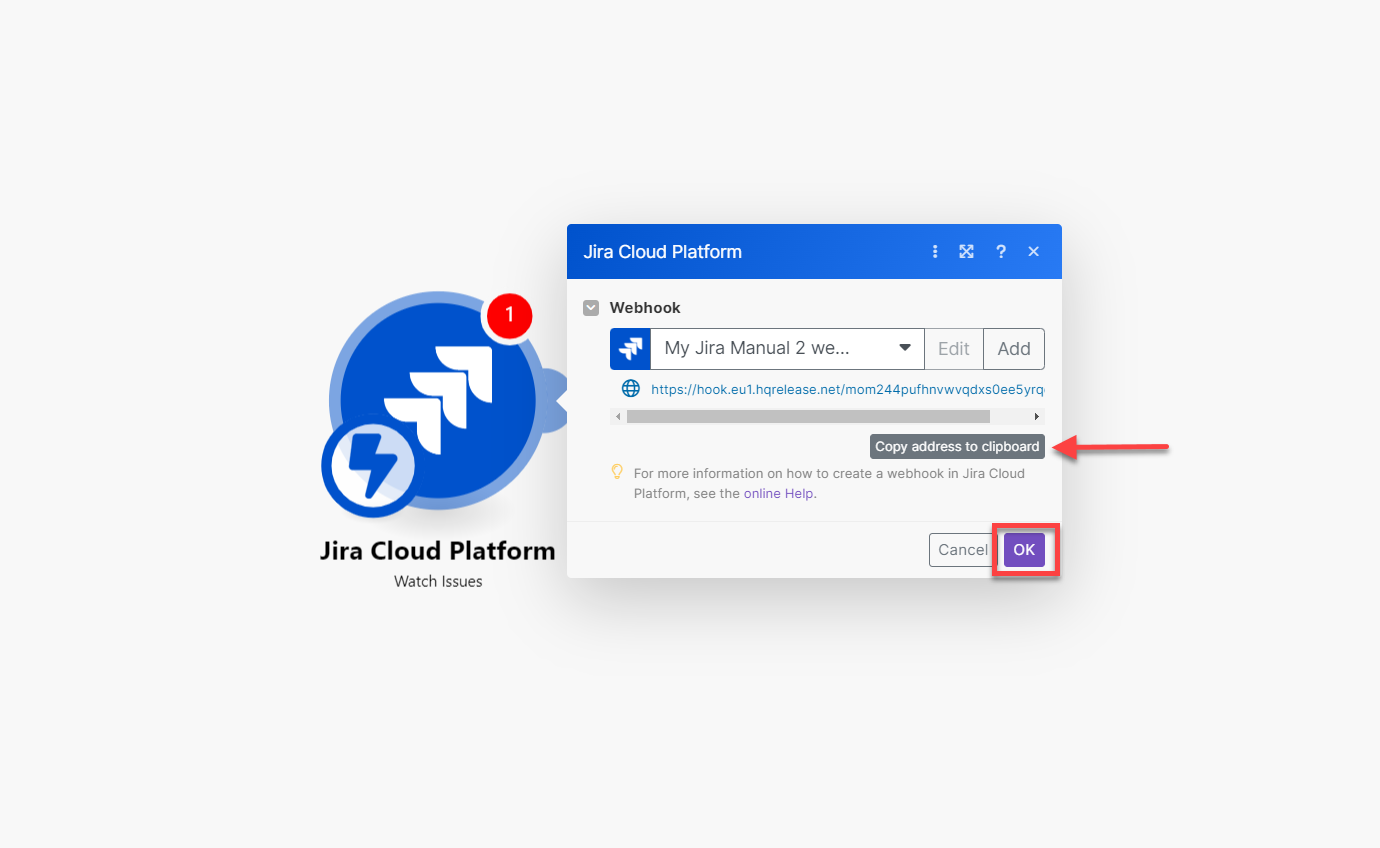
Click Add next to the Webhook field.
Optional: In the Webhook name field, enter a name for the webhook.
Select the Hook type and click Save.
Copy the generated URL address and click OK.
Go to Jira and click the Settings Icon > System. In the Advanced section, click WebHooks.
Here you can create a webhook using the copied URL from step 5. Please refer to the Jira Cloud platform Webhooks documentation as a guide.
Caution
From July 1, 2023, there will be a limit of up to 100 active Jira admin webhooks per Jira instance.
Build JIRA Cloud Platform Scenarios
After connecting the app, you can perform the following actions:
Watch Issues
Triggers when a ticket event occurs.
Watch Issues
Triggers when an issue is created or updated.
Create an Issue
Creates a new issue.
Update an Issue
Updates an existing issue.
Get an Issue
Returns the details for an issue.
Search Issues
Searches for issues.
List Current Available Transitions in an Issue
Lists current available transitions in an issue.
Update an Issue Status (Transition Issue)
Updates an issue status.
Assign/Unassign an Issue
Assigns an issue to a user.
Get Changelog of an Issue
Retrieves changelog of an issue.
Delete an Issue
Deletes an issue.
Add an Issue Comment
Adds a comment to an issue.
Update an Issue Comment
Updates a comment to a specific issue.
Get an Issue Comment
Returns an issue comment.
List Issue Comments
Returns all comments for an issue.
Delete an Issue Comment
Deletes a comment on a specific issue.
Create an Issue Link
Creates an issue link.
Delete an Issue Link
Deletes an issue link.
Add a Watcher
Adds a user as a watcher on an issue.
List Issue Watchers
Returns the watchers for an issue.
Delete a Watcher from an Issue
Deletes a user as a watcher of an issue.
Add an Attachment
Adds a new attachment to a ticket.
Download an Attachment
Downloads an attachment.
Delete an Attachment
Deletes an attachment.
Create Custom Fields Options
Creates options for a custom select field.
Update Custom Fields Options
Updates the options of a custom field.
Get All Custom Field Options
Returns a list of all the options of a select list issue field.
Reorder Custom Fields Options
Changes the order of custom field options or cascading options in a context.
Delete Custom Field Option
Deletes a custom field option.
Create a Component
Creates a component.
Update a Component
Updates a component.
List Project Components
Retrieves project components.
Delete a Component
Deletes a component.
Create a Project Version
Creates a project version.
Update a Project Version
Updates a project version.
List Project Versions
Retrieves all versions in a project.
Delete a Project Version
Deletes a project version.
List Users
Retrieves all users (active and inactive).
Search Users
Searches for users by query.
Get a User
Returns a user.
Make an API Call
Performs an arbitrary authorized API call.
Custom fields
When retrieving issues from JIRA via webhooks or Get Actions, basic sample data from the general JIRA installation is available. In order to get your custom fields, there must be at least one issue available in JIRA for Make to retrieve it and remember the custom fields. Once you run your scenario (or run a single JIRA module) the fields become available. These custom fields are available only on your computer as they are saved in your browser. If you access Make from another computer, you must repeat the process.