ManyChat
The Manychat modules enable you to monitor new data, send messages, or flows and manage tags, custom fields, or retrieve subscriber's info in your Manychat account.
Prerequisites
A Manychat Pro account
In order to use Manychat with Make, it is necessary to have a Manychat account. If you do not have one, you can create a Manychat account at manychat.com.
Note
The module dialog fields that are displayed in bold (in the Make scenario, not in this documentation article) are mandatory!
To connect your Manychat account to Make you need to obtain the API Token.
Note
You need to have a ManyChat PRO account to generate the API Token and connect Manychat to Make.
1. Log in to your Manychat account.
2. Go to Settings > API.
3. Click the Generate Your Token button.
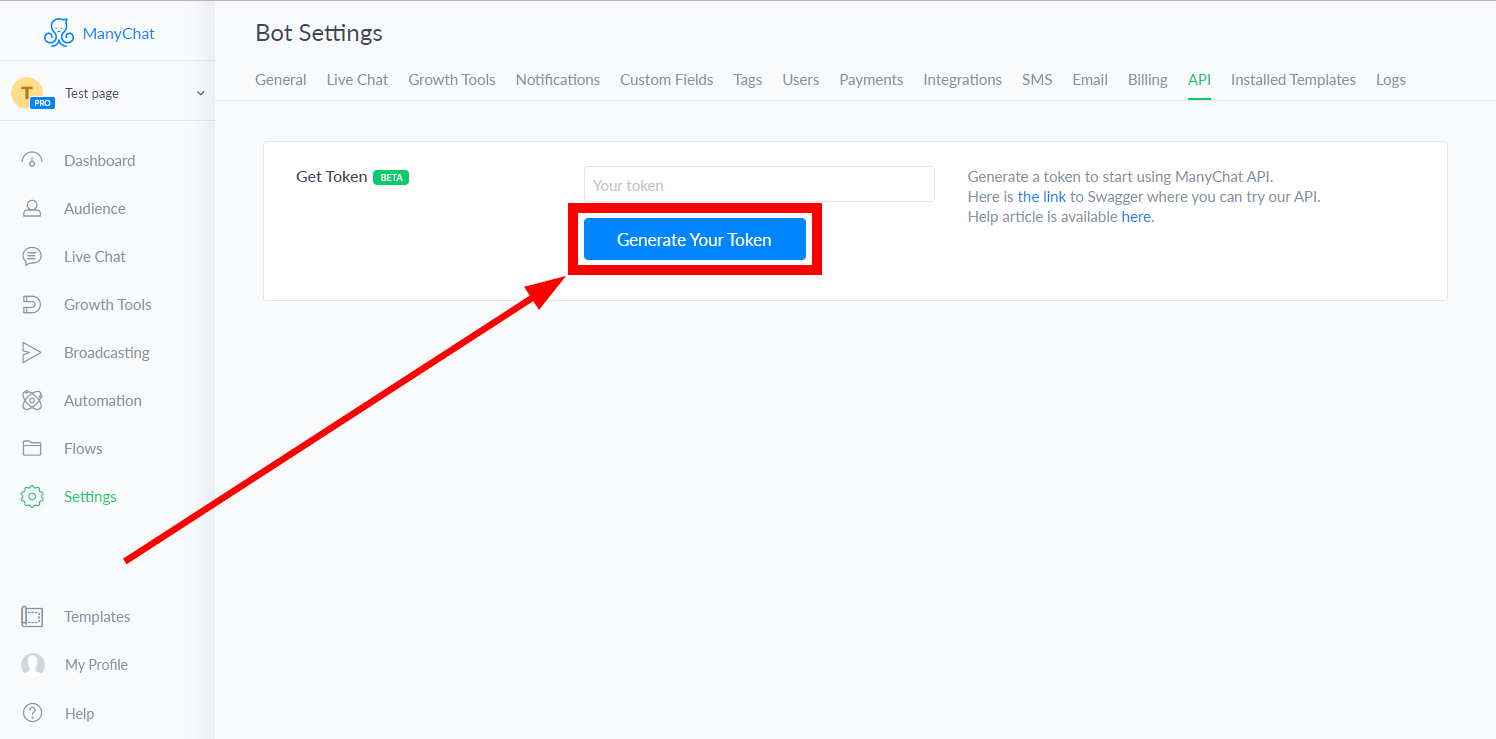
4. Copy the provided token.
5. Go to Make and open the ManyChat module's Create a connection dialog.
6. Enter the API Token you have copied in step 4 to the respective field and click the Continue button to establish the connection.
Triggers when a ManyChat action is performed and returns subscriber's details. Add this module as the first module in your scenario.
Webhook name | Enter a name for the webhook. |
Connection |
To trigger the Watch Incoming Data module you need to add an action to your ManyChat's flow.
Log in to your ManyChat account.
Go to Flows and open the flow where you want to add the action that triggers the Watch Incoming Data module.
Add the Button or Quick reply. Click the +Add Button button and enter the Button Title.
Scroll down and click the +Action button.
Select the Trigger Make option.
Click to the field below the TriggerMake action and select the webhook that should be triggered when a user clicks the button.
Now, when a user clicks the button, the Watch Incoming Data module in Make is triggered.
Retrieves a subscriber's details.
Connection | |
Subscriber ID | Enter (map) the Subscriber ID. |
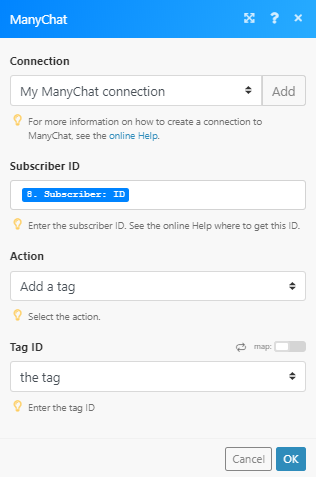
Enables you to add or remove a tag from the subscriber.
Connection | |
Subscriber ID | Enter (map) the Subscriber ID. |
Action | Select whether you want to add or remove a tag. |
Tag ID | Select or map the tag you want to add or remove. |
Performs one or more actions for the subscriber.
Connection | |
Subscriber ID | Enter (map) the Subscriber ID. |
Actions | Add one or more actions you want to perform. NoteThe custom field or tag must already exist in your ManyChat account. |
Sends a flow to the subscriber.
Connection | |
Subscriber ID | Enter (map) the subscriber ID to whom you want to send the flow. |
Flow ID | Enter the flow ID of the flow you want to send to the subscriber. To use the Send a flow module, you need to get the unique ID of the flow you would like to send as shown below: 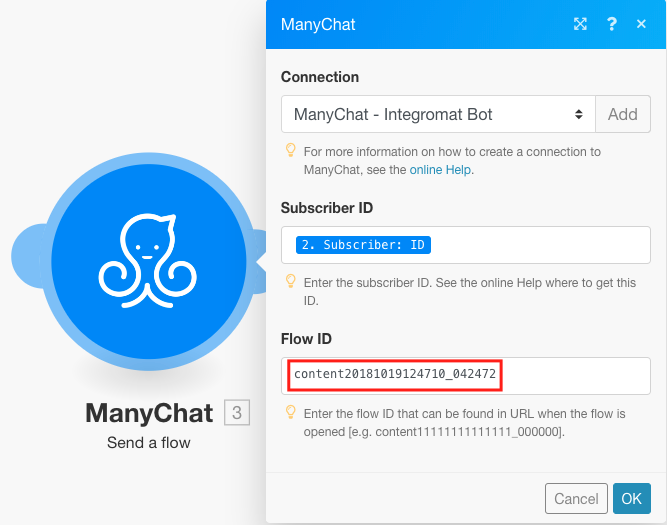 To get the Flow ID, go to Flows in your ManyChat account, select the flow and copy the ID from the page URL as shown below: 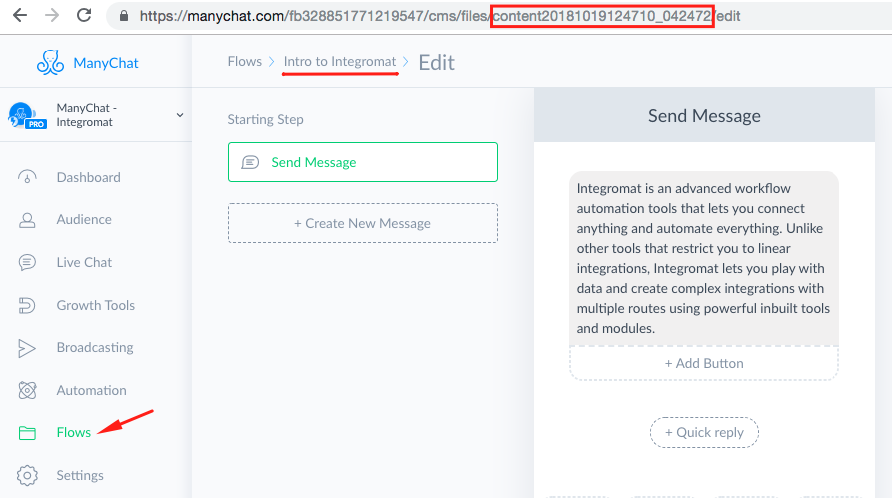 |
Enables you to send a batch of messages.
Connection | |
Subscriber ID | Enter (map) the Subscriber ID you want to send messages to. |
Message Tag | Select one of the message tags. This is required from January 15th, 2020. |
Messages | Add one or more messages. Required. Select the type of message to be sent to the subscriber and fill the corresponding fields. |
Quick Replies | Add one or more quick replies. |
Sends a text message to the subscriber.
Connection | |
Subscriber ID | Enter (map) the subscriber ID you want to send a message to. |
Message Tag | Select one of the message tags. This is required from January 15th, 2020. |
Text | Enter the text content of the message. |
Buttons | Add one or more buttons to the message. |
Quick Replies | Add one or more quick replies. |
Sends a text message with the file to the subscriber.
Connection | |
Subscriber ID | Enter (map) the Subscriber ID you want to send the message to. |
Message Tag | Select one of the message tags. This is required from January 15th, 2020. |
Text | Enter the text content of the message. |
File URL | Enter the URL of the file you want to attach to the message. |
File Type | Select the file type of the file attached to the message. |
Quick Replies | Add one or more quick replies. |
Sends a text message with the image to the subscriber.
Connection | |
Subscriber ID | Enter (map) the Subscriber ID you want to send the message to. |
Message Tag | Select one of the message tags. This is required from January 15th, 2020. |
Text | Enter the text content of the message. |
Image URL | Enter the URL of the image you want to attach to the message. |
Buttons | Add one or more buttons to the message. |
Quick Replies | Add one or more quick replies. |
Sets the value of the custom field for the subscriber.
Connection | |
Subscriber ID | Enter (map) the Subscriber ID you want to set the custom field for. |
Field ID | Select or map the custom field you want to add the value to. |
Field Value | Enter the value for the custom field. |
Returns subscribers by a custom field.
Note
The module works with the Text and Number custom field types only.
Connection | |
Field ID | Select or map the custom field you want to search the subscriber by. |
Field Value | Enter the value for the custom field you want to the subscriber by. |
Limit | Set the maximum number of subscribers Make will return during one execution cycle. |