Mapping
What is mapping?
Mapping is how Make knows what information to get from one app and which app to send it to. You can use mapping to tell Make how to transform data in your scenario. For example:
You want to automatically send information from emails to a colleague in a Slack message. In this case, map the subject or body of email messages to Slack.
When a customer submits a form to request support, you want a Jira issue created automatically. Here, you can map the information from the form into Jira.
Your business gets valuable leads from Facebook, so you want a database of this information and the same information entered into Pipedrive. Just map the data from Facebook leads to Airtable and Pipedrive.
In the same way that a map leads you from your starting point to your destination, mapping in Make tells your data where to go in your scenario.
What can I map?
You can map any information that a module gets in a bundle. A bundle is like a box of information. Some boxes are large; some are small; some have just one thing inside them; some might have smaller boxes in them. Bundles are similar. Sometimes a bundle is just one piece of information, for example, a number or email address. Other times a bundle contains a variety of information.
When bundles have a lot of information, you might see the data organized into an array or collection. An array is like a menu organized into different sections like soups, starters, desserts, and so on. There's a lot of information but it's the same kind of information: food. An array has information of only one kind. For example, it might have multiple dates or names but not both. Collections can have different kinds of information and are like a moving box. When you move, you might put various things into one box: books, small gadgets, a box of letters. Collections contain a similar variety of information, for example, dates, numbers, and text descriptions.
Getting a bundle
To know what you can map from a module, you run only that module and look at its bundles. Once you know what you can map, you can start mapping. Let's use the first example above to explore how this works. We want to take information from emails and send them to a colleague. Before we do any mapping, we begin by finding what information we can get from the email module. Because the email module provides the information we want, we call it the source module.
Go to the Scenario editor and add the module Email > Watch emails.
Create a connection.
Select a folder and criteria.
Click OK.
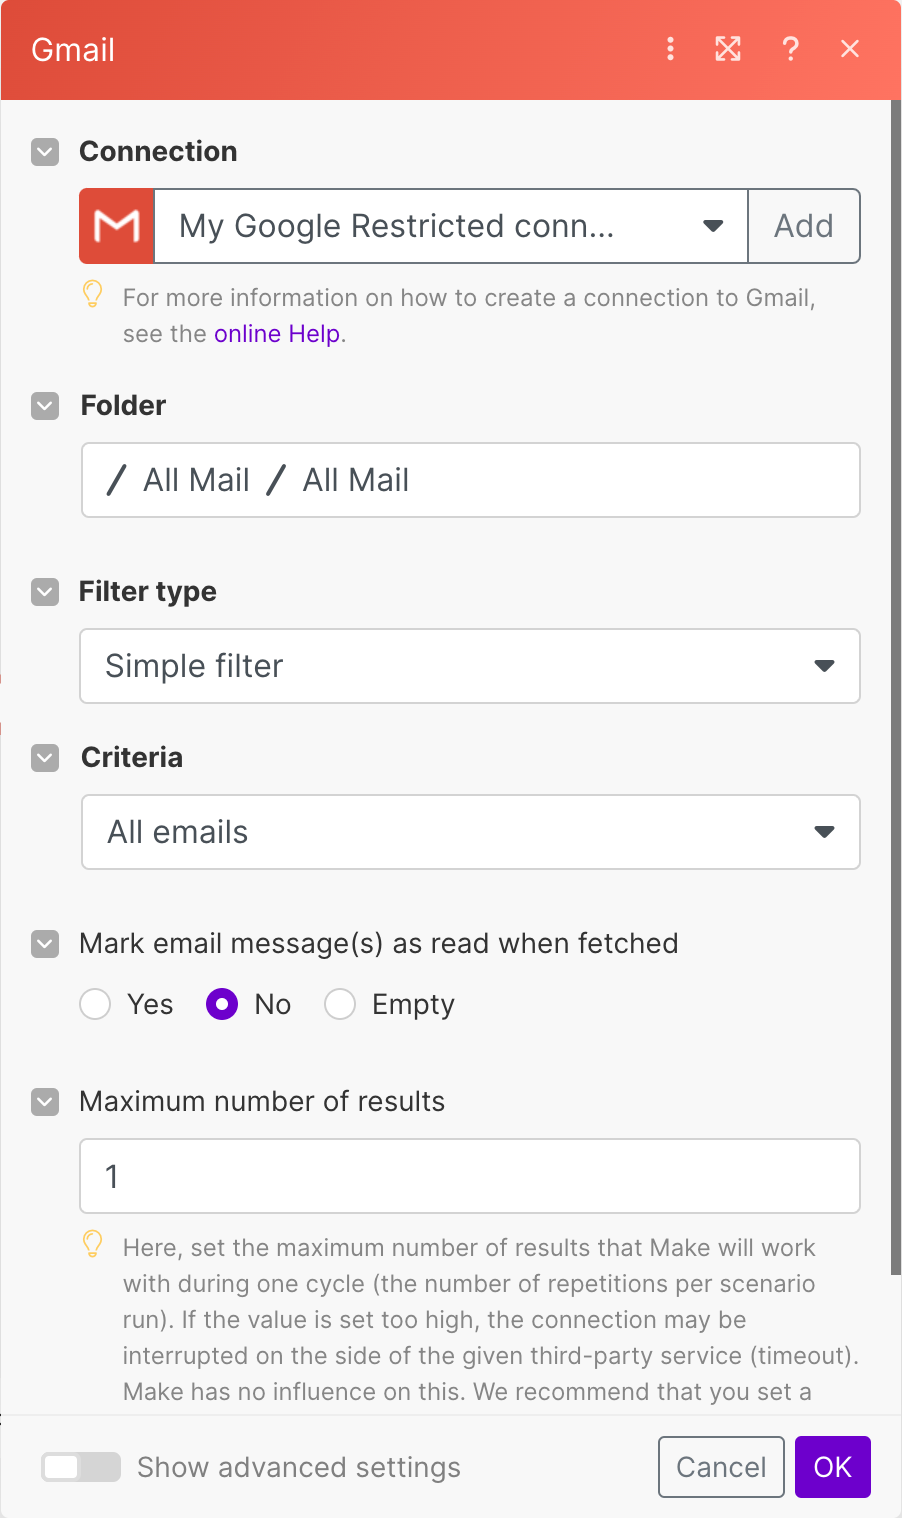
Choose where you want Make to start getting your emails and click OK.
Right-click the module.
Select Run this module only.
A small circle with 1 inside appears beside your module. Click inside the small circle.
A window opens and shows you all of the information that your email module got. You can map anything that appears. Click + to expand items.
What's in a bundle?
Let's take a closer look at the information in the bundle window. In this example, we see the bundles from the Slack > Create a message module.
 |
Input - the information Make sends to the third-party app.
In this example, you can see:
Text - the content of the message sent. Click + to expand for further details.
User - the user ID of the person receiving your Slack message.
Output - the information Make gets back from the third-party app.
In this example, you can see:
Message - the text content of the sent message, similar to Text in the Input. Click + to expand for further details.
Channel - the ID of the channel where the message was sent. In this case, it's the same as User from the input. That's because we sent a direct message to a specific user.
Mapping to the target
Now we know what information we can send to other modules. Next, we map that information. To do that, we first add the module we want to receive the information. In our example, that's Slack > Create a message. If you're still in the Scenario editor, continue with these steps:
Add the module Slack > Create a message.
Create a connection.
Under Enter a channel ID or name, select Choose from a list.
Under Channel type, select IM channel.
Under User search or scroll to find your intended recipient.
Under Text, click inside the empty field. A new window appears.
In the new window, click Text content. A red box labeled Text content appears in the Text field.
Click OK.
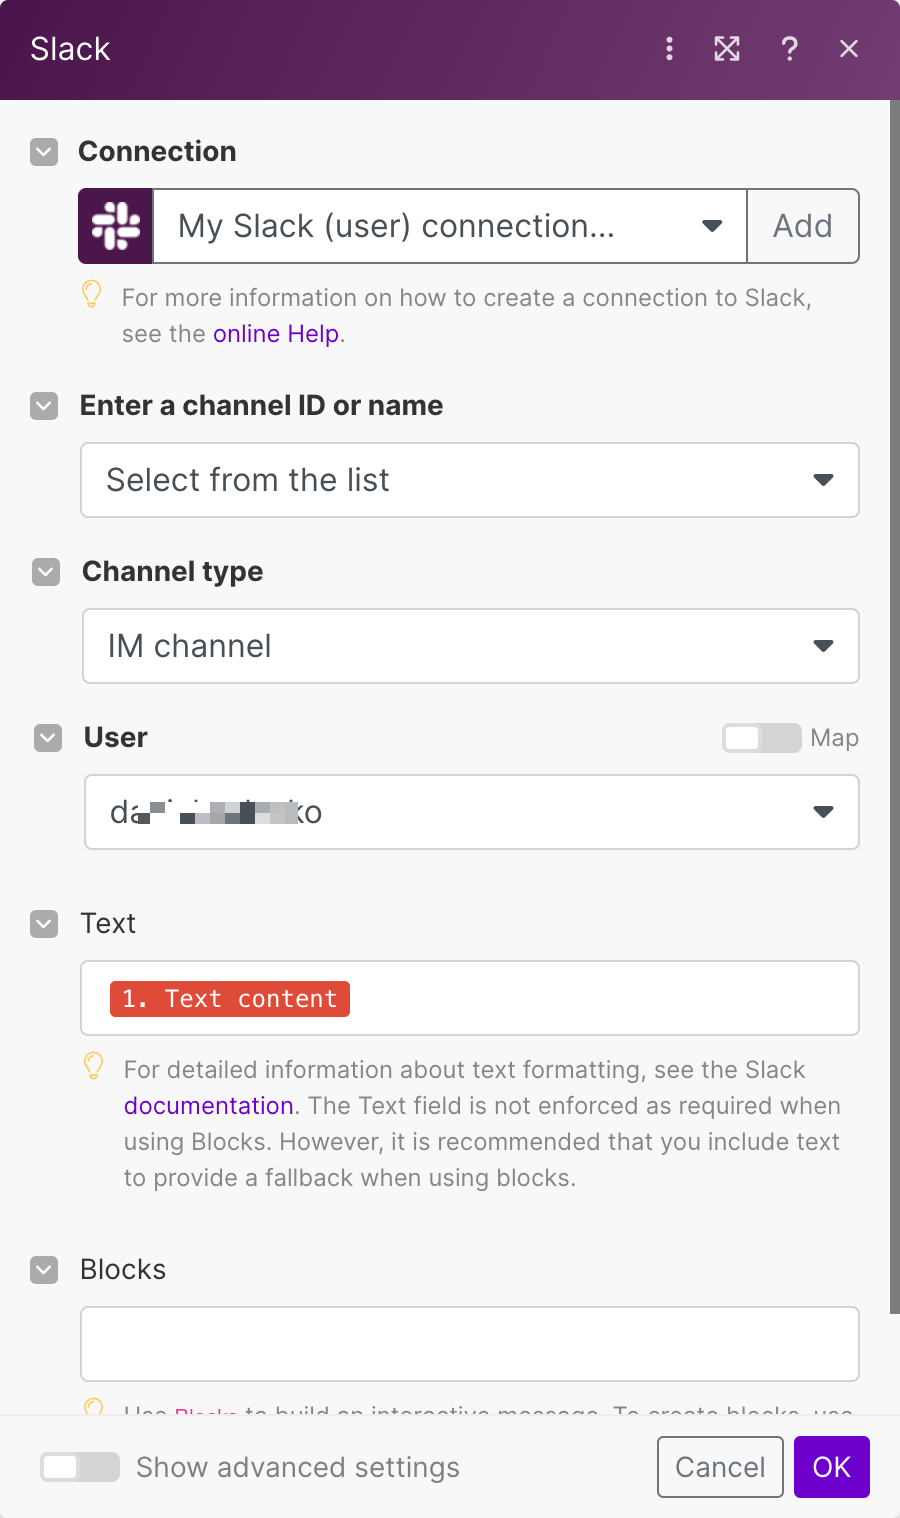
Your data is now mapped so that Slack automatically receives email content and sends it in a message.
Tips and solutions
Find the source module
While mapping a scenario, you can find the source module by hovering over the mapped data. As you keep your mouse on a mapped item, the source module pulses.
When there's no info for an instant trigger
When you click Run once or Run this module only, an instant trigger waits to receive information. The instant trigger needs incoming info to run. So the trigger waits until it receives incoming data. To run the module, you need to provide incoming information. Let's explore with an example: Airtable > Watch responses.
Right-click on Airtable > Watch responses and select Run this module only. The module waits for new responses.
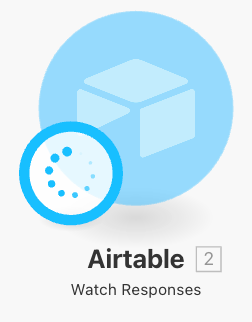
Go to your Airtable form and submit a response.
The information submitted goes to your Airtable > Watch responses module. You can inspect the bundle to check that your configuration is working.
When there's no info for a polling trigger
You can use the above procedure to generate a bundle for most modules, including polling triggers. For instant modules, see the solution for instant triggers. The following are the general steps to get a bundle.
Go to the Scenario editor and find the module you want to get a bundle for.
Right-click the module.
Select Choose where to start.
To get a bundle, select one of the following options and click OK.
From a specific date option: for example Emails from after a specific date. Enter a date you know there is data for. Example: enter a date you know you received emails.
Select the first option: when available, this option lets you choose from a list.
Right-click the module.
Select Run this module only.
A small circle with 1 inside appears beside your module. Click inside the small circle.