Scheduling a scenario
Make allows you to define when and how often an activated scenario executes.
Go to the scenario editor.
Click the
 icon.
icon.The Schedule setting panel appears. Use this panel to customize your scenario schedule.
Schedule setting panel
The schedule setting panel lets you adjust the running schedule of the scenario. By default, a scenario runs every 15 minutes, but within this panel, you can customize the run schedule and the interval.
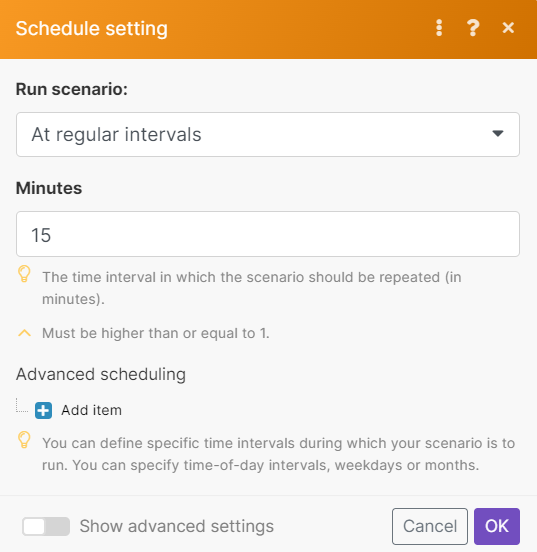 |
Run scenario
You can select the following schedule options:
Immediately
At regular intervals
Once
Every day
Days of the week
Days of the month
Specified dates
On demand
When choosing any of these options, you may have to further define how often you want the run to occur. For example, if you select the At regular intervals option you must define the time interval (in minutes) between two consecutive scenario runs.
The minimal length of the interval depends on your subscription plan.
The Immediately option is available only for some triggers. For more information on triggers, please see the types of modules help guide.
Tip
You can always see how much time is left till the next scenario execution on the organization dashboard.

On demand scheduling
With the On demand scheduling option, your scenario is waiting to be triggered by an API call or the Run once button. The scenario does not have any schedule and it does not run unless you start it manually.
Start and end date
To define the time range in which an activated scenario runs, check the Show advanced settings box and fill in the Start and End date.