Mar 23, 2021 | 11 minutes
How to Auto Send Shopify Orders to Dropshipping Suppliers [Guide]
Learn how to automate one of the most time-consuming dropshipping processes there are: Sending Shopify orders to manufacturers for fulfillment.

In recent times, the convenience of Shopify dropshipping has attracted many sellers in the ecommerce industry.
The appeal of this retail variety is easy to come by for the attentive observer, and can be explained in a few strong reasons:
Well-oiled supply chains
Abundance of quality fulfillment services
Massive adoption of online shopping
Ease of building a digital store
In other words, markets are ripe for sellers who excel in the two key areas of dropshipping: finding good products at great prices, and managing processes better than the competition.
Naturally, automation plays a predominant role in the latter.
By automating processes related to operations, marketing, and sales, dropshippers lay the foundation for more efficient operations and better margins.
But where to begin?
There are multiple tasks and processes that fit the “dropshipping automation” bill, and it’s easy to get confused.
With that in mind, we are here to show you how to automate one of the most time-consuming processes Shopify dropshippers deal with: Sending Shopify orders to manufacturers for fulfillment.
It’s a dropshippers’ job to receive orders and notify the supplier/manufacturer to fulfill them, and automating the process can make a huge impact on earnings.
In this tutorial, we will show you how to automate your flow of orders from the very beginning. But first, let’s take a look at some important considerations.
Shopify sellers and suppliers: A special relationship
It’s an understatement to say that reliable, professional suppliers are crucial for dropshippers.
After the careful and somewhat tedious process of choosing a supplier, collaboration between parties begins.
If you already have a Shopify store, you probably came across the problem of having to manually send orders to your supplier. This usually requires using email or some other form of communication.
It’s an inefficient, but also counterproductive workflow. The more orders you get, the longer it will take you to funnel them to your manufacturer.
Moreover, Shopify doesn't provide a native solution to this problem, and that’s why we are here today.
In the following use case, we will show you how to use Make to:
Automatically store new Shopify orders in a database
Let your suppliers view new orders in the database (and consequently, fulfill them)
Send a confirmation email to the customer once an order is fulfilled
To fully automate the entire process, we will rely on three tools: Airtable, Make, and email.
Note: You will need an Make account to create this integration. If you don’t have one yet, please register for free.
Note 2: You will see the word “scenario” thrown around a lot. This is a synonym to “automated workflow”, and our setup will require two of them. For more information about basic Make terms, please refer to this page.
Shopify order to manufacturer, automated: A step-by-step guide
As we mentioned earlier, we will be using Airtable as our database. Here, we will store the orders for the suppliers to fulfill. Once that’s done, an automatic notification will be sent to the customer.
To accomplish this, we will use two Make scenarios that will do the following:
Scenario 1: Instantly receives new orders from Shopify and adds them to an Airtable base. This scenario will use two Make modules:
Shopify > New Event (instant)
Airtable > Create a record
Scenario 2: Checks if the order status has been changed to ‘Shipped’ in the Airtable base. Then, it automatically changes the order status in Shopify, and sends the confirmation email to the customer. This scenario will use the following Make modules:
Airtable > Watch records
Shopify > Create a fulfillment
Email > Send an email
Now, let’s begin by creating the first Make scenario.
Scenario 1: Connecting Shopify to Airtable
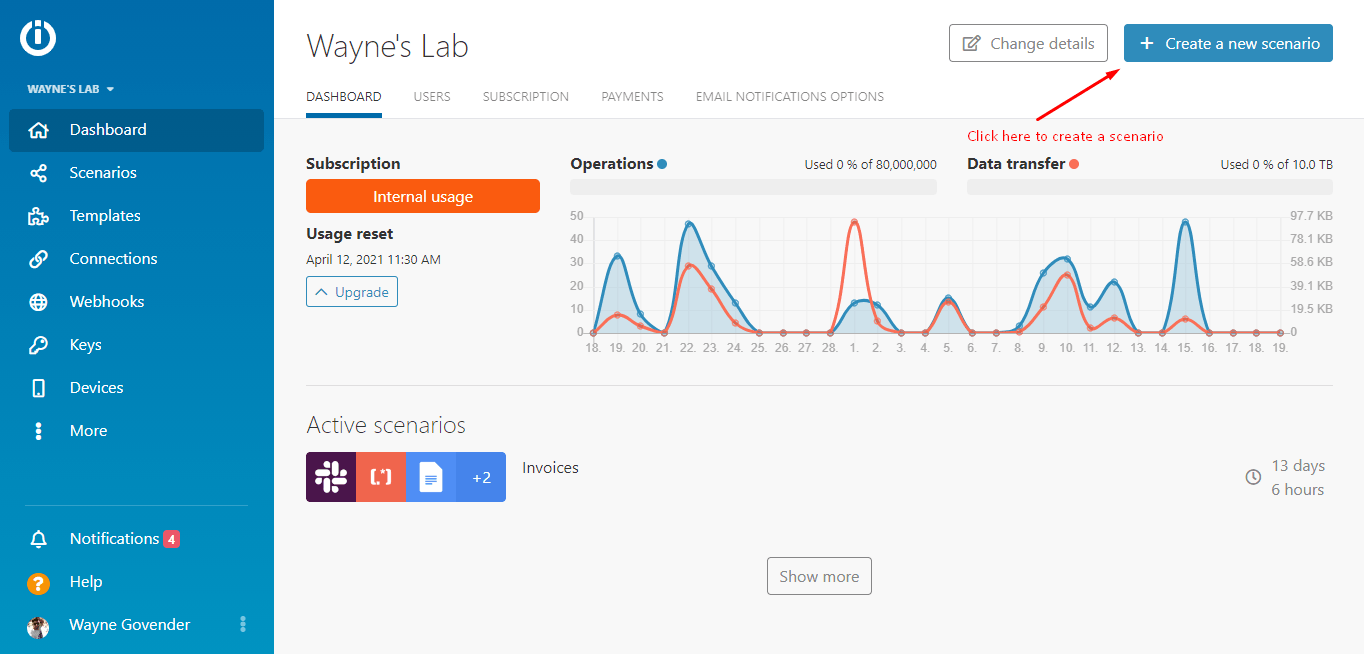
To begin, please click the “Create a new scenario” button on the top right corner of your Make dashboard.
On the next screen, type “Shopify”, select the app, and click “Continue” on the top right corner.

You will be redirected to the scenario builder, where you will create the Shopify - Airtable integration.
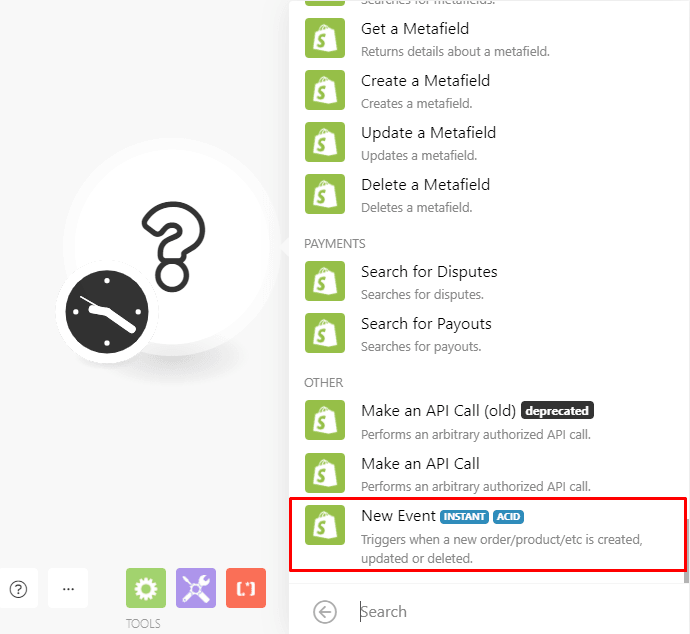
The first thing you’ll see is a blank module on your screen. Select the pre-loaded Shopify app and select the “New events” module.
This module will instantly receive orders when they are created on Shopify.
1. Configuring the “New Event” Shopify module
For Make to instantly receive the orders, you first need to create a webhook. To do that, click the “Add” button in the module.

The “Add a hook” box will appear on your screen. Here you have to give your webhook a name (if you want), and then click the “Add” button.
After you do this, a second box labeled “Create a connection” will appear.
This is where you can give your connection a name; you will also have to copy and paste your Shopify subdomain, and click “Continue”.

Next, you will need to click on the “Event” dropdown, and select the “orders/paid” option from the list. Once you do this, click “Save”.

After you do this, Make will automatically attach the webhook to Shopify.
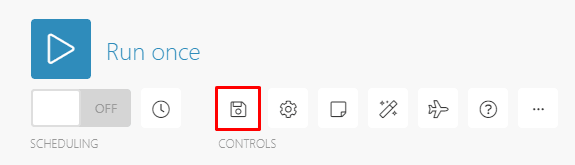
To finish the configuration of this module, we will have to test the webhook. When it comes to webhooks, Make needs to learn the data structure before adding other apps to the scenario. To do this, please follow these steps:
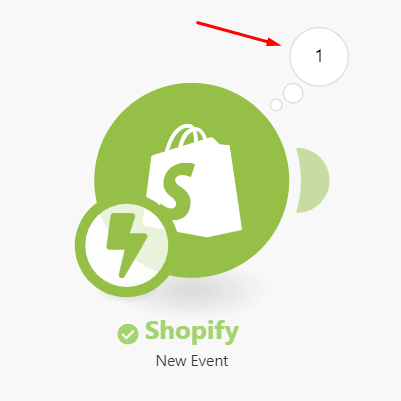
Hit the “Run once” button on the bottom left of your scenario
Go over to Shopify, create an order and mark it as paid
Go back to your Make scenario. If you see the number ‘1’ above the module, then the webhook is working properly
2. Configuring the “Create a record” Airtable module
Now that the Shopify module has been configured, it’s time to add the “Create a record” Airtable module to the scenario.
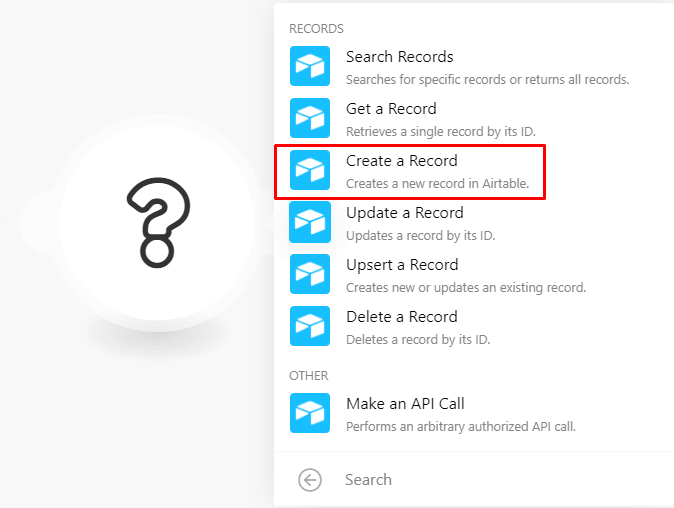
On the left side of the Shopify module, you’ll notice a plus sign. Click on it to bring up the search box, type “Airtable”, and click on the Airtable app.
You will see a list of Airtable modules; here, select the “Create a record” module. We will use this module to automatically add new Shopify orders to an Airtable base.
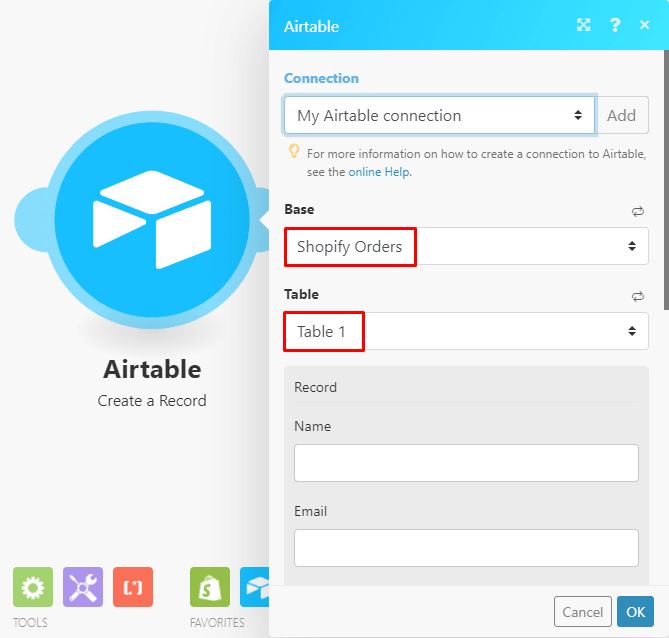
Once in the module configuration box, start by clicking the “Add” button to connect your Airtable account to Make.
Bear in mind, you will be required to enter your Airtable API token. To obtain it, all you have to do is follow these simple steps.
Assuming that you have created an Airtable base beforehand, you now need to choose the base and the table that you want to add the orders to.
Now comes the important part: mapping the data elements coming from the Shopify module into the Airtable module.
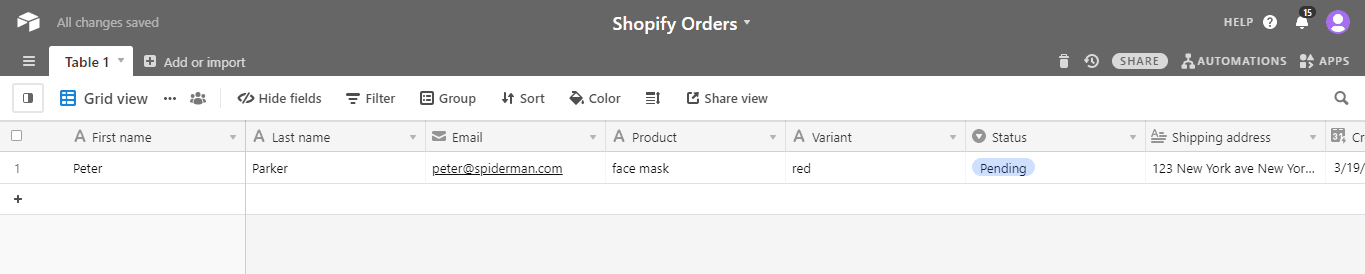
Before learning how to do this, let’s take a quick look at the field layout in the Airtable table.
Please note that your table may contain different fields according to your requirements. Make sure that the fields below are included, as they are standard for the process:
First name
Last name
Email
Product
Variant
Status (Use the Single Select field type and add Pending and Shipped options.)
Shipping address
Created time
Last modified time
Order ID
Order number
If you want to use the same base used in this tutorial, you can copy it here.
Back in the Airtable module, you will see your Airtable columns as fields.
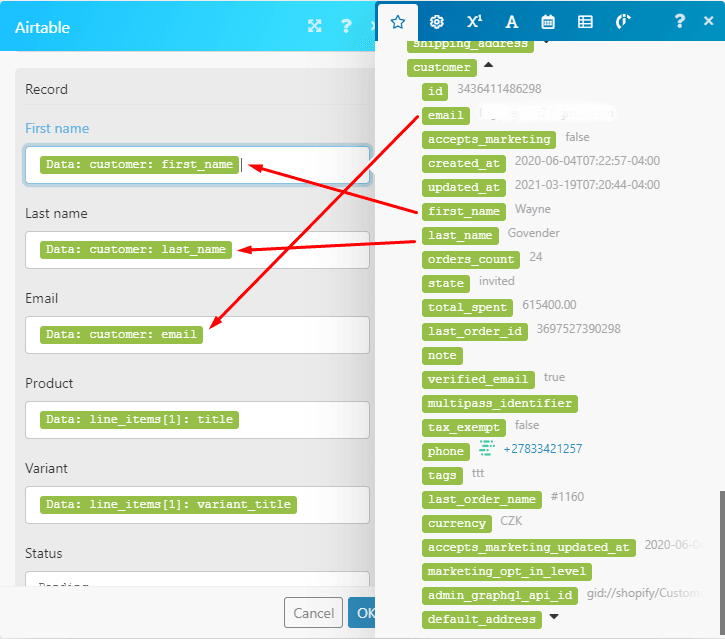
Here, you will have to map (drag and drop) the data elements from the Shopify module to the corresponding fields in the module.
Eg. Data customer: first_name to the First name field, Data customer: last_name to the Last name field.
This sounds more complicated than it actually is - please refer to the image below to visualize how to do it.
When you get to the “Status” field, enter the word “Pending”, as this should be the initial status of orders that have been placed but not yet shipped.
Then, you will have to complete the “Shipping address” box with the corresponding data element, as shown below.
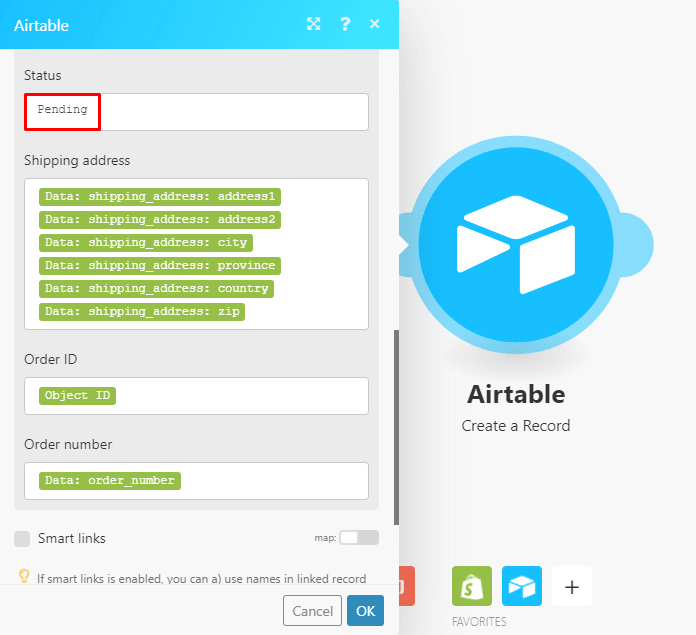
Once you do this, click “Ok” at the bottom of the module, and then hit the “Save” button at the bottom of the scenario.
3. Testing the scenario
Now that the scenario has been configured, it’s important to ensure it works the exact way you want it to.
Like you did previously, hit the “Run once” button and create an order in Shopify. This is what the execution should look like:

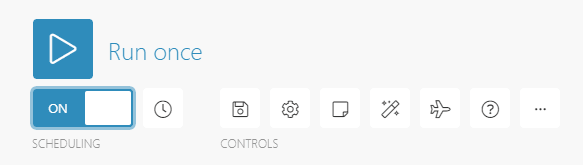
To activate this scenario, please set the switch below the “Run once” button to “on”.
Scenario 2: Updating order status on Shopify, sending email notifications
The first scenario is running, which means that new Shopify orders will be automatically sent to the Airtable base.
After you provide your supplier with access to that base, it will see the orders as soon they arrive, and start the fulfillment process.
Here, we will need a second Make scenario to go the full circle. This second scenario will:
Change the order status in Shopify to “Fulfilled” after your supplier changes the status to “Shipped” on the Airtable base
Send an email notification to the corresponding customer, telling that the order has been shipped
This is how it's done.
1. Creating a new scenario
You need to create a new scenario, which you can do directly from the scenario builder.
In the first scenario you are watching Shopify for new orders, in the second scenario you will be watching Airtable for order status changes.
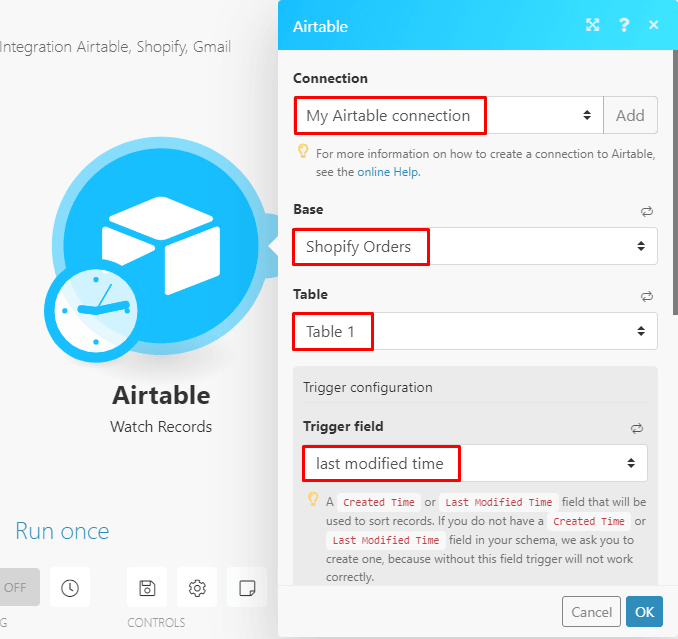
So, after you create a new scenario on Make, please select the Airtable app on the scenario builder, and search for the “Watch records” module.
Since you already added your Airtable connection, it should already be selected for you in the module.
After you do this, select the Airtable base and the table that contains the orders.
In the “Trigger” field, select the “last modified time” option.
When the status is changed in a record, the last modified time will be updated, telling Make to pick up this record and trigger the automation.
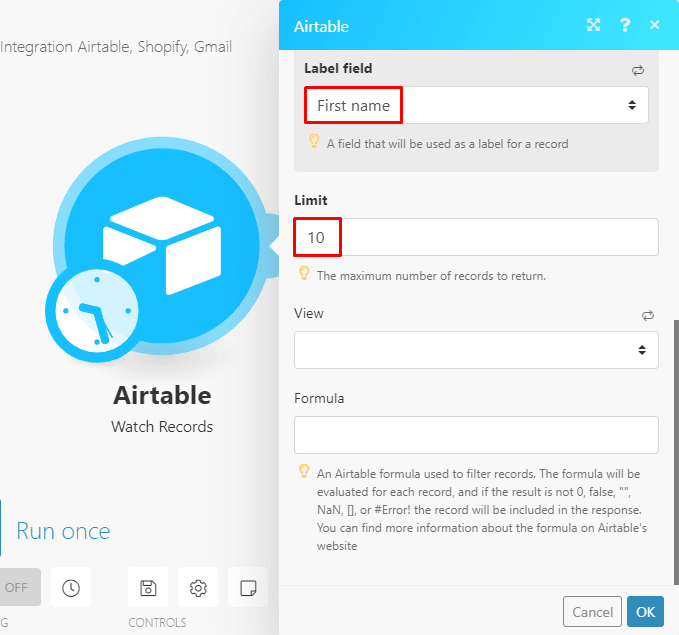
Next, choose a field that will be used as a label for the record.
In the “Limit” field, enter the maximum number of records you want Make to retrieve during one scenario run.
2. Connecting the Shopify app
This module will change the order status on Shopify to “Fulfilled” automatically, so you don’t have to.
In the scenario builder, add a new module, select the Shopify app and pick the “Create a fulfillment” module.
Inside the module, select your Shopify account, which was added earlier in the flow. Then, simply map the “Order ID” data element from the Airtable module to the “Order ID” field, and select the location.

Scroll down to the “Shipment status” field and select the “confirmed” option. After that, click “OK”.

3. Configuring the filter: A simple way to manipulate data on Make
What happens if the supplier accidentally changes the status to “shipped” and then changes it back to “pending”?
The “last modified time” field in the table will still be updated. Therefore, when the scenario executes, the order status will be incorrectly changed to “Fulfilled” in Shopify.
So how do you prevent this from happening? Simple: use a filter.
Exclusive to Make, filters are used to only allow data meeting specific criteria to pass through.
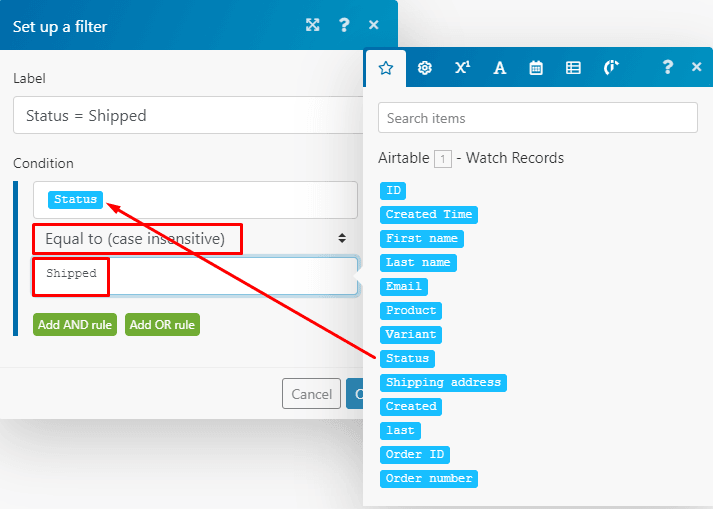
In this case, the filter’s criteria will be the following: the status of a record must be “shipped”. Thus, only the records labeled as such will pass through to the Shopify module and update the fulfillment status of the order.
To set up the filter you have to click on the link between the two modules:

Then, configure the filter as follows:
Give it a name
Map the “Status” element to the top field (under “Condition”)
Select the “Equals to (case insensitive)” text operator
Type in the word “Shipped” in the bottom field(exactly as is, including a capital S)
And that’s it. Now that the filter has been set up, let’s finish setting up the scenario.
4. Configuring the Email app
The final part of the scenario uses email to send shipping notifications to your customers.
To configure it, add a new module, search for the Email app and select the “Send an email” module.
When you add your account, you have the option of choosing between two connection types:
Google restricted
Others (SMTP)
If you are using Gmail, please read the additional information under “Connection name”.
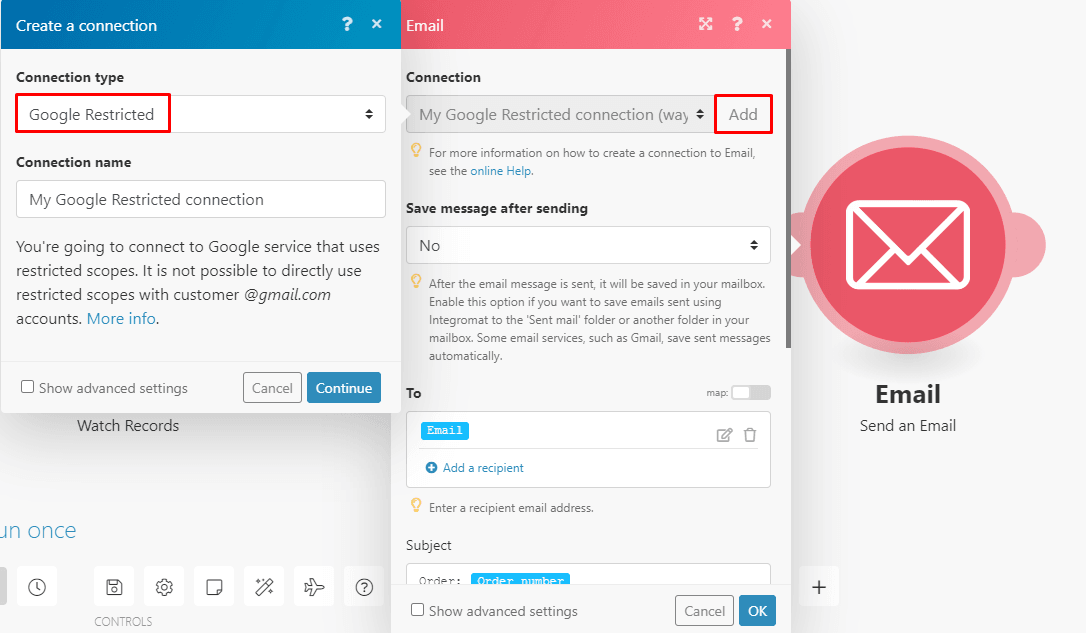
Moving on, the customer’s email address is contained in the “Email” field on the table.
In the “To” field, click the pencil icon and map the “Email” element from Airtable.

When it comes to the subject and content of the email, you can customize it the way you want.
Below is an example of a basic layout and the important elements to map in the subject and body.

5. Testing the scenario
Testing this second scenario is slightly different than the first one.
Since we are not using a webhook, you will need to:
Change the status of an order in Airtable
Hit the “Run once” button in the scenario
If done correctly, the execution will look like this:

6. Scheduling the scenario
To set up scenario scheduling, switch the scenario on and the schedule box will pop up.
You can always access this menu by clicking the clock icon on the trigger module as well.
In the “Run scenario” field, simply choose the interval that best suits your business needs and click “Ok”.
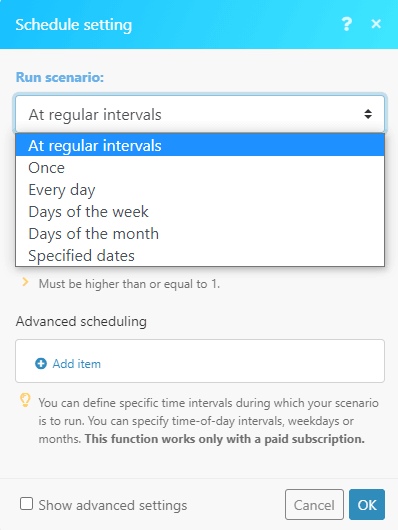
Scheduling will determine how often the scenario will run - that is, update order status on Shopify, and send the corresponding email notifications to customers.
And that, friends, is all.
Conclusion
Shopify dropshippers want their business to run smoothly, but also to be sustainable in the long term. That is why Shopify dropshipping automation matters.
These two automated scenarios will help you achieve that, and focus on the less automatable parts of your business: getting better suppliers, and lower prices.
To conclude, there’s the peace of mind factor. Knowing that your customers will get what they purchased without requiring your intervention is dropshipping at its finest.
Happy automating!

Wayne Govender
Solutions Architect at Make who loves all things tech with a focus on workflow automation. Also enjoys fitness and spending too much time on YouTube.