Aug 7, 2023
AI Sentiment Analysis for Product Satisfaction Surveys: A Tutorial
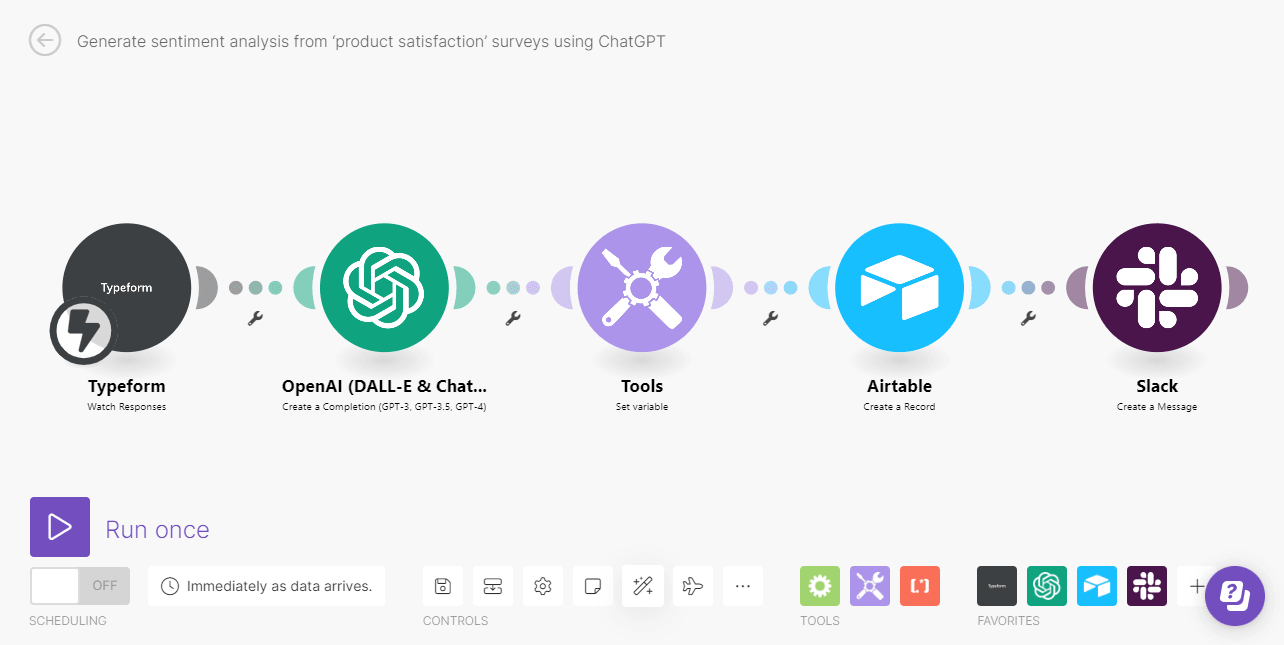
In this tutorial, we’ll show you how to build a Make scenario that automatically performs accurate sentiment analysis for product satisfaction surveys using ChatGPT. Moreover, this solution is also available as a pre-built template.

Up until recently, people conducting sentiment analysis had to make a trade-off between accuracy and efficiency.
On one hand, they could spend more time on identifying and categorizing opinions, or else resign some degree of accuracy to finish the process earlier (usually, by replacing open questions with range questions and automating the categorization task).
But thanks to the appearance of new AI products - particularly large language model-based chatbots - we now can attain highly accurate sentiment analysis in record time.
This is a game changer for anyone conducting sentiment analysis, and solutions can be created in little time by combining online survey tools like Typeform with Make and ChatGPT.
In this tutorial, we’ll show you how to build a Make scenario that automatically performs accurate sentiment analysis for product satisfaction surveys using ChatGPT. Moreover, this solution is also available as a pre-built template.
If you’re new to Make though, we highly recommend getting a paid Make account (the Core Plan will do) and following the tutorial below to get a full understanding of how everything works behind the scenes.
Step 1: Create a new scenario and add the Typeform module
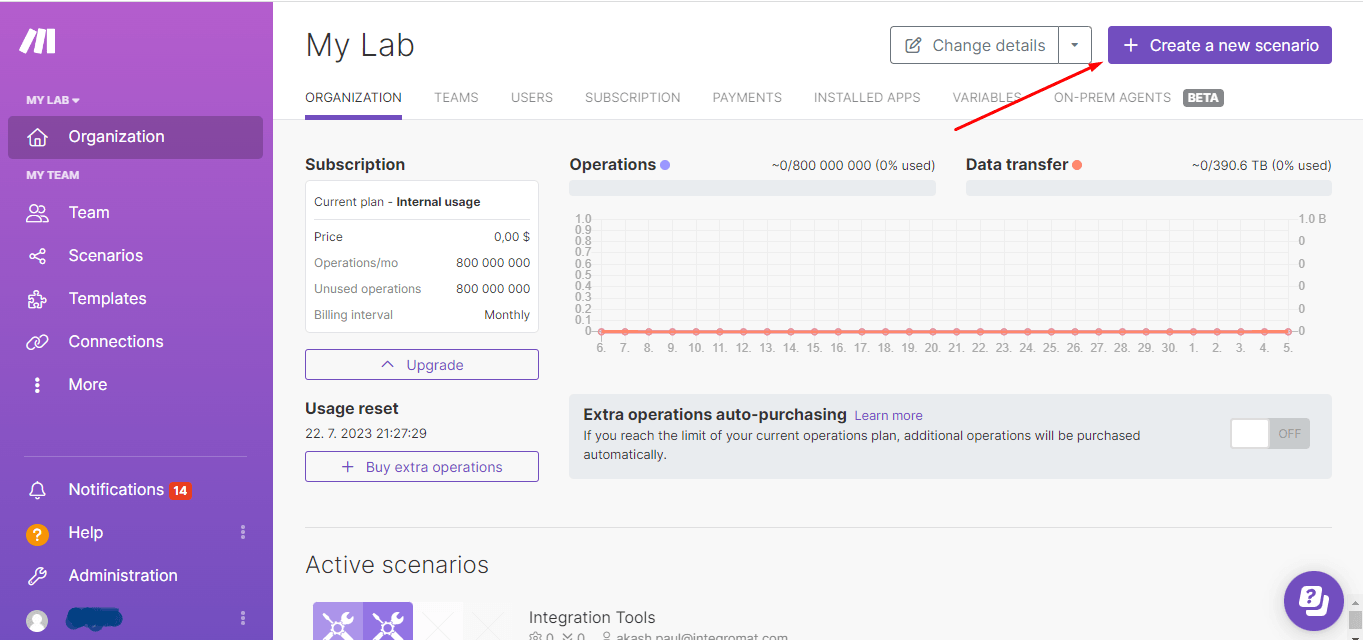
After logging into Make, click Create a new scenario from your dashboard, which will land you on the visual canvas - the place where we’ll build this solution.
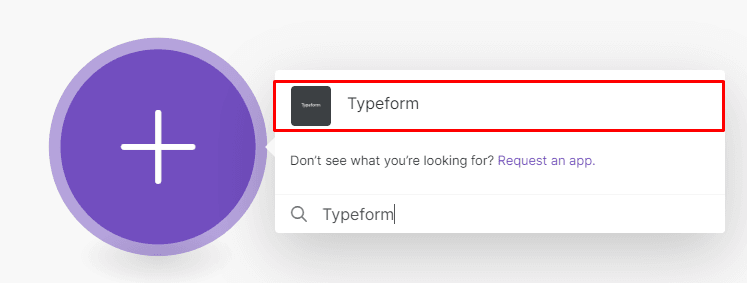
We will be using Typeform to collect survey responses. Thus, click the plus symbol at the center of the visual canvas, and search for the Typeform app.
Note: Make features dozens of online survey tools, so feel free to use another one if you may.
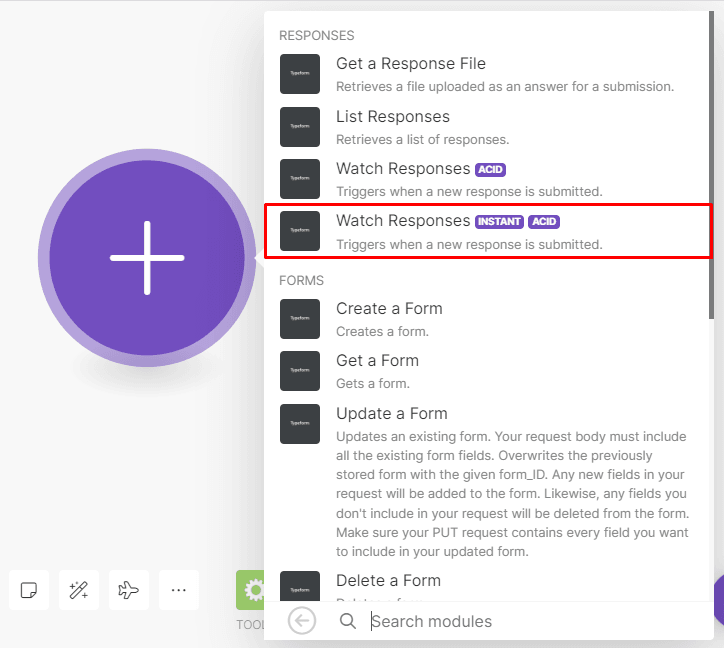
After searching for the Typeform app, select the Typeform > Watch responses module.
This module uses a webhook to instantly receive the responses as they are submitted - in other words, they get instantly processed by Make without delay.
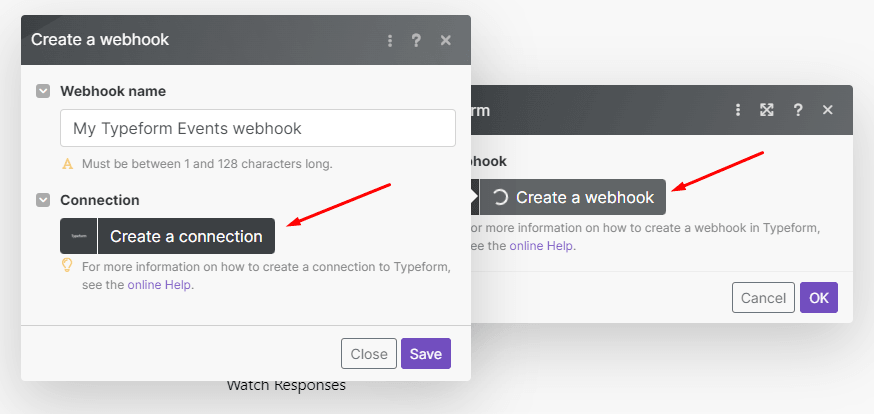
To configure this module, start by connecting your Typeform account to Make. Do this by clicking the Create a Webhook button, and then the Create a Connection button. Once connected, you can select the form you want to watch. Make will automatically attach the webhook in Typeform for your convenience.
To finish configuring this module, click OK.
Step 2: Add the OpenAI module
Now that the Typeform module has been configured and your customer survey responses will be received correctly, it’s time for the next step in the process - getting AI to analyze the responses to provide sentiment and usefulness.
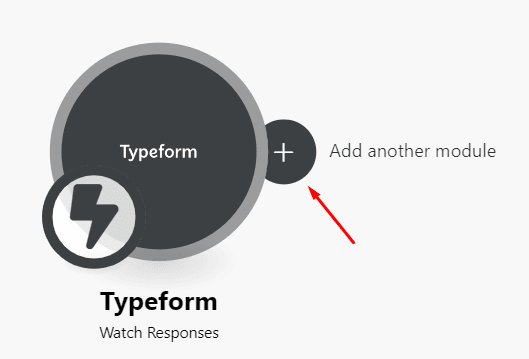
Do you notice the Add another module button on the right side of the Typeform module when you hover over it? Click it!
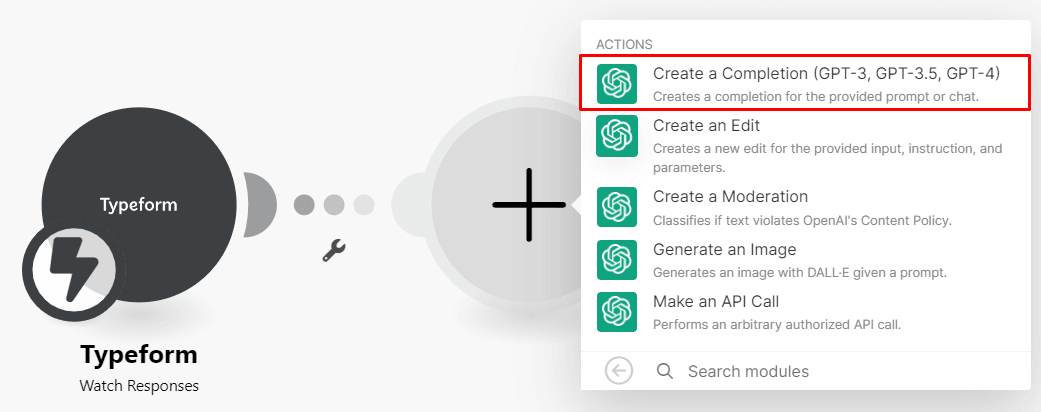
Now, search for the OpenAI (DALL-E & ChatGPT) app, and select the Create a Completion module.
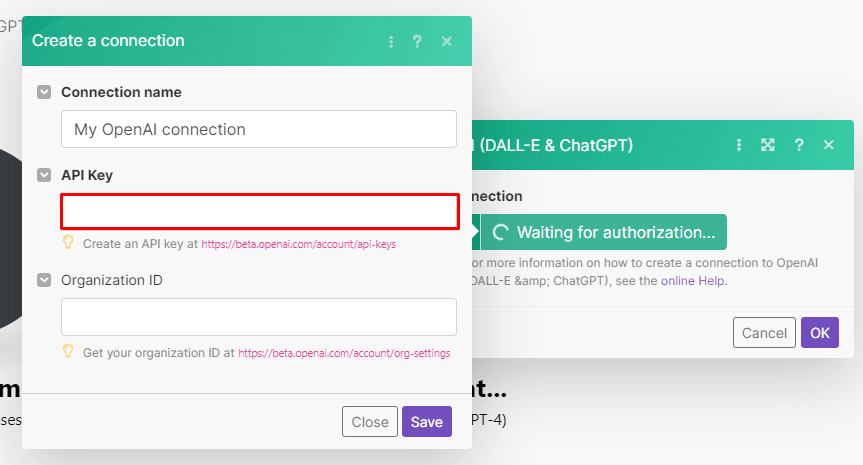
When the module opens, click Create a connection, and connect your OpenAI account using your API key.
In case you don’t know your OpenAI API key, click the URL below the field, which will take you to the page where you can find it.
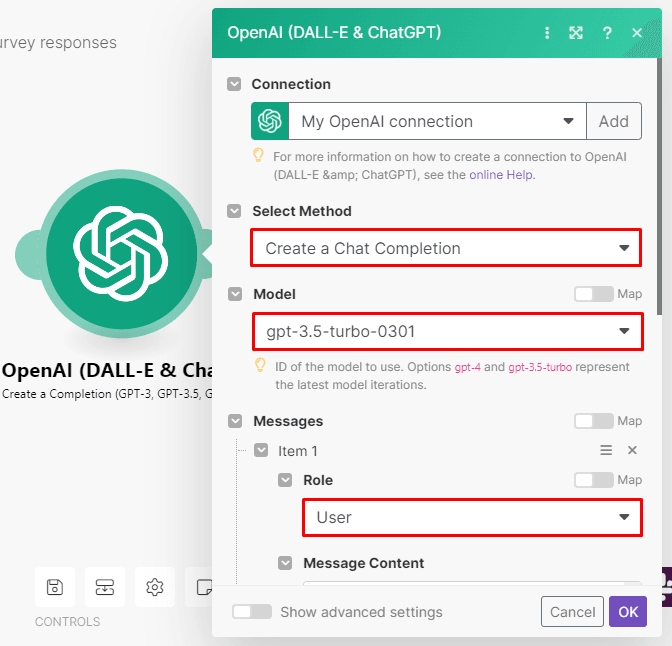
Now it’s time to configure the OpenAI module. Follow the instructions below to set it up:
Select Method: Create a Chat Completion
Model: gpt-3.5-turbo-0301 (currently has the highest limit of 16k tokens)
Messages Role: User
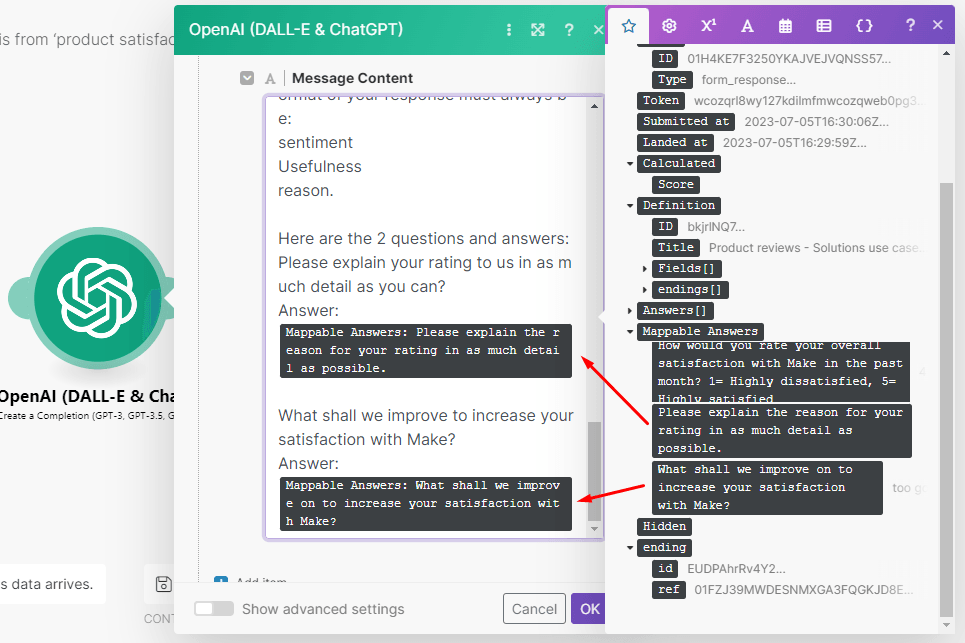
Message Content: Below we have provided the prompt for you that requests the sentiment of the comment, its usefulness, and the reason/comment analysis for the choice. Replace the job title, company, and questions with your own, and then map the answer data items from the Typeform module next to ‘Answer’ as you see in the screenshot. We only need to analyze the answers to 2 questions since the first one is just the star rating.
Prompt: You are a product manager researcher for a technology SAAS company. Determine the sentiment of the following answers from a survey and assign one of the following: Positive Useful or Positive
Not useful or Negative
Useful or Negative
Not useful or Neutral
Useful or Neutral
Not useful or No answer
There must be no text before the sentiment.
Provide a reason in your own words for your choice without repeating any part of the answer. Consider that it may not have context but can still be useful. For example:
Too expensive Too few features Outdated technology Great price New features are good, etc.
These and similar answers that relate to the product must be considered useful even though it does not provide any suggestions or context however one-word answers like:
Great Cool Awesome Bad, etc.
Should be considered not useful.
Please translate foreign languages to English and mention it in your comment.
Always analyze both answers and the format of your response must always be:
Sentiment Usefulness Reason
Here are the 2 questions and answers:
Once done, click OK to finish configuring the OpenAI module.
Step 3: Add a variable module to your scenario
ChatGPT outputs the response as a single bundle of data, which means that the sentiment, usefulness, and comment analysis need to be split so that we can map it in the database module that follows.
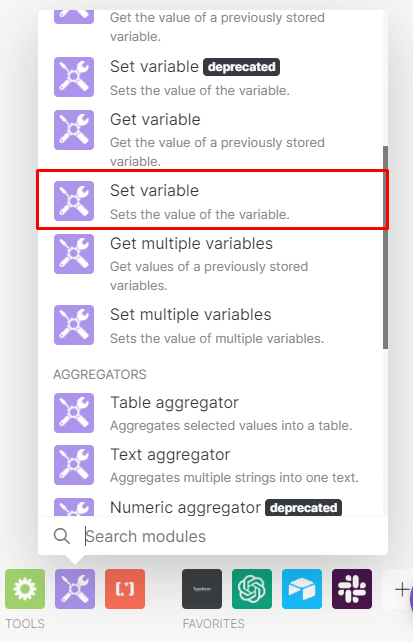
To achieve this, let’s use the Set variable module. You’ll find it in the Tools menu located at the bottom of the scenario builder. Select and attach it after the ChatGPT module.
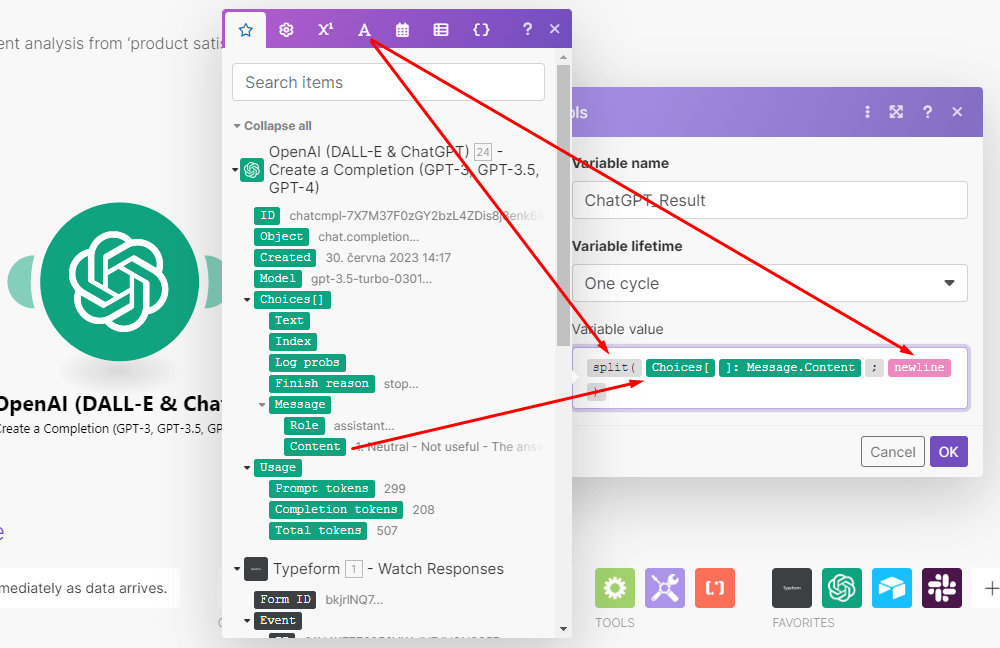
To configure the module, start by naming your variable.
Next, use the split function together with ChatGPT’s output and the newline keyword.
This will separate the sentiment, usefulness, and comment analysis and put it on its own line.
You will find the split function and newline keyword under the Text and binary functions.
See the image below for reference on how to set up this module:
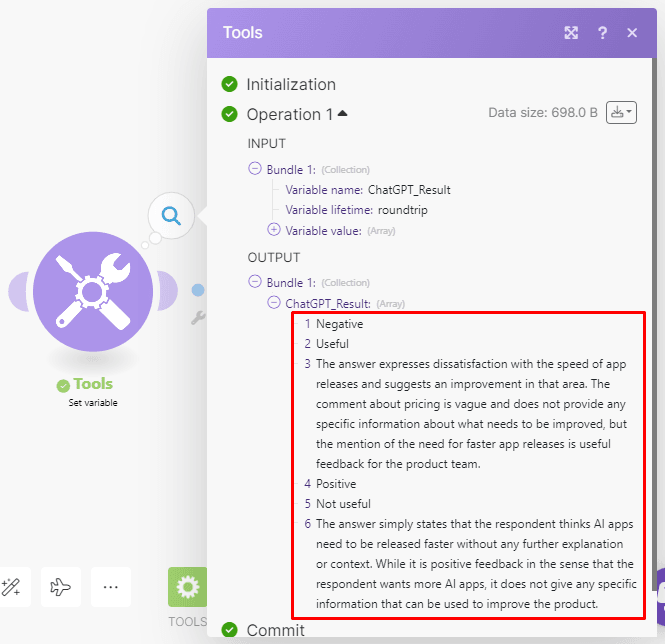
Here’s what the output of the Set variable module looks like.
Notice that each line is numbered 1-6. This is important, as it will be used in the mapping of the database module shortly.
Step 4: Add the Airtable module
Now it’s time to funnel the resulting sentiment analysis data to the Airtable base that will store it.
Here’s the Airtable base we’re employing for this purpose in case you want to copy and use it yourself.
To do this, add the Airtable > Create a record module to the scenario.
Start configuring it by connecting your Airtable account to Make, and then select the base and table. Map the data items as follows:
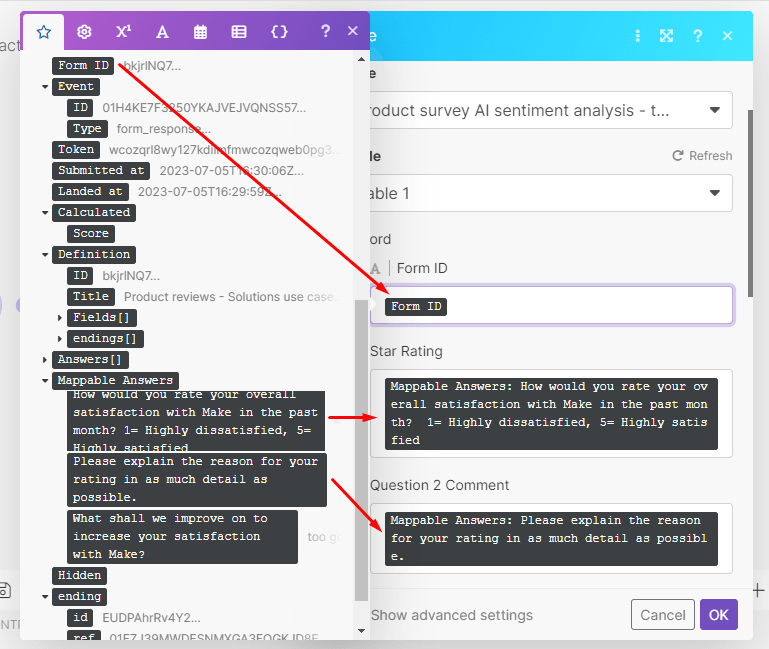
Form ID, question 1 answer (rating), and question 2 comment/answer from Typeform to the matching fields.
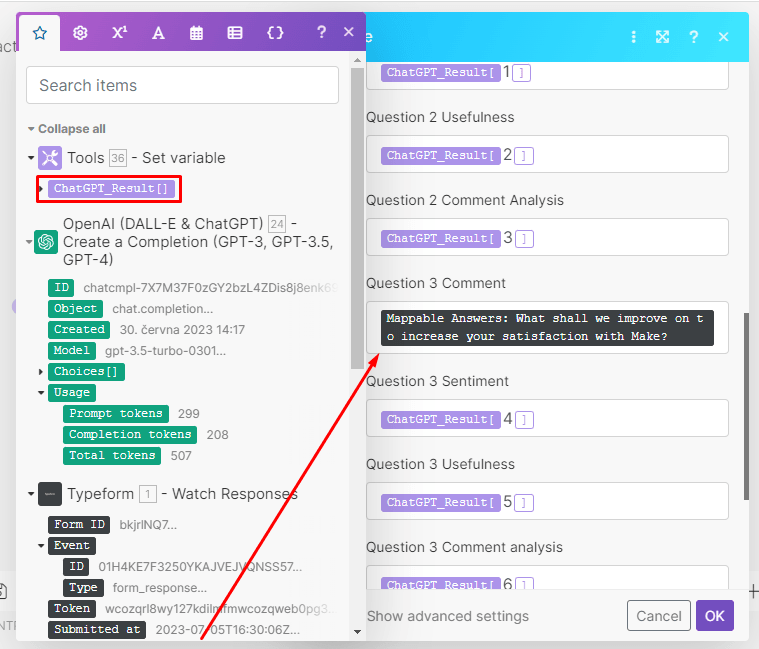
Remember that the Set variable module outputted the response in lines 1-6. All you need to do is map the ChatGPT_Result[] item from the Set variable module to the fields and enter the number of the line in the brackets that corresponds to the field. Don’t forget to map Question 3 to the field as well! See the screenshot below for reference.
Once ready, click OK and move on to the next step.
Step 5: Add the final module to your scenario
Storing the information in your Airtable base is great but as an added touch, you can also notify yourself or your team about the latest survey responses through an IM tool like Slack.
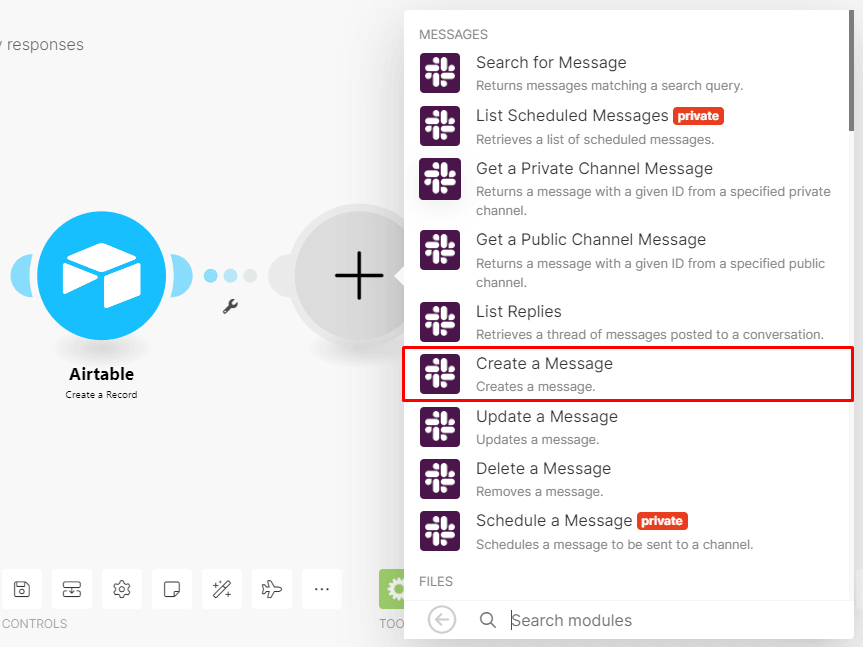
So let’s go ahead and add the Slack > Create a Message module to the scenario after Airtable.
Configure the module as follows once you have connected your Slack account to Make:
Choose the Select from the list under Enter a channel ID or name field.
Select the Channel type.
Select the User/Channel you want to send the message to.
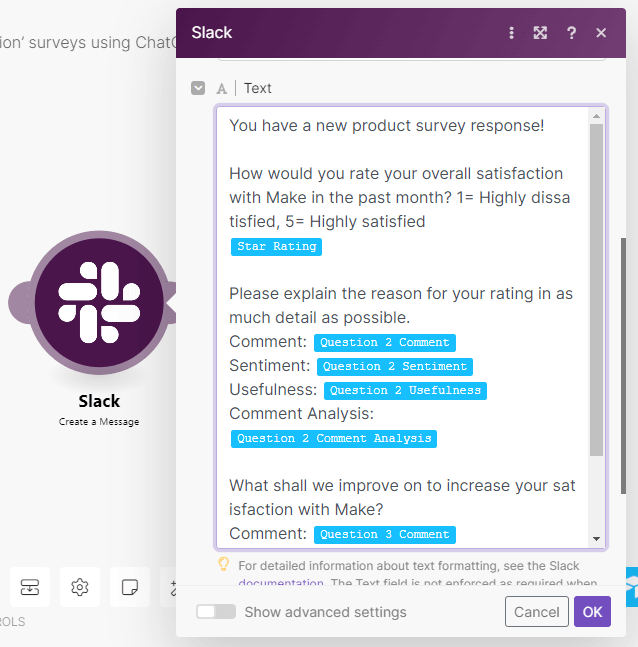
You can then compose the message in the Text box. Here’s an example of our message:
To finish configuring your scenario, save it and turn it on.
Time to celebrate! You have just created an AI-powered sentiment analysis tool for Typeform surveys.
Final words: Outgrowing old processes with new technologies
Thanks to newly released AI apps, it is now possible to automate complex tasks and put resources to better use.
Sentiment analysis is an example of this, and automating is yet another proof of how Make can bring processes to a whole new level of quality and efficiency.
All it takes is a Make account, a few minutes of your time, and the desire to leave old, clunky processes behind you once and for all.


