Nov 29, 2022
How to Automate the Recruitment Process with Make [Tutorial]
From candidate sourcing to interviewing and beyond, this tutorial will show you how to build a recruitment automation system from scratch.

In a recent article, we explored the topic of automated interview processes, and how these can help companies hire faster in a context marked by economic downturn and major cultural shifts.
Today, we’re going to expand our coverage on the topic, and show you how to automate the recruitment process using Make and a handful of familiar apps.
The goal of this tutorial is to show you how easy it is to dive into recruitment automation without having to sign up for complicated, expensive HR platforms.
Before we jump into the action, let’s take a couple of minutes to lay out the processes we’ll automate, and the apps involved in it.
The recruitment automation process
Our recruitment automation solution consists of two Make scenarios that allow recruiters and HR professionals to automatically:
Process incoming applications from potential candidates.
Schedule meetings with the candidates the recruiters decide.
Notify the candidate and the interviewer about the upcoming first interview.
Accept or reject a candidate, or let them know that a second interview is needed.
This simple solution can save recruiters (and candidates) lots of time and resources, and also streamline the process of hiring new employees by leaps and bounds.
In addition to this, the solution relies on a series of widely used apps, namely: Typeform, Airtable, Google Meet, and email (any email client will do).
It is worth noting that all of the apps mentioned above have free versions that you can use; in addition, a paid Make plan will be needed as well.
Now, let’s dive right into the action and build an automated recruitment tool for free.
Scenario 1: Automatically process job applications
The first scenario is the simplest one, as it relies on two apps: Typeform, and Airtable.
Typeform is a form-building app, and as such, it is helpful to receive incoming job applications from candidates.
Airtable is a spreadsheet-database hybrid that will contain the data that candidates submit through Typeform.
The scenario we’ll build here allows you to capture responses from a form and create a record with the form data in an Airtable base.
Let’s begin with the Typeform form.
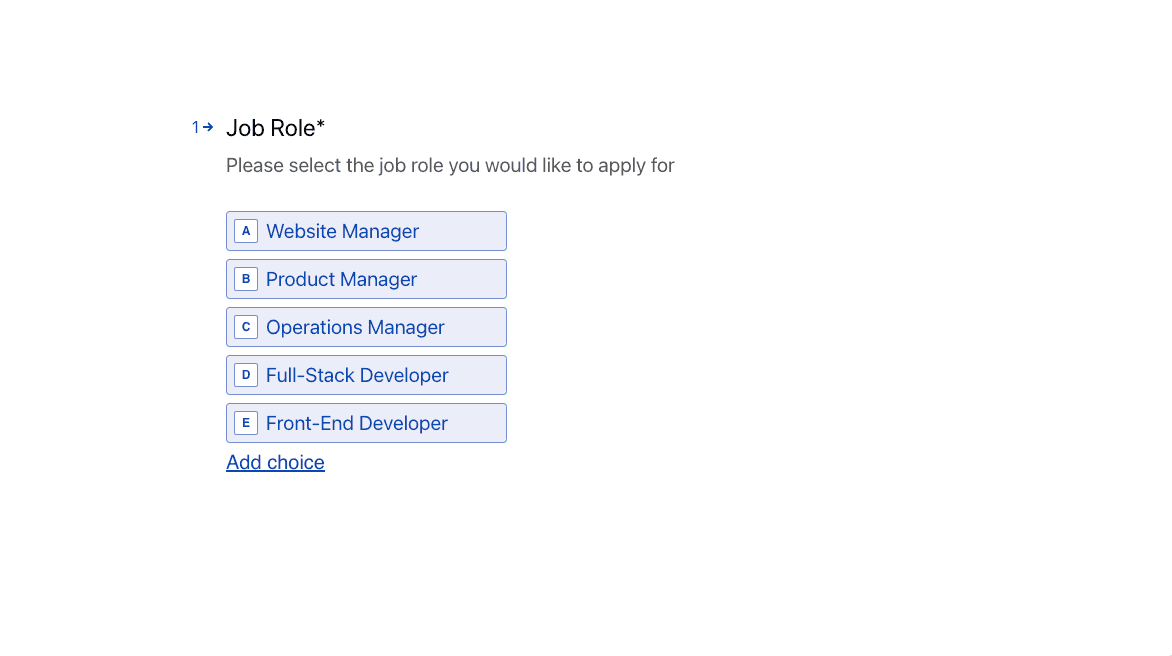
The following questions have been added to our job recruitment form. First, we’ll ask candidates to select the job role they would like to apply to.
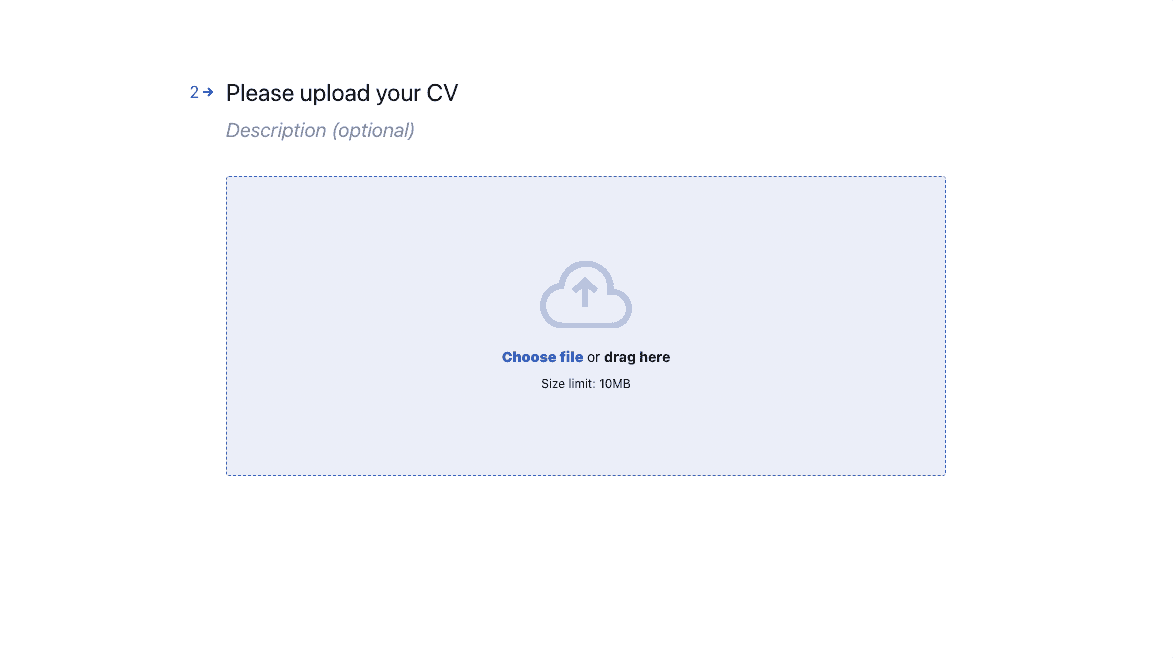
Then, we’ll ask candidates to upload their CVs as well.
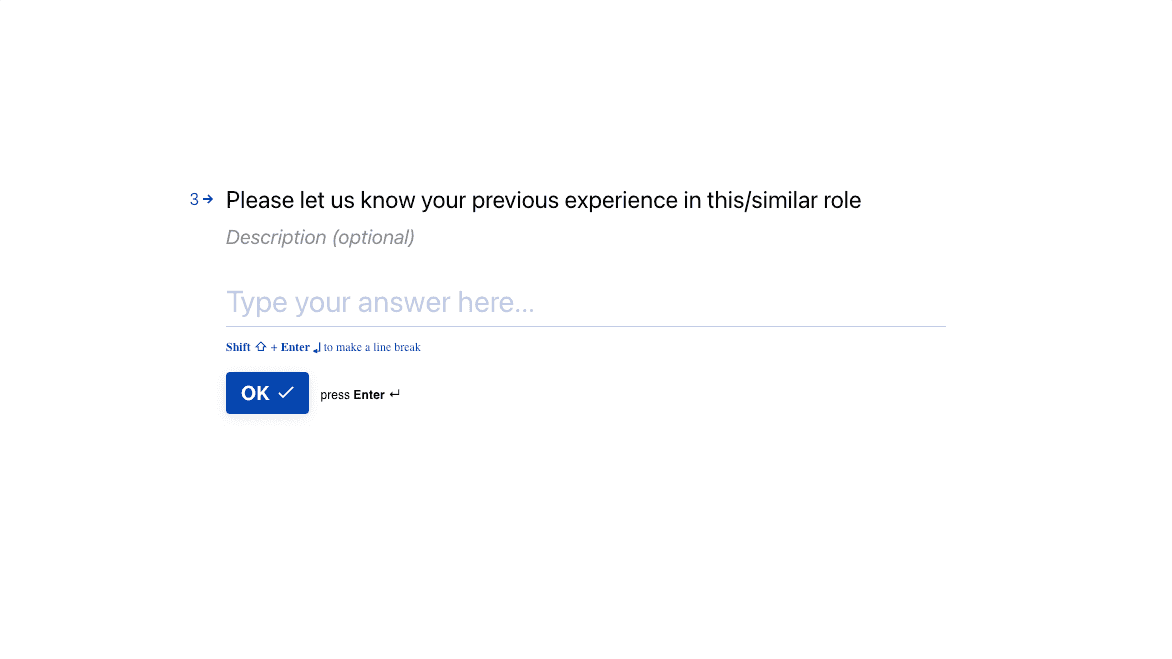
In the third question, candidates can write about their work experience and explain why they are ideal for the role.
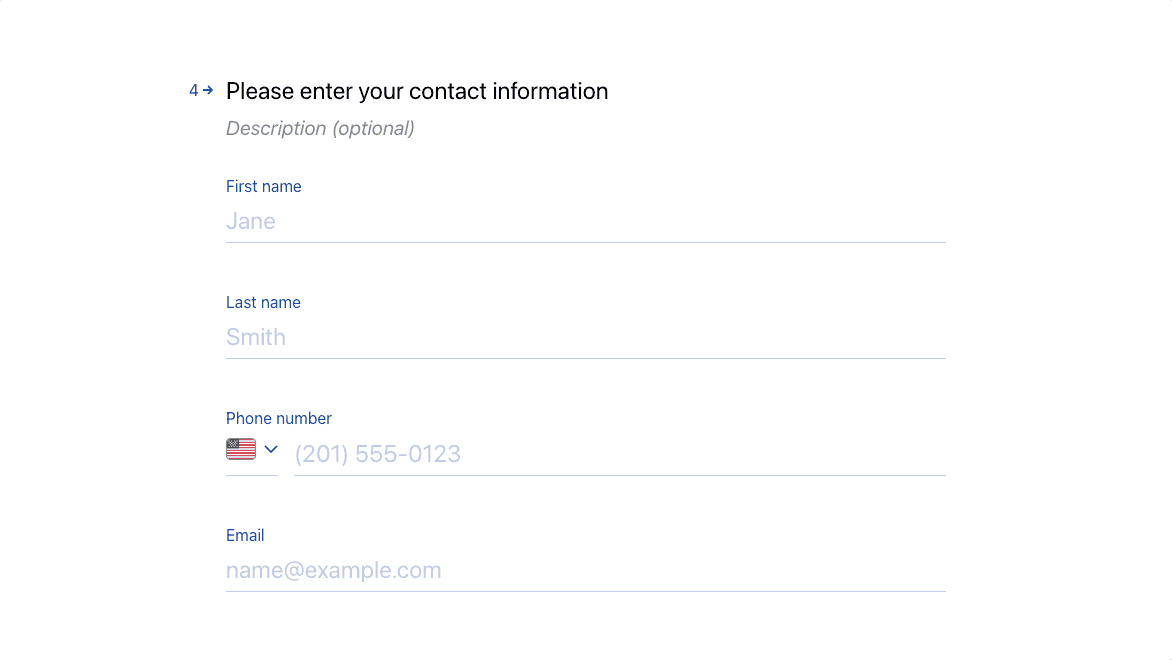
Finally, we have a fourth question to ask for personal information and contact details.
Once you have the Typeform ready, you’ll have to create an Airtable base.
This base will store the applications coming from Typeform and also activate different actions depending on the status of each application.
After creating the Airtable base, head over to your Make dashboard and create a new scenario.
Doing this will take you to the scenario builder.
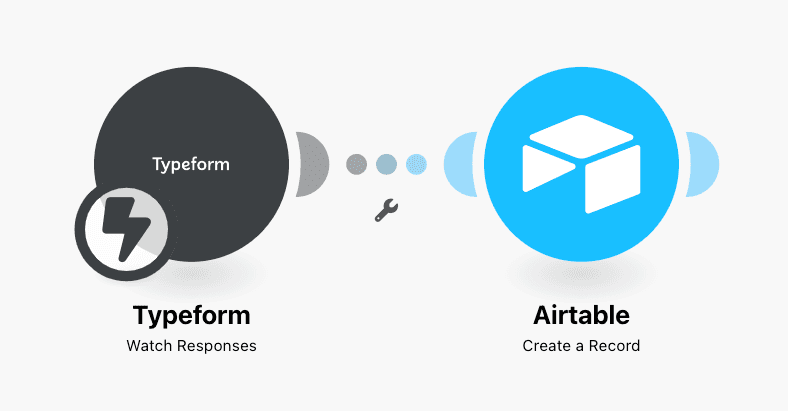
Here, add the “Typeform > Watch Responses” module.
This module has an instant trigger which means it will get executed as soon as a new form response is submitted by a candidate.
After connecting Make to Typeform, add the “Airtable > Create a Record” module to your scenario.
This module will create a new record in your Airtable base.
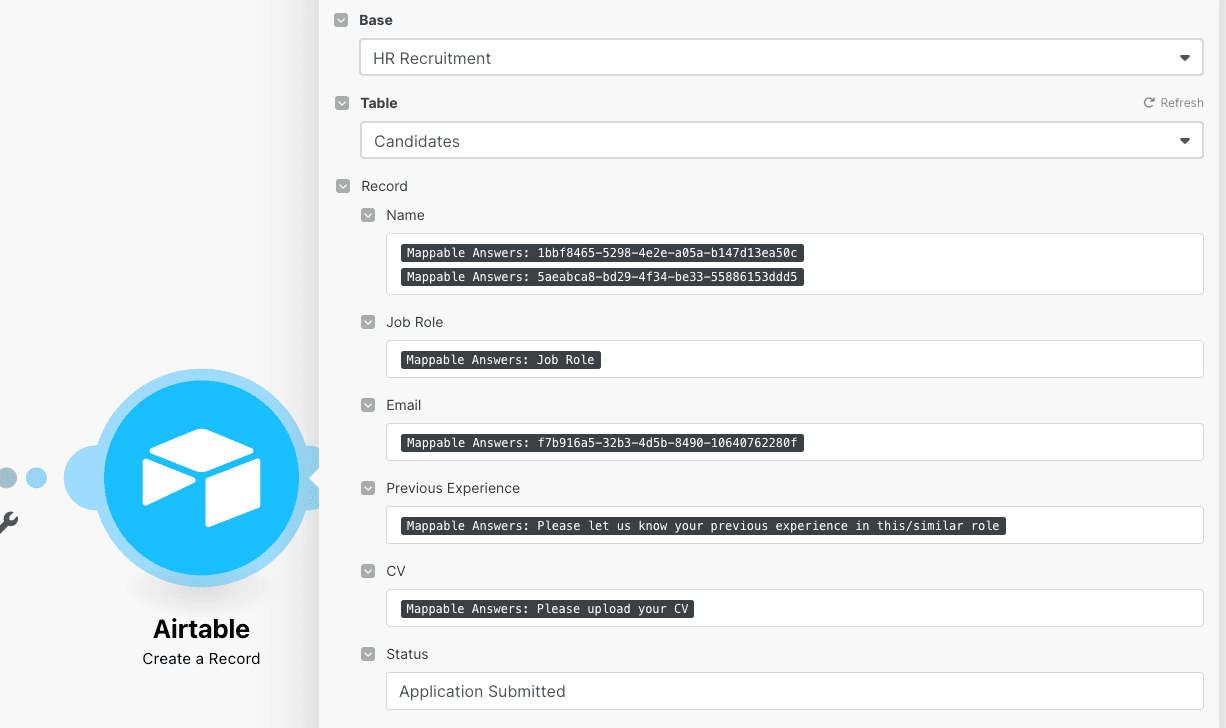
The data in the Airtable base is mapped using data elements from the Typeform module and the “Status field” in Airtable is set to ‘Application Submitted’. See the image below for reference.
Once you finish configuring the Airtable module, hit “OK”, turn your scenario on, and save it.
Now, this scenario will automatically collect the applications from candidates into the Airtable base.
As you can see below, the Airtable base features columns for all the questions/fields present in the Typeform form, namely: Candidate name, job role, the status of the application, email, previous experience, CV, and so on.
It also includes a key column/field that we’ll address later on: the “Status” one.
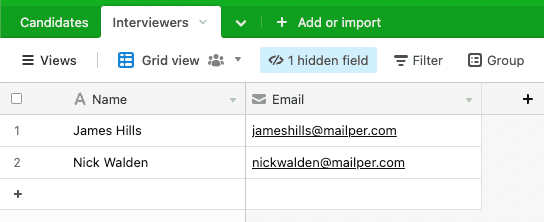
Also, it’s important to note that we’ve included a second table named “Interviewers”, which contains the details of the people who will be conducting the interviews (i.e. the HR people in your company, recruiters, tech leads).
Make sure your base has the same configuration so we can build the next scenario.
Scenario 2: Automatically schedule interviews and communication with candidates
Now that you can automatically get and organize candidate applications in Airtable, it’s time to put this data to work.
The following scenario allows you to automate the next steps in the recruitment process depending on the status you set for each received application:
Scheduling an interview with a candidate.
Sending a rejection email to the candidate.
Telling the candidate that the application was successful.
Let’s start with the first step: Scheduling an interview.
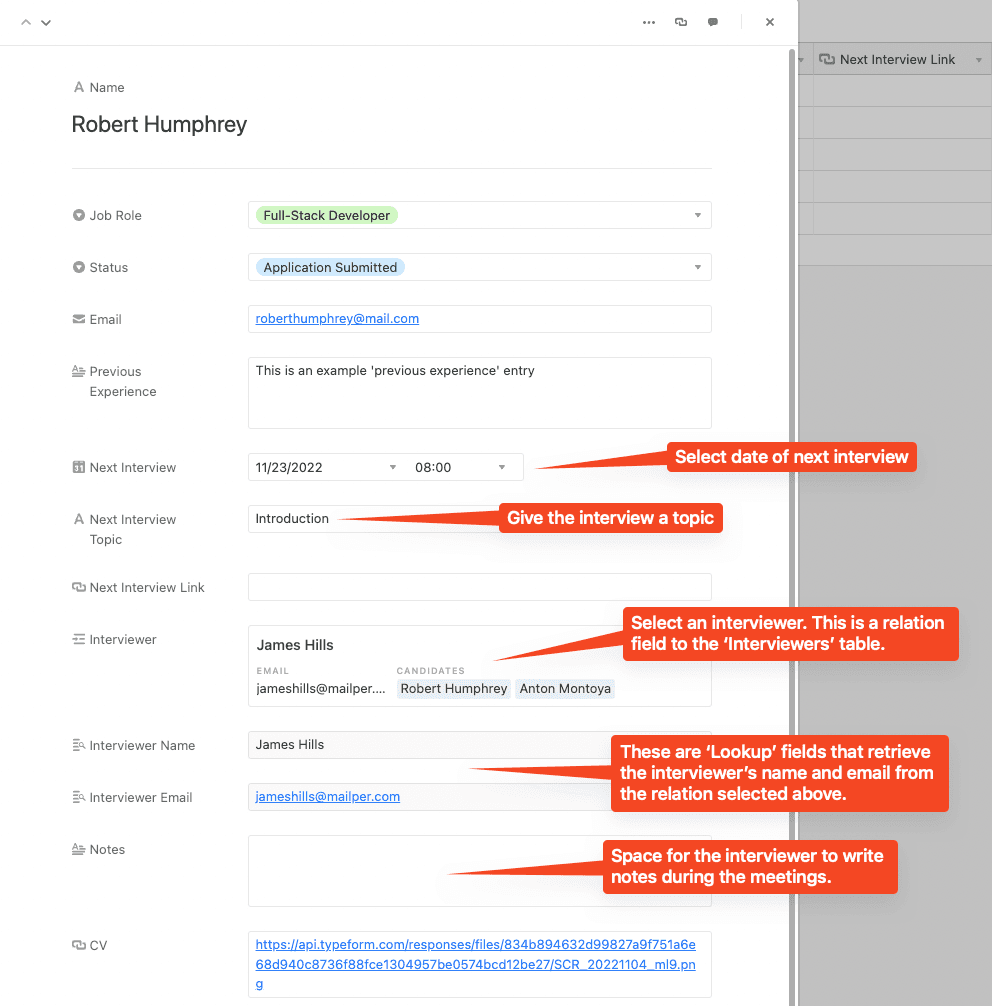
To achieve this, the Airtable base needs to be enriched with new fields, which will capture all the information required for generating the interview meetings.
These fields must be created and filled out by you (or your team) in the Airtable base. Unlike the original fields, these won’t be automatically populated by new Typeform submissions.
The fields in question are related to the recruitment automation process and include the date and time for interviews, the name of the interviewer, and the topic of the interview.
See the image below for reference.
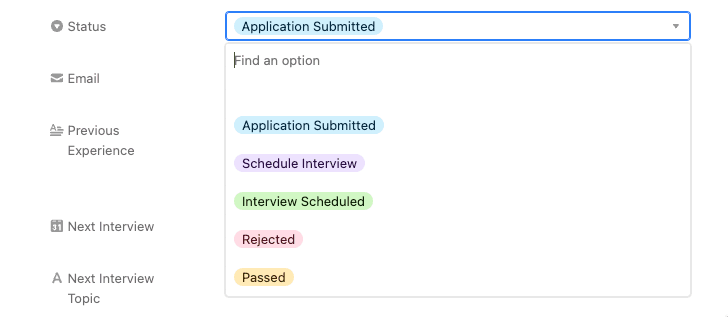
After adding these to Airtable, pay special attention to the “Status” field in your table.
We provided a total of five options to choose from in this field. Each of these options will act as a trigger for the processes that will be automated in this scenario.
Now that we clarified this, you’ll have to create a new scenario from scratch.
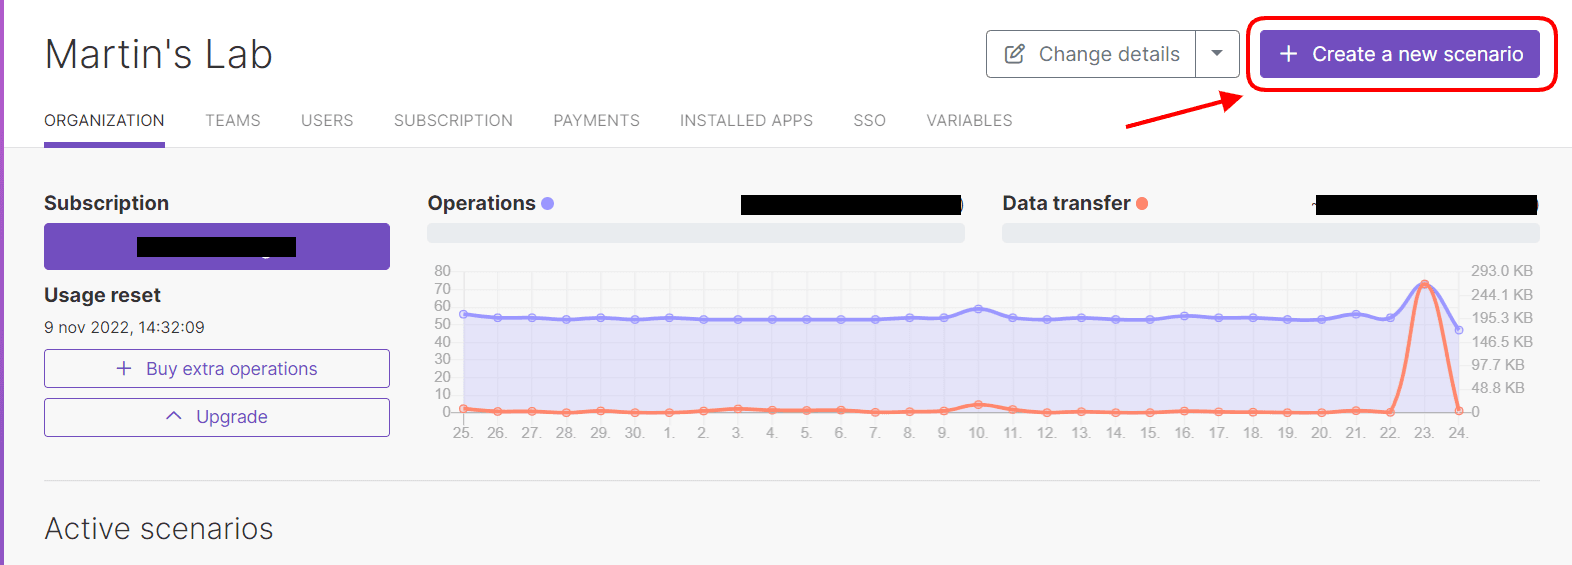
Just as you did before, head over to your Make dashboard and hit the “Create a new scenario button”.
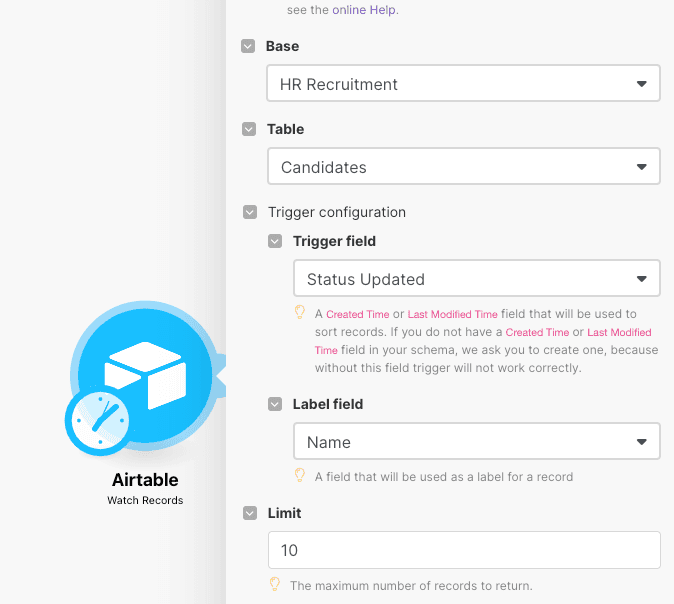
Then, add the “Airtable > Watch Records” module.
This module will retrieve all the records in the “Candidates” table that have received a “Status” field update since the last time the module was executed.
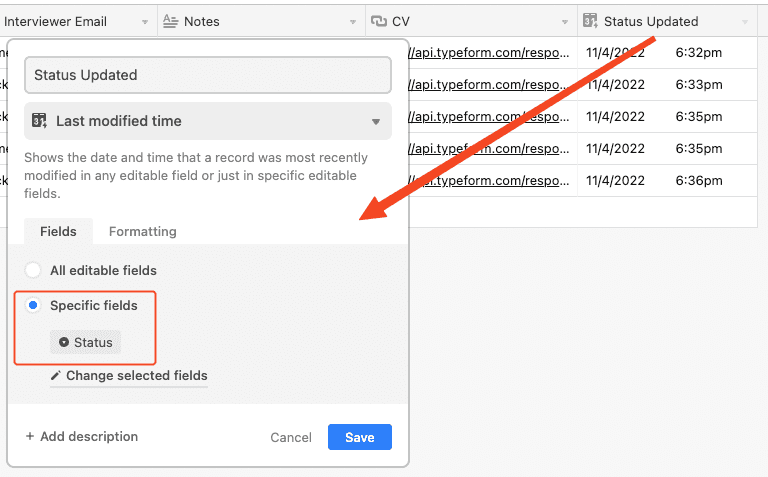
To know whether the “Status” field has been updated or not we’ll create a field called “Last modified time” in the Airtable base.
Then, we’ll set the Airtable module to only detect updates on the “Status” field of the table.
This field (which in this example we named “Status Updated”) can be set as the trigger field in the “Airtable > Watch Records” module (as seen in the above screenshot).
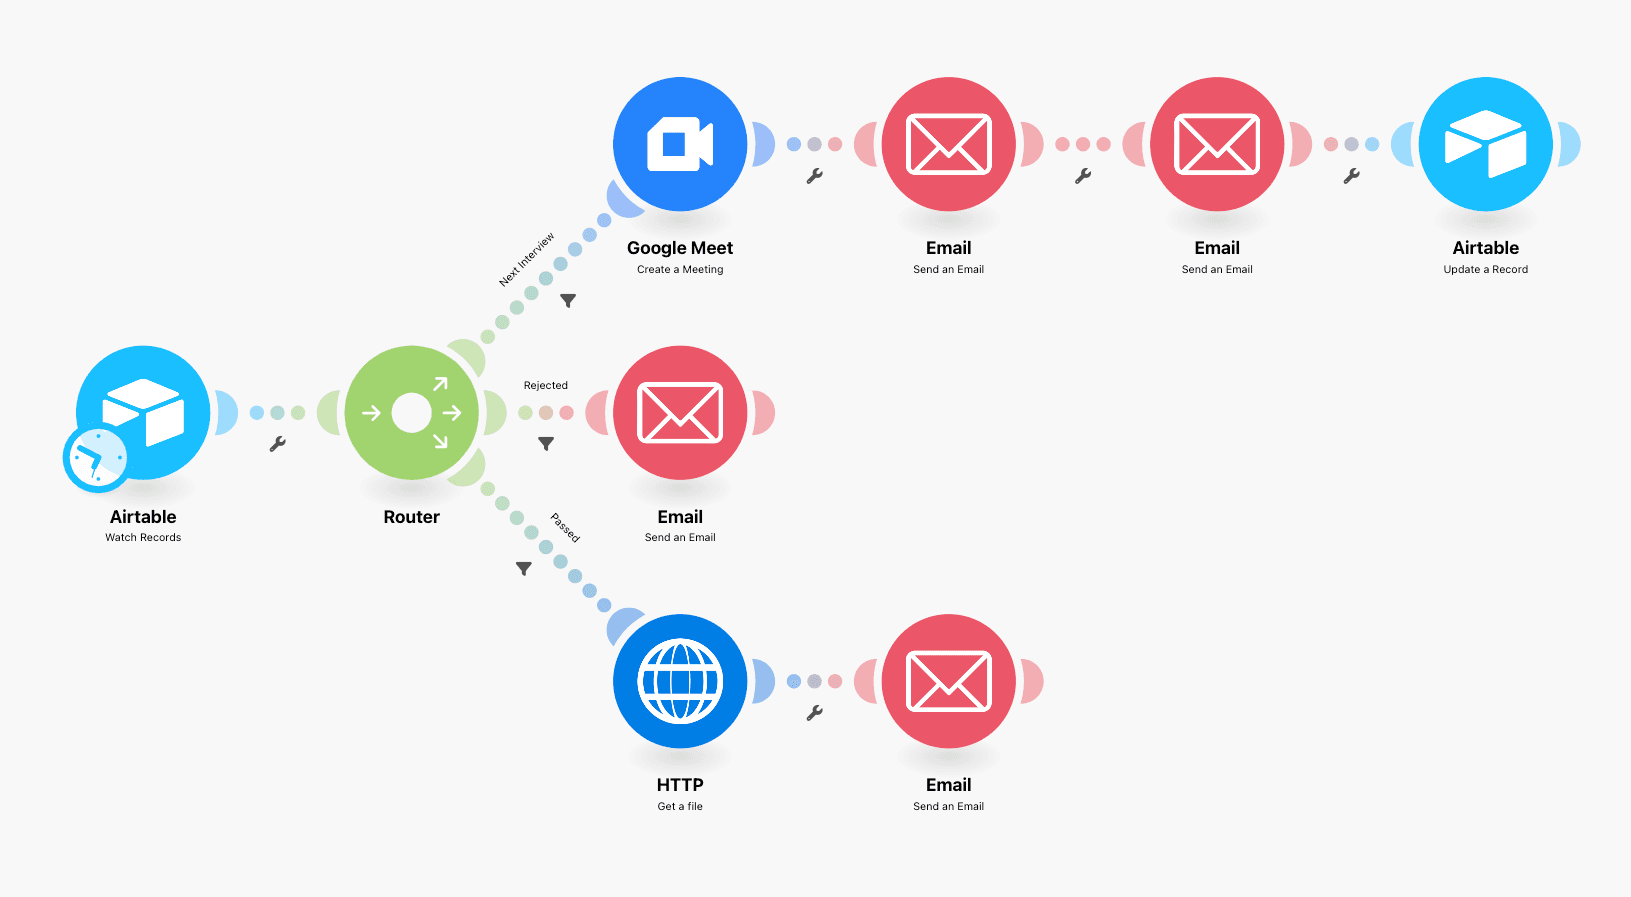
Now that you configured the first module and your Airtable base, let’s take a look at the first path of this second scenario.
Path 1: Automatically schedule upcoming interviews
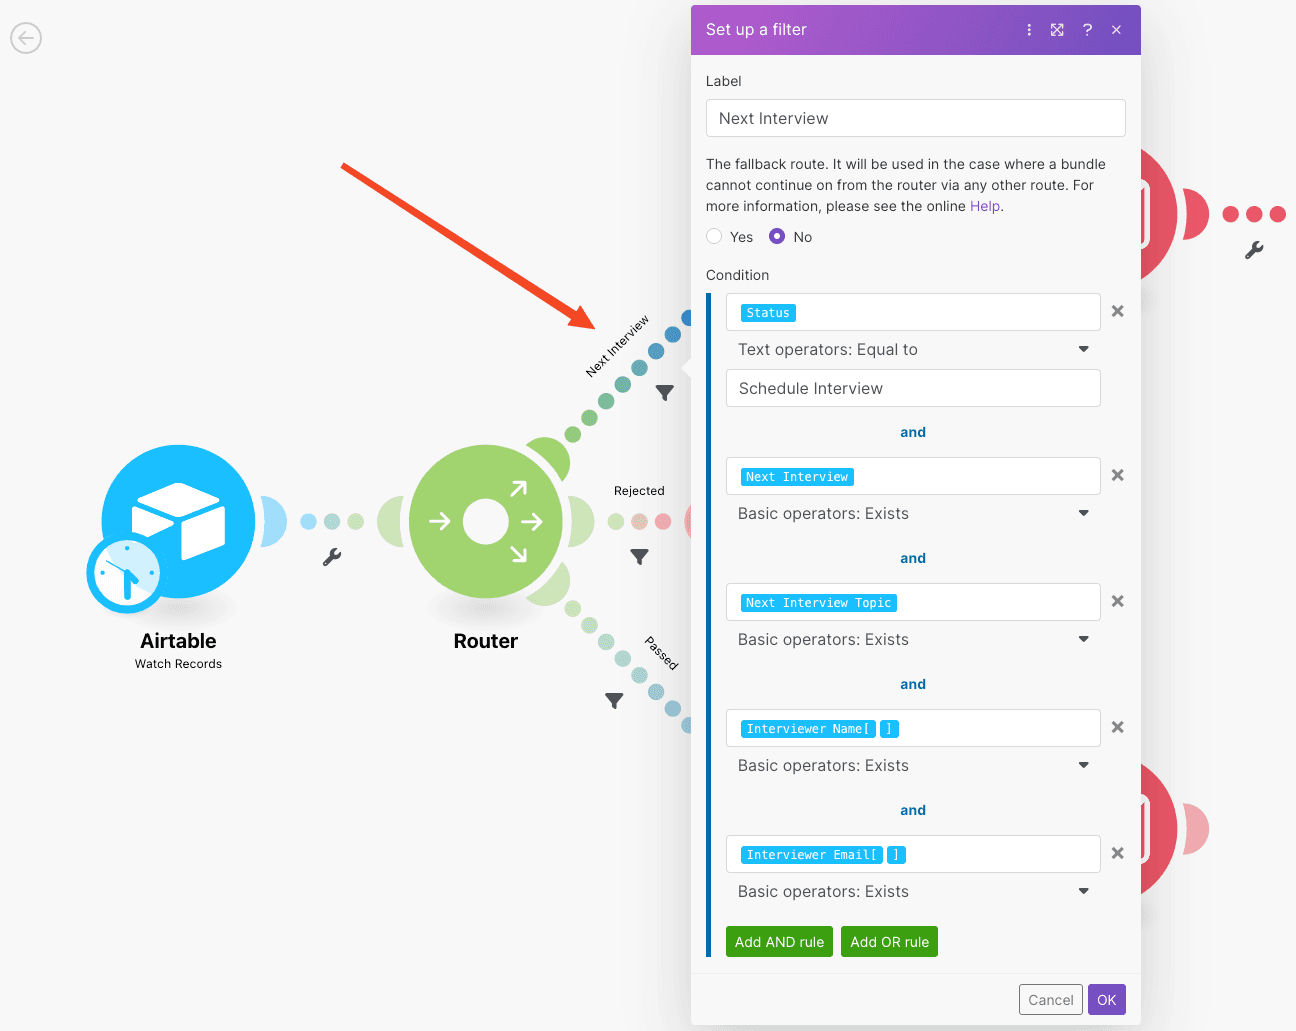
This path will schedule interviews for the candidates whose “Status” field gets set to “Schedule interview”.
The following filter conditions have to be met as well in order for Make to automatically schedule the interview:
The “Next Interview” field is not empty.
The “Next Interview Topic” field is not empty.
The “Interviewer Name” field is not empty.
The “Interviewer Email” field is not empty.
So, what happens when these conditions are met?
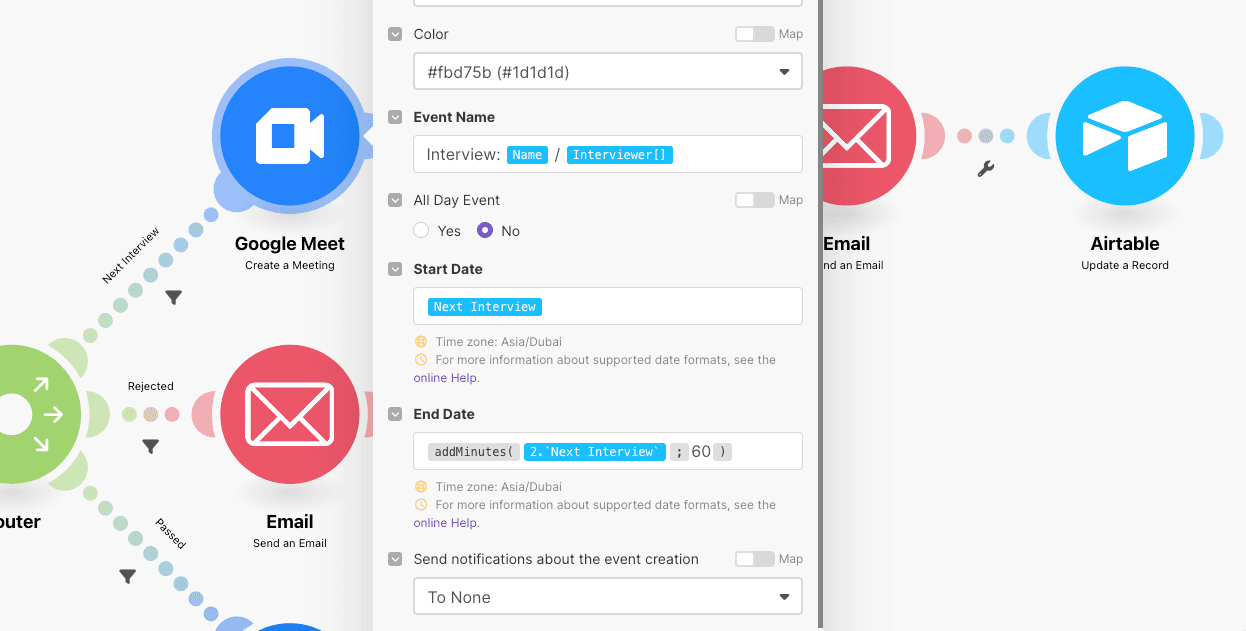
Simple: the “Google Meet > Create a Meeting” module will generate a link for the upcoming interview meeting (Worth noting, it will do so based on the timestamp selected in the “Next Interview” field of the Airtable record).
To achieve this, add a Router after the initial Airtable module, and then add the “Google Meet > Create a Meeting” module.
After creating the Google Meet meeting, Make will send an email to the candidate in question.
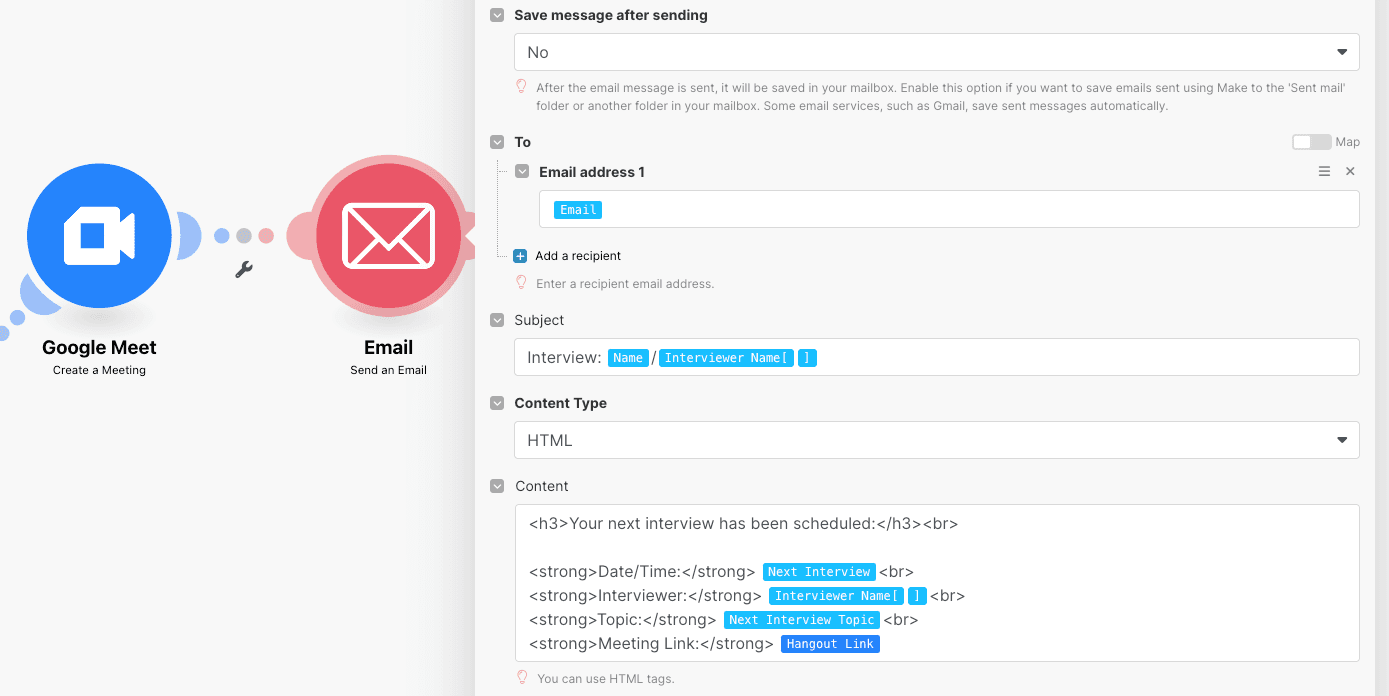
To do this, you have to add the “Send an email” email module to this path in your scenario.
The email will contain the date and time of the interview, as well as the interviewer’s name, the topic of the interview, and most importantly, the meeting link created by the previous module.
See the screenshot below for reference.
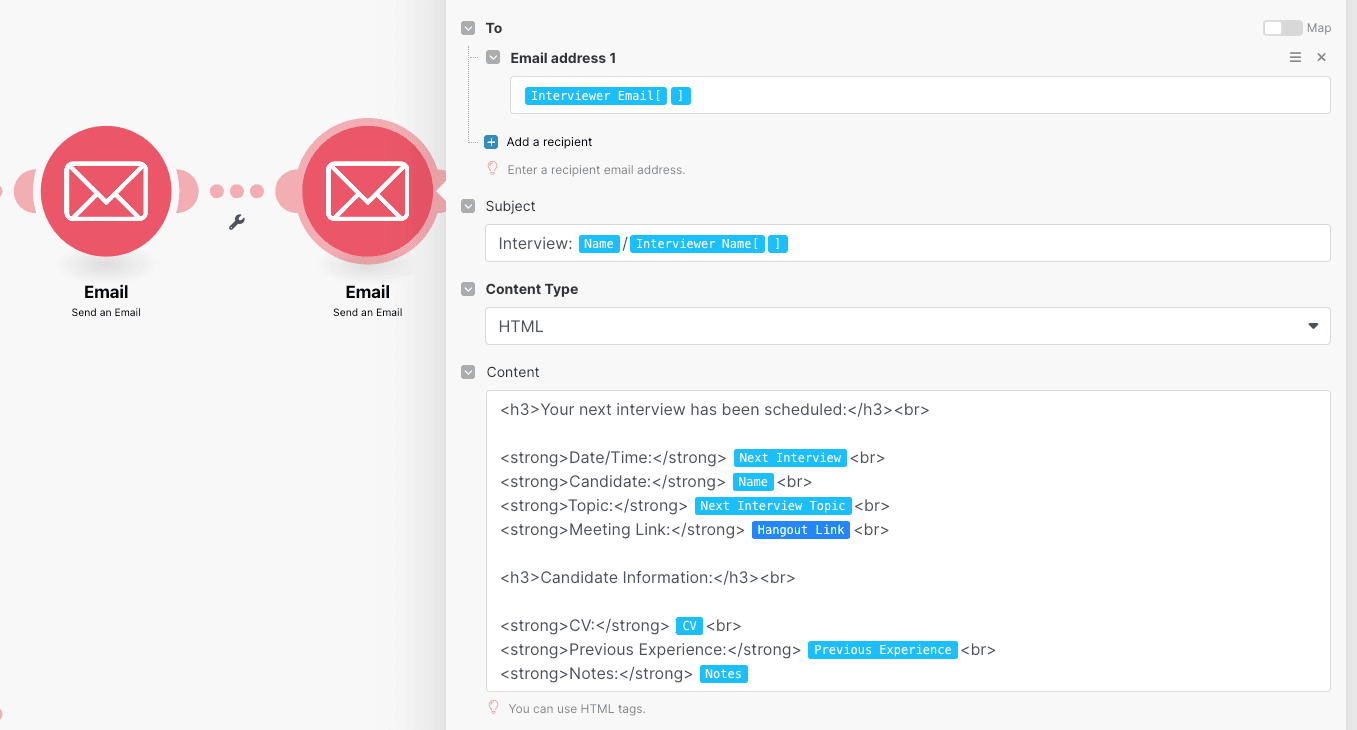
Then, Make will send an email to the interviewer containing the same information and some useful additions as well: The candidate’s CV, previous experience, and (if available) notes by the HR department or by an interviewer during a previous meeting.
To achieve this, add another “Send an email” email module to your scenario.
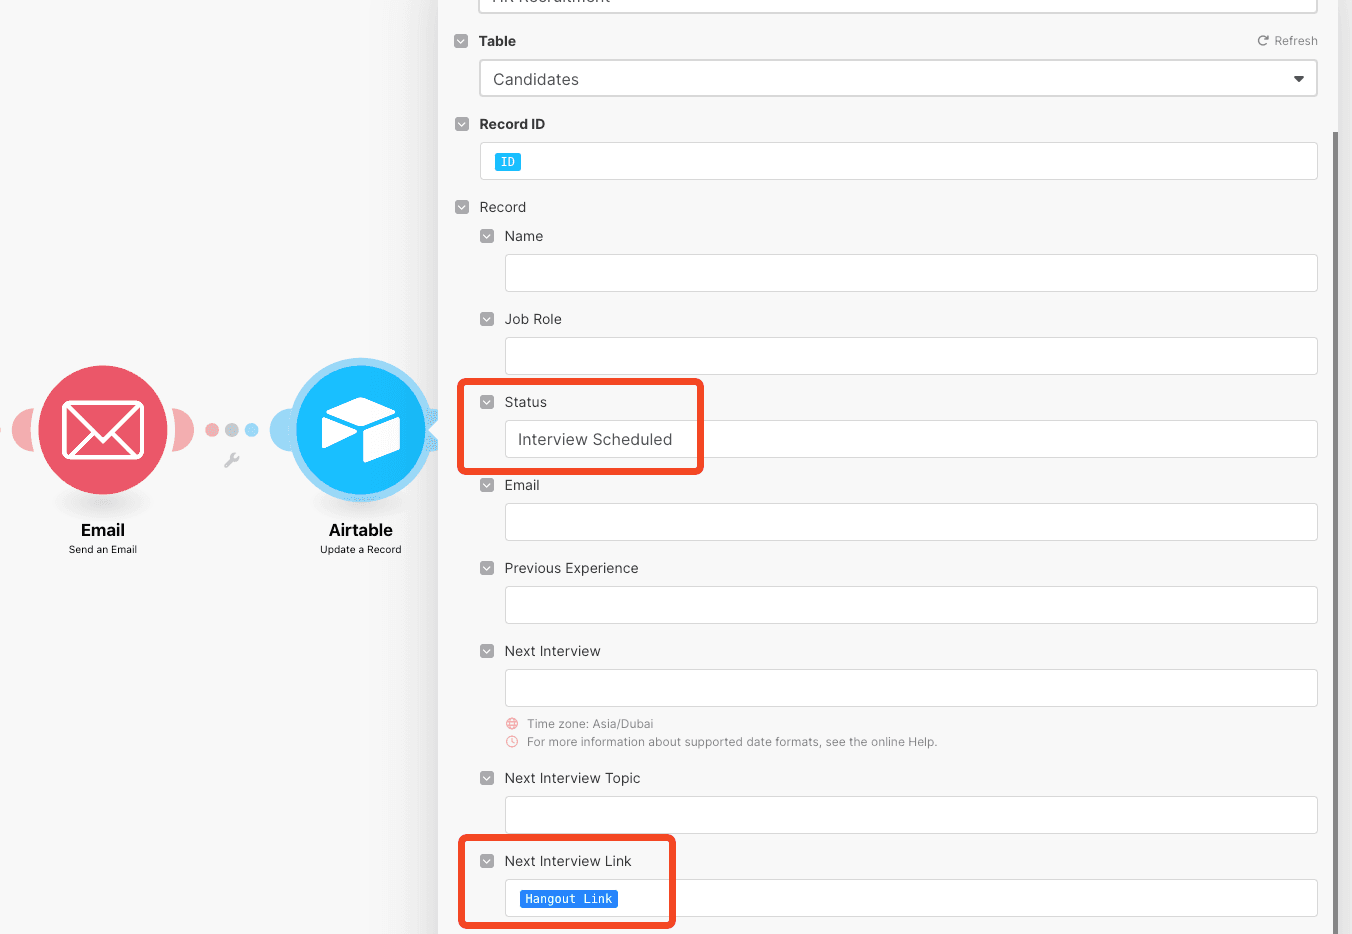
Finally, add the “Airtable > Update a Record” module to this path.
This module will update the “Status” field in Airtable to “Interview scheduled”, and also add the Google Meet link for the upcoming interview in the “Next Interview Link” field in Airtable.
Now, let’s move on to the second path in this scenario.
Path 2: Automatically send a rejection email to a candidate
When recruiting, it’s not rare to come across applications that don’t represent a good match from the get-go.
In such case, the recruiter will be able to set the “Status” field to “Rejected”, and Make will automatically send a rejection email to the corresponding candidate.
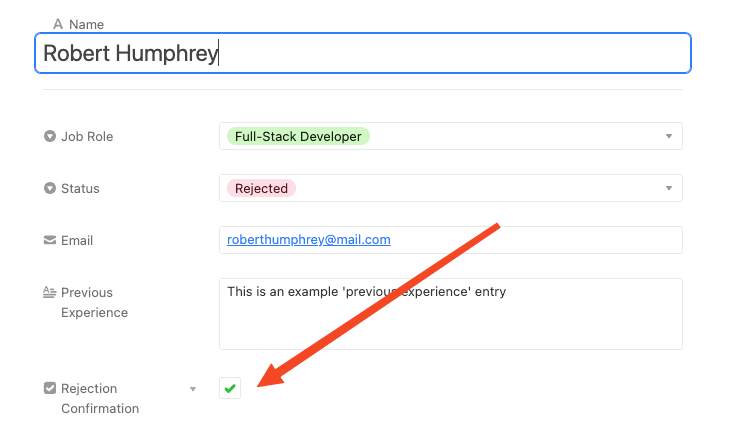
To avoid any accidents, you can add an additional “Checkbox” field in your Airtable and require this scenario to (excuse the redundancy) check it prior to sending the rejection email.
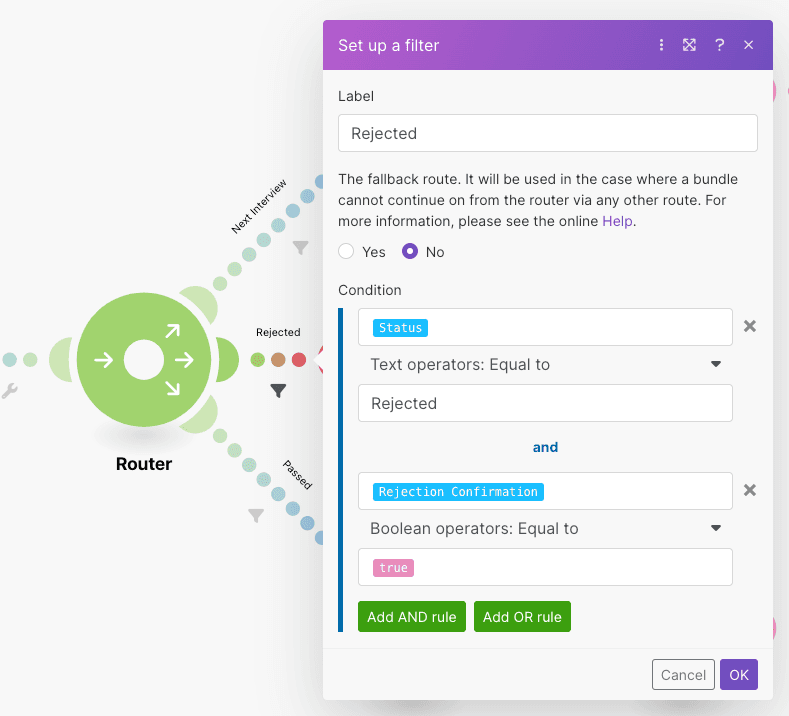
To summarize: When the recruiter sets the “Status” field in Airtable to “Rejected” and the following filter condition is met:
The “Rejection Confirmation” field is equal to true (i.e. the checkbox has been checked)
This second path of the scenario will get executed, and the candidate will receive a rejection email.
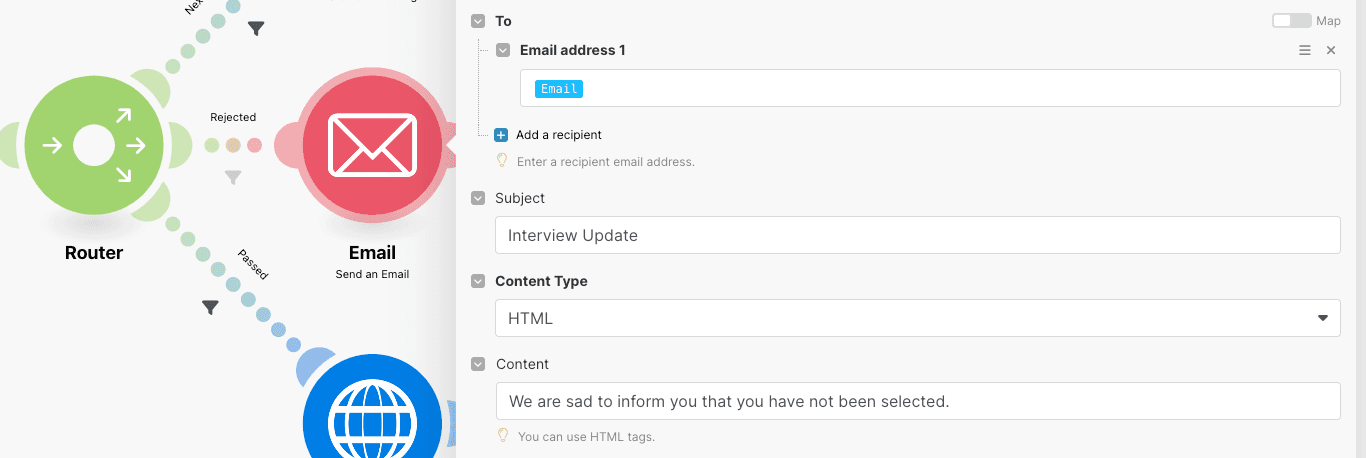
See the screenshots below to understand how to configure the filter, and the “Send an email” module.
Once the conditions above are met, an email is sent to the candidate with the rejection notice.
Now, let’s see how to configure the third and final path of this second scenario.
Path 3: Automatically notify candidates that they passed the interview
The third path of our scenario will be activated when a candidate passes the interview and an offer needs to be extended via email.
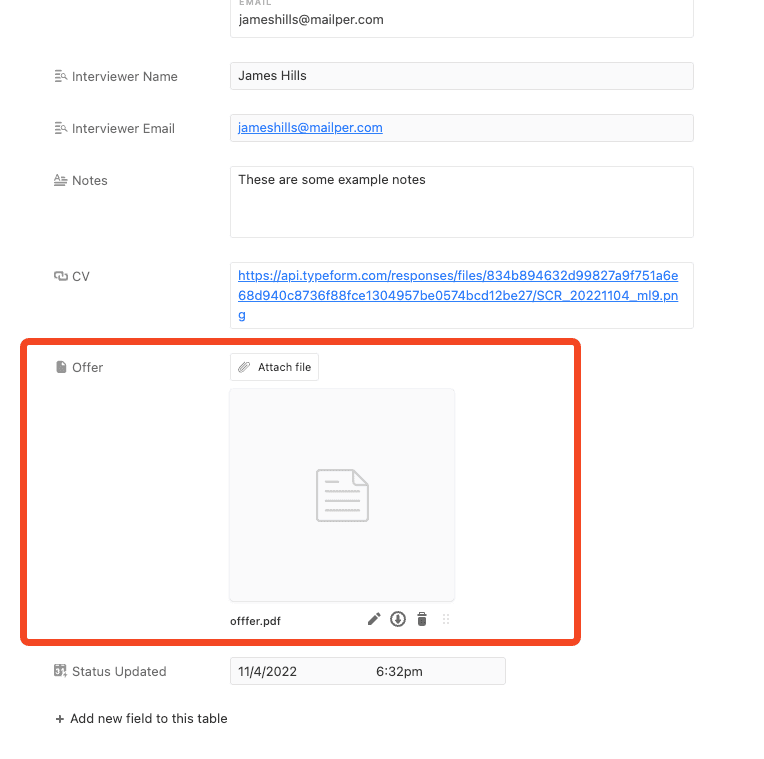
To achieve this, we’ll add an “Offer” field (of type ‘Attachment’) to the Airtable base.
This field will be used by the recruitment team to upload the offer document.
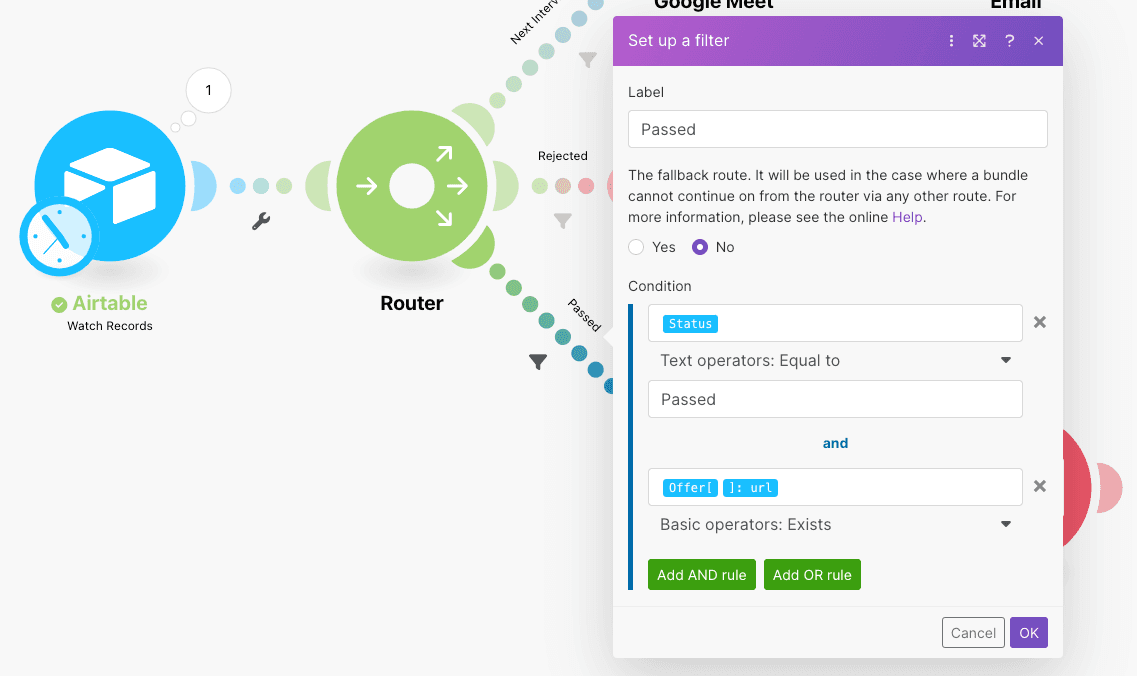
If the “Status” field in Airtable is set to “Passed” and the “Offer” field is not empty, the third path of the scenario will be executed by Make.
To achieve this, we’ll add the “HTTP > Get a file” module to the third path in the scenario, and configure the filter as shown above.
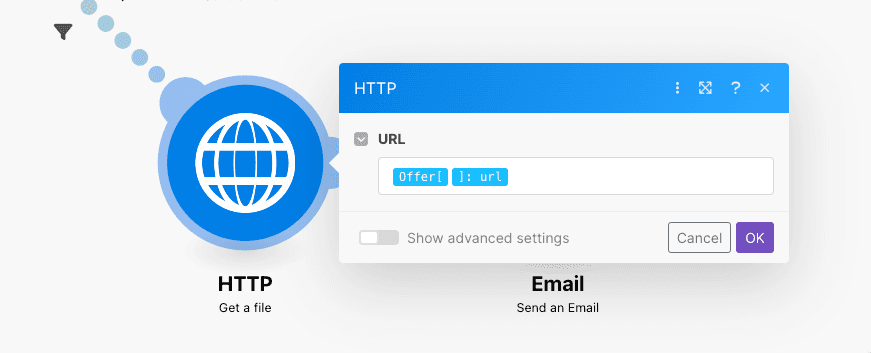
On the other hand, the HTTP module will download the offer document (when available) from Airtable.
Configuring this module is easy, as you can see below.
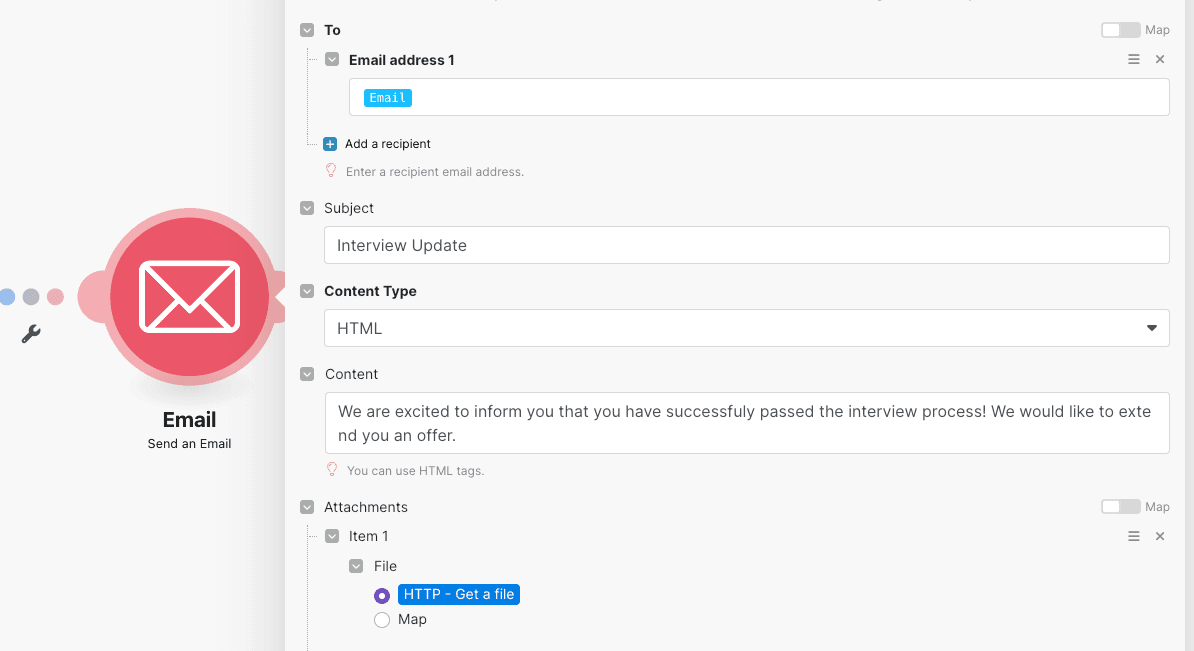
After configuring the HTTP module, all you have to do is add a “Send an Email” module.
This module will send an email to the candidate and include the offer document as an attachment.
And that’s all!
Once you’re done, save your scenario and turn it on.
You now have an automated recruitment automation solution that only involves humans when absolutely necessary.
Getting the best talent out there with automated recruitment
Headed by companies like Netflix, Meta, Twitter, Stripe, and Lyft, the recent wave of layoffs poses a challenge for organizations that are still hiring.
As layoffs surge, it is safe to say that companies that continue to hire will start to get more applicants than before.
In this situation, a solution that automates the recruitment and selection process will help companies go through more candidates in less time, and put them in a favorable position to get the best talent.
As we’ve shown in this use case, that solution lies closer than what most think - all it takes is a Make account and the willingness to turn a burden into an afterthought.
Ready to make the automation revolution happen?


