Jul 5, 2023
How to Automatically Categorize Zendesk Tickets With AI
Thanks to ChatGPT and Make, you will now be able to automatically categorize incoming tickets in seconds without human intervention, and also without risking loss of context/meaning.

Ticket categorization is one of the biggest bottlenecks for customer support teams around the world.
Even in its simplest forms, this process continues to rob companies of resources and customers of their time as they wait for the right agent to address their problems.
But why?
Until today, there have been two main approaches to categorizing customer support tickets.
The first one features a human agent reading the tickets and tagging them manually.
The second one relies on some form of automation (usually leveraging APIs offered by customer support platforms) to recognize keywords in tickets and tag them when there’s a match.
Having a human reading tickets is usually better, but then again, takes a lot of time (as there are one or more people actually reading tickets and tagging them).
On the other hand, automatically scanning tickets for keywords is faster, but doesn’t solve an important problem: Context and meaning.
Tagging tickets based on keywords alone is a recipe that fails regularly, as the same keyword can mean different things in different contexts.
Today marks the moment when these approaches become a thing of the past.
Thanks to ChatGPT and Make, you will now be able to automatically categorize incoming tickets in seconds without human intervention, and also without risking loss of context/meaning.
Moreover, we’ll show you how to build this so you can start earning back the lost money and time right here, right now.
Solution overview: Automatic ticket allocation based on agent expertise
By using ChatGPT, we can now address the shortcomings observed in the aforementioned ticket categorization approaches.
This happens because ChatGPT is quite efficient in understanding meaning and context, and features a powerful API that allows us to automate those capabilities at large.
To harness this new technology, we created a Make scenario that does the following:
Watch and read every new ticket created on Zendesk.
Categorize the ticket based on its contents.
Assigns the ticket to the right customer support representative (based on the categorization).
Simple as that - and we’ll show you how to build it.
Worth noting, the solution is also available as a pre-configured Make template that you can deploy right away.
However, we recommend following the tutorial and building from scratch to understand the underlying principles of this useful solution.
To conclude - in order to build this solution (or use the template), you’ll need accounts for Zendesk, OpenAI (do not confuse with ChatGPT Plus), and a paid Make account.
Have everything in place? Let’s start then!
Step 1: Create a Make scenario and add the Zendesk app
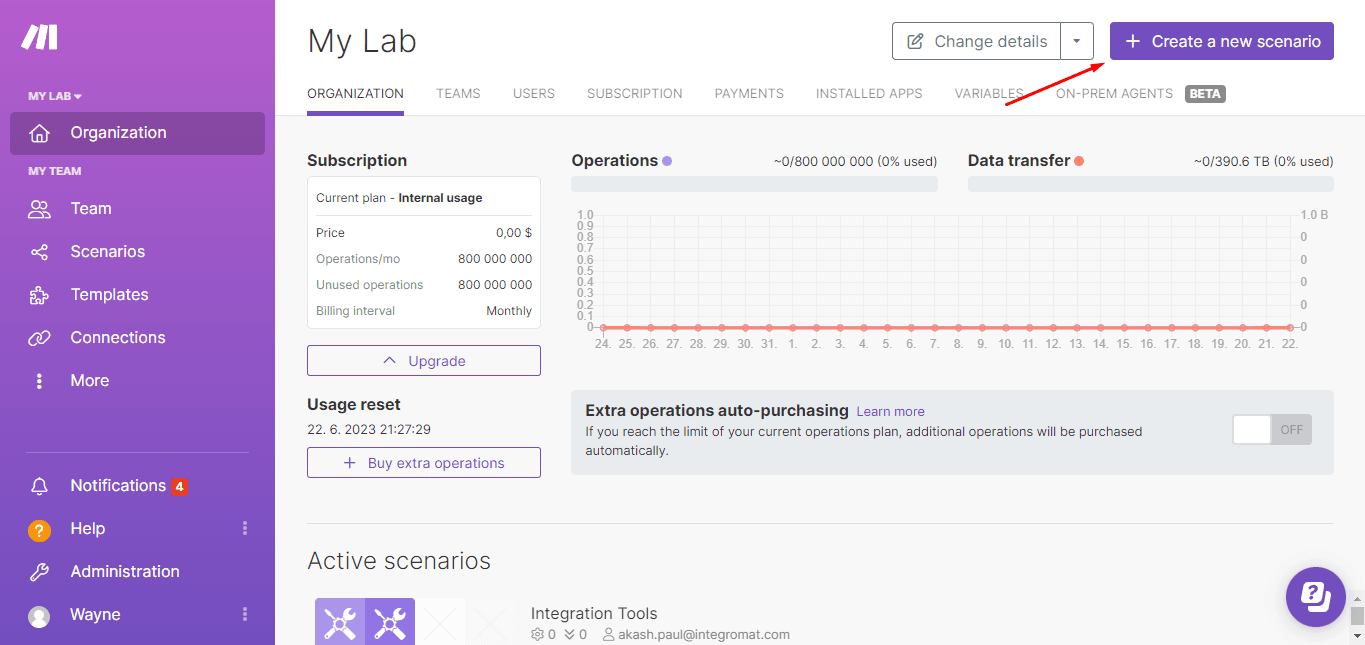
Let’s get started by logging into Make and clicking on Create a new Scenario.
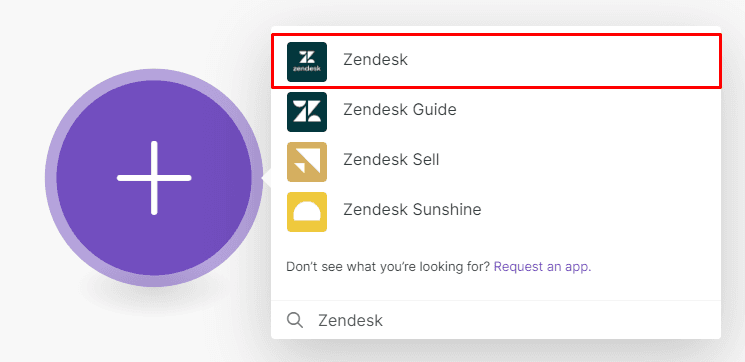
You’ll see the arrow pointing to the purple circle instructing you to click it. Once you do, search for the Zendesk app.
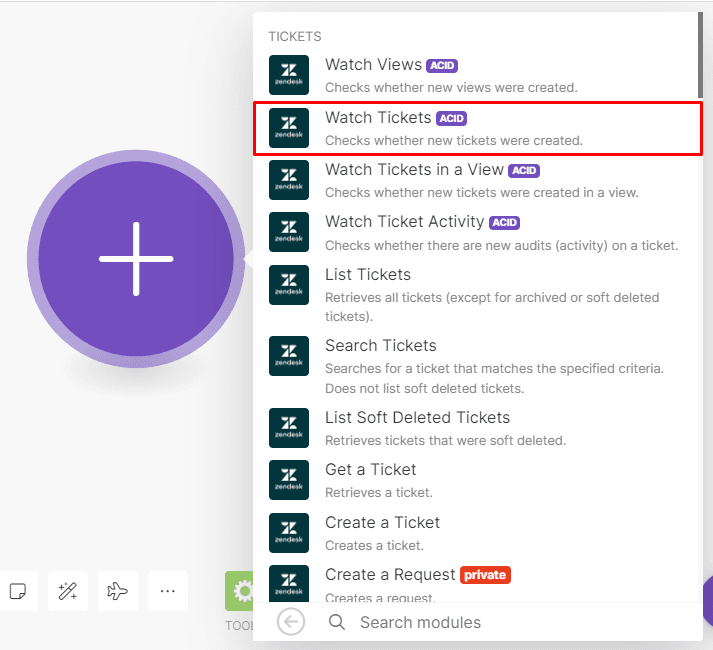
Now select the Watch Tickets module which will trigger the scenario when new tickets are created.
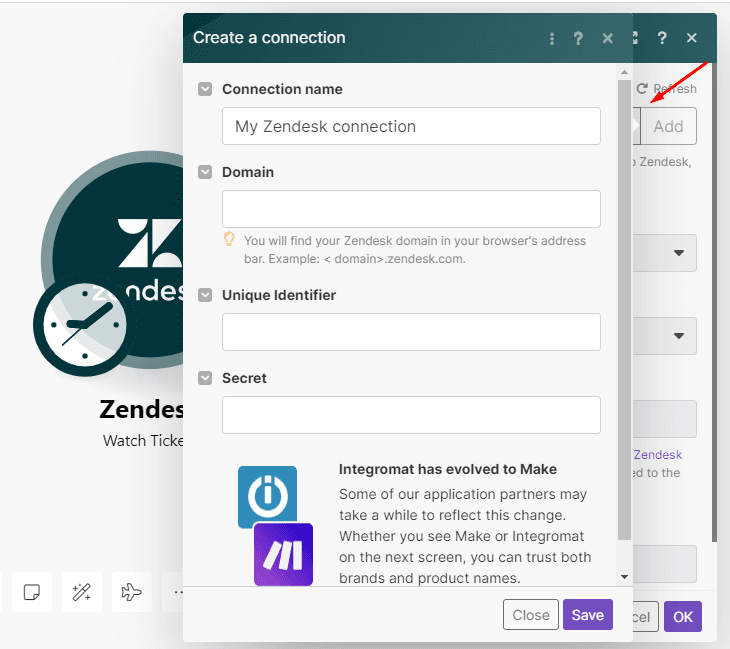
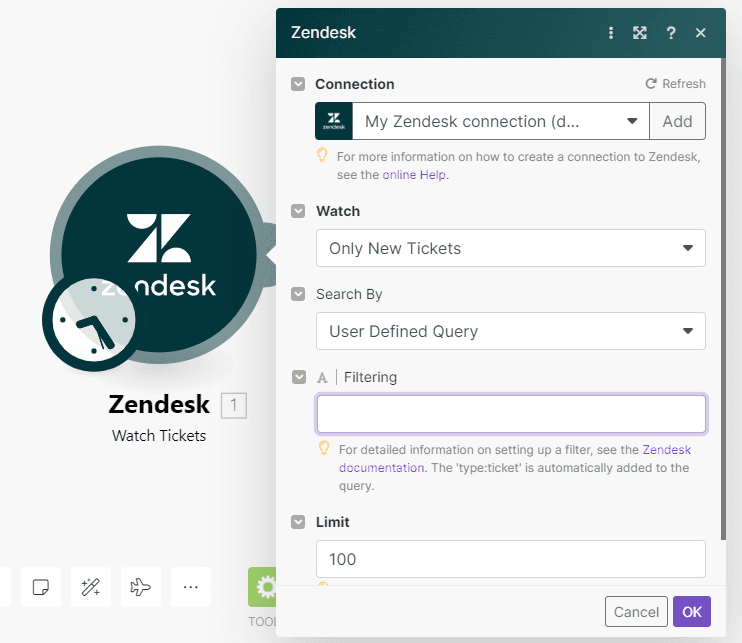
To access the module’s configuration, click Add and complete the fields to connect your Zendesk account to Make.
Once connected, you’ll see the configuration fields. Select Only New Tickets as the Watch option.
The Limit is the maximum amount of tickets the scenario will retrieve for you every time the scenario executes. Set it to a high number to ensure all new tickets are fetched.
Once ready, click OK to finish configuring this module.
Step 2: Add the OpenAI app
After the scenario fetches new tickets, we’ll automatically categorize them using AI.
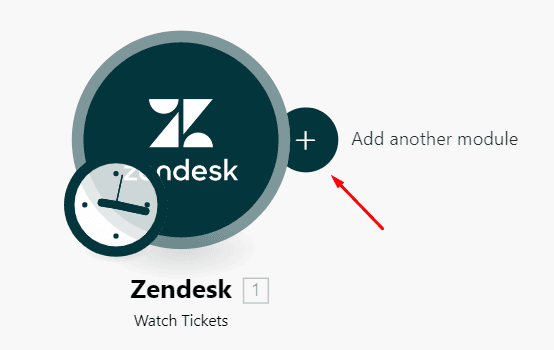
To make this possible, click Add a new module which you’ll see when you hover over the Zendesk module.
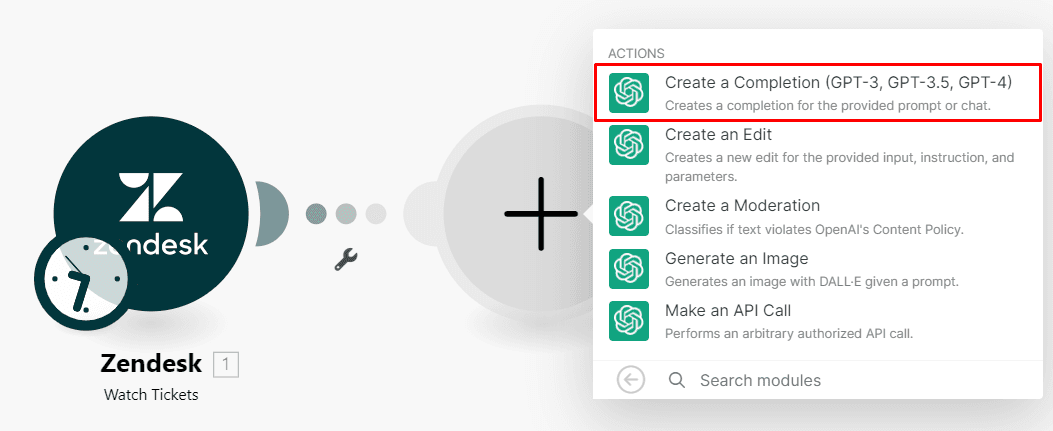
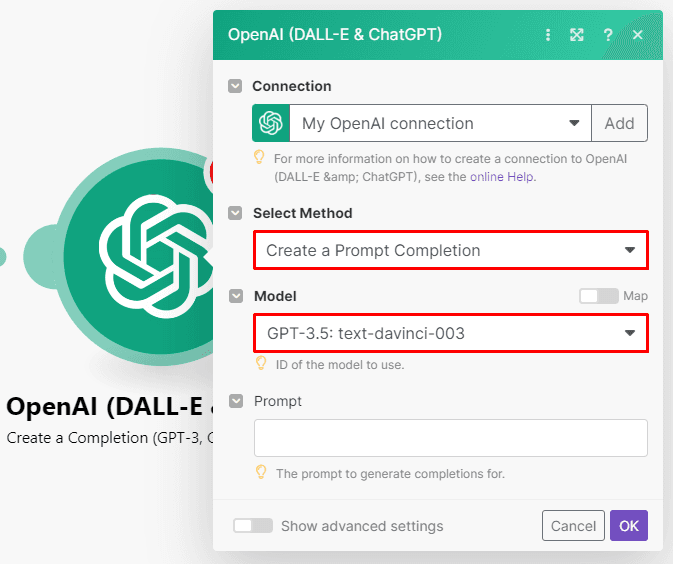
Search the OpenAI (DALL-E & ChatGPT) app and select the Create a completion module.
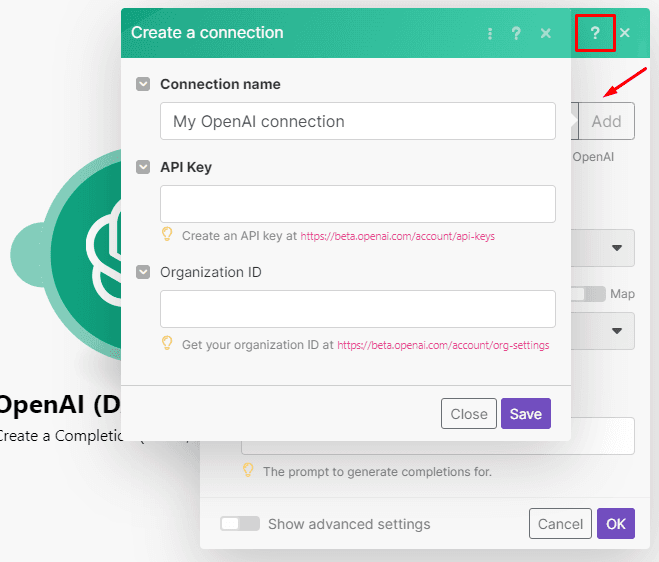
As you did with Zendesk, connect your OpenAI account to Make.
Want to know where to find your API key? Click the ‘?’ on the main configuration window for the walkthrough.
Choose the Create a Prompt Completion method and the latest model.
We have created a prompt that will help you categorize the tickets for you!
Prompt:
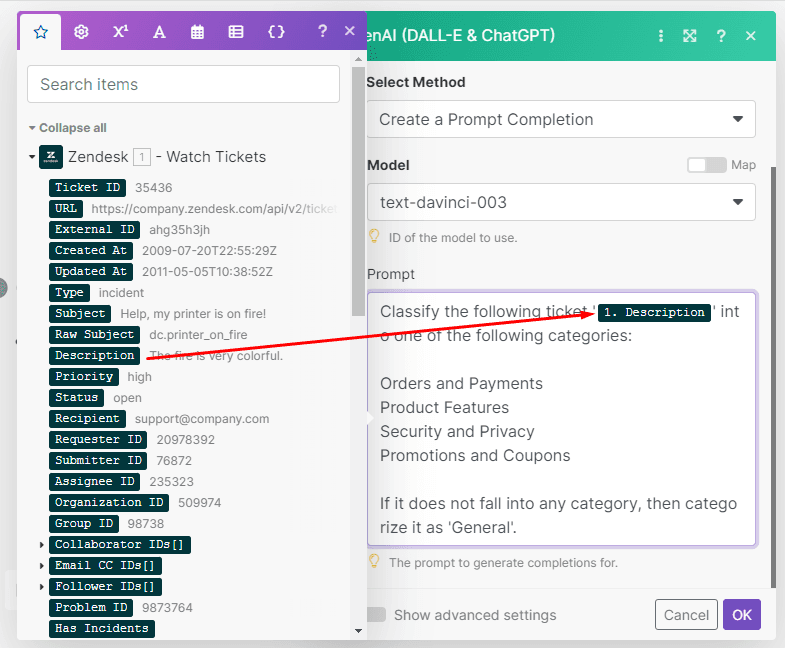
Classify the following ticket '{1.description}' into one of the following categories:
Orders and Payments
Product Features
Security and Privacy
Promotions and Coupons
If it does not fall into any category, then categorize it as 'General'.
Also, don’t forget to map the Description data item from the Zendesk module as shown in the screenshot.
Important note: It’s imperative that your categories match the name of your groups (teams) in Zendesk for the tickets to get assigned correctly.
Once done, click OK to finish the configuration of this module.
Step 3: Add the second Zendesk module
Once the ticket has been categorized, we need to find the agents in that group/team to whom the ticket should be assigned.
To do this, add the Zendesk > Search Users module to your scenario.
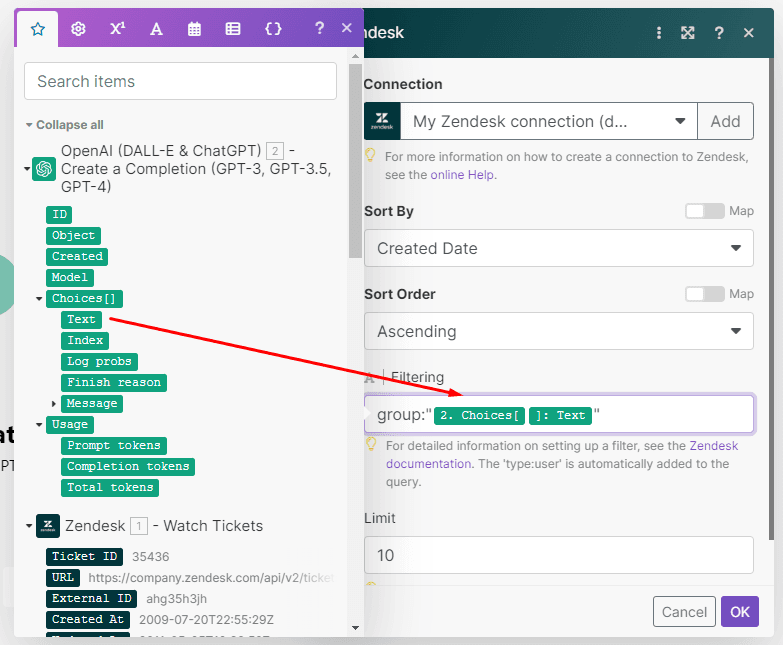
After selecting your connection, head over to the Filtering field and use the group:"" filter.
Map the choices[]text data item from the OpenAI module within the filter as shown below.
Once ready, click OK and move to the next step.
Step 4: Add an array aggregator
When we assign a ticket using the Zendesk > Update a Ticket module (which we will get to later), it requires us to assign the ticket to an agent and not just a group.
So how do we decide which agent from the group gets assigned the ticket? A random selection seems fair in this case. To do this we need to aggregate the User IDs first, shuffle them, and fetch the ID that lands in the first position.
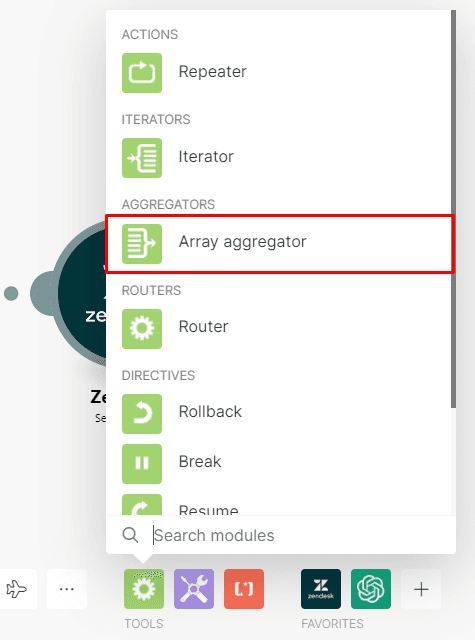
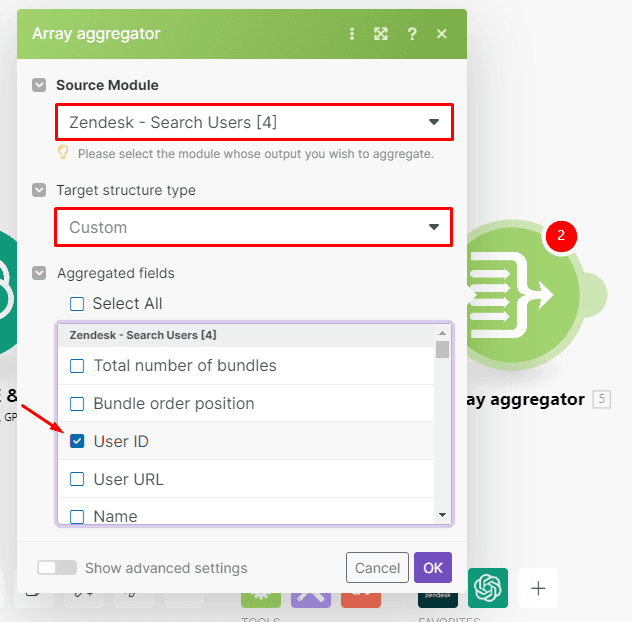
Let’s use Make’s array aggregator to first aggregate the IDs.
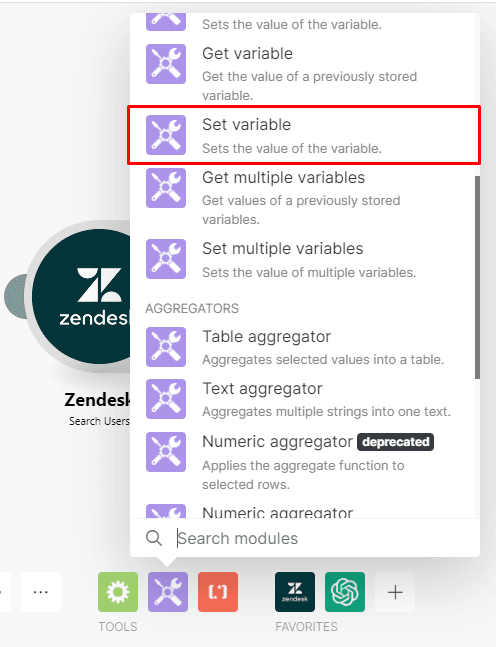
You can find the array aggregator in the Tools menu at the bottom of the scenario builder.
Attach it after the Zendesk > Search Users module and configure it as follows: Source module: Zendesk - Search Users Target structure type: Custom
Aggregated field: User ID
After configuring it, click OK.
Step 5: Add the “Set Variable” module
Now let’s add the Set Variable module to our scenario.
Like the array aggregator, this module is also a native Make tool, and you’ll find it it the Tools menu.
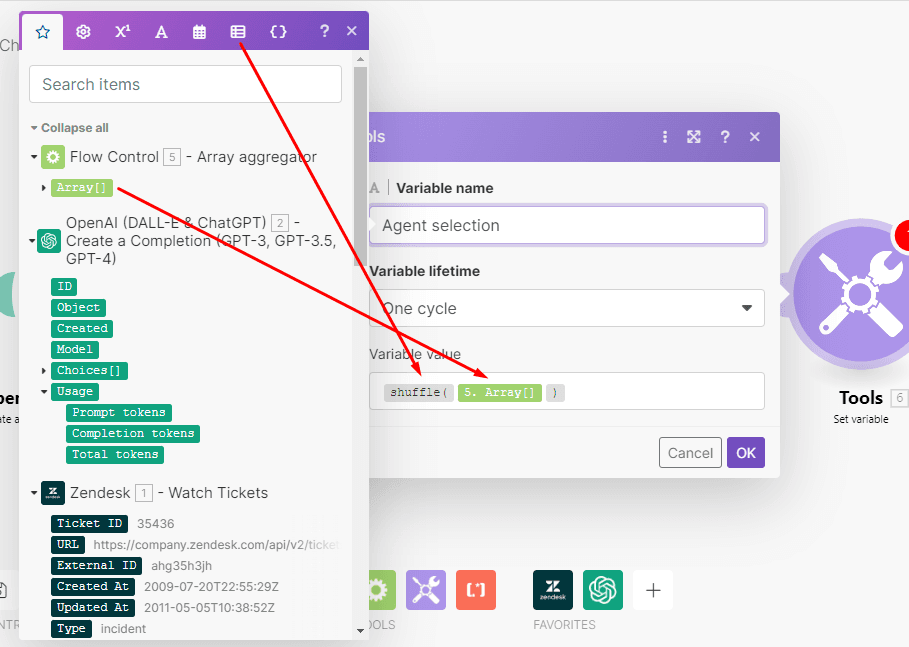
We’ll use this module to shuffle the IDs of customer support agents and use the output in the final module.
To configure it, name the variable, click in the Variable Value field, and then open the Functions for working with arrays tab. Select the shuffle() function and map the Array data item as shown in the screenshot below.
Once ready, click OK to finish configuring the module.
Step 6: Add the third and final Zendesk module
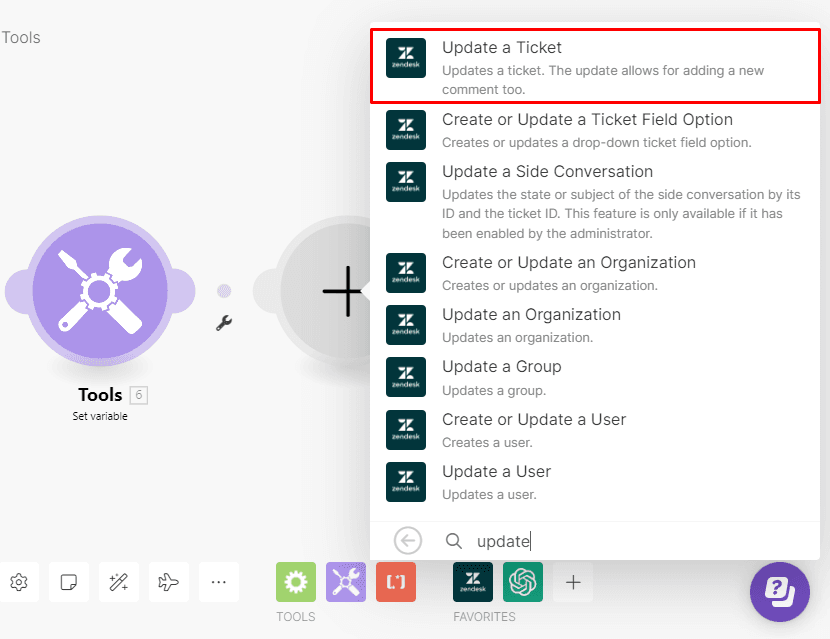
Moving on to the final step, add the Zendesk > Update a Ticket module as the last module in the scenario.
As the name states, here is where the ticket gets updated by assigning it to an agent.
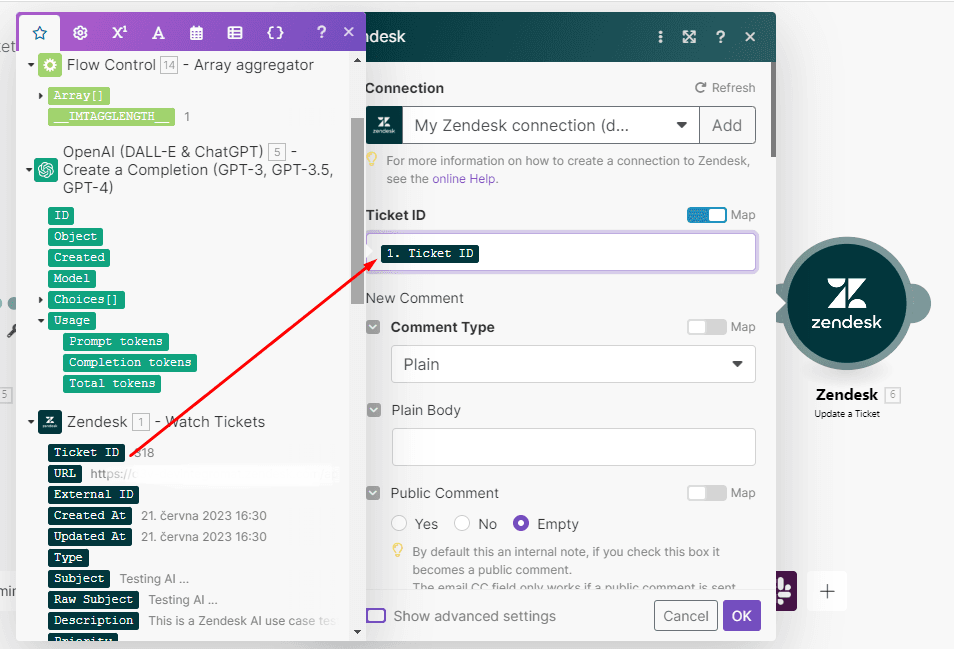
The module needs to know which ticket requires updating, so simply map the Ticket ID item from the Watch Tickets module to the Ticket ID field, and then select Plain as the Comment Type.
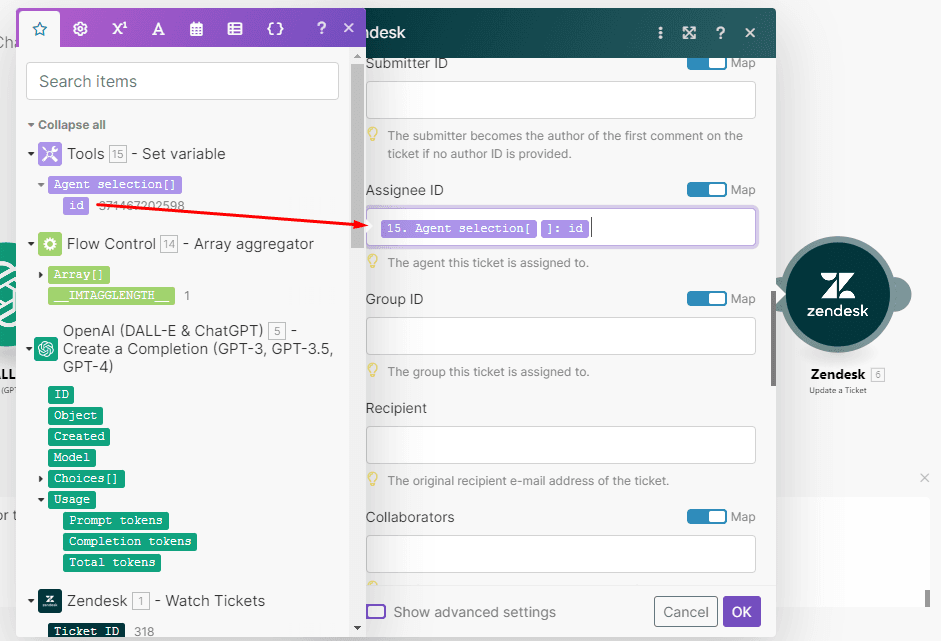
Next, scroll down until you see the Assignee ID field. From the array output of the Set variable module, map the ID item which will always be the first position. Once done, click OK to finish configuring the module.
Your scenario is almost fully configured!
Step 7: Schedule the scenario and turn it on
How often do you want the scenario to check for new tickets?
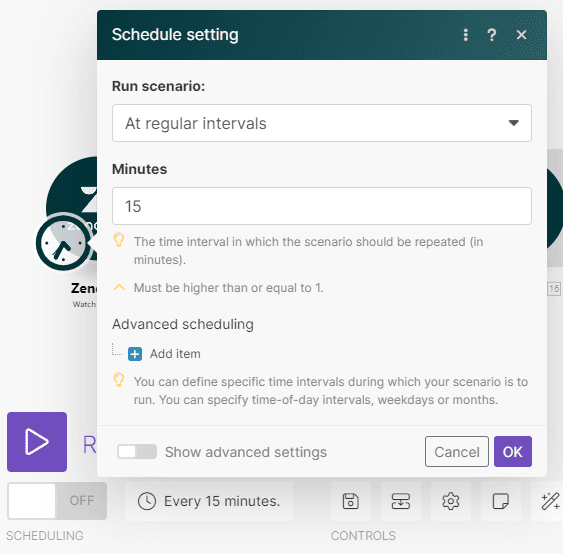
You can schedule the scenario execution by clicking the clock icon on the trigger module.
By default, it's set to execute every 15 minutes, but you can change this depending on the volume of tickets that you deal with on a regular basis.
Now save your scenario and switch it on.
You’re good to go!
Recap: Automatic ticket classification for Zendesk is now a reality
By using Make to automate processes like ticket categorization, you’ll be able to reclaim valuable resources that up until now go down the drain of inefficiency.
Moreover, this will allow you to solve tickets faster, improving the customer experience by a significant degree.
As usual, all it takes is a Make account, and a few minutes of your time to turn ideas into reality.
Ready to make the automation revolution happen?


