Mar 3, 2023
How to Send Xero Invoices to Multiple Email Addresses [Tutorial]
In this tutorial, we’ll show you how to build an automation that uses a regular email client (such as Gmail) to instantly send an approved Xero invoice to multiple email addresses.

How can you send a Xero invoice to multiple email addresses?
The most obvious solution is to use Xero’s built-in email feature, but it has some drawbacks:
All the email addresses you’ve saved for your Xero contacts will appear in the email’s “From” field. You can’t CC or BCC them.
You may not want to use Xero’s default email body text, and changing it every time is a recurring waste of time.
Recipients can see that you’re sending emails via Xero’s postmaster email address instead of your own email client.
An alternative is to connect Xero to an email marketing tool like Mailchimp, but this is not ideal when you just want to send invoices instead of, say, fancy newsletters.
Plus, you’d need a premium Xero account to access Xero’s native integration with Mailchimp - again, not ideal!
The problem, however, is easily solved by using Make.
In this tutorial, we’ll show you how to build an automation that uses a regular email client (such as Gmail) to instantly send an approved Xero invoice to multiple email addresses.
How does it work?
Simple: When we approve an invoice in Xero, we’ll use Gmail to email that invoice to a main recipient while BCC’ing the other email addresses (such as for management or finance) in the same email.
To build this solution, all you need is a Make account and a few minutes of your time.
Ready? Let’s get down to business!
Step 1: Save your contacts’ email addresses in Xero
Before sending your Xero invoice, you’ll first need to add the organization you’re invoicing as a new Xero contact. A single Xero contact can contain an email address for a primary/main person, plus extra email addresses for additional people within the same organization.
So, for the first step of this tutorial, we’ll create a new contact in Xero and add:
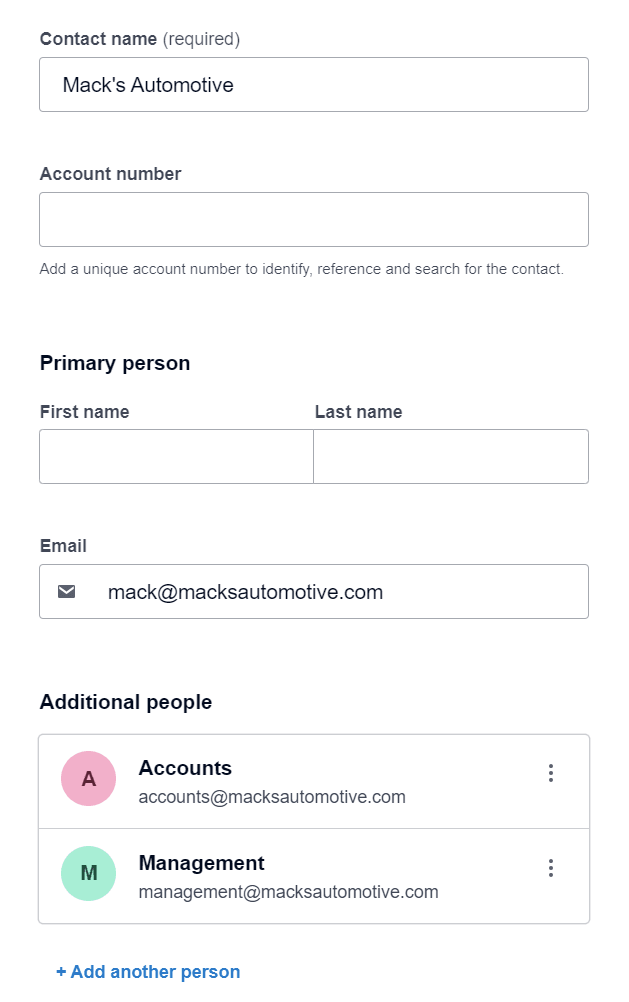
The main recipient’s email address as the email address in the “Primary person” section, and
Everyone else’s email addresses to the email address fields for the “Additional people” section.
See the image below for reference:
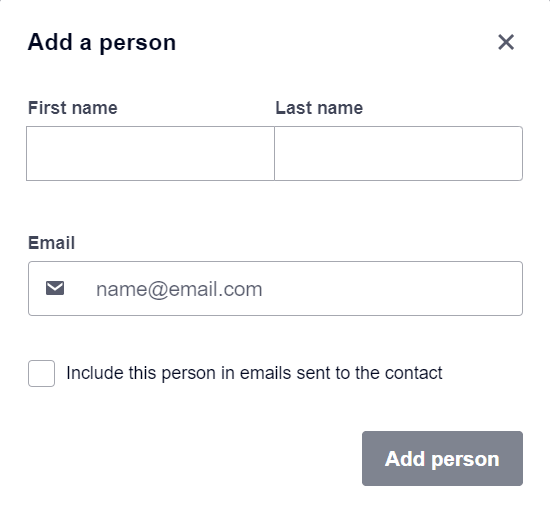
Important note: When setting up additional people for a Xero contact, you’ll see a checkbox option that reads “Include this person in emails sent to the contact.”
We do not need to enable this checkbox as it controls whether Xero’s built-in email service sends emails to that person.
Make doesn’t rely on this option to decide to whom it should send (or not send) emails, so leave it be.
Step 2: Set up the Make scenario to automatically email Xero invoices to your Xero contacts
After adding our contacts’ email addresses to Xero, it’s time to set up the Make scenario that will automatically send them our approved invoices.
It’s a simple scenario that requires four modules, and we’ll show you how to configure them one by one.
1. Watch for new invoices in Xero
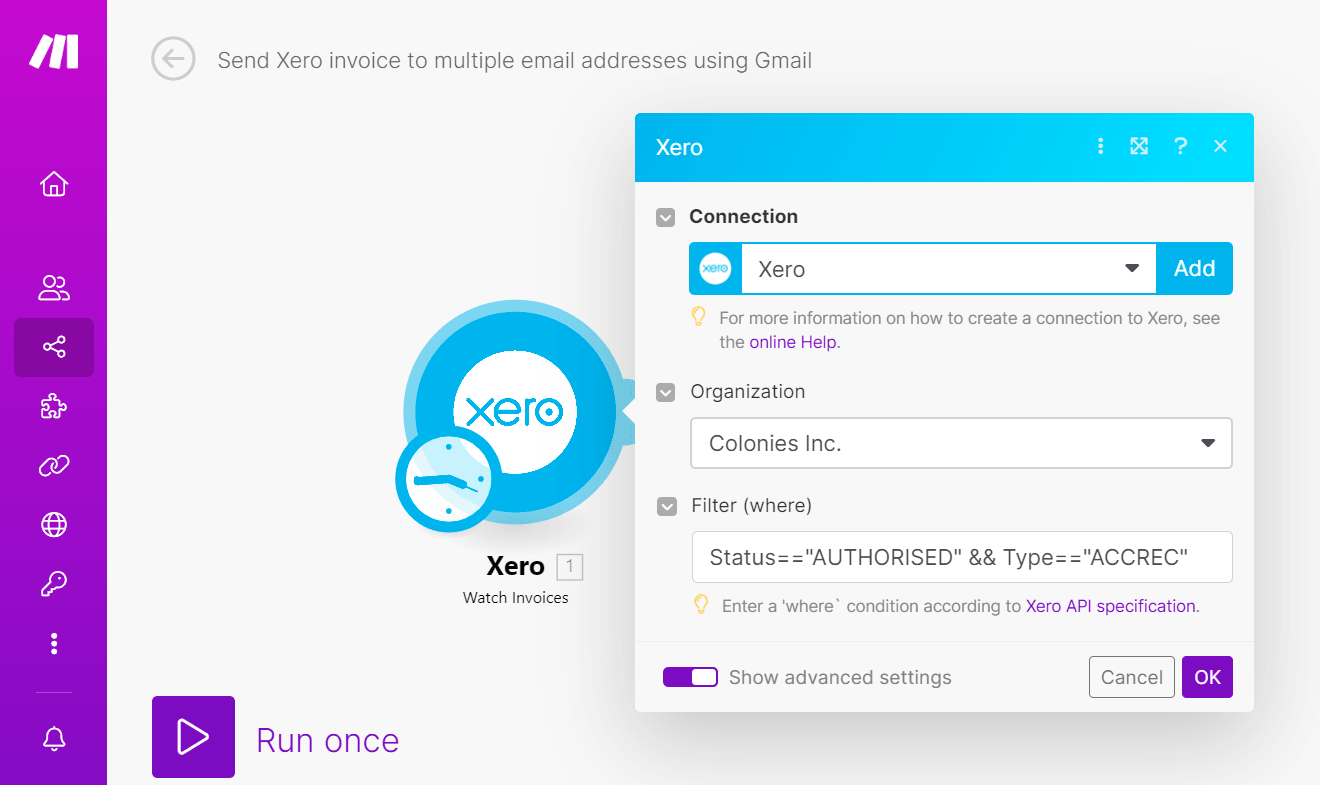
Start by creating a new scenario in Make and add the “Watch Invoices in Xero” trigger module.
When configuring the module, toggle the “Show advanced settings” and add this filter to the “Filter (where)” field:
Status=="AUTHORISED" && Type=="ACCREC"
This filter helps Xero watch for only invoices that have the approved status and that are owing to us (also known as “accounts receivable”).
2. Get the Xero invoice URL for the new invoice
When the “Watch Invoices in Xero” module finds a newly approved Xero invoice, it will provide us with some data on the invoice.
This data includes the invoice’s invoice number and invoice ID, plus the contact ID for the contact to whom the invoice is addressed.
However, the invoice’s URL isn’t provided, so we’ll need to obtain it separately.
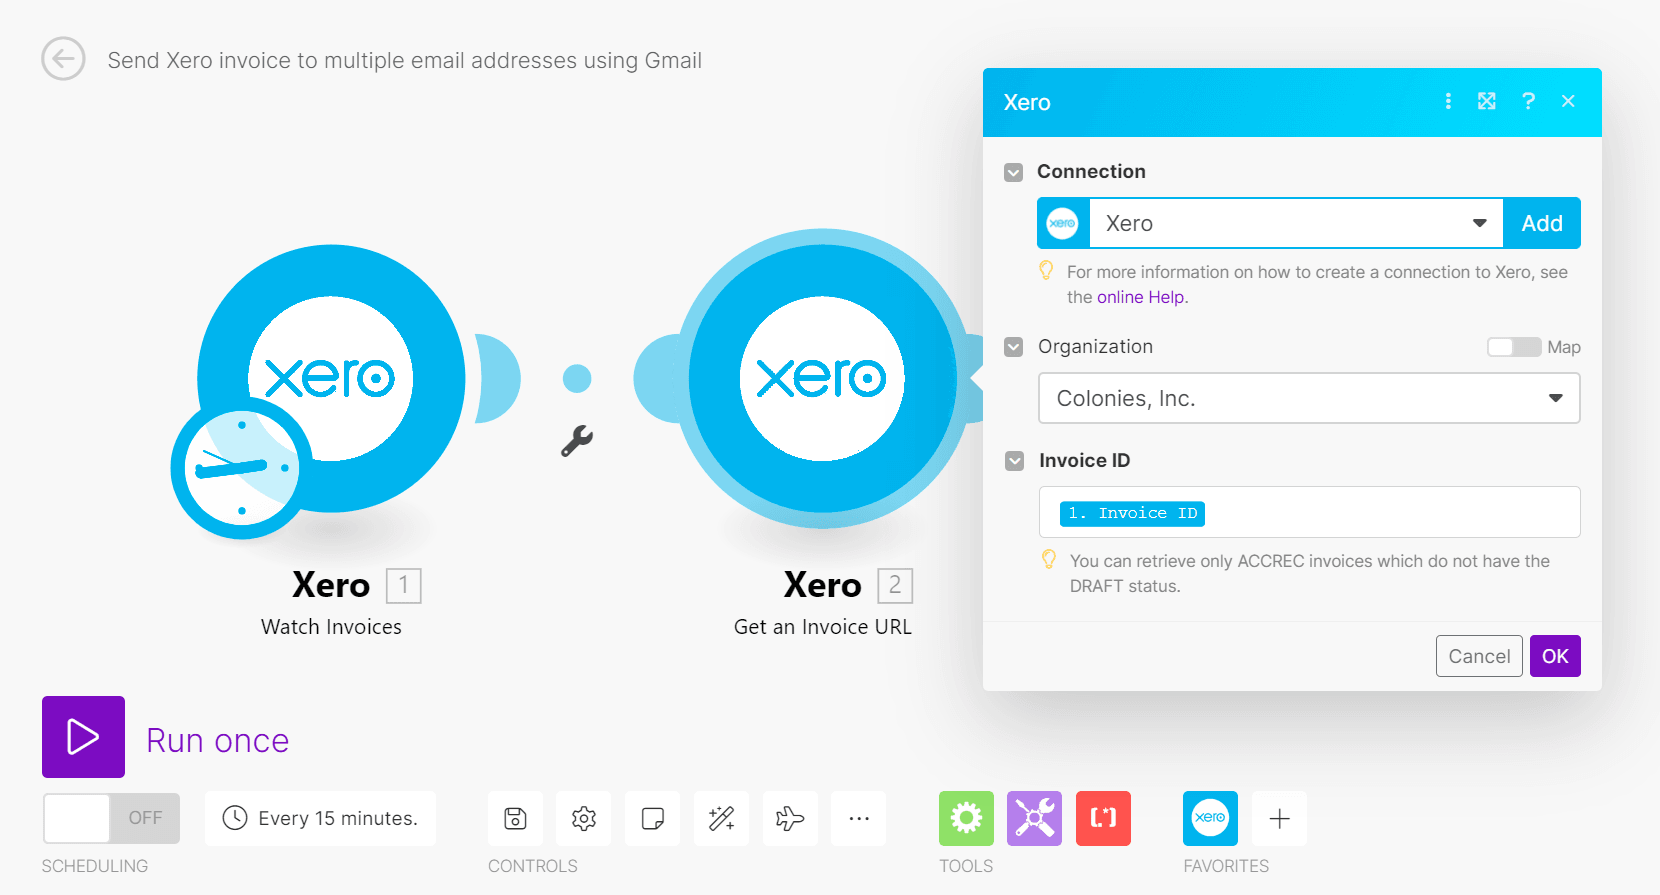
To do so, we’ll add a “Get an Invoice URL in Xero” module to our scenario.
We need to provide this module with the invoice IDs for our newly approved Xero invoices, so we’ll map the “Invoice ID” item obtained from the “Watch Invoices in Xero” module.
3. Get the contact’s email addresses in Xero
Similarly, the Xero contact information that the “Watch Invoices in Xero” module retrieves doesn’t include the contact’s associated email addresses.
The next step is therefore to get these email addresses so we can automatically send them the invoice at once.
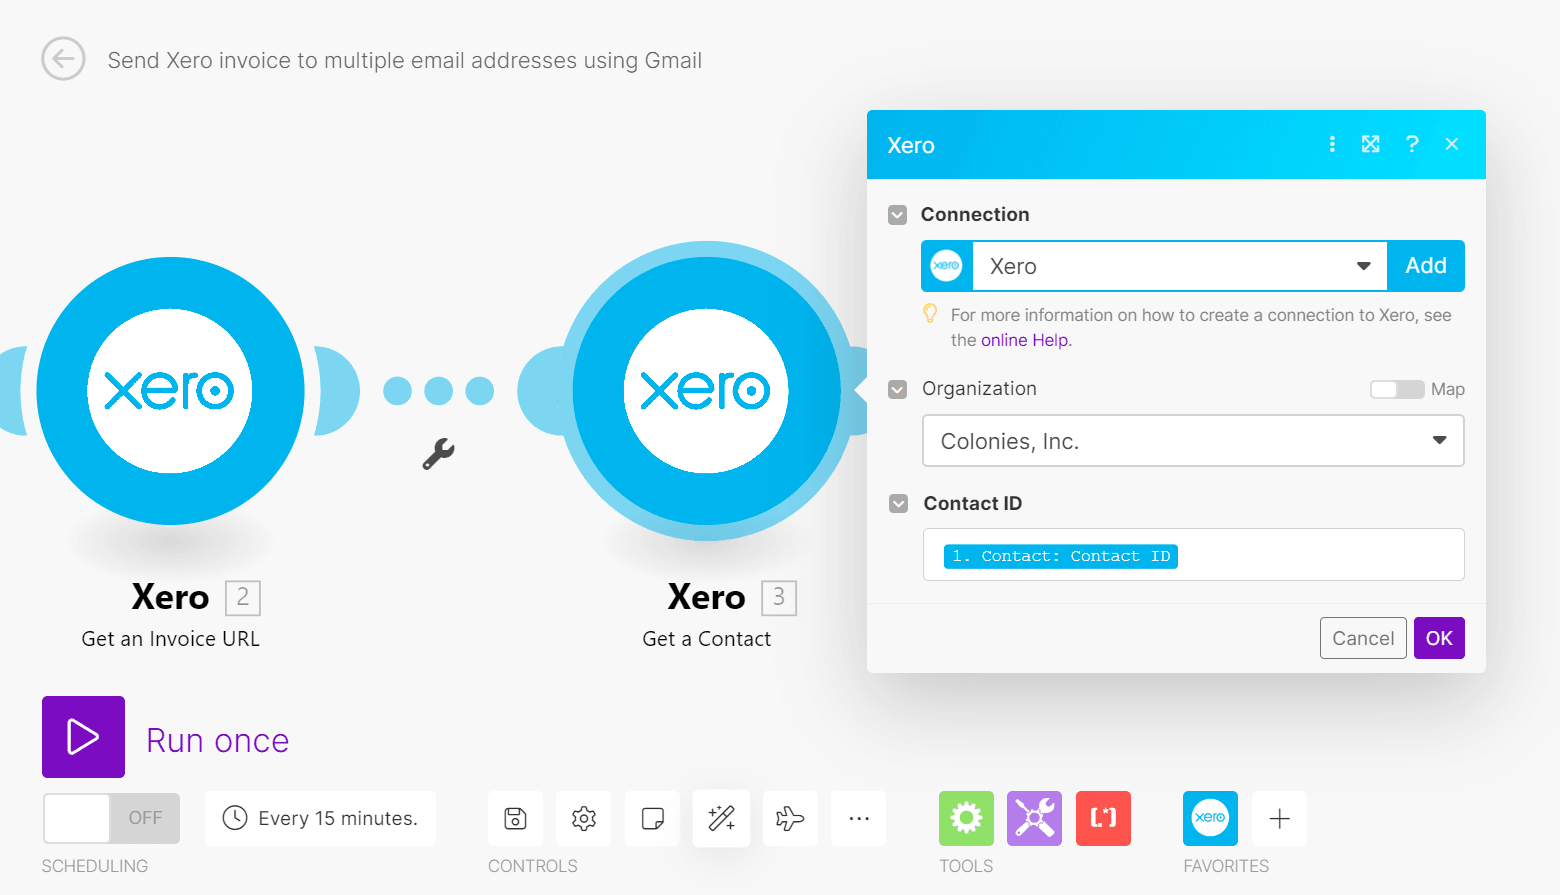
We’ll add the “Get a Contact in Xero” module to our scenario, and then map the “Contact: Contact ID” item from the “Watch Invoices in Xero” module to the new module’s “Contact ID” field.
This sounds complicated but it’s actually very simple - check the image below for reference.
4. Set up the Gmail module
To conclude, we’ll add the “Send an email” Gmail module to emailing our Xero invoice using Gmail.
It’s worth mentioning that you can use the regular “Send an email” module if you have a different email client than Gmail - it works the same way as the Gmail one.
Now, let’s configure this module.
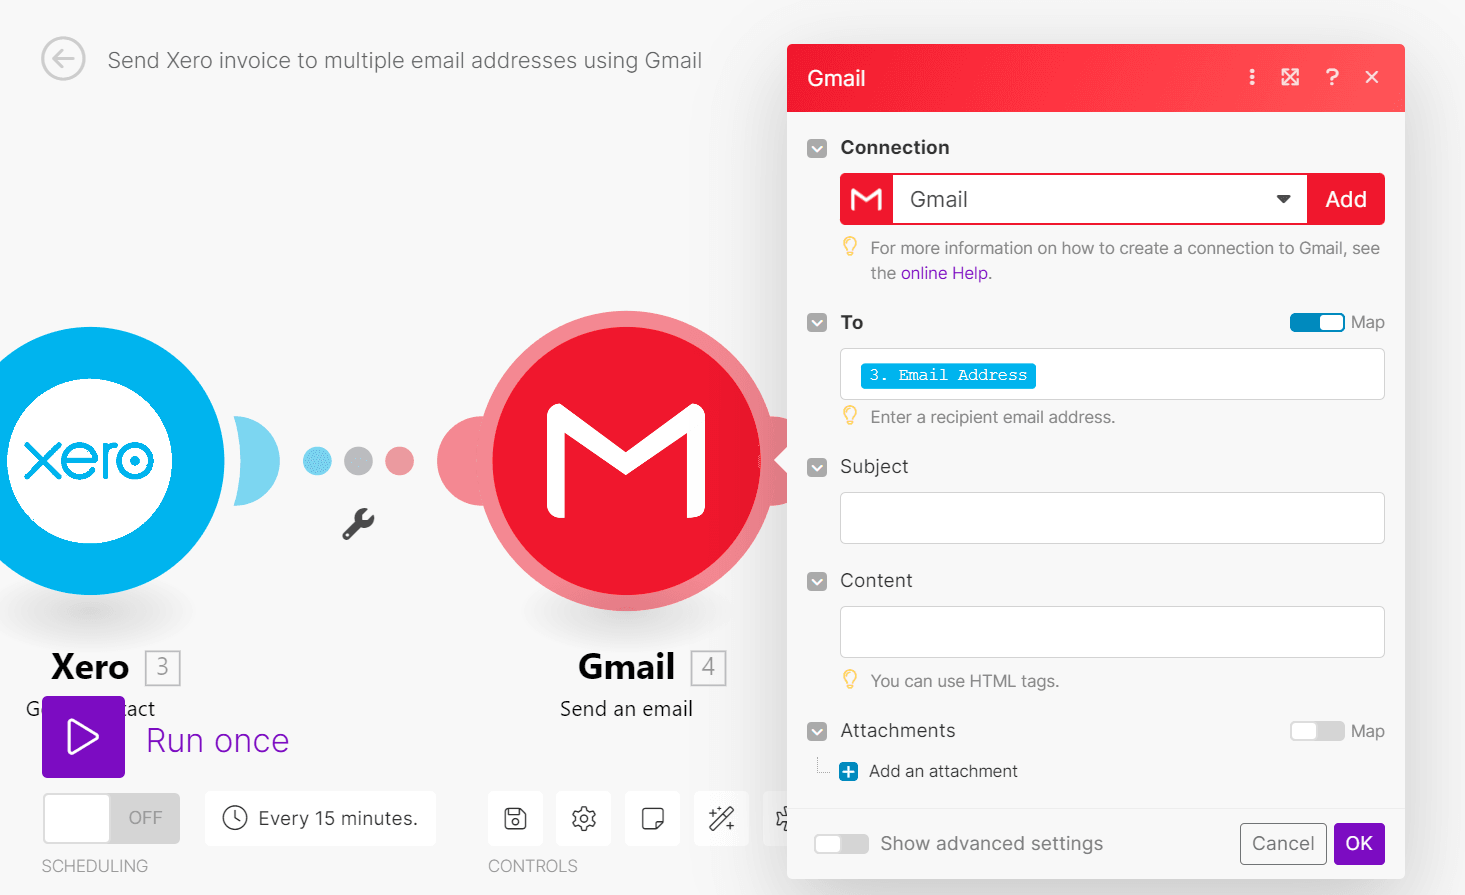
At the “To” field of this module, toggle the “Map” option and map the “Email Address” item obtained from the “Get a Contact in Xero” module.
Doing this will add your main recipient’s email address to your email’s “To” field.
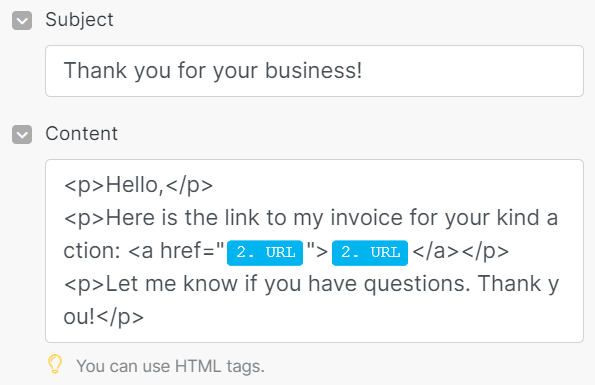
Next, fill out the “Subject” and “Content” fields with your default email subject and body respectively.
As you fill out the “Content” field, map the Xero invoice URL you’ve obtained from the “Get an Invoice URL in Xero” module.
Now, we’ll BCC the same email to your other email recipients. To do this, toggle the “Show advanced settings” option at the bottom of the module.
A “Blind copy recipient” field will appear. Toggle the “Map” option next to it too. Then, map this value to the field:
{{map(3.ContactPersons; "EmailAddress")}}
This value allows Make to retrieve the email addresses we’ve saved in the “Additional persons” section for our Xero contact.
Moreover, we need to use this because Xero saves these additional email addresses as a complex array of collections with keys such as “EmailAddress.”
However, Gmail uses a simple array of text values for its email address fields.
So here, the map( function helps us:
Extract the email address data from Xero’s complex array, and
Create a simple array of email address text values that Gmail can work with.
If we don’t use the map( function and directly map {{3.ContactPersons[].EmailAddress}} to the “Blind copy recipient” field instead, Make will BCC only the email address belonging to the first additional person and not those of any other additional persons you’ve set up.
Note: If you want to CC instead of BCC the additional persons, then map {{map(3.ContactPersons; "EmailAddress")}} to the “Copy recipient” field instead.
And that's it!
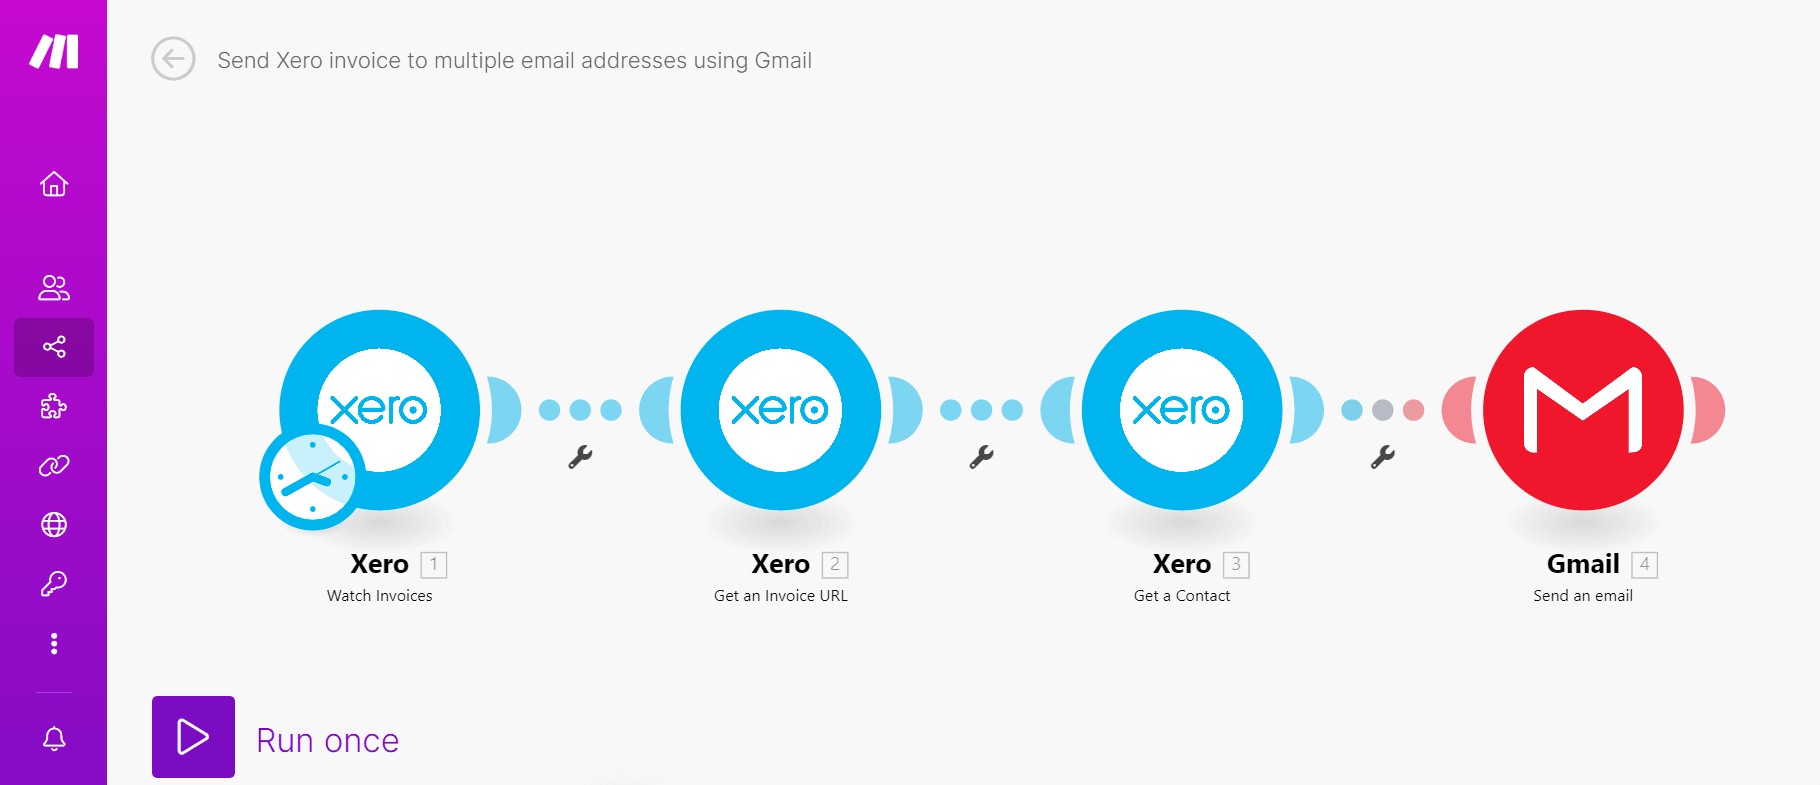
Your full scenario should look like this:
Test the scenario to check that it works, and if it does, schedule, save, and activate.
With it, every invoice will be properly sent to the corresponding stakeholders at once, and save you from doing so each and every time.
Send invoices - and get paid - quicker than ever before with Make
This Make scenario is amazing. It’s such an invoicing time-saver - just approve your invoice in Xero, and it’ll automatically be sent to your intended recipients via email.
I personally use a version of this scenario for automatically sending Xero invoices to clients of my freelance business.
If you’d like to try setting it up for yourself, just sign up for a Make account and you’ll be on your way!

