Jan 15, 2021 | 5 minutes
Using Slack to Create UTM Links: A Step-by-Step Guide
Did you know that you can create UTM links using Slack? Let us show you how to automate the process to better track your website traffic in Google Analytics.

Did you know that you can create UTM links using Slack?
If you’re a marketer, then you are probably familiar with Google Analytics UTM Tracking links. These are links you create to track and identify where your traffic is coming from.
For example, let’s say you created a landing page to get subscribers, and shared links to it over email, and also on a Facebook page you manage.
If these links were regular non-UTM links, you wouldn’t be able to tell whether your new subscribers came from Facebook, or from the email channel. In consequence, it’d be impossible to tell which channel deserves your efforts, and why.
In this use case, certified Make Partner Andy O’Neil will show you how to use Make to generate Google tracking URLs for your marketing campaigns using Slack. That’s right: with this Make scenario, you will be able to create UTM links without ever leaving your Slack channel.
Even if you aren't a high-tech marketing person, this use case will break it down easy, and help you set up an automated scenario that will save you a lot of time for the recurring task of creating UTM links.
Please note that you will need a Make account to create the integration. If you don’t have one yet, please register for free.
Operating principles
This scenario allows you to generate Google tracking URLs for your digital marketing campaigns and works on simple rules.
After you build it, all you need to do is enter the following information in a dedicated Slack channel:
Your campaign name
A space
Your landing page link
Like this:
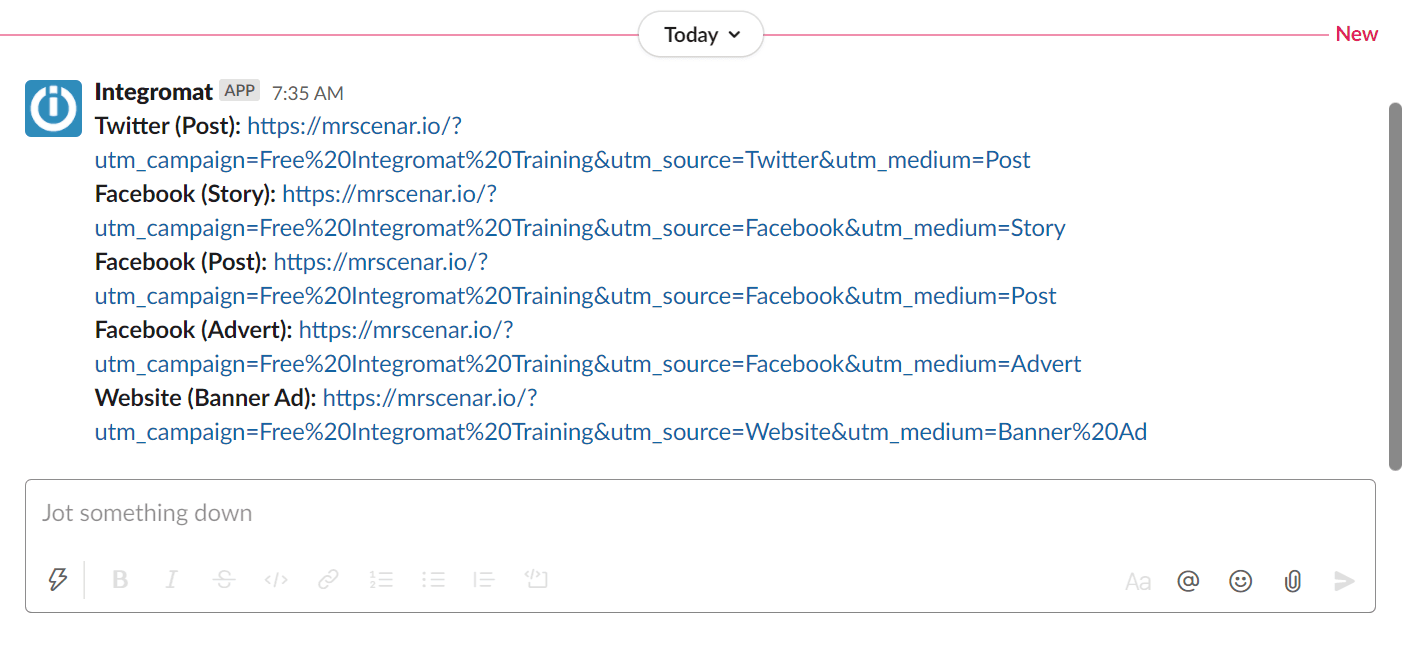
Then, you will need to press “Send”, and the scenario will generate your links and send them to you in a slack message, like this:
Each of the generated links includes tags for your landing page, campaign name, and the source and medium options defined in your scenario.
This way, you will be able to customize the source (i.e. Facebook, Twitter, etc.) and the medium (i.e. banner, text link, advertisement, etc.) in the scenario set up to effectively solve your traffic tracking needs.
Under the hood: Slack API and Make
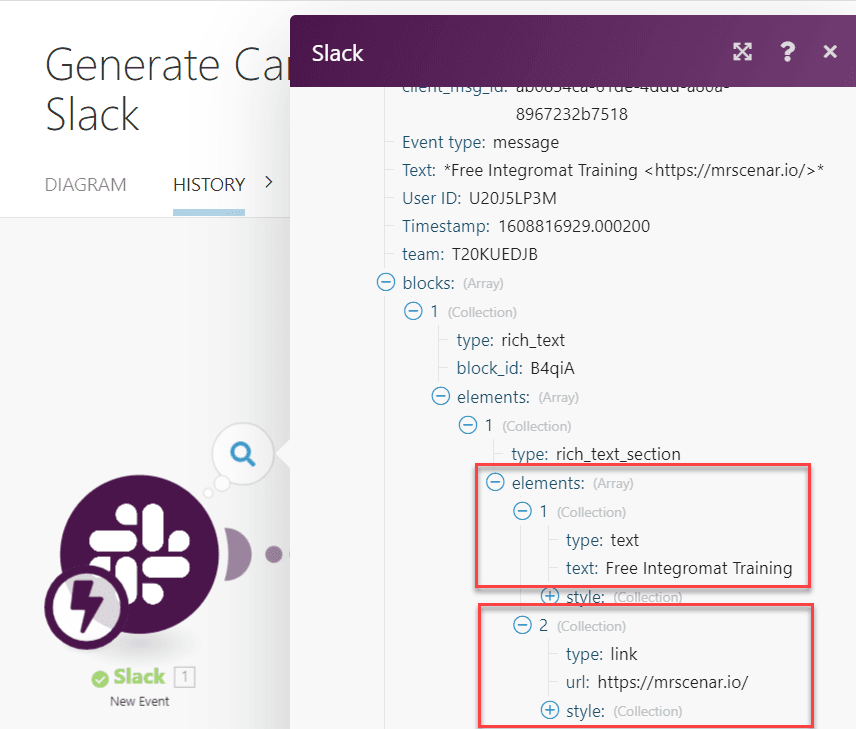
When a message is submitted, the Slack API automatically separates messages into individual elements.
Note: It’s important to always submit your link generation message as specified (campaign name, then a space, then the full link to your landing page).
When this format is followed, Slack will predictably recognize those elements, and use them to generate the tagged links.
Scenario summary
To build this scenario, you will need a Make account and a Slack Account.
In addition, it’s good to note that we will utilize a pre-built Make template to make the setup of this automated scenario a breeze.
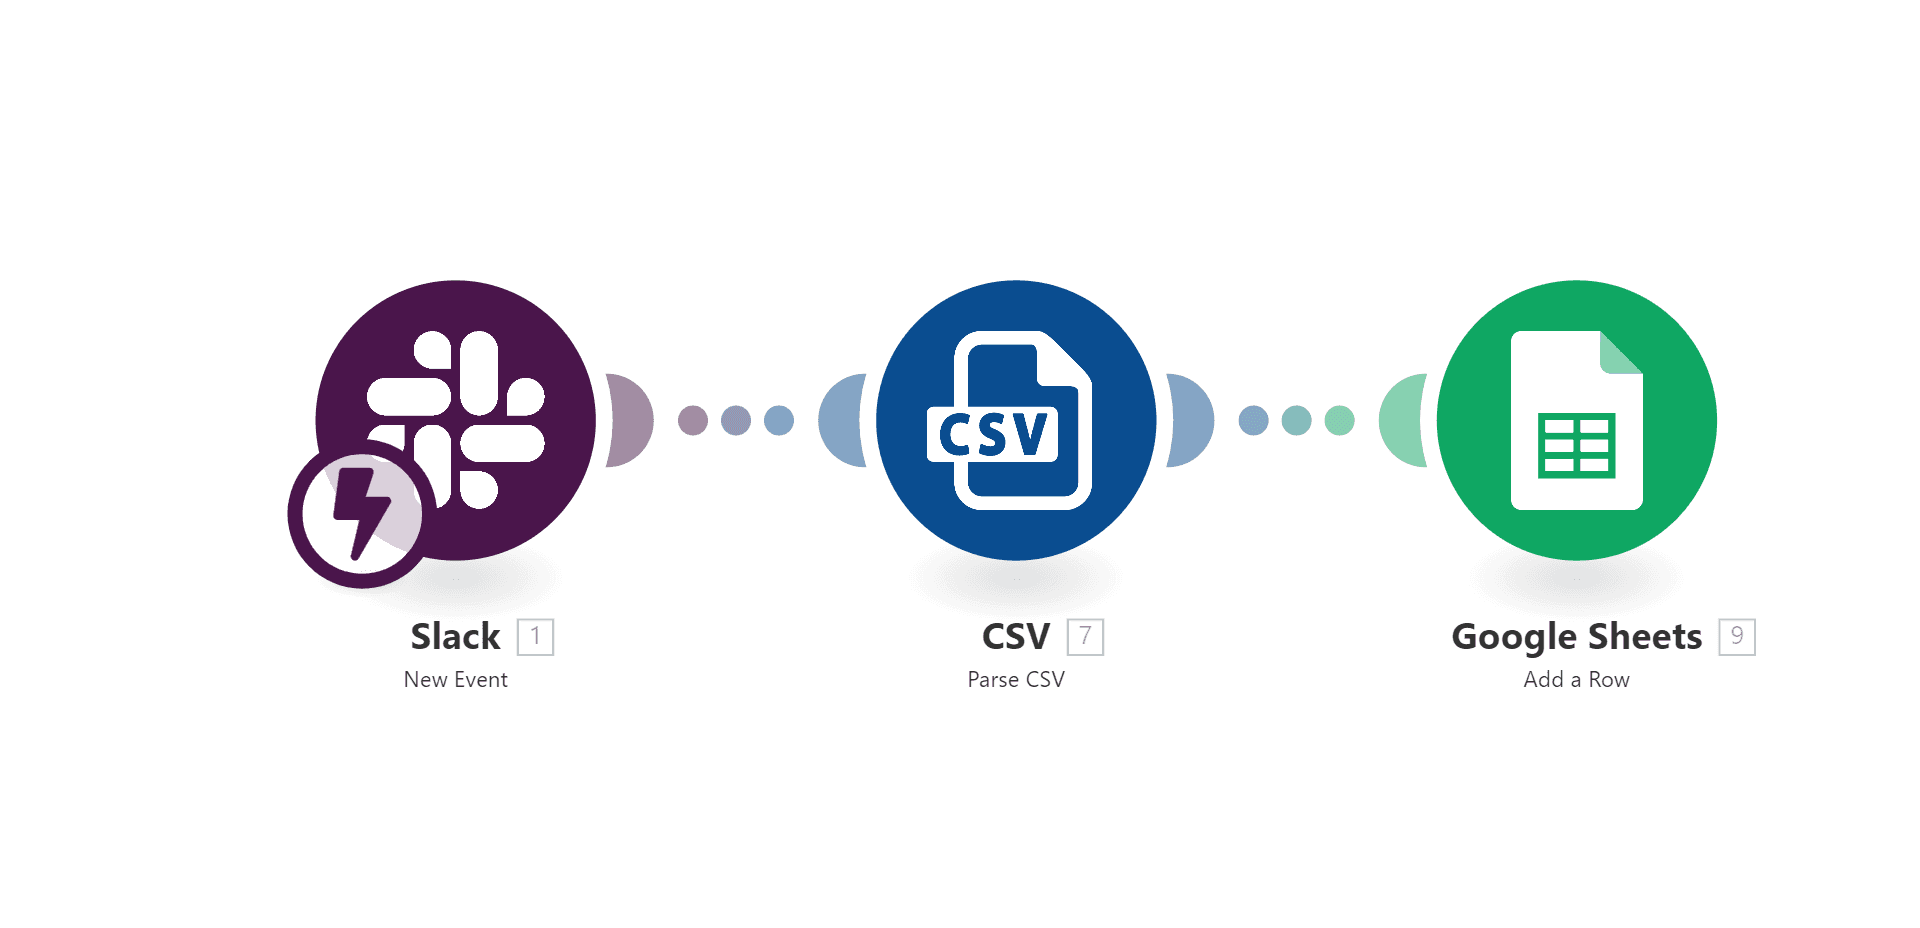
Below you will find a summary of the Make modules that are included in the scenario template. Let’s take a look at them!
Module 1 - Slack » New Event: This module will watch the private Slack channel where you will submit the name of your marketing campaign and the link to your landing page.
Module 2 - Parse CSV: This module is where you will define your marketing source and medium values for your different tracking links. To learn more about campaign values, please refer to “More information and examples for each parameter.”
Module 3 - Google Sheets » Add a Row: This module will save your links to a Google Sheet.
Configuring the template
To get started, click the “Create new scario from template” button on the bottom left of your screen to get started.
Setting Up a Private Slack Channel
NOTE: It is recommended to create a separate private Slack channel for generating your links, and to only share that channel with the person(s) responsible for generating campaign links. For example, you can name this channel “UTM generator”, or “UTM requests”, share it with the team members that usually request UTM links, and encourage them to use it to accelerate the creation of UTM links.
Step 1: Configuring the Slack » New Event module
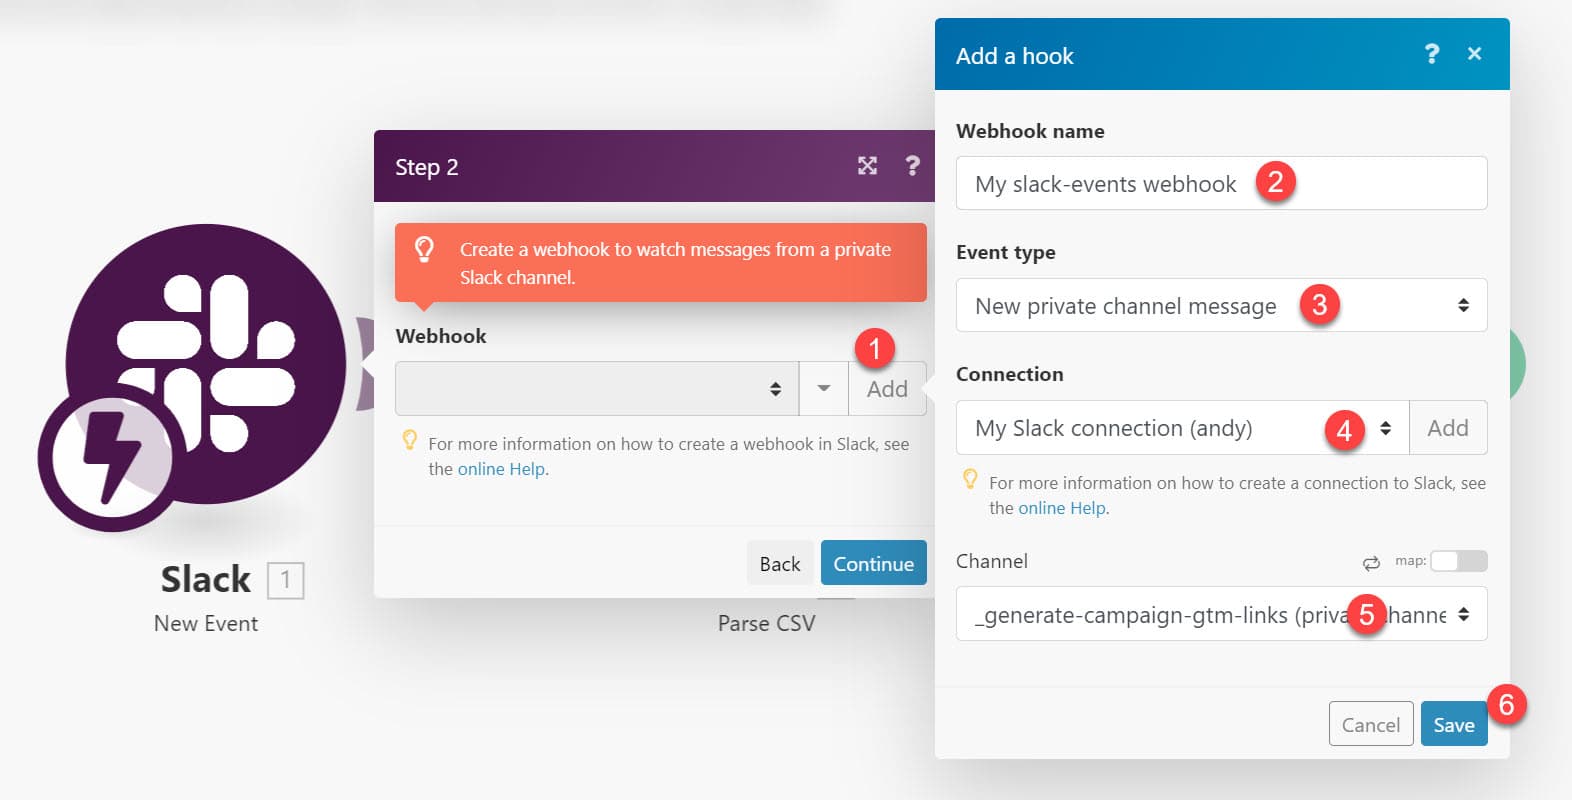
Now, it’s time to set up the first module of your scenario, which will trigger the rest of the actions. To do so, you have to:
1. Click “Add” to create a new webhook that will watch for messages from your private slack channel.
2. Give your webhook a name that makes sense, like “Campaign Link Generation Webhook”
3. Select the event type, which will be “New private channel message”
4. Select your Slack connection (click Add to create a new connection to Slack)
5. Select the name of your private campaign link generation channel
6. Click “Save”
7. Click “OK”, then click “Continue”
Step 2: Configuring the CSV » Parse CSV module
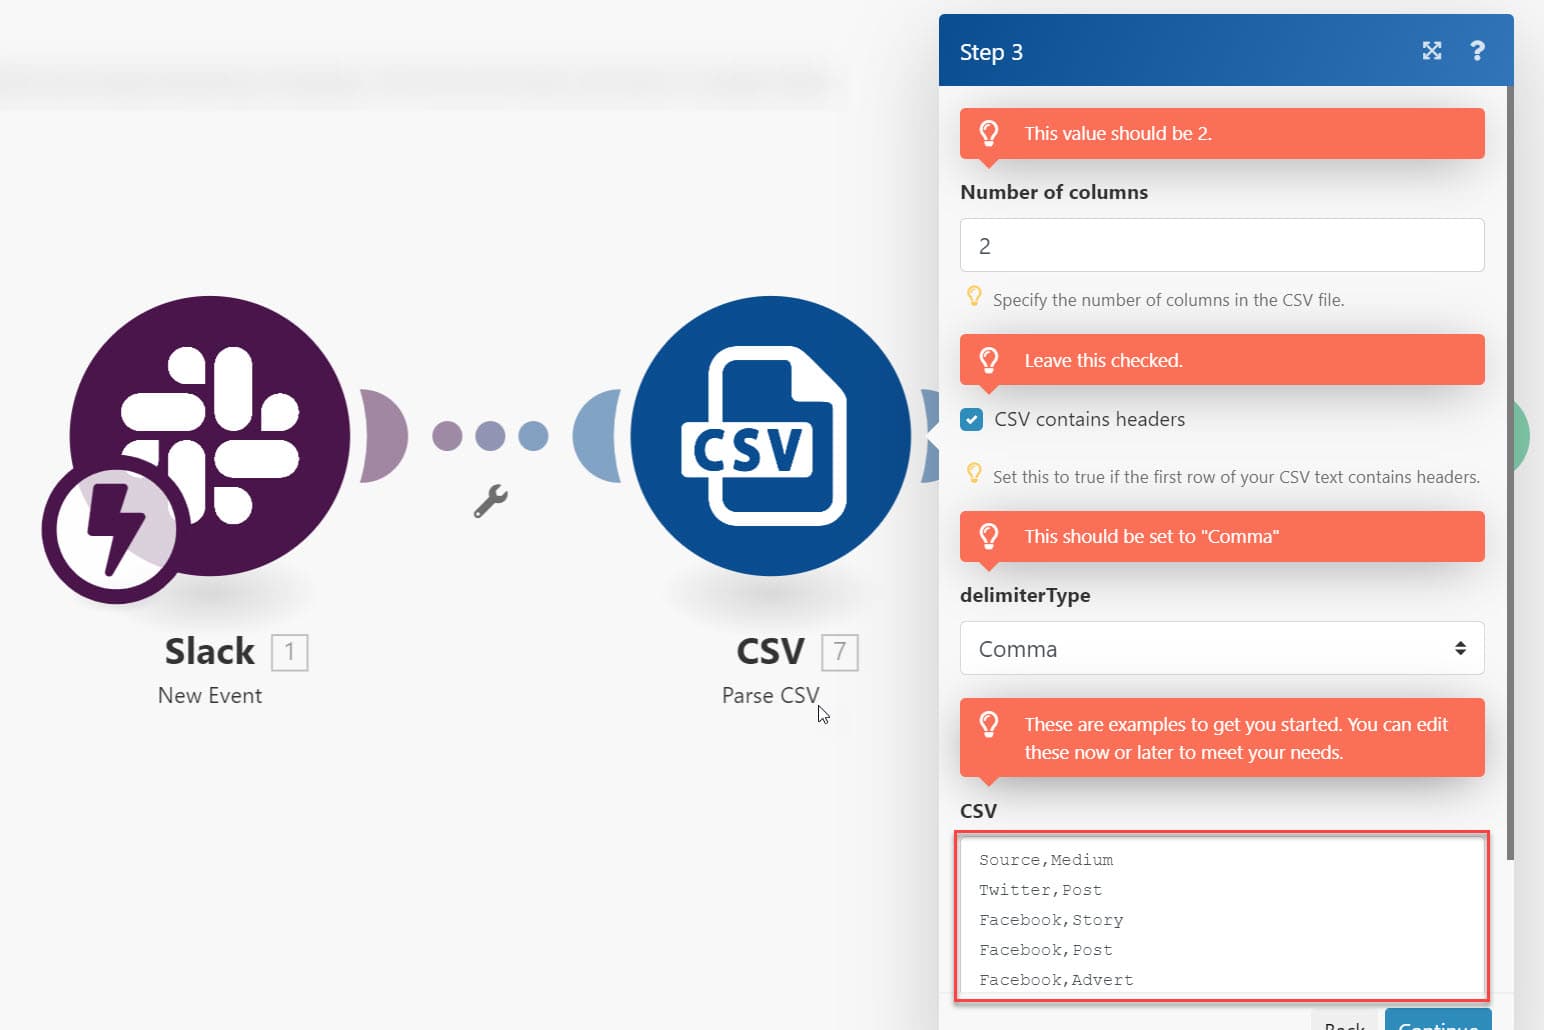
There is only one field in this module that you will need to update (shown in the red box above), and it depends on your campaign medium and source values.
To learn more about campaign values, please read “More information and examples for each parameter”, by Google.
Source is the platform where your traffic originates from, and medium is the type of source. For instance, we have populated this module with these default values:
Source,Medium
Twitter,Post
Facebook,Story
Facebook,Post
Facebook,Advert
Website,Banner Ad
Note: Watch out for UTM capitalization. It’s recommended to lowercase UTMs, but as long as you are consistent, uppercase could be used too.
Please note that the header row (“Source,Medium”) should stay, as it is required for the remaining modules in this scenario. Also, do not include a space after the comma for best results.
Once you are happy with the source and medium definitions for your campaigns, click OK to save this module.
Step 3: Configuring the Google Sheets » Add a Row module
First, head over to this Google Sheet and make a copy to save your Google Analytics Tracking Links.
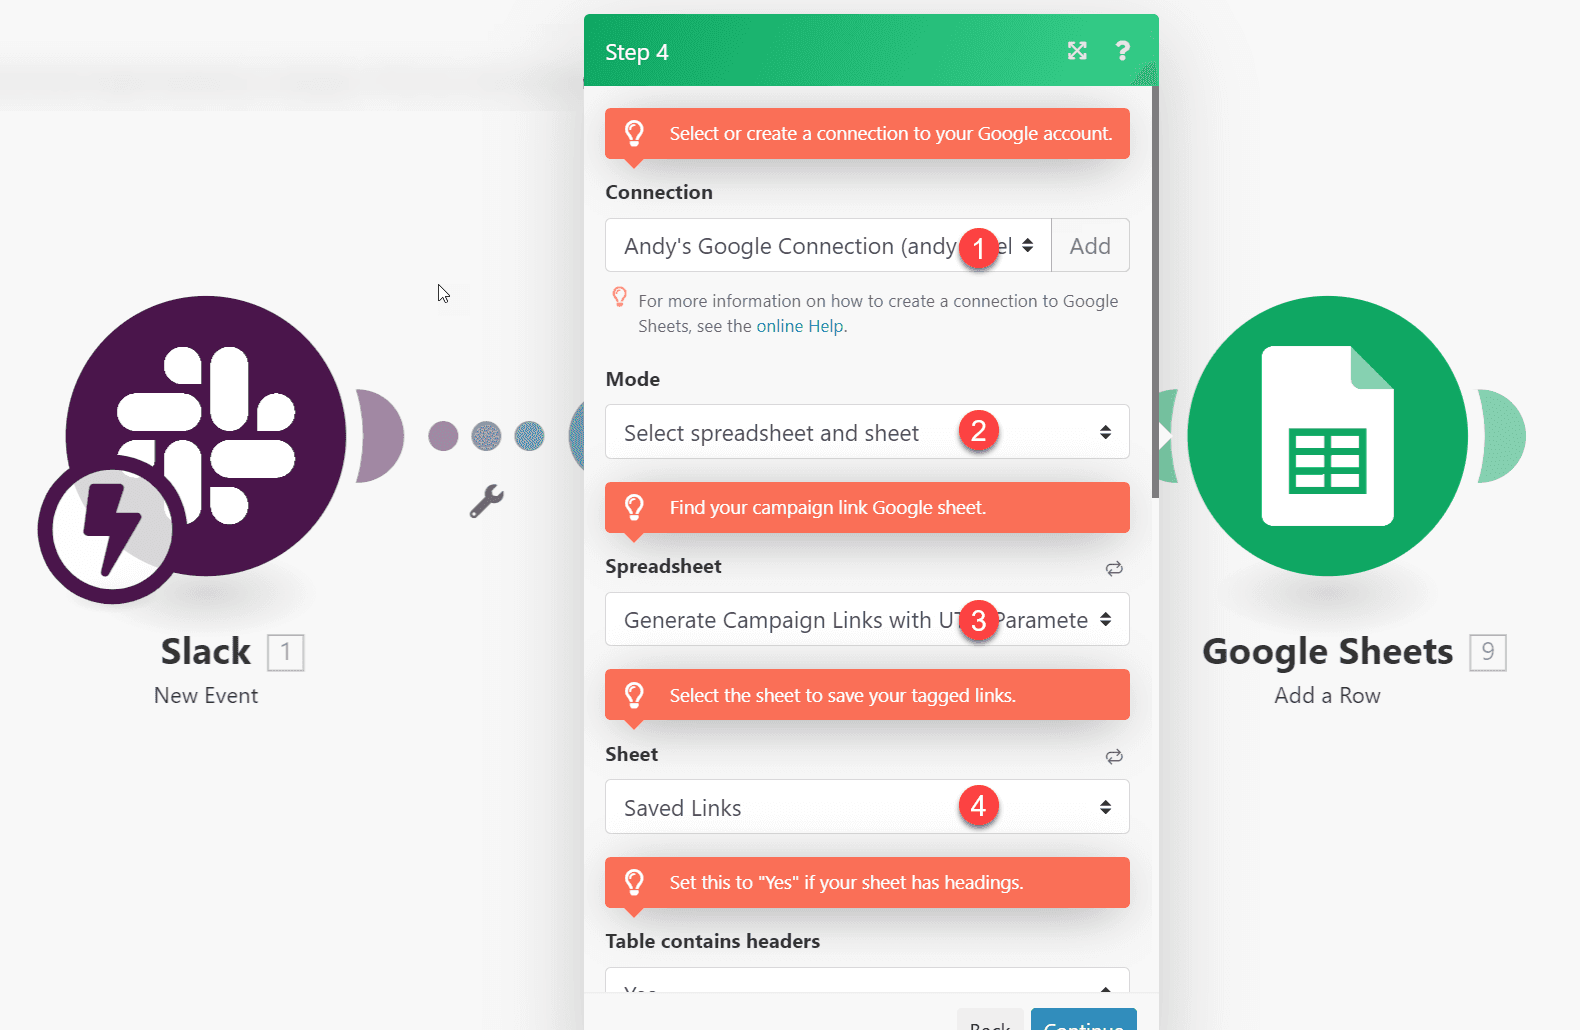
1. Click “Add” to create a new Google connection or select your existing connection from the dropdown.
2. Select the spreadsheet and sheet in the Mode dropdown.
3. Find the Google Sheet you want to save the links to in the “Spreadsheet” dropdown.
4. Select the sheet name. If you copied the sheet provided above, you should select “Saved Links” here.
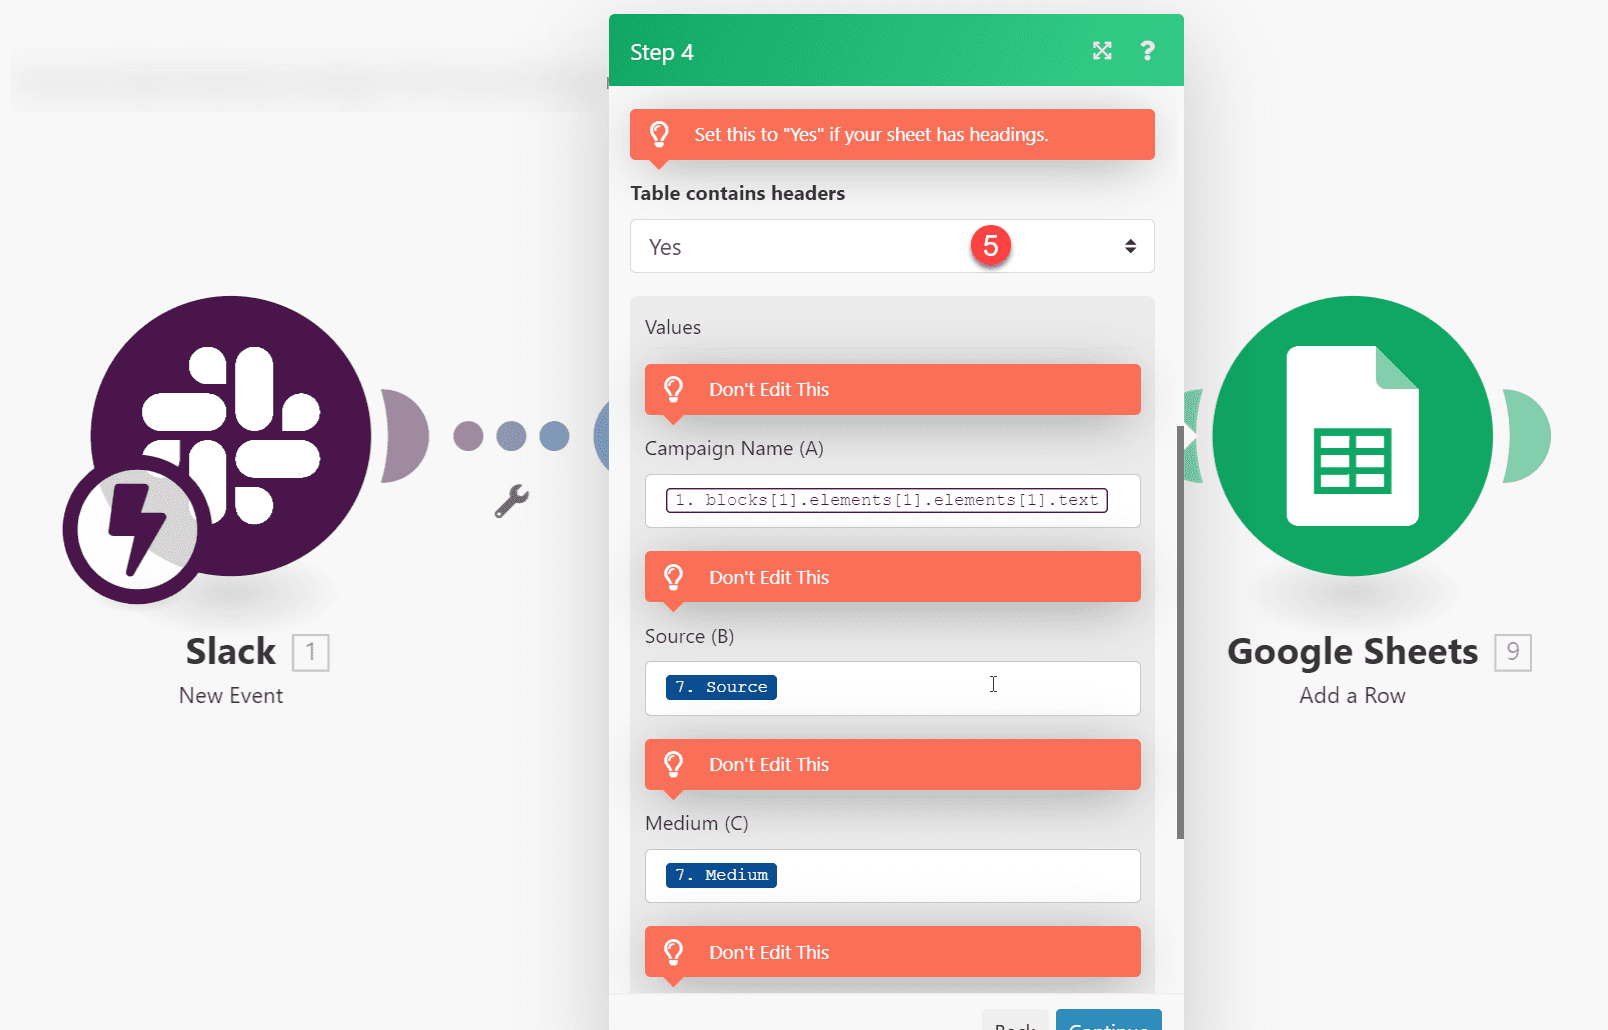
5. Set “Table Contains Headers” to “Yes”.
The rest of the fields should already be mapped in your template.
Click “Continue” and your template is ready to use!
Step 4: Test your scenario
Next, let’s test your scenario.
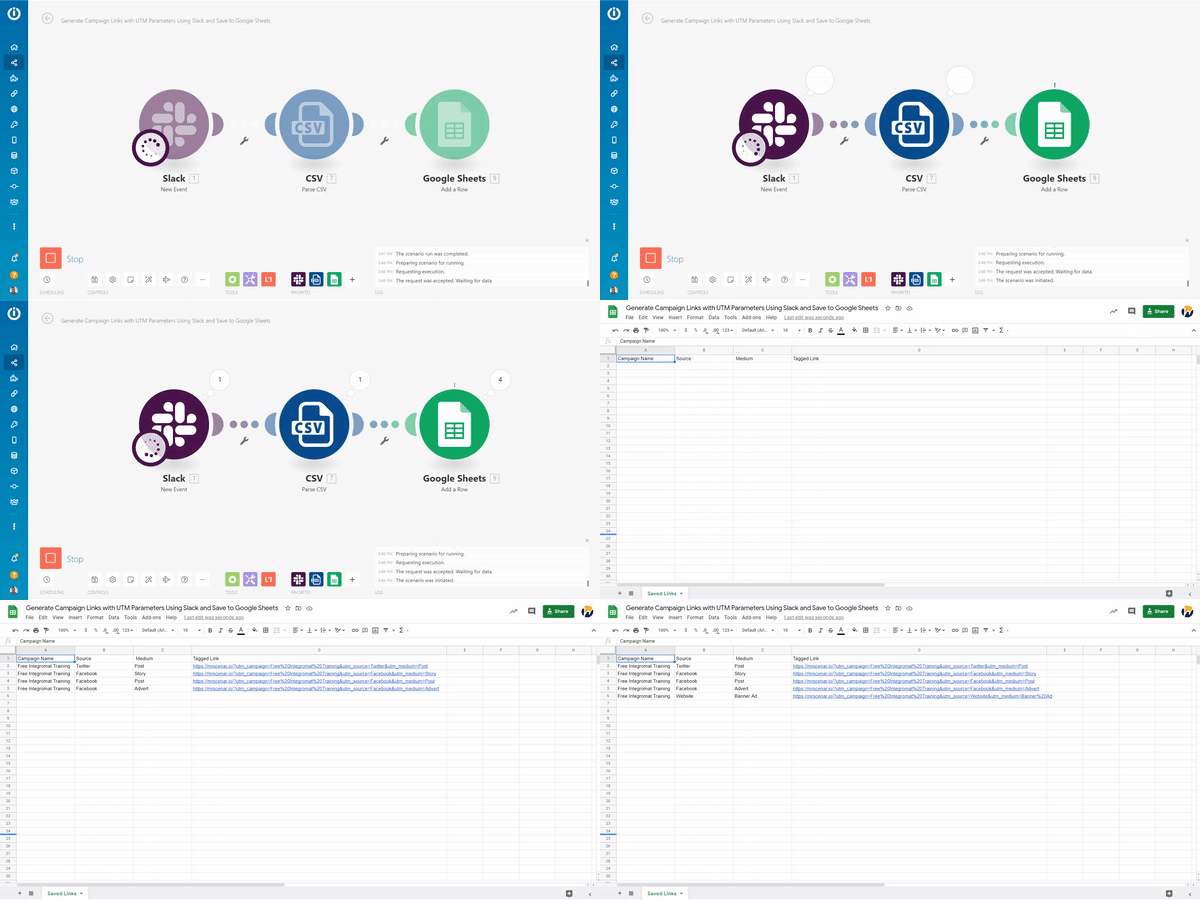
1. Click the blue “Run Once” button.
2. Next, compose and send a message from your dedicated private Slack channel. Please remember that your message should be your campaign name, a space, and the link to your landing page, like this:
Next, check your Google Sheet. In there, you will see new rows created with campaign name, source, medium and tagged link.
Conclusion
Voilà! Your template is now ready to go!
Now you have automated the process of generating your UTM tagged links to better track your website traffic in Google Analytics. Best of all, your links will be saved in a place where you and your entire marketing team will know where to find them.
More ideas for your business
Improve your work and business with Make. For more marketing automation ideas, please read our curated selection of use cases and marketing articles.
You can also create custom Slack integrations, or check out the full list of analytics and marketing integrations.
Happy automating!
Ready to make the automation revolution happen?

Andy O'Neil
Andy O'Neil is a Registered Make Partner and leads a workflow application development agency that specializes in code-free solutions with Integromat. He provides one-on-one paid Integromat support at Weblytica.com and offers free tutorials for new Integromat users at MrScenar.io.

