Jun 23, 2021 | 7 minutes
Can You Tweet From Notion? Yes, and Here’s How to Do It [Tutorial]
Learn how to schedule and post tweets automatically from a Notion database with this step-by-step Integromat tutorial.

One of the most valued aspects about Notion is the possibility to manage everything from your base. And thanks to the recent introduction of the Notion API, this applies to tweeting as well.
Using Make, you can create a simple Twitter scheduler that will allow you to:
Type your tweets in Notion
Select a date and time for publication
See your tweets getting posted without ever leaving Notion
In this article, we will show you how to automatically post tweets from Notion. To follow along, you'll need a Notion account, a paid Make account, and a Twitter account.
Now, let’s see how to create this useful Notion - Twitter integration, step-by-step.
Step 1: Configuring Notion
The first thing you will need to do is create a new database in Notion. This database is where you will schedule your tweets, so let’s call it “Notion tweet scheduler”.
Next, you will have to change the name of the Title property to “Tweet text”, and add a Date property, that you can name “Scheduled for”. Then, add a Last edited time property.
This will allow Make to know when you’ve added a new item.
Lastly, create a Checkbox property called “Tweeted”. We'll use this property to prevent tweets from being sent out twice.
When you're finished, your database should look like this:
Step 2: Creating the first Make scenario
It's time to jump into Make and create a new scenario.
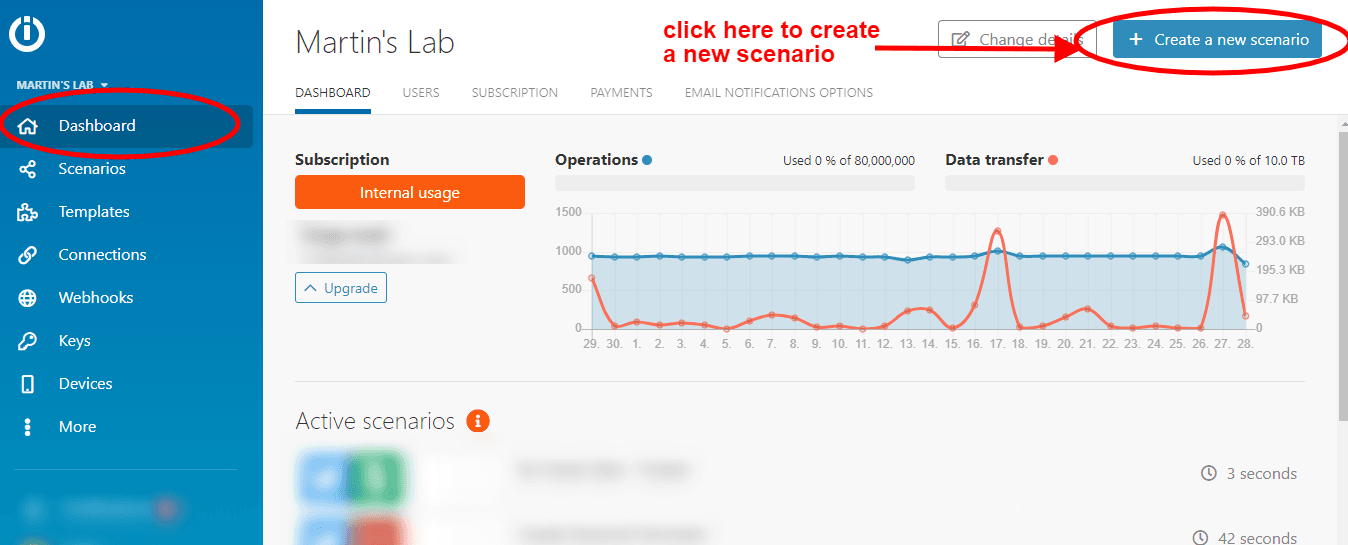
On your Make dashboard, create a new scenario, select the Notion app, and choose the Watch database items Notion module.
Once you do that, it’s time to configure the module. First, you will have to connect your Make account to Notion. Just click “Add”, and follow the instructions - it shouldn’t take longer than a few seconds to establish the connection.
Now, let’s proceed with the module configuration. In it, select your tweet scheduler database, and set it to trigger when the “By updated time” changes, and increase the limit to a higher number - say, 14.
This way, Make will not retrieve every item in the database each time it checks for new items (tweets) in your database. Increasing the limit to 14 will make sure that even if you've scheduled 14 tweets in one go, the automation will still work as expected.
Perfect for when you plan out your tweets in advance before you go on a 2 week long holiday, right?
Once you are done here, click “OK”.
Now, we will add another module to our Make scenario: a Data store.
After you add it, select “Add/replace a record”, and “Create a new Data Store”. Give it an inspiring name (for example, “Scheduled tweets”), and add the following properties:
A required multiline text property called “Tweet”
A Date property named “Scheduled for”
The data storage size can stay at 1 MB.
After you do this, make sure to check ”Overwrite an existing record”, or else any changes made to scheduled tweets will result in an unintended tweetstorm.
You can leave all the other values the same.
Now we have to select which items should be added to the Data store.
You can go ahead and type in some test data into your Notion database. Then, run the Make automation once, click on the Data store, and find the following items:
Key: “Database Item ID”
Tweet: “Properties Value: Tweet text[1]: Text: Content”
Scheduled for: “Properties Value: Scheduled for: Start”
If it works, give yourself some props: You've just created an automation that moves data from a Notion database to an Make Data store.
It's probably a good time to explain why this is useful.
To schedule tweets, we have to check whether the “Scheduled for” time is exceeded. This can be done manually in Notion, but it’d require you to to check all the items in the database every single time just to see if one or more have exceeded their scheduled time.
This is not very efficient.
Instead, we keep a smaller, more efficient database (called a Data store) that contains the tweets that are scheduled, but not yet posted.
Whenever Make posts a scheduled tweet, that tweet will also be removed from the Data store.
There are however two problems with this automation.
First, if one of the tweets in your database is still a draft version that you're editing to perfection, Make has no way of knowing.
An easy way to fix this is to add a Checkbox property to your Notion database, which you can call “Ready”. Only checked items will be added to the Data store, giving you the necessary room to edit, improve, or straight on delete your tweet drafts.
The second problem is that tweets that have already been posted might go into the Data store, which means they can be sent out multiple times.
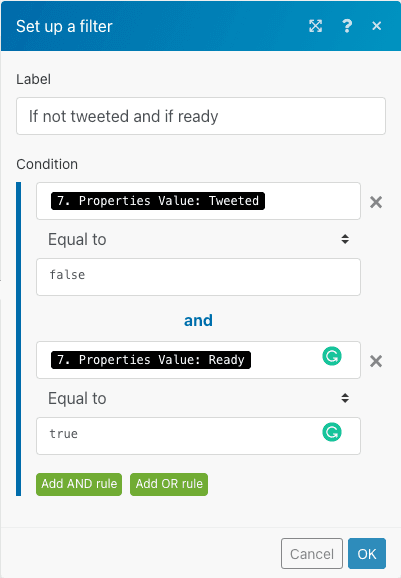
To avoid this, you will have to add an Make filter in between the Notion and Data store modules.
To configure the filter, you will have to use two rules or conditions.
The first condition will be Properties Value: Tweeted is Equal to false. In other words, this prevents a tweet that has already been posted from going into the Data store. We'll explain more about how this works later.
The second condition is and AND one. Here, select Properties Value: Ready Equal to true, so you can tell Make when you are ready with your tweet.
See the image below for reference on how to configure the filter:
Now, it’s time to schedule your Make scenario.
Click on the clock icon on the Notion module. Here you can schedule how often Make should check whether there are new items in the tweet scheduler database.
The lower the time between scenario runs, the more tasks it will take up from your Make account.
Now, let’s test the automation by typing in some information in the Notion database.
Type in a tweet, check the Ready box, and add a date and time before the current date.
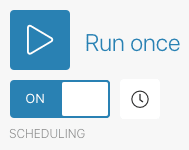
Then, go to your Make scenario, click the Run once button in the bottom left corner, and see if any errors occur.
Try it with different times and dates and with and without the Ready box checked.
If everything works, turn the automation on by clicking on the switch.
And here’s how the resulting scenario looks like:
Step 3: Creating the second Make scenario
The following scenario will automatically post your tweets to Twitter.
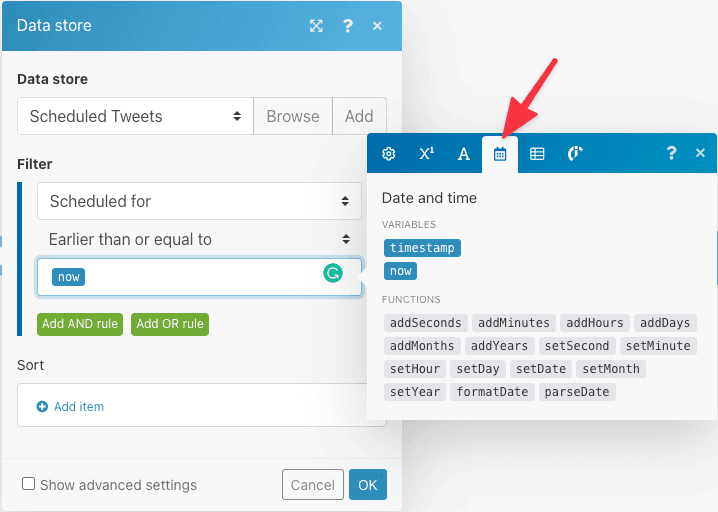
As before, you will have to create a new Make scenario. Then, add a Search Records Data store module.
After this, choose the “Scheduled Tweets” Data store, and filter the “Scheduled for” property to be “Earlier than or equal to” under the “DateTime operators” heading. Click on the data field, go to the date tab and select “Now”.
The reason we include the “Earlier than now” rule is because the automation only checks every so often whether this condition is true, and it's unlikely that the scheduled time is exactly the same time when the automation checks the condition.
To test the automation, we recommend using a throwaway Twitter account. This way, your main Twitter account won’t suffer in case anything goes wrong.
Next, you will need to add the Create a Tweet Twitter module to your scenario. After you connect your Twitter account to Make (in the module), select the “Tweet” record in the Data store for the “Status” property.
Great! You can now Tweet new things using Notion. Let’s improve the scenario with a few more tweaks though.
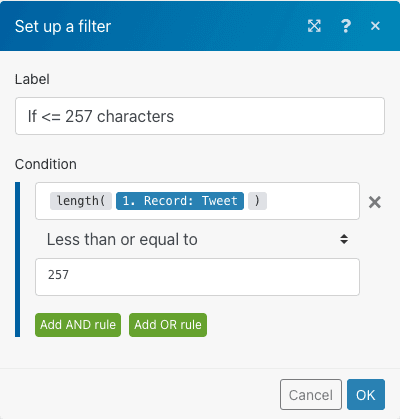
Just to make sure that nothing goes wrong, let’s set up a filter between the Data store and Twitter modules to see if the length of the tweet is less than or equal to 257 characters (which is Twitter's character limit if you include a link in your tweet).
If you don't ever tweet links, you could set this to 280.
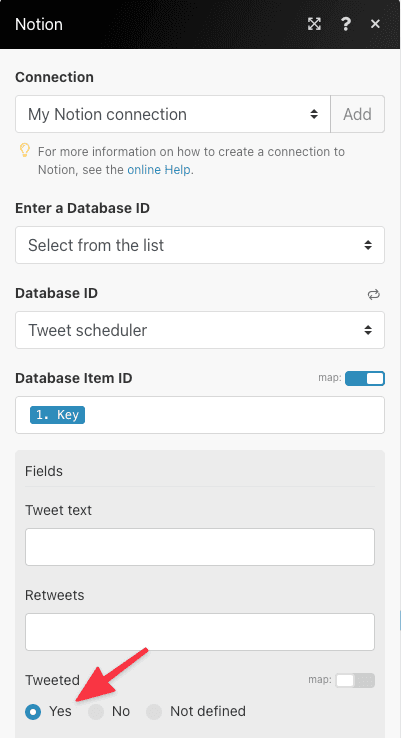
Next, add a Update a Database Item Notion module to this scenario.
In the module, select the tweet scheduler database, and use “Key” as Database Item ID (it doesn't matter from which Data store, since they have the same key values).
Then, select “Yes” for the Tweeted property.
This will allow you to know that the automation went through, and that your tweets are posted successfully when you see this property checked in Notion.
Lastly, add another Delete a record Data store module. Here, simply select the “Scheduled tweets” datastore, and use “Key” again as the “Key” value. This will make sure that the same tweet won't be posted twice.
As for scheduling, we'll run this automation every 30 minutes. That way, when you schedule a tweet, at most it will be sent out 29:59 minutes later.
Click on the clock at the Data store module, set the “Run scenario” field at “regular intervals” and the “Minutes” field at “30”.
Make sure to also test this automation by typing in different kinds of data in the Notion database and clicking the “Run once” button in your Make scenario.
After checking that it runs smoothly, make sure to click the switch to turn the scenario on.
If everything works, change the connection in the Twitter module from your throwaway account to your main account, and you’ll be all set. The resulting scenario should look like this:
Conclusion
Great job!
You have learned how to build a tweet scheduler in Notion, with the help of Make.
From now on, whenever you want to schedule a tweet, you just type it in the database, select a date and time, check the box, and let Make do the rest.
Happy automating!

Luc Meijer
Luc is a freelance (no-code) software engineer. He’s been working in tech for 5+ years and helps people automate their businesses.


