Apr 6, 2023
Power Up Your Contracts with NDA Automation [Tutorial]
Learn how to automate non-disclosure agreements with Make. In this tutorial, we'll show you how to automatically create and distribute NDAs.

Do you get the feeling sometimes that non-disclosure agreements (NDAs) are getting out of control?
If that’s the case, you are not alone: This problem was raised by law professor Orly Lobel in a 2018 HBR article, where she pointed out that up to a third of workers in the United States are bound by an NDA.
If we take February 2023 employment figures as a reference, that’d equate to 43.9 million NDAs.
In light of this, we’ll show you how to build a solution to automate the creation and distribution of NDAs.
With it, you’ll be able to effectively streamline your processes and get those precious resources back to where they belong.
Before we jump into the tutorial, let’s take a look at the apps you’ll need to build this solution (nothing expensive), and the process it effectively automates.
How to automate NDAs: An Overview
The solution we’ll build in this tutorial relies on a handful of popular tools to automate the equally popular process of creating and distributing NDAs across an organization.
These are:
Typeform (you can choose other form-building apps as well).
Salesforce (likewise, other CRMs are eligible).
Google Docs.
Google Drive.
Make.
For the purposes of this tutorial, you’ll need a paid Make account (the Core Plan is more than enough, but feel free to choose the one that suits your needs).
Now - what will we do with these apps?
Simple: We’ll create a Make scenario that does the following:
Monitors new Typeform responses.
Looks up data in Salesforce (needed for the NDA).
Creates the NDA document.
Stores the document in Google Drive.
Emails the document to one or more people (including the signer, of course).
Ready to wave those back-and-forths bye-bye? Then let’s automate NDAs once and for all.
Step 1: Create the NDA document template
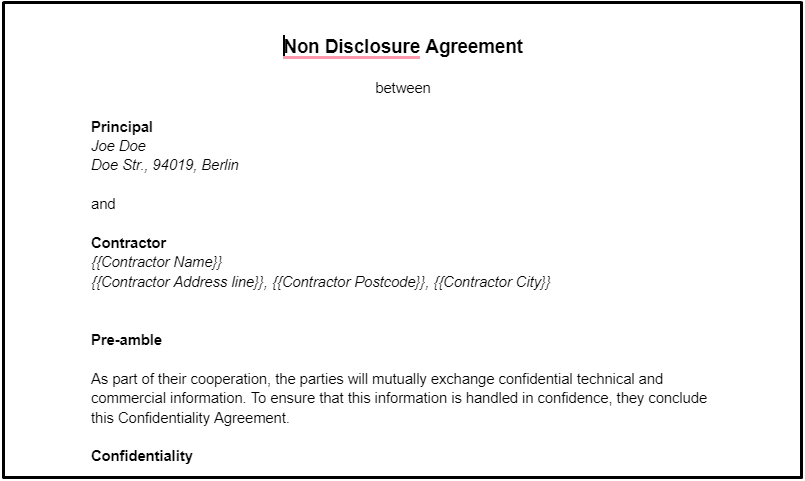
The first thing we’ll do is create an NDA template in Google Docs.
Here’s a snippet of the one we created, but you’re free to create one that reflects your actual recurring needs.
Step 2: Create a Make scenario and add the first module
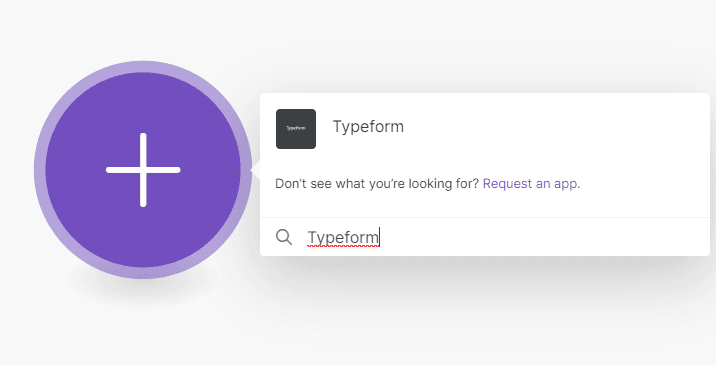
Once you have the NDA template ready, create a new Make scenario and search for the Typeform app.
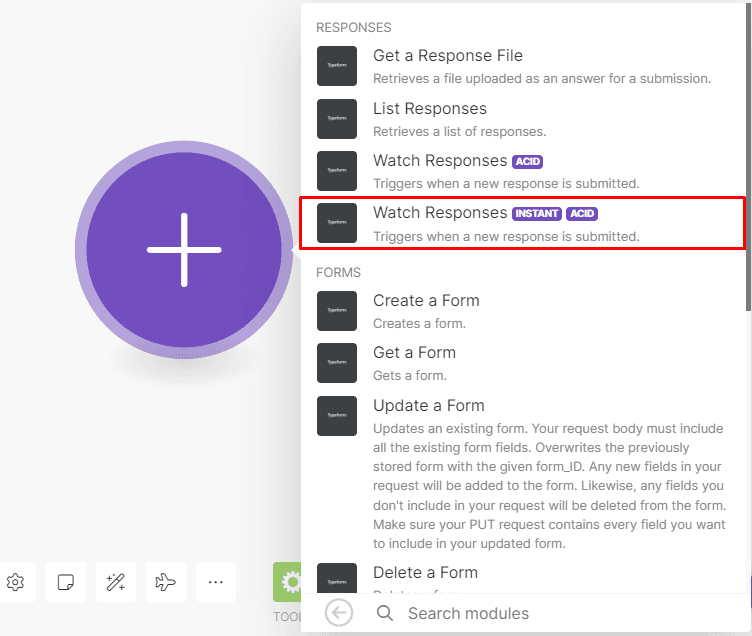
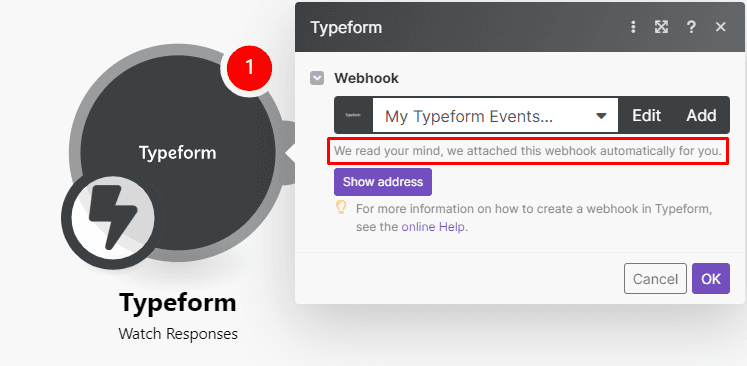
You’ll notice that there are two Watch Responses modules; select the instant one.
As it implies, this module instantly receives the responses of a form when submitted (for reference, the other one works on a scheduled basis - every 15 mins, 30 mins, etc.).
In other words, this module works like a webhook.
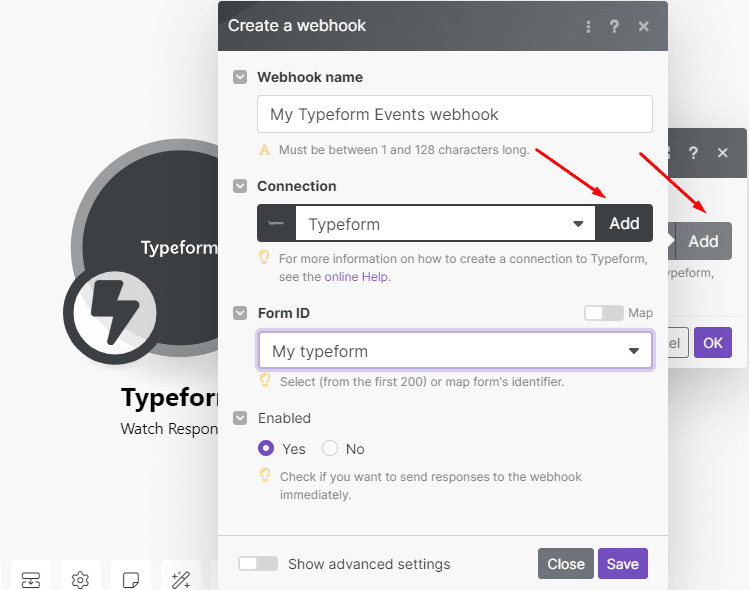
It’s time to configure this webhook, so start by connecting your Typeform account to Make. To do this, simply click Add under Connection, and give your webhook a name.
Once done, select the form that you want to watch for responses and click Save.
Note: You don’t need to attach the webhook in Typeform since Make does this automatically for your convenience!
Step 3: Add Salesforce to your scenario
The next step in the process is to add the Salesforce app to the scenario so that you can retrieve the person's information (that was submitted through a Typeform form) to be used in the NDA.
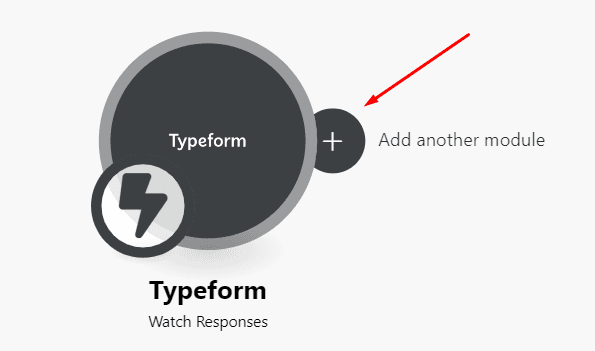
Move your cursor over the module on the right side and you’ll see the Add another module button.
Then, search for the Salesforce app and select the List/Search Records module.
Now you’ll have to connect your Salesforce account to Make; doing so will open the fields for configuration.
Our scenario will search Salesforce and use the person’s email address to retrieve their contact information.
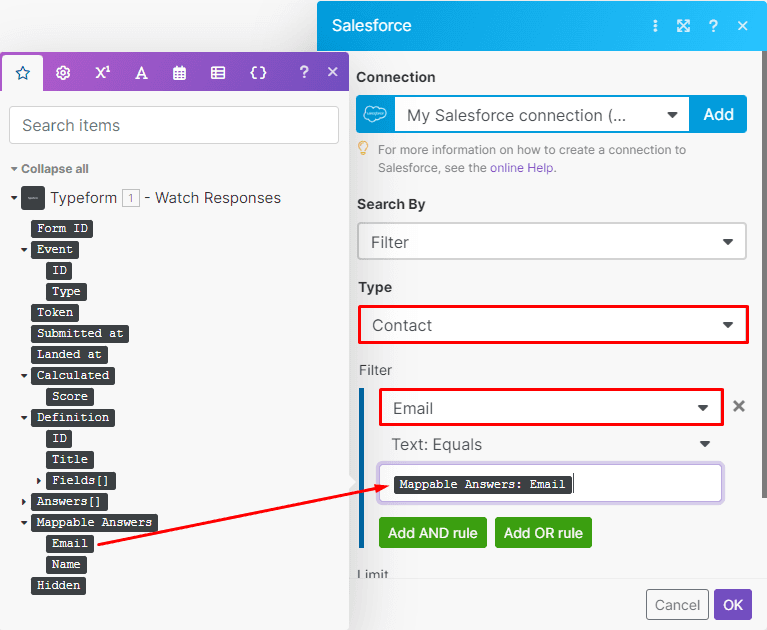
So, in the module, select Contact under Type. To set up the filter, select Email, Text: Equals operator, and then map the Mappable Answer: Email element (ensure that your form has a field for email addresses) to the bottom field.
Check the image below for reference:
Once done, click OK.
Step 4: Add Google Docs to automatically create NDAs
Now that the Salesforce module is set up, the next step is to create the NDA with the contact information that was retrieved.
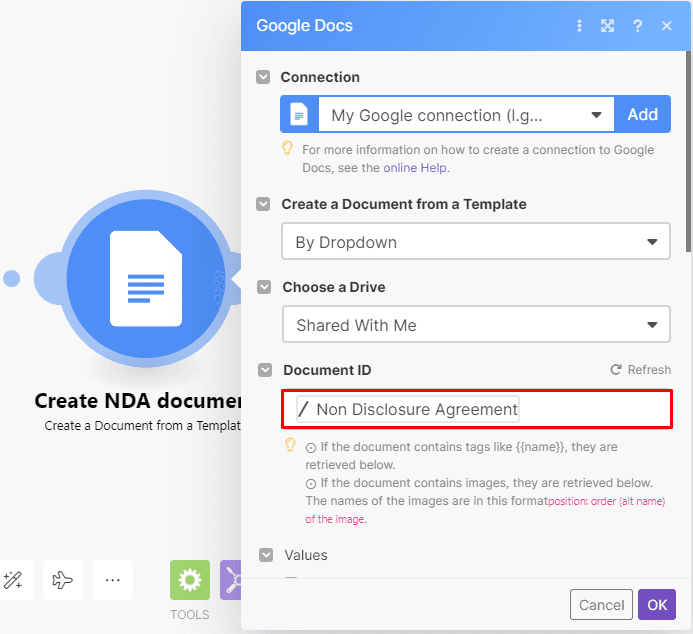
To do this, search for the Google Docs app and select the Create a Document from a template module.
To configure it, connect your Google account, and then select the Google Drive folder where the NDA template is stored.
Next, select the template in the Document ID field.
Let’s keep configuring the module.
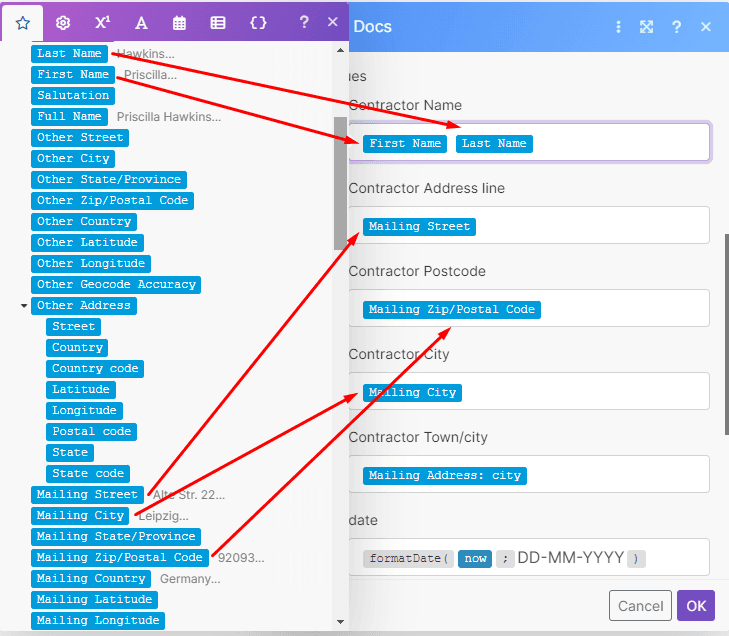
Scroll down to see the fields where you will map the data elements from the Salesforce module.
Below you’ll see the template’s variable fields we are including.
However, keep in mind that your template will likely be different (and so will the fields).
At this point, you’ll have to map the data from the Salesforce module to the matching fields like you see below.
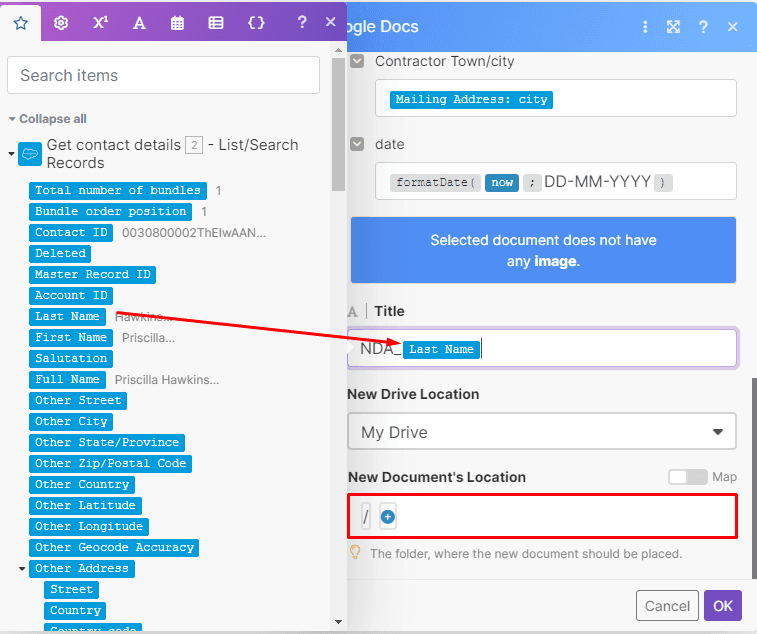
You can provide a title for the new document and select the new document’s location in your Google Drive.
Step 5: Add Google Drive to your scenario
Once it’s uploaded to Google Drive, you need to download the NDA so that you can email it to the relevant person(s).
To do this, search for the Google Drive app and select the Download a File module.
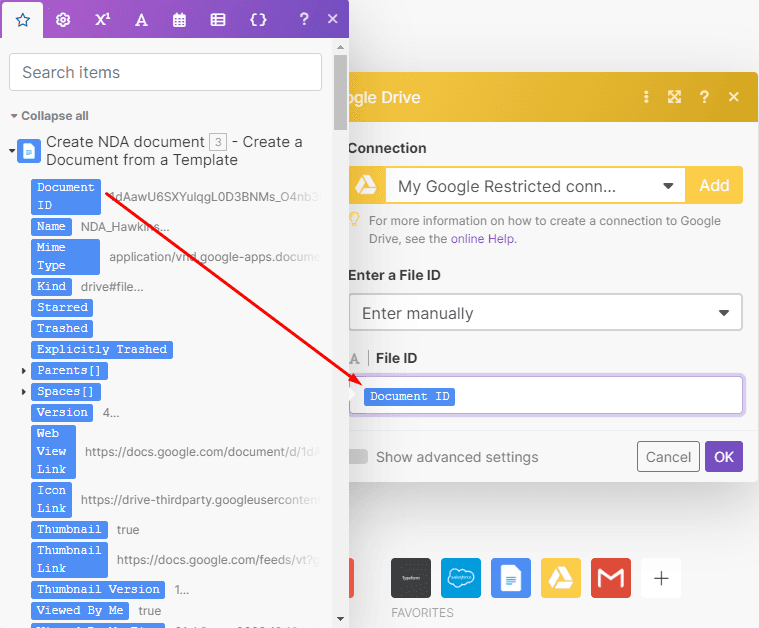
After connecting Google Drive to Make, map the Document ID data element from the previous module to the File ID field.
This concludes the module’s configuration, so once done hit OK.
Step 6: Automatically email NDAs for review and approval
The final step is to email the NDA to the person that needs to sign off before sending the document to the client.
To do this, search for the Email app in Make, and select the Send an Email module.
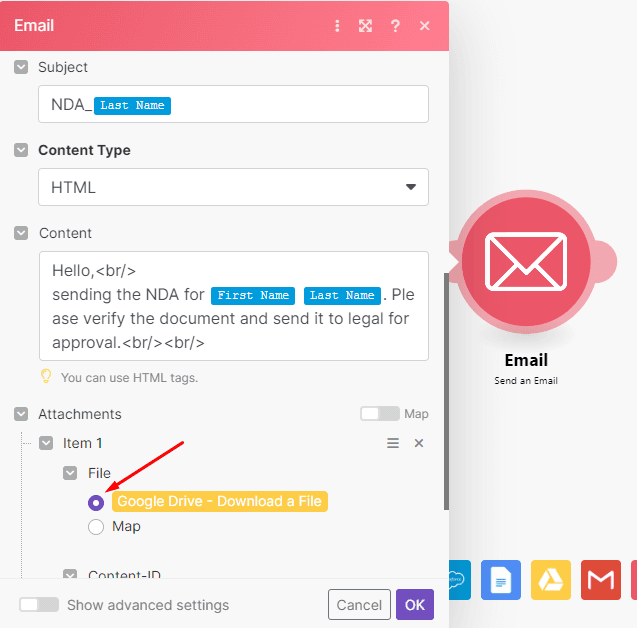
Then, enter the recipient’s email address, and add the subject and email content.
You can add text and map elements from the Salesforce module to compose the message.
Most importantly, ensure that you select the Googe Drive - Download a File option under Attachments so that the NDA document is attached to the email.
And that concludes the scenario-building. Let’s quickly test it before deploying!
Step 7: Test the scenario
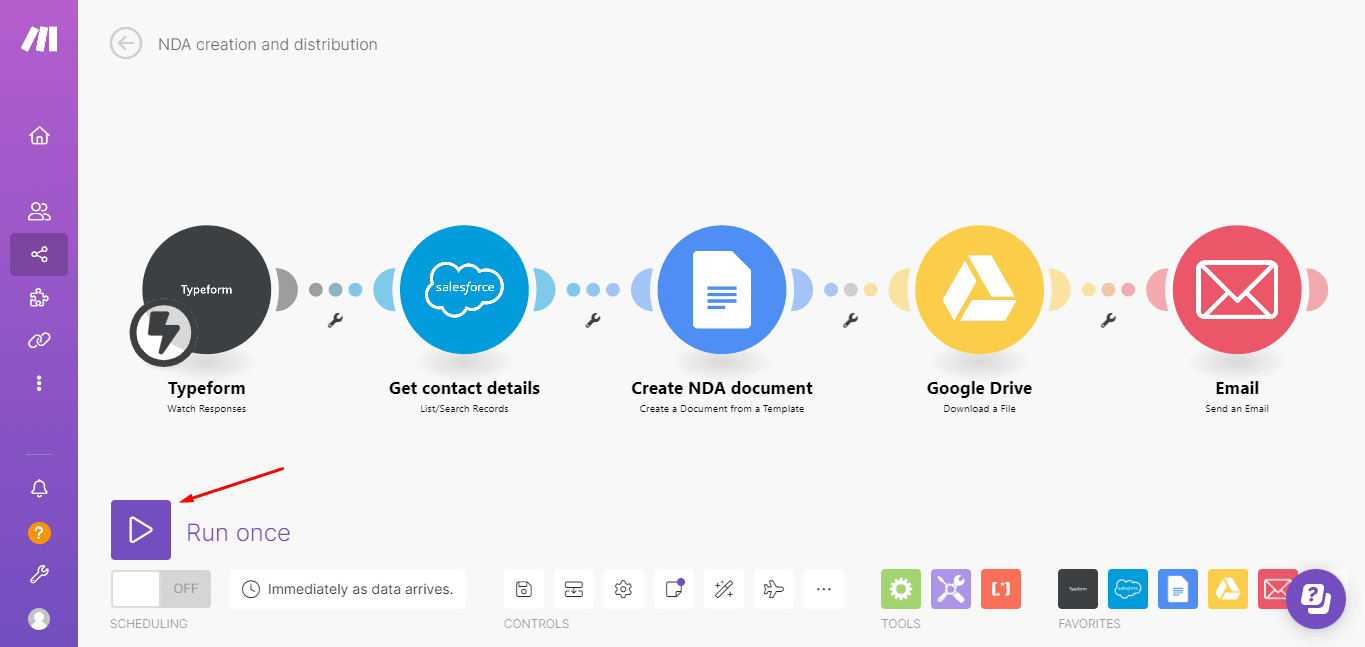
To execute the scenario, hit the Run Once button located at the bottom left of the scenario builder.
Now, it’s important that you open a Typeform form and submit it.
This will allow us to check if our solution is working as intended. If it does, the scenario will instantly receive the answers in the form.
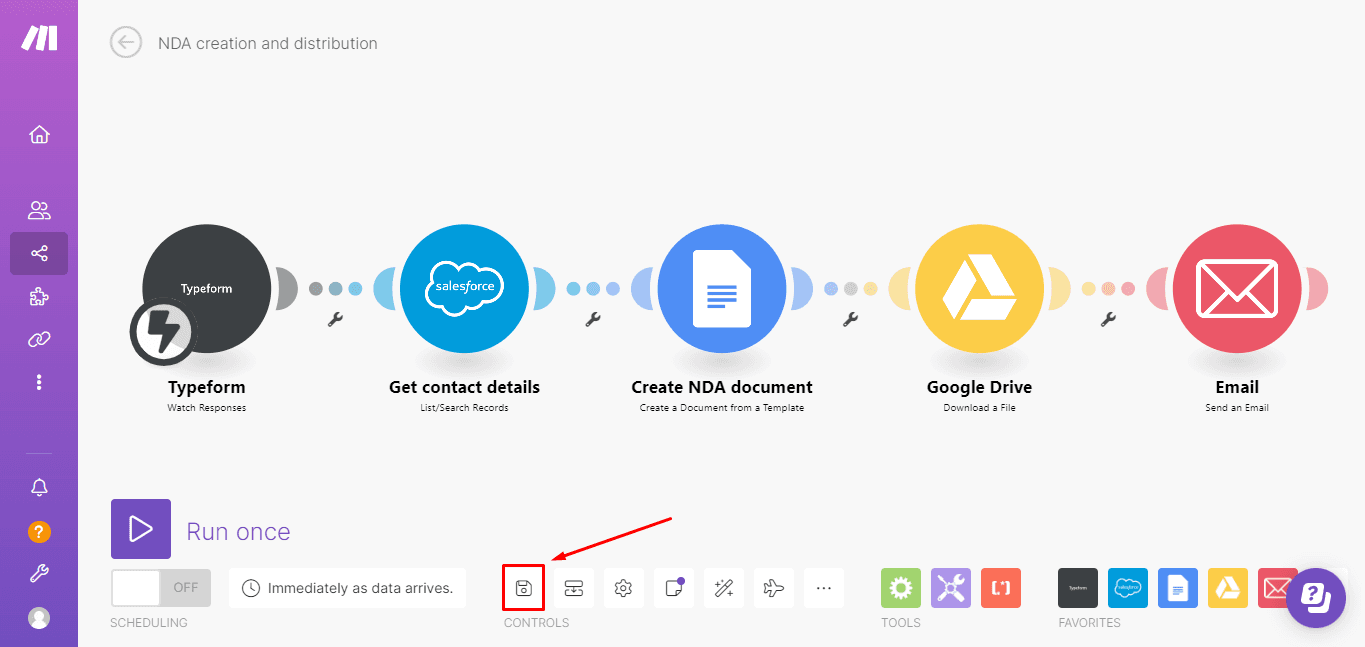
Once you know everything works, hit the Save button at the bottom of the builder under the Tools menu.
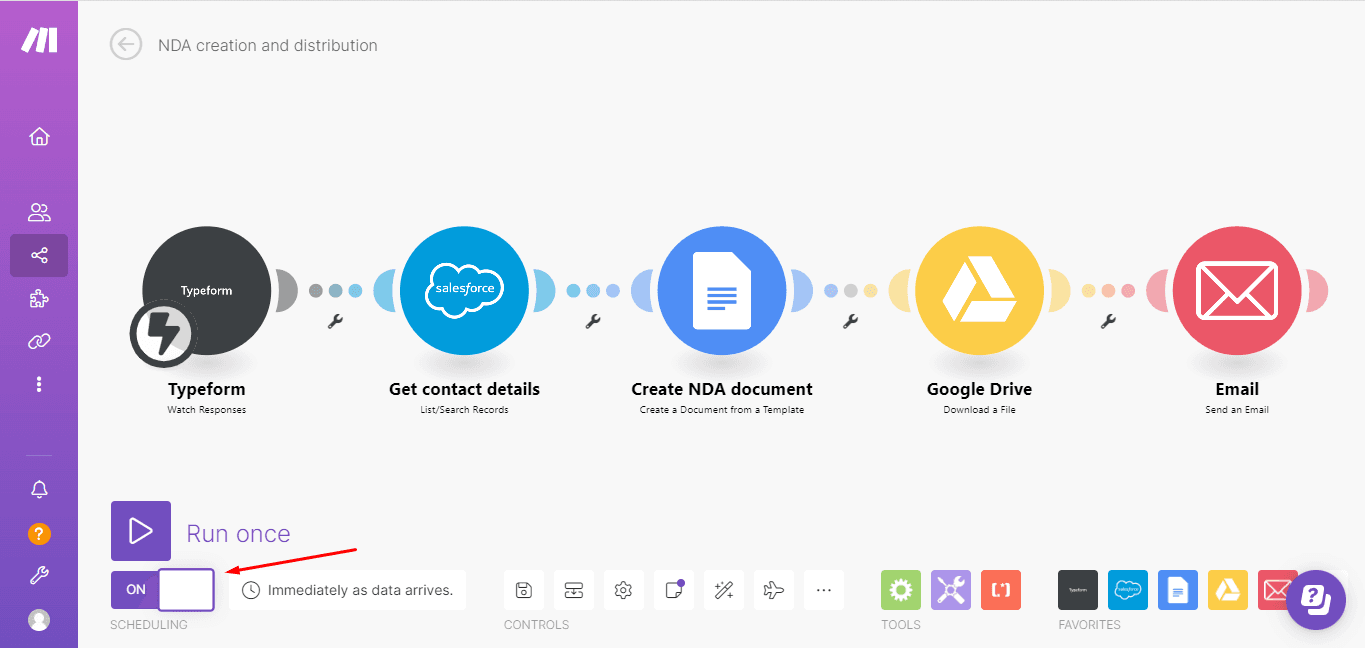
Finally, switch the scenario on by toggling the switch below the Run Once button.
You NDA automation tool is alive and kicking! Now you don’t have to worry about spending time on drafting NDAs anymore - it’s all done automatically behind the scenes.
Final words: Time to stop money from slipping through the cracks
In a recent tutorial about automated contract creation, we referenced a study that shows how organizations lose revenue due to the lack of good procurement practices, understaffing, and overworked teams.
These are exactly the pain points that solutions like the one we just built solve: They help you fix the circumstances that drain money from the company on a regular basis.
To conclude, remember that you can replace the tools in this tutorial with similar ones - including free alternatives as well, such as Google Forms instead of Typeform, or HubSpot instead of Salesforce.
The only thing that can't be replaced is the desire to change your company's processes for the better.
But if you have that already, it's easy, fun, and affordable to do it with Make!
Ready to make the automation revolution happen?


