Nov 19, 2024 | 6 minutes
How to automate LinkedIn conversion tracking for higher ROAS
A step-by-step guide to automate conversion tracking for a higher return on your advertising spend.
Investing in LinkedIn ads can be a complete game changer for your business – but how do you make sure your strategies are getting you the best possible results?
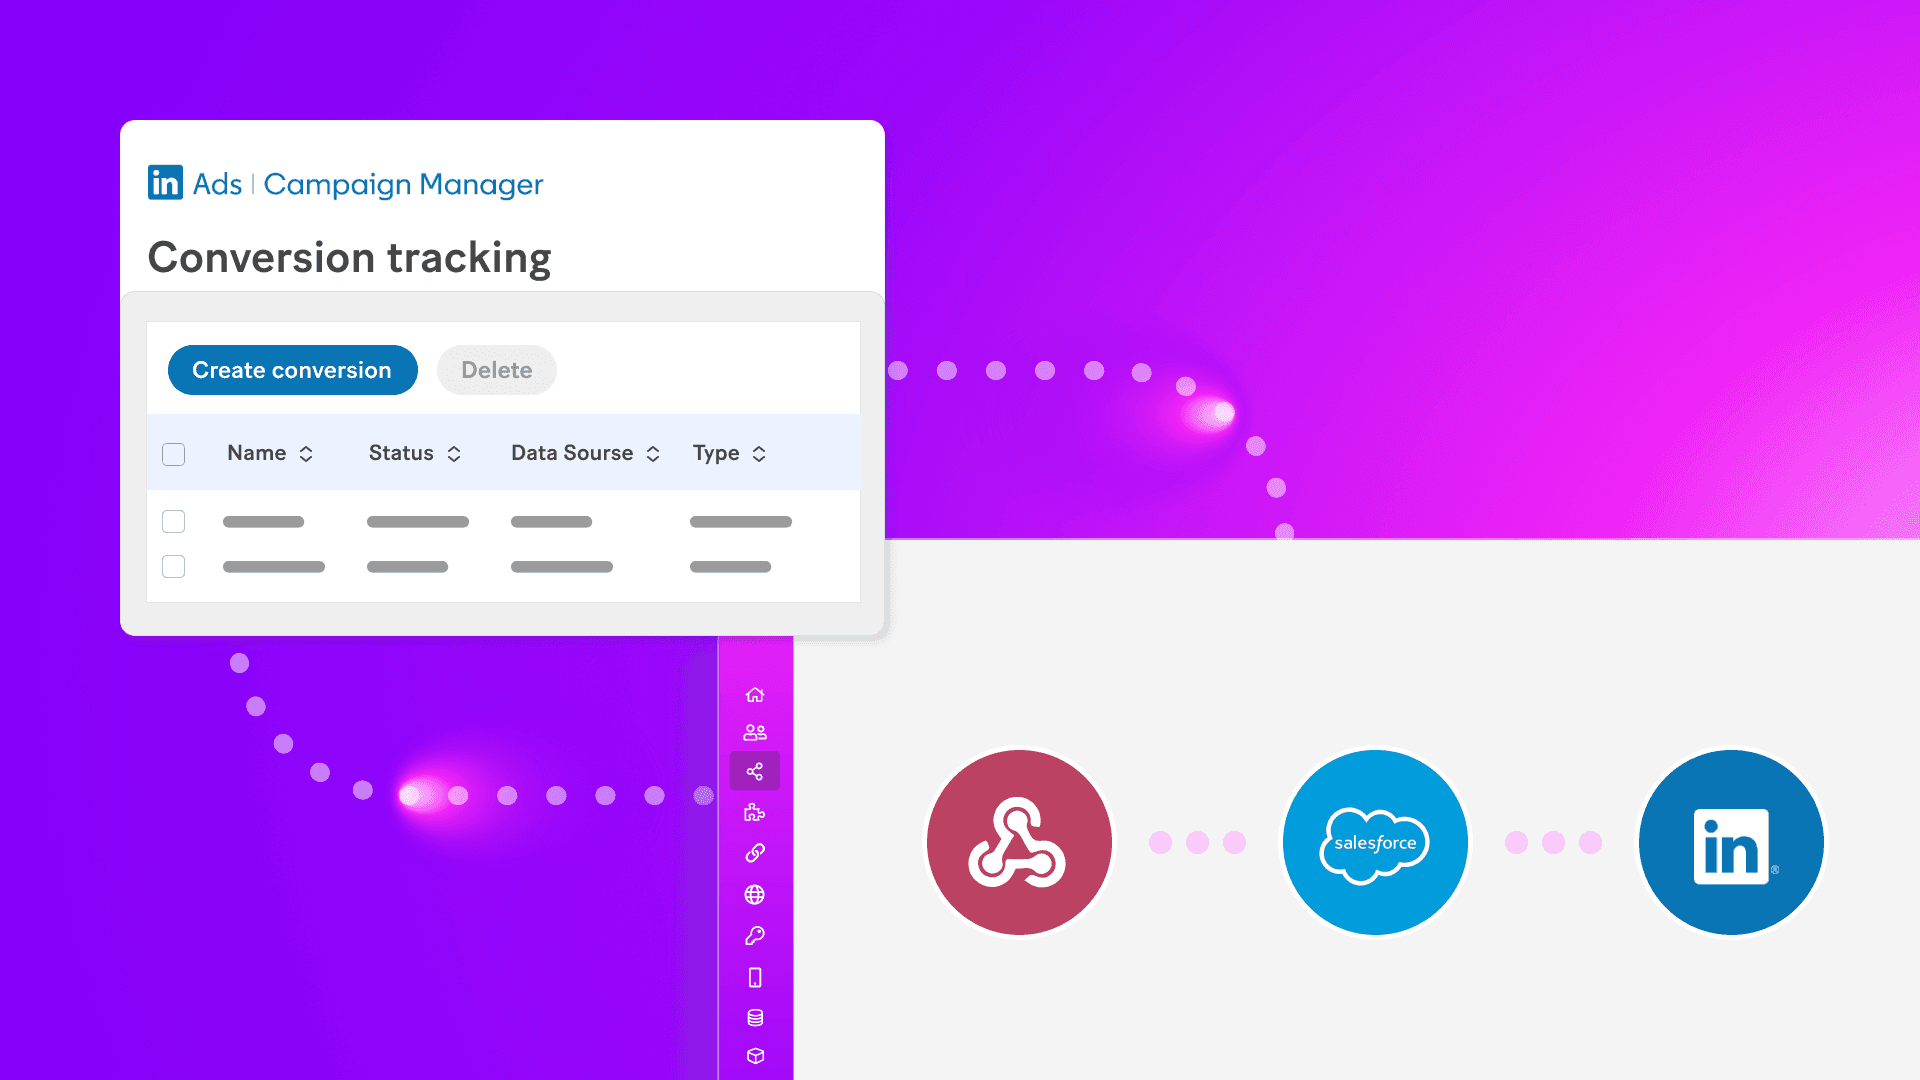
That’s where LinkedIn Conversions API (CAPI) comes in – it helps you seamlessly connect your conversion data to LinkedIn Ads Campaign Manager, helping you build a fuller picture of how your ads are driving real-world returns.
By combining the CAPI with the automation superpowers of Make, you can track data directly from offline sources like your CRM or spreadsheets — with no complicated coding needed.
You can also automatically capture more conversions from online sources, which can give you a vital advantage in the wake of increased ad blockers and cookie restrictions.
With better data, you can boost the accuracy of conversion counts in LinkedIn Ads Campaign Manager, enabling you to fine-tune targeting and budget strategies and ultimately get a better ROAS.
Ready to get started? In this blog, we’ll walk you through the steps. Watch the video below for more help.
Step 1: Create a new tracked conversion event in LinkedIn
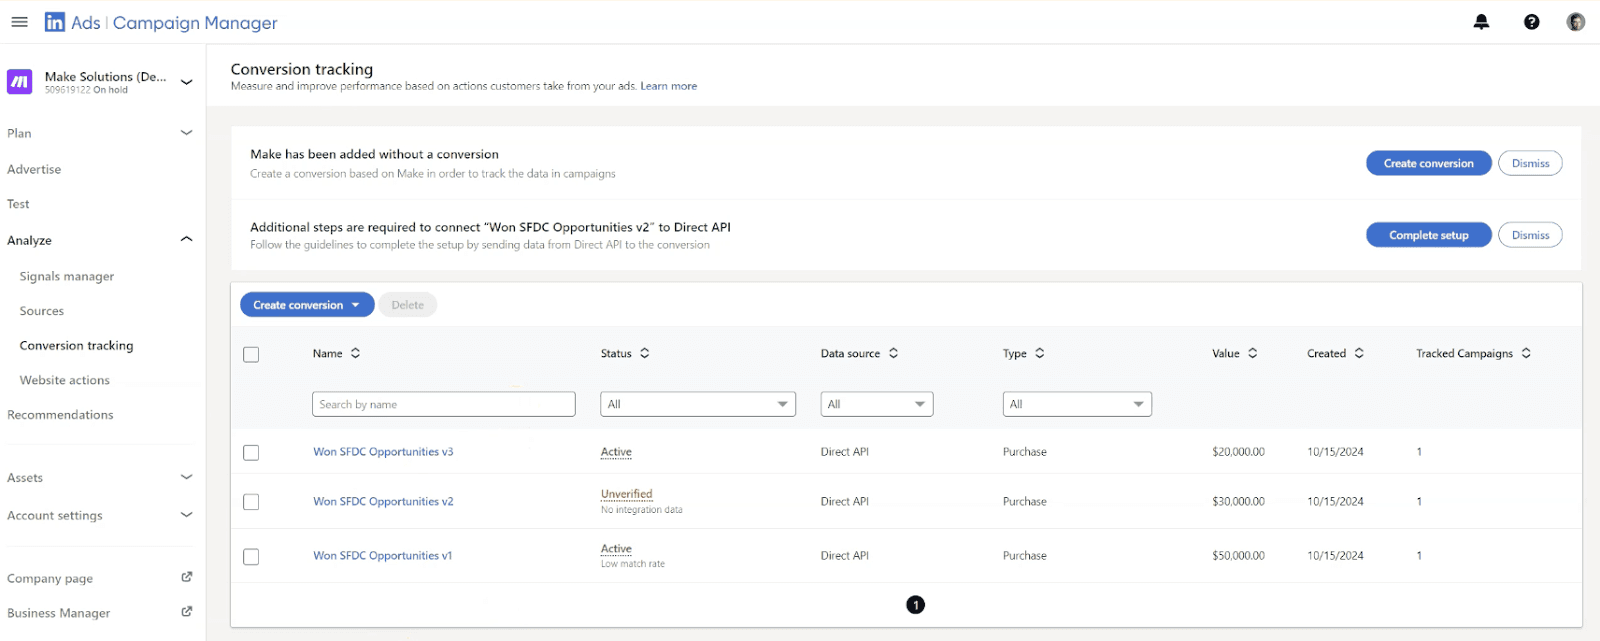
Open LinkedIn Campaign Ads Manager and from the left hand menu, head to Analyze and then click Conversion Tracking.
You should see something like this:
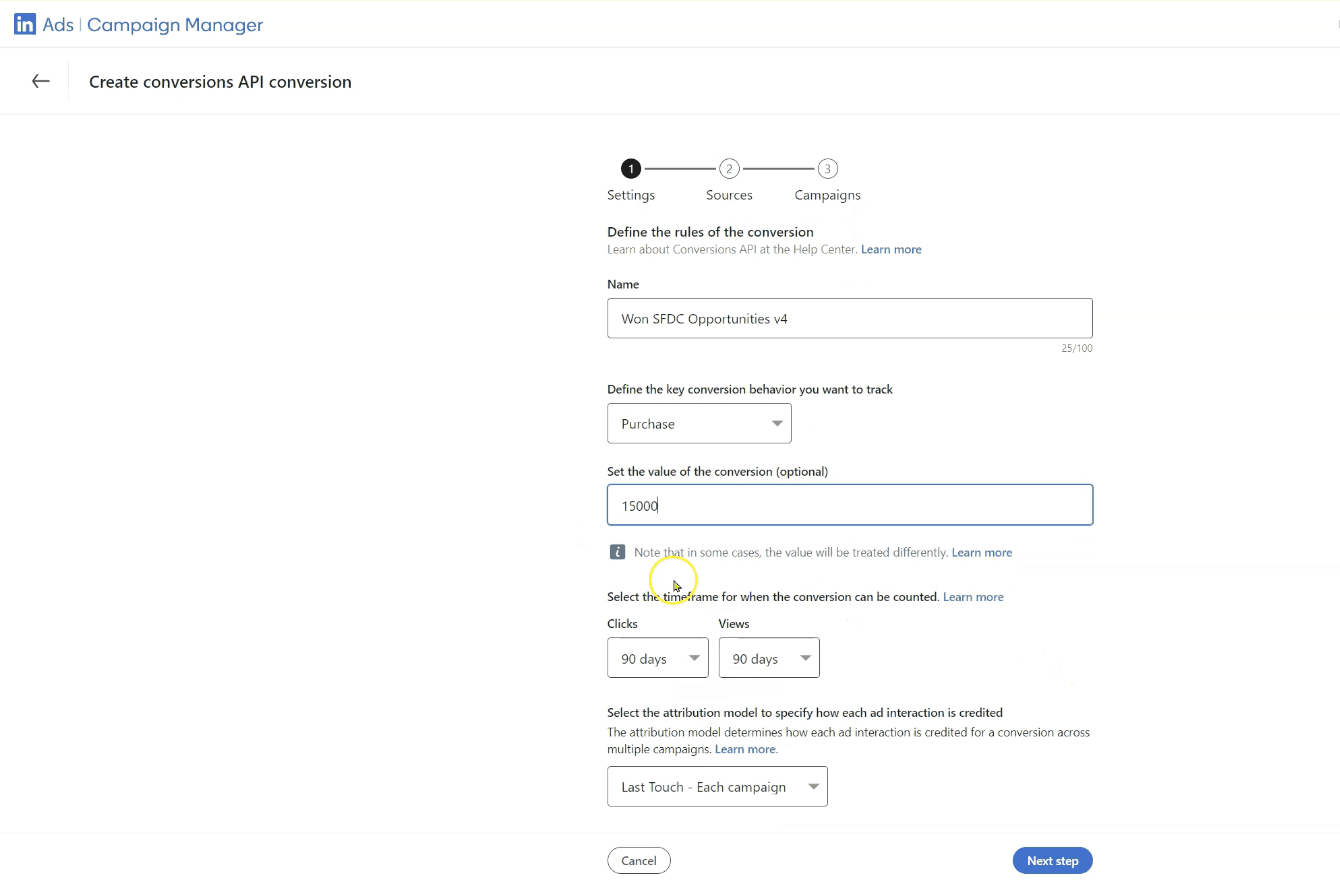
Click the blue Create Conversion button and then Conversions API from the drop-down options.
Give the conversion a name and select the type of conversion behavior you want to track. Most likely, you will want to select ‘purchase’ as the type of event — because most often when a sales opportunity is won, it means the LinkedIn user is purchasing from you.
You have the option to set the value of the conversion, which is usually the typical value of a closed deal, but this is optional.
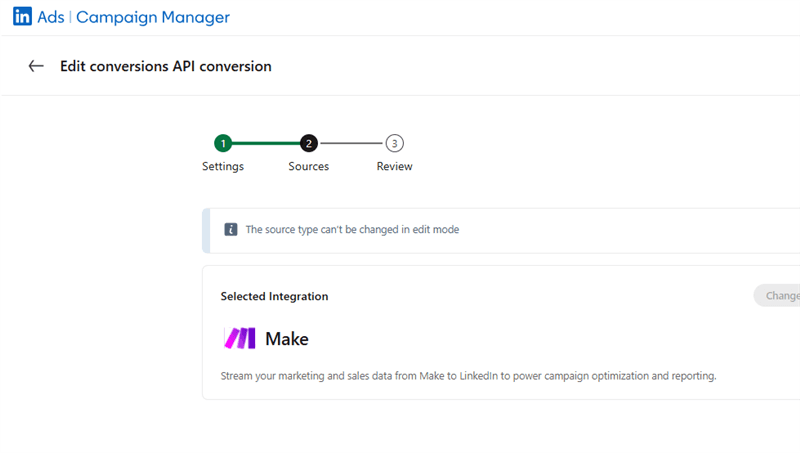
Click Next and select Make as the source.
Step 2: Get your data source ready
Note: In this guide and our video tutorial, we use Salesforce as the source for our conversion data. However, Make supports more than 130 CRMs, as well as other data sources such as Google Sheets.
We need to set up your data source to pass information on conversion events to Make.
Your automation scenario in Make will start with a webhook module to catch conversion events as they happen.
We recommend using webhooks rather than a standard watch module because watch modules run to a rigid schedule – for instance, they might watch for a conversion every hour. If a sales opportunity rapidly progresses to the ‘closed won’ stage in half an hour, the watch module may not capture it.
For webhooks to capture events as they happen, you need to set up a trigger from your data source.
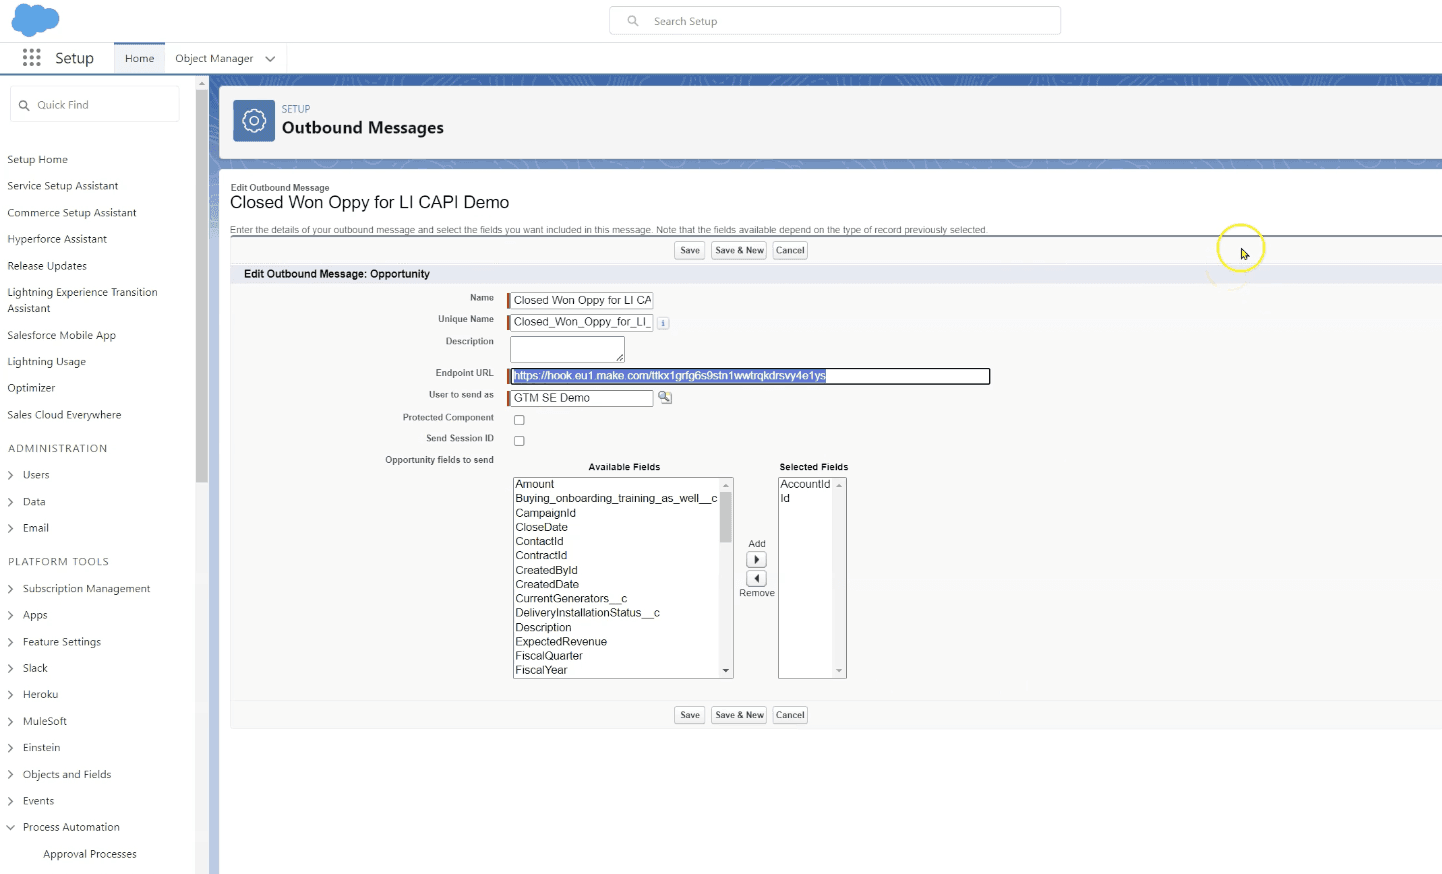
With Salesforce, we do this with Outbound Messages and Flows.
First, set up an Outbound Message that will send the ‘Account ID’ and ‘ID’ Fields from Salesforce to your webhook module. Enter the URL of your webhook in Make as the Endpoint URL.
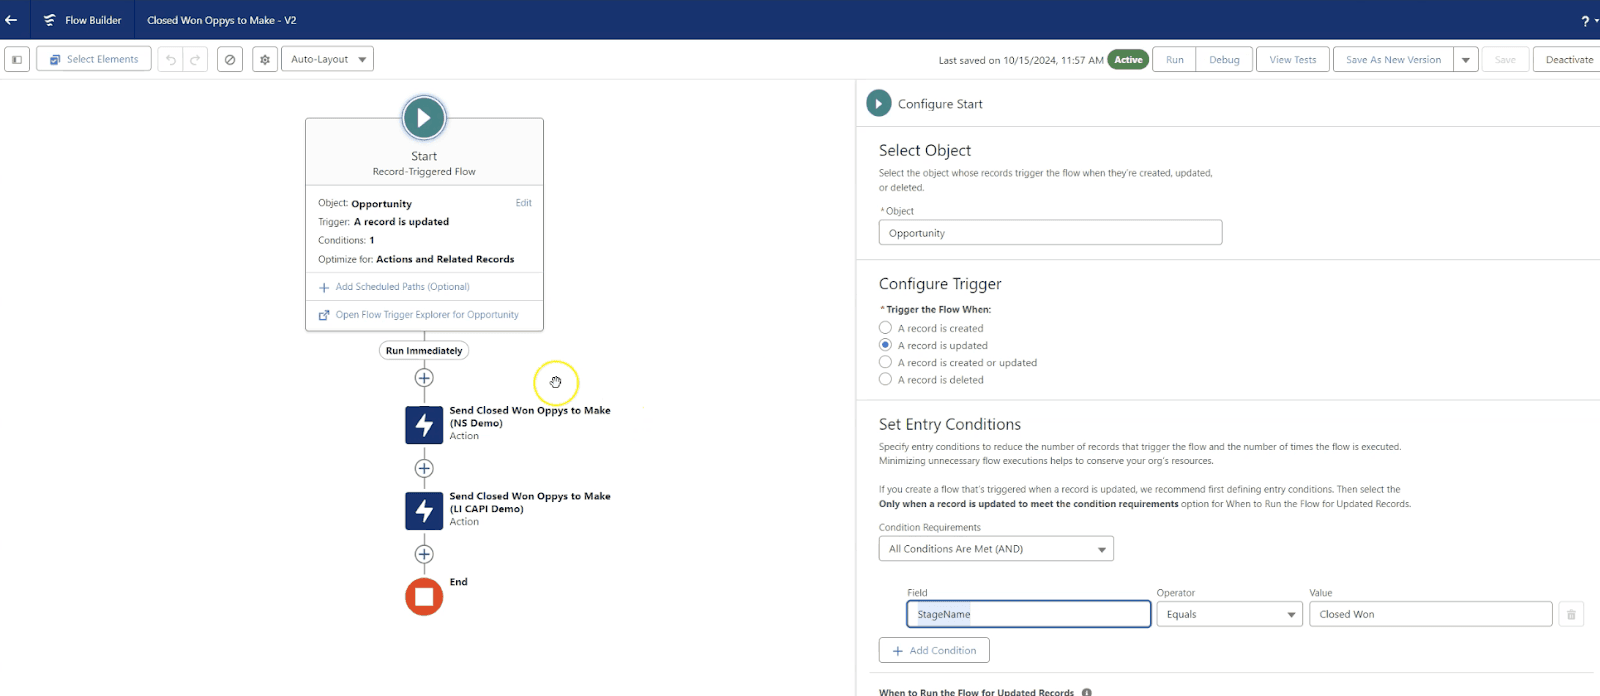
Next, you need to set up a trigger for the Outbound Message to be sent at the right time. For this we use Flows. Create a New Flow and select the Object as Opportunity. Under Configure Trigger, choose to trigger the flow when ‘a record is updated’.
Under Set Entry Conditions. enter the Field as ‘StageName’, the Operator as ‘Equals’ and the Value as ‘Closed Won’.
Note: We kept things simple in the video demo, but it is possible to track all stage change events. However, this does require advanced Make and CRM knowledge or support.
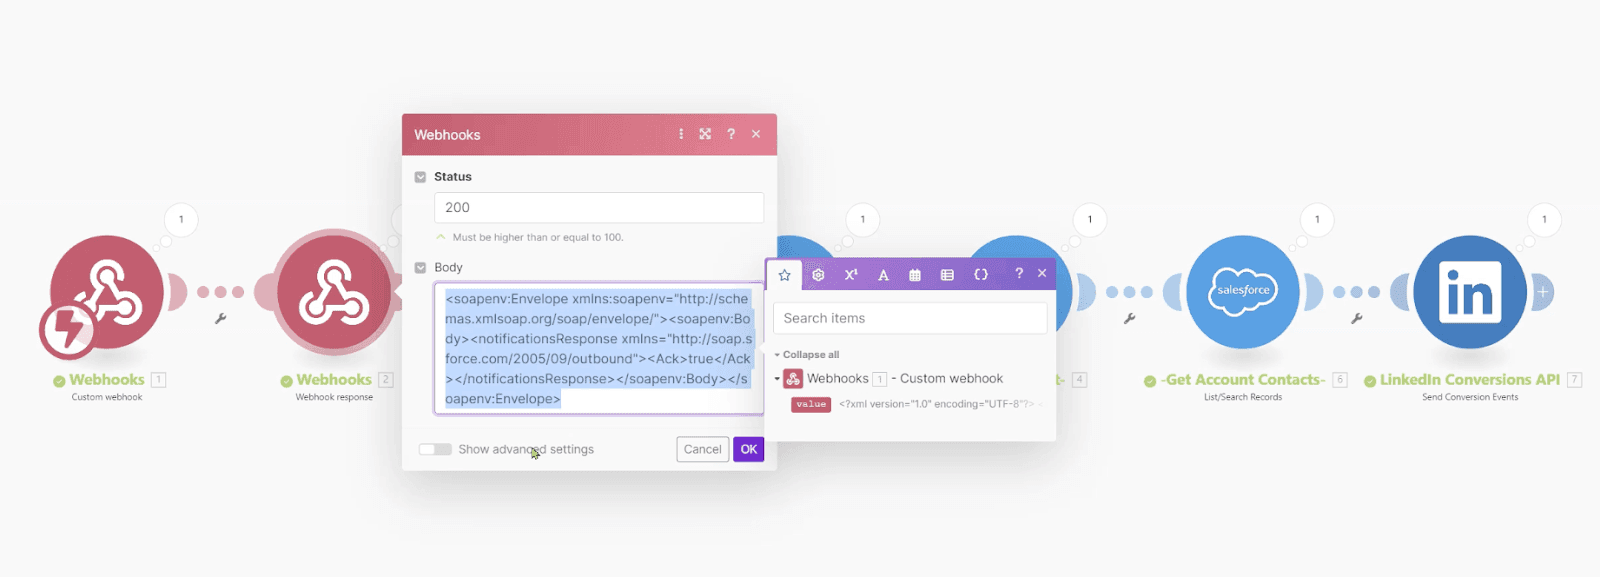
Remember to Save and Activate your Flow. From this moment on, every time an opportunity in Salesforce reaches the Closed Won stage, your Outbound Message will be fired automatically to your webhook in Make. Back in Make, you then need to add a second webhook response module to fire a message back to Salesforce to acknowledge receipt of your Outbound Messages. If you don’t do this, Salesforce will keep sending the same conversion data over and over again — so don’t skip this step.
To set up this second webhook response module, insert the below XML into the response module:
<soapenv:Envelope xmlns:soapenv="http://schemas.xmlsoap.org/soap/envelope/"><soapenv:Body><notificationsResponse xmlns="http://soap.sforce.com/2005/09/outbound"><Ack>true</Ack></notificationsResponse></soapenv:Body></soapenv:Envelope>
Then set the Status to 200 – and that's it.
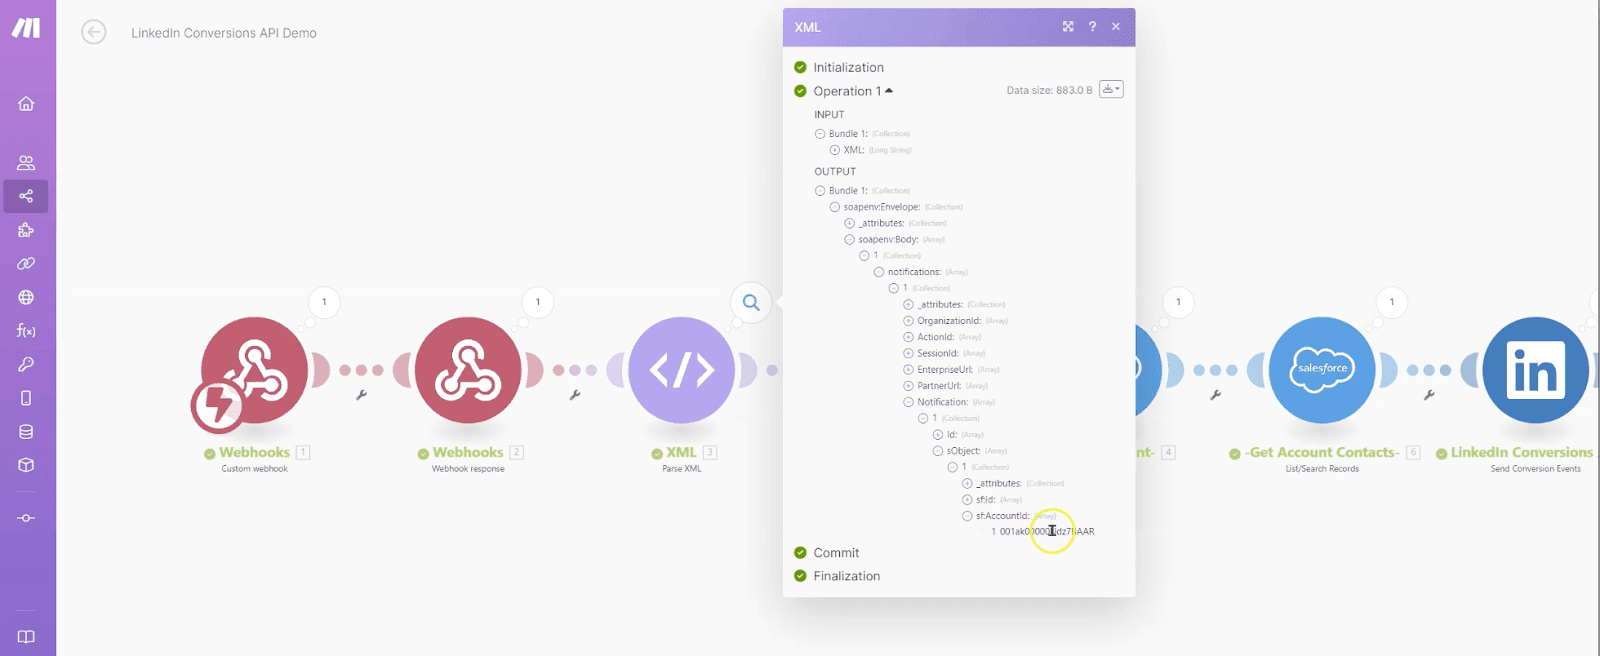
As a final stage in this step, you need to set up an XML module to parse the payload from the first webhook module.
This sounds complicated but don’t worry — ‘parsing the payload’ simply means sorting through all the data contained in the XML and picking out the parts which we need, which in this case is the Account ID and the Opportunity ID. You’ll find these by clicking through to the bottom of the list under Output.
Step 3: Configure your Make scenario
With your two webhook modules and your XML module already set up in Step 2, it’s time to finish configuring your Make scenario.
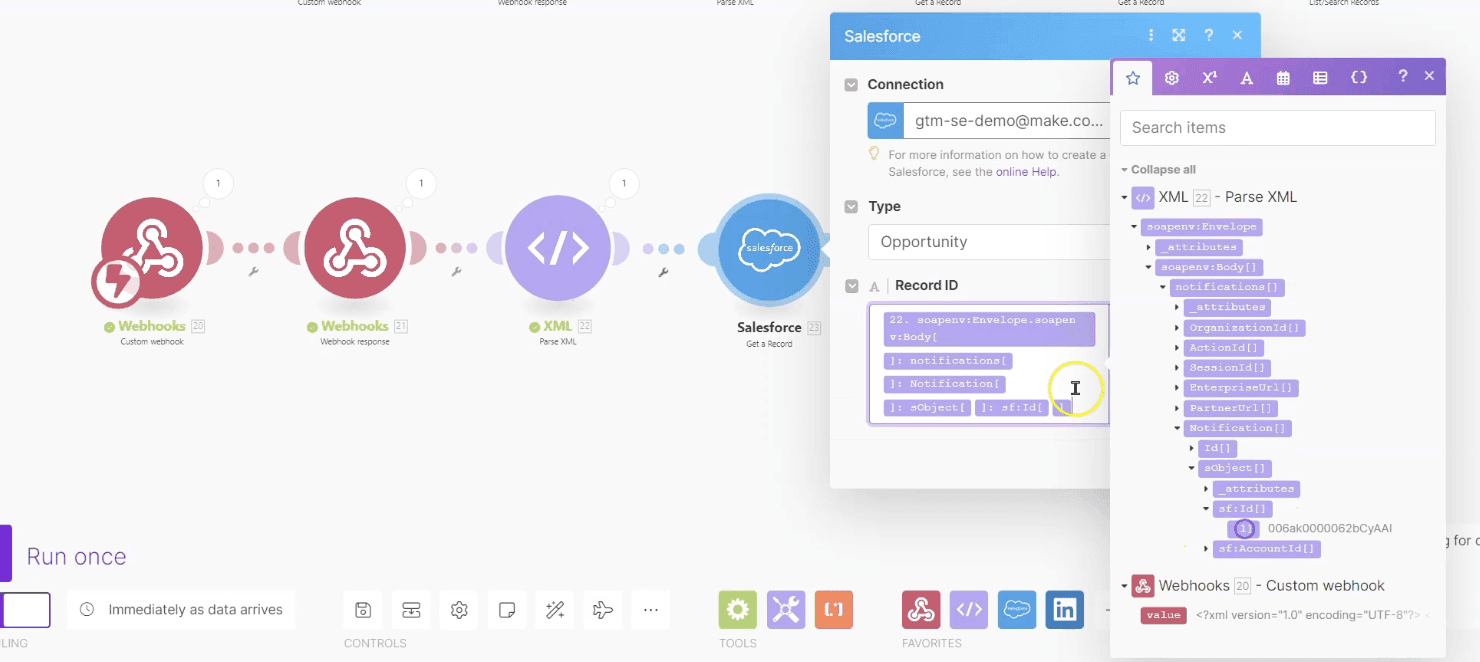
Add a Salesforce ‘Get a Record’ module and specify the type as Opportunity. You’ll also need to add the Record ID of the opportunity.
Add a second Salesforce ‘Get a Record’ module — this time to fetch the Account information, which will include the name of the contact and the company name related to the sale. It’s easiest to clone the module you just created, changing the type to Account and changing the Record ID to Account ID.
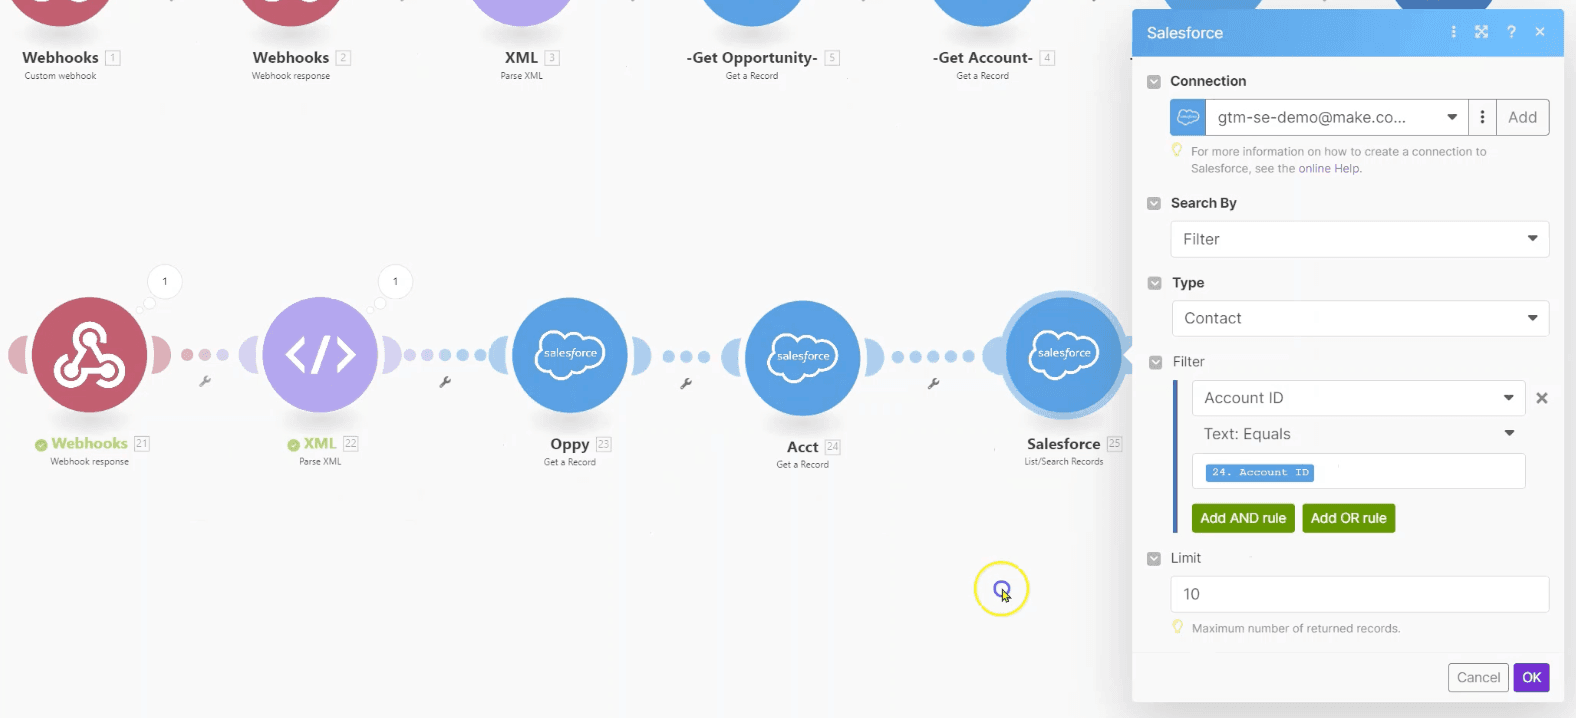
The next step is to retrieve the contacts associated with the Account. For this, add a Salesforce ‘List/Search Records’ module. Make sure you select the option that uses an SOQL query, not a SOSL query. Filter the Contact by the Account ID associated with your opportunity.
You can choose to limit the number of records returned. Think about how many people from the customer’s company that you want to attribute to the conversion event. We suggest a limit of 10, but it could be just one or two.
As a final step, add a LinkedIn Conversions API module to ‘Send Conversion Events’.
If you want to limit the people attributed to the conversion event to only the CEO or CFO or VP of Engineering, it’s possible to add a filter before this module.
Next we need to configure your LinkedIn Conversions API module. If you haven’t used it before, you’ll need to authorize access to your LinkedIn account.
Click Add Event and choose the Conversion Rule that you set up earlier from the dropdown menu and enter that the conversion happened ‘now’.
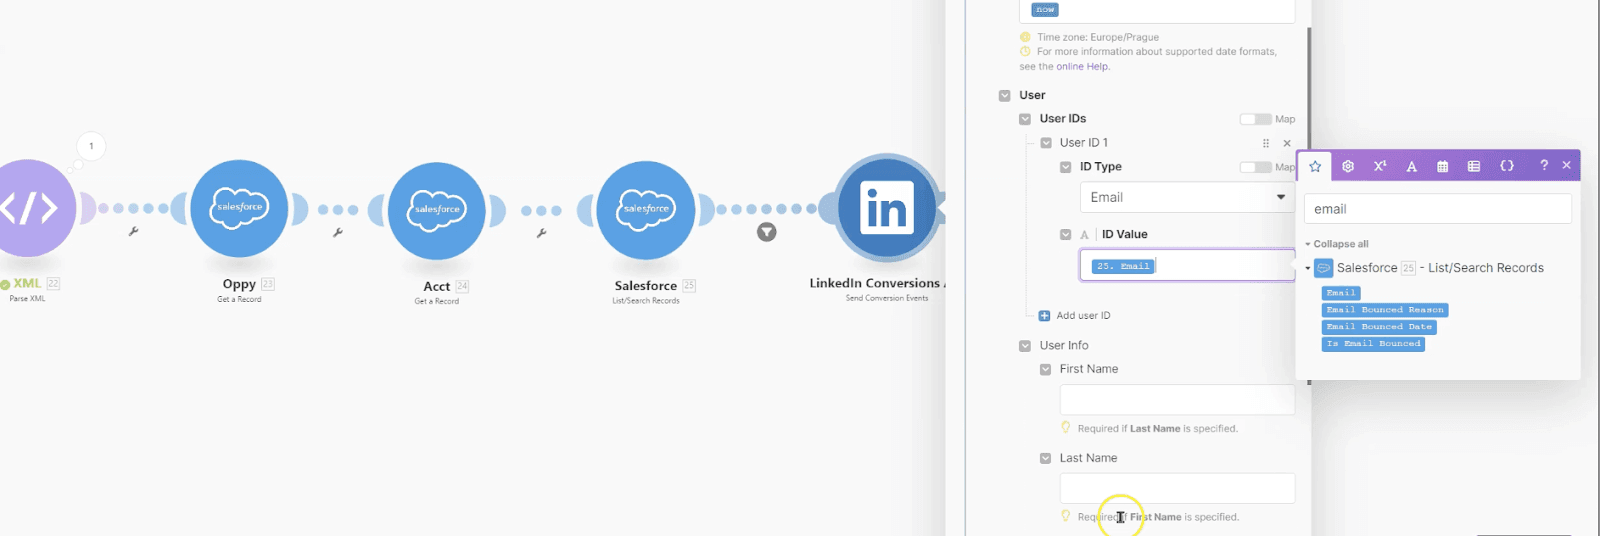
Then enter the user ID Type as Email.
The ID Value needs to be the email of the contact linked with the sale in Salesforce. Type email in the search box and select Email from the List/Search Records module when it pops up.
You can also add the First Name, Last Name and Company Name (or Account Name).
Step 4. Test!
It’s time to check your scenario is running as it should. To run a test, simply change the status of a lead in Salesforce.
Next, head to your scenario in Make and click on the LinkedIn Conversions API module. If the status of your Output is 201, your automation has been completed successfully.
You are now automatically transferring your conversion data from your CRM to LinkedIn, making it easy to tweak your strategy based on accurate conversion data and maximize your ROAS.
Start doing more with LinkedIn today
By combining the no-code automation power of Make with LinkedIn Conversions API, it’s easy to track and boost your results from LinkedIn paid marketing.

