Salesforce
With Salesforce modules in Make you can broadcast messages, create and modify records and jobs, and make API calls from your Salesforce account.
To use Salesforce modules, you must have a Salesforce account. If you do not have one, you can create one at salesforce.com.
Refer to the Salesforce API documentation for a list of available endpoints.
Connect Salesforce to Make
Note: Not all editions of Salesforce have API access. See here for more information.
To establish the connection in Make:
Log in to your Make account, add a Salesforce module to your scenario, and click Create a connection.
Optional: In the Connection name field, enter a name for the connection.
Select if you are using a Salesforce Sandbox environment and click Save.
Optional: Click Show advanced settings and enter your custom app client credentials.
You have successfully established the connection. You can now edit your scenario and add more Salesforce modules. If your connection needs reauthorization at any point, follow the connection renewal steps here.
Create a custom application in Salesforce
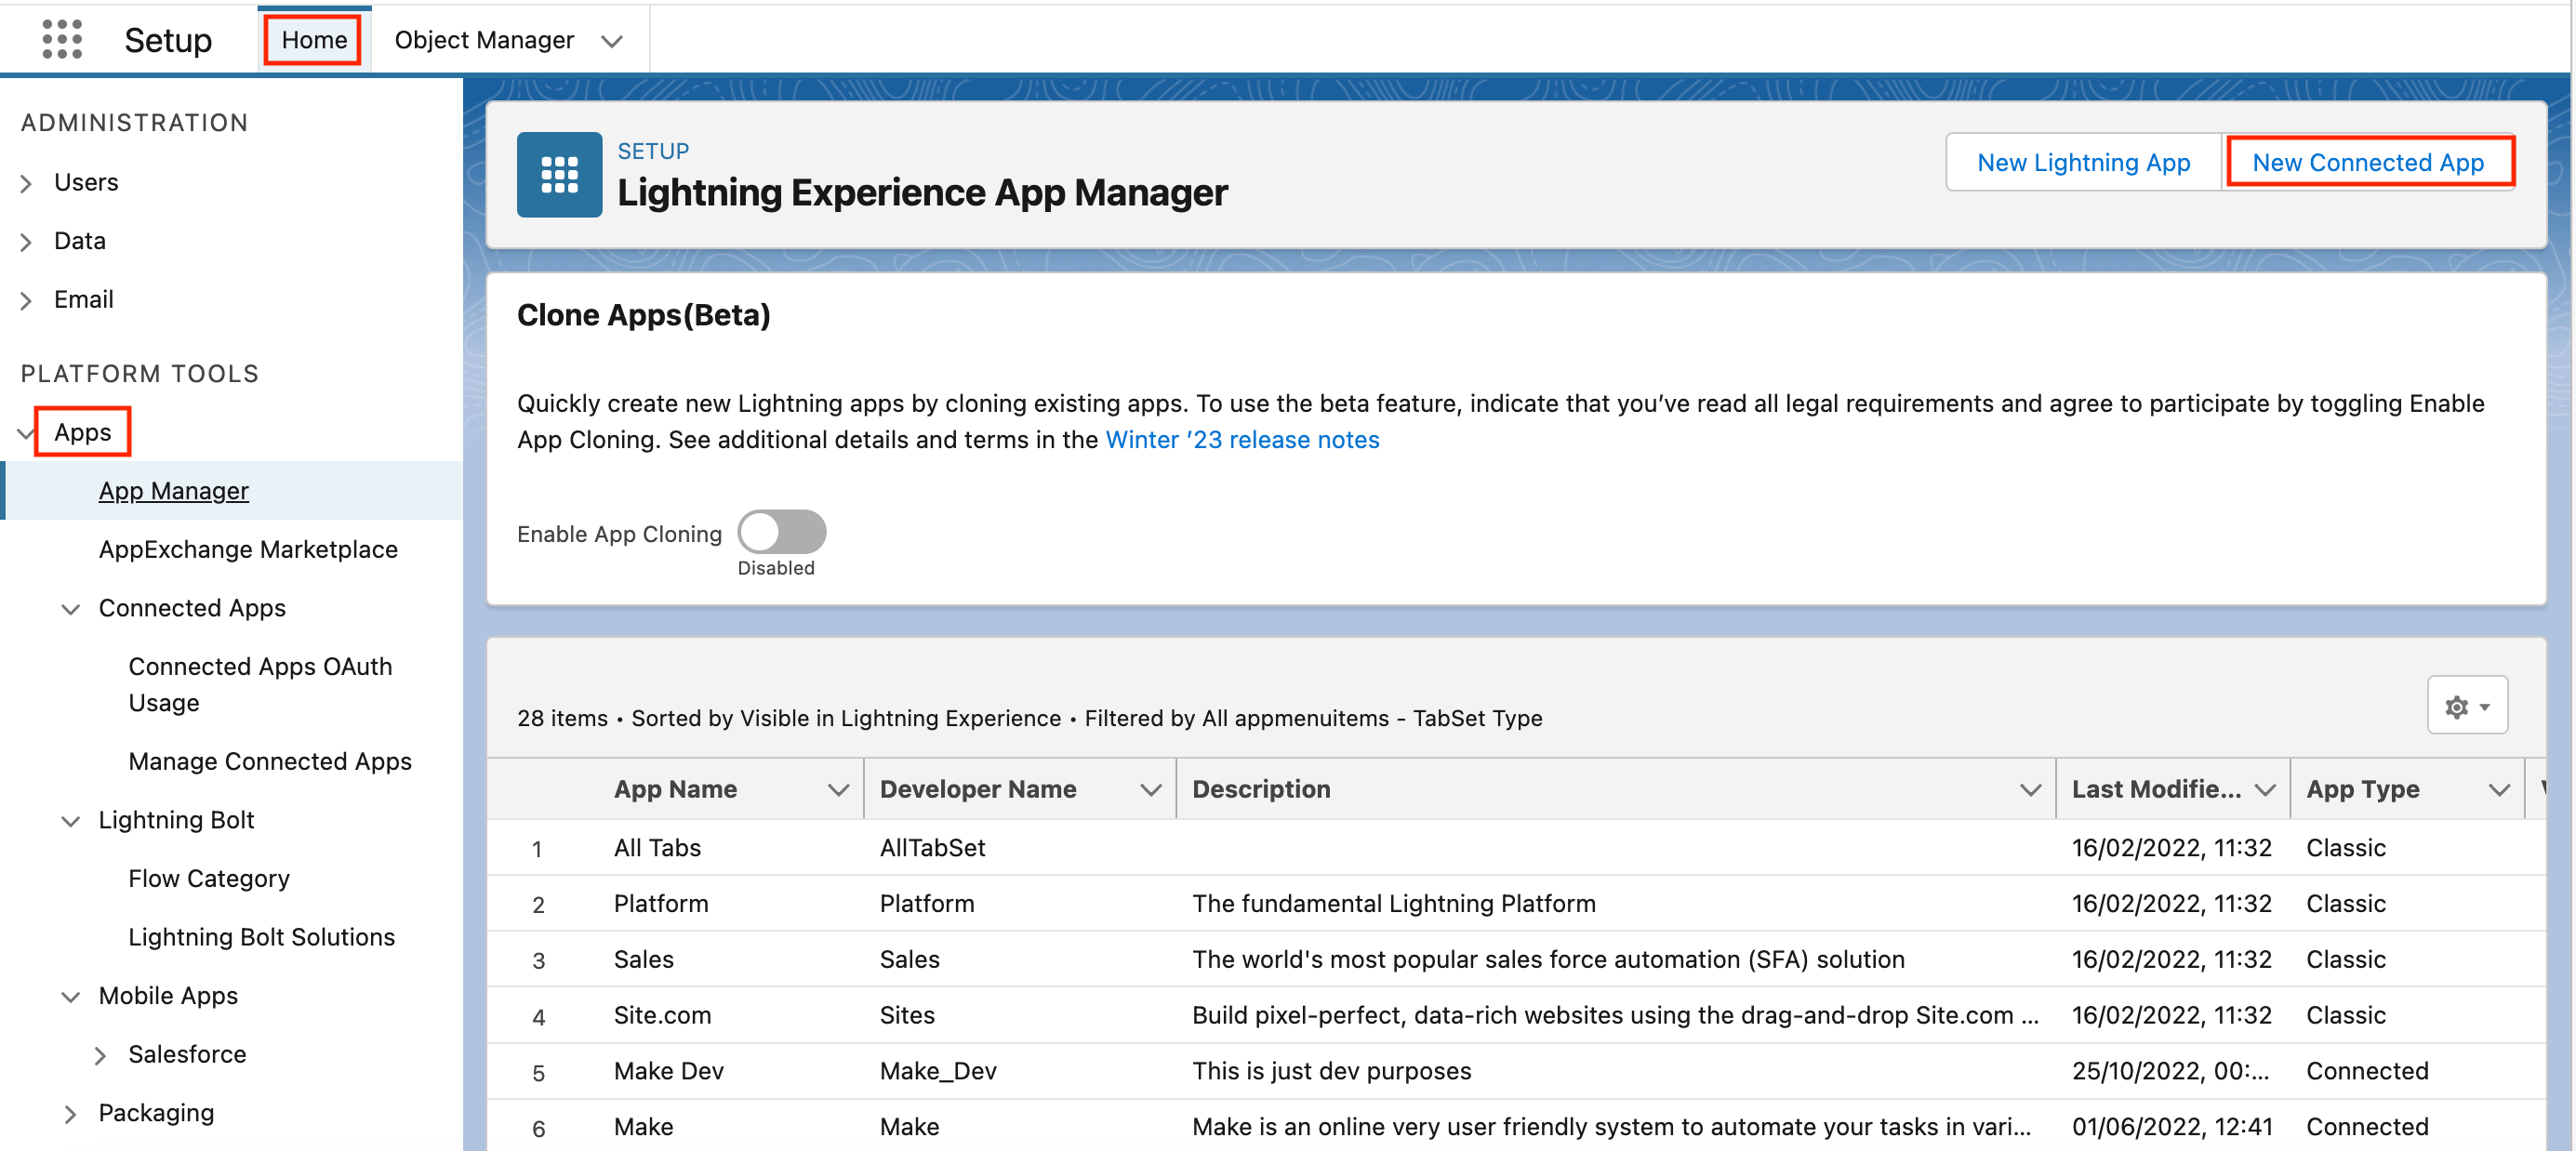
Log in to your Salesforce account.
Click Home and then in the left sidebar click Apps > App Manager.
In the upper right, click New Connected App.
On the New Connected App page, under Basic Information, fill in the mandatory fields:
Connected App Name
API Name
Contact Email
Under API (Enable OAuth Settings), click Enable OAuth Settings. Enter the following application details:
Callback URL
https://www.integromat.com/oauth/cb/salesforce/Selected OAuth Scopes
Choose the scopes you need and click Add.
Note: You will, at minimum, need the following scopes enabled:
Manage user data via APIs (api)
Perform requests at any time (refresh_token, offline_access)
Require Proof Key for Code Exchange (PKCE) Extension for Supported Authorization Flows
Must be OFF
Require Secret for Web Server Flow
Optional, but ON is more secure
Require Secret for Refresh Token Flow
Optional, but ON is more secure
Enable Client Credentials Flow
Optional, but OFF is more secure
Enable Authorization Code and Credentials Flow
Required
Require user credentials in the POST body for Authorization Code and Credentials Flow
Optional, but ON is more secure
Issue JSON Web Token (JWT)-based access tokens for named users
Optional
Click Save and then Continue.
On the Manage Connected Apps page that is displayed for your new app, under the API (Enable OAuth Settings) section, click Manage Consumer Details.
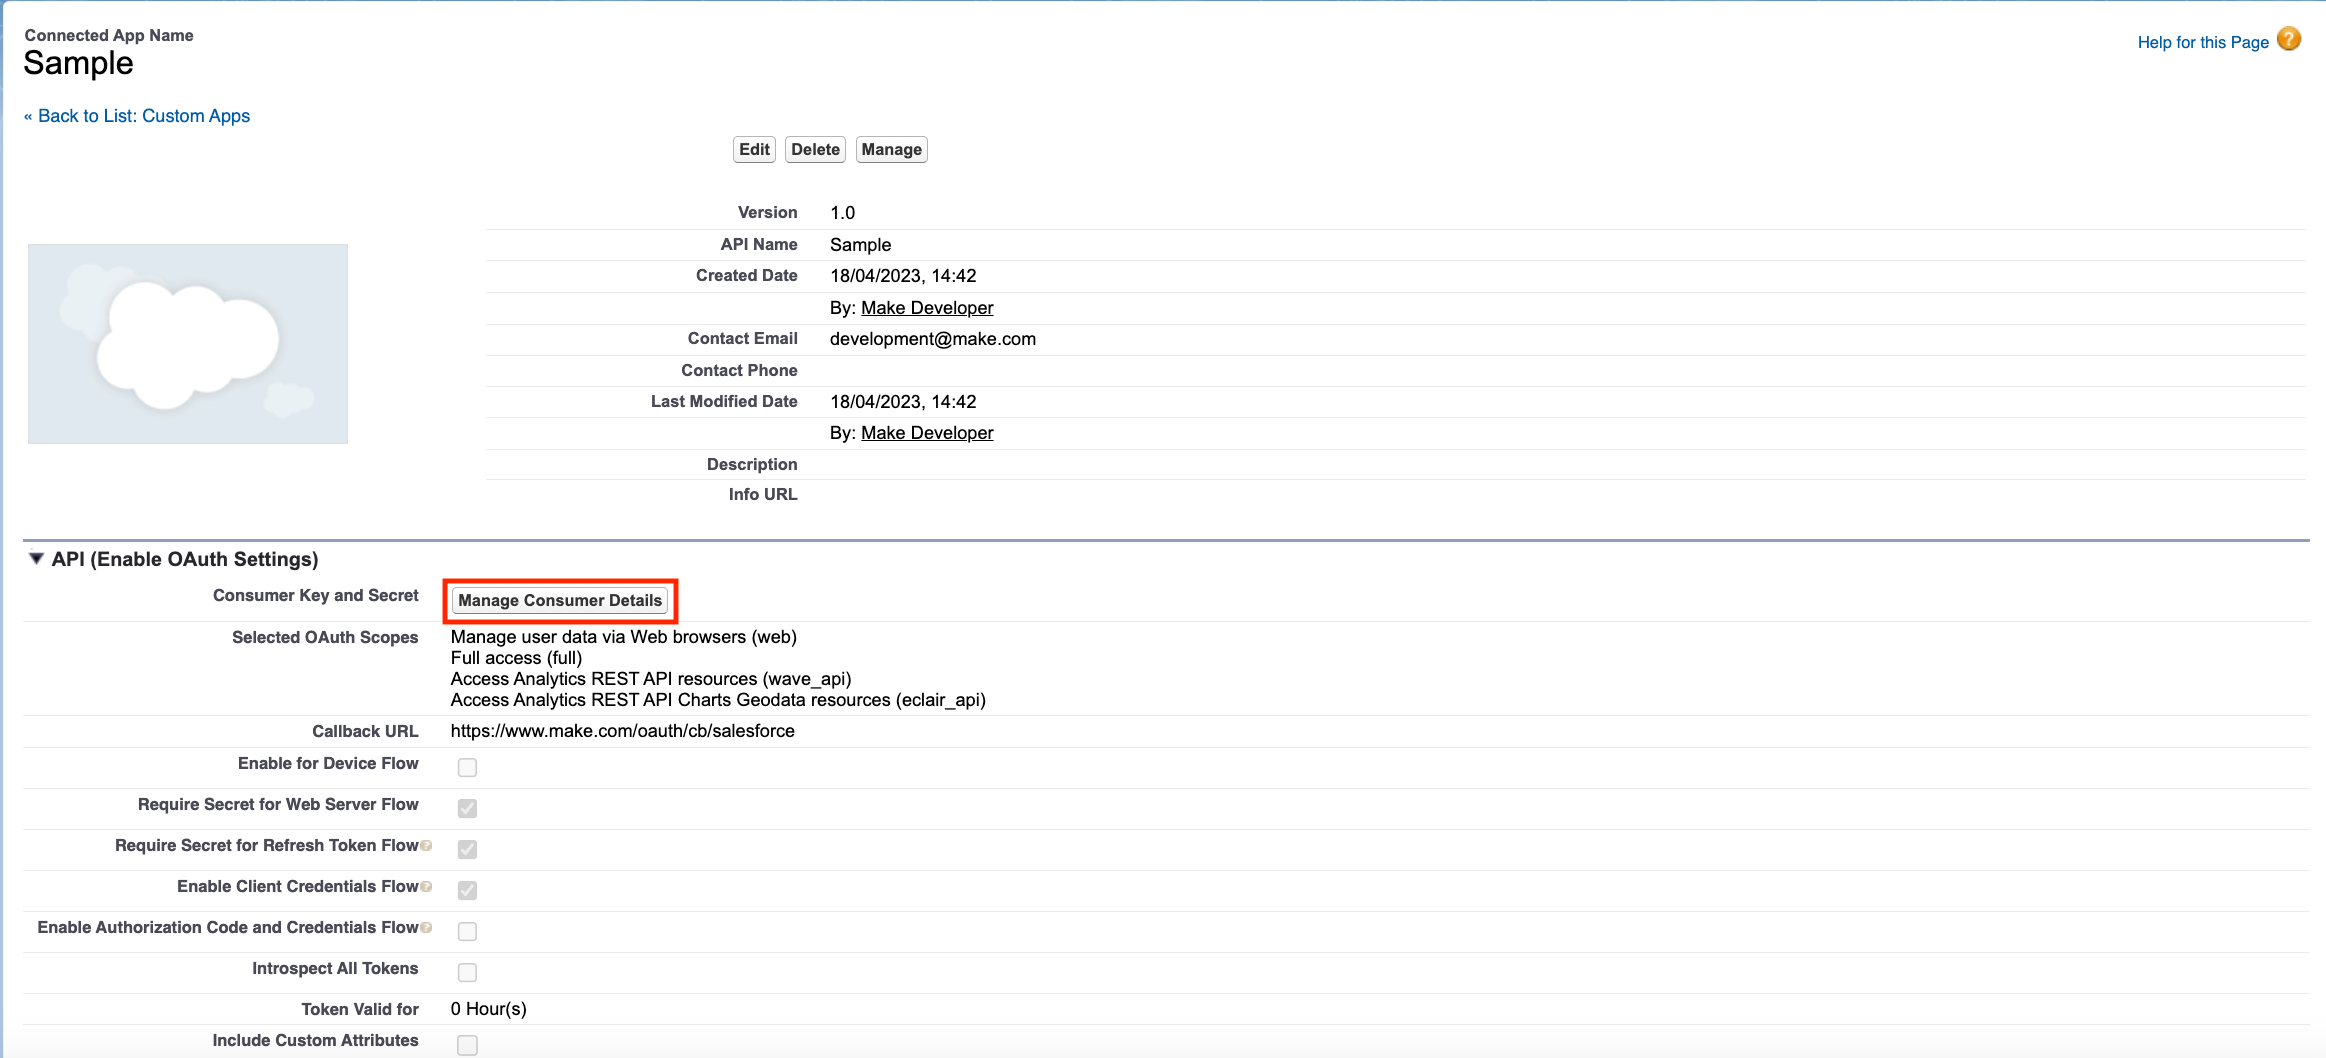
Copy your Consumer key and Consumer Secret values and store them in a safe place.
You will use these values in the <Consumer Key > and <Consumer Secret > fields in Make when connecting using advanced settings.
Build Salesforce Scenarios
After connecting the app, you can perform the following actions:
Watch Records
Watch Record Fields
Search Records
List/Search Records
Get a Record
Create a Record
Update a Record
Upsert a Record
Delete a Record
Watch Jobs
List Jobs
Create a Job
Complete/Abort a Job
Note: If you complete a job, Salesforce queues the job, uploads data for processing, and you can’t add any more job data. If you abort a job, the job does not get queued or processed.
Make an API Call
For the URL, enter a path relative to
<Instance URL>/services/data. For example:/v51.0/query. Refer to the Salesforce API documentation for a list of available endpoints.Post a Message to a Chatter Feed
Download an Attachment Document