Dynamic connections
A dynamic connection is a variable that contains a connection.
Imagine that you have a scenario that automatically sends emails to multiple email addresses. Your team doesn't have a team email so you want your colleagues to use their work emails when they run the scenario:
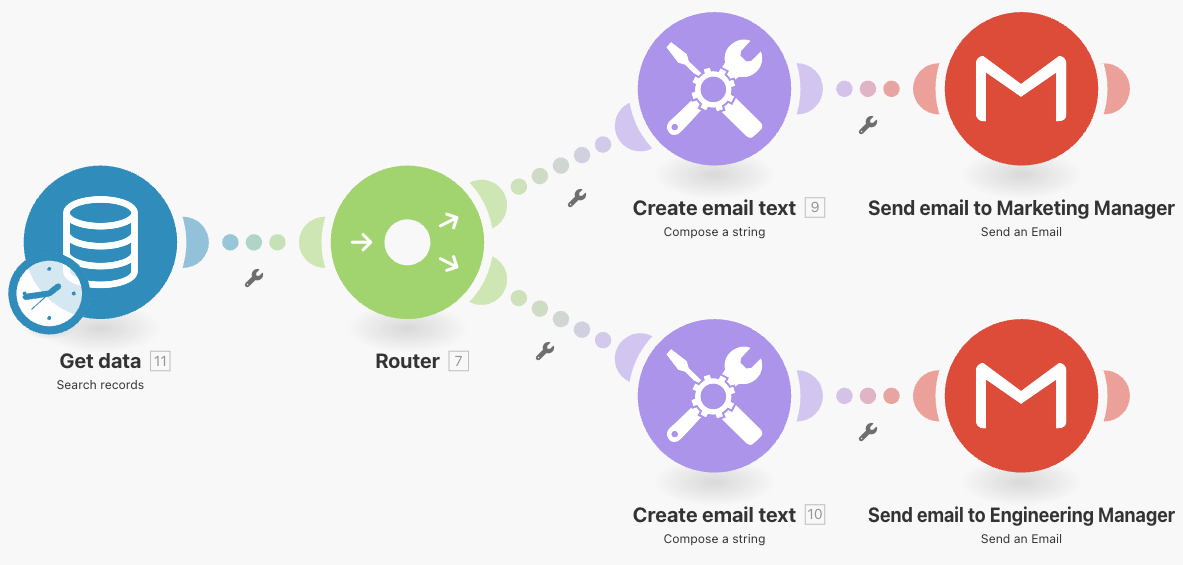
You can set a dynamic connection in both Gmail modules. That way, your teammates can use their own Gmail connections to send the emails when they run the scenario.
Note
Dynamic connections are available to the Enterprise plan users only.
Creating a scenario with a dynamic connection
Almost every module requires a connection to work properly. To create a scenario with a dynamic connection, you have to assign a connection to build the scenario. Make calls the initial connection as the "build-time value."
When you finish the scenario, you can assign a different connection to the dynamic connection anytime.
Go to your scenario and select an app module.
Click the
 button, and then click Create a dynamic connection.
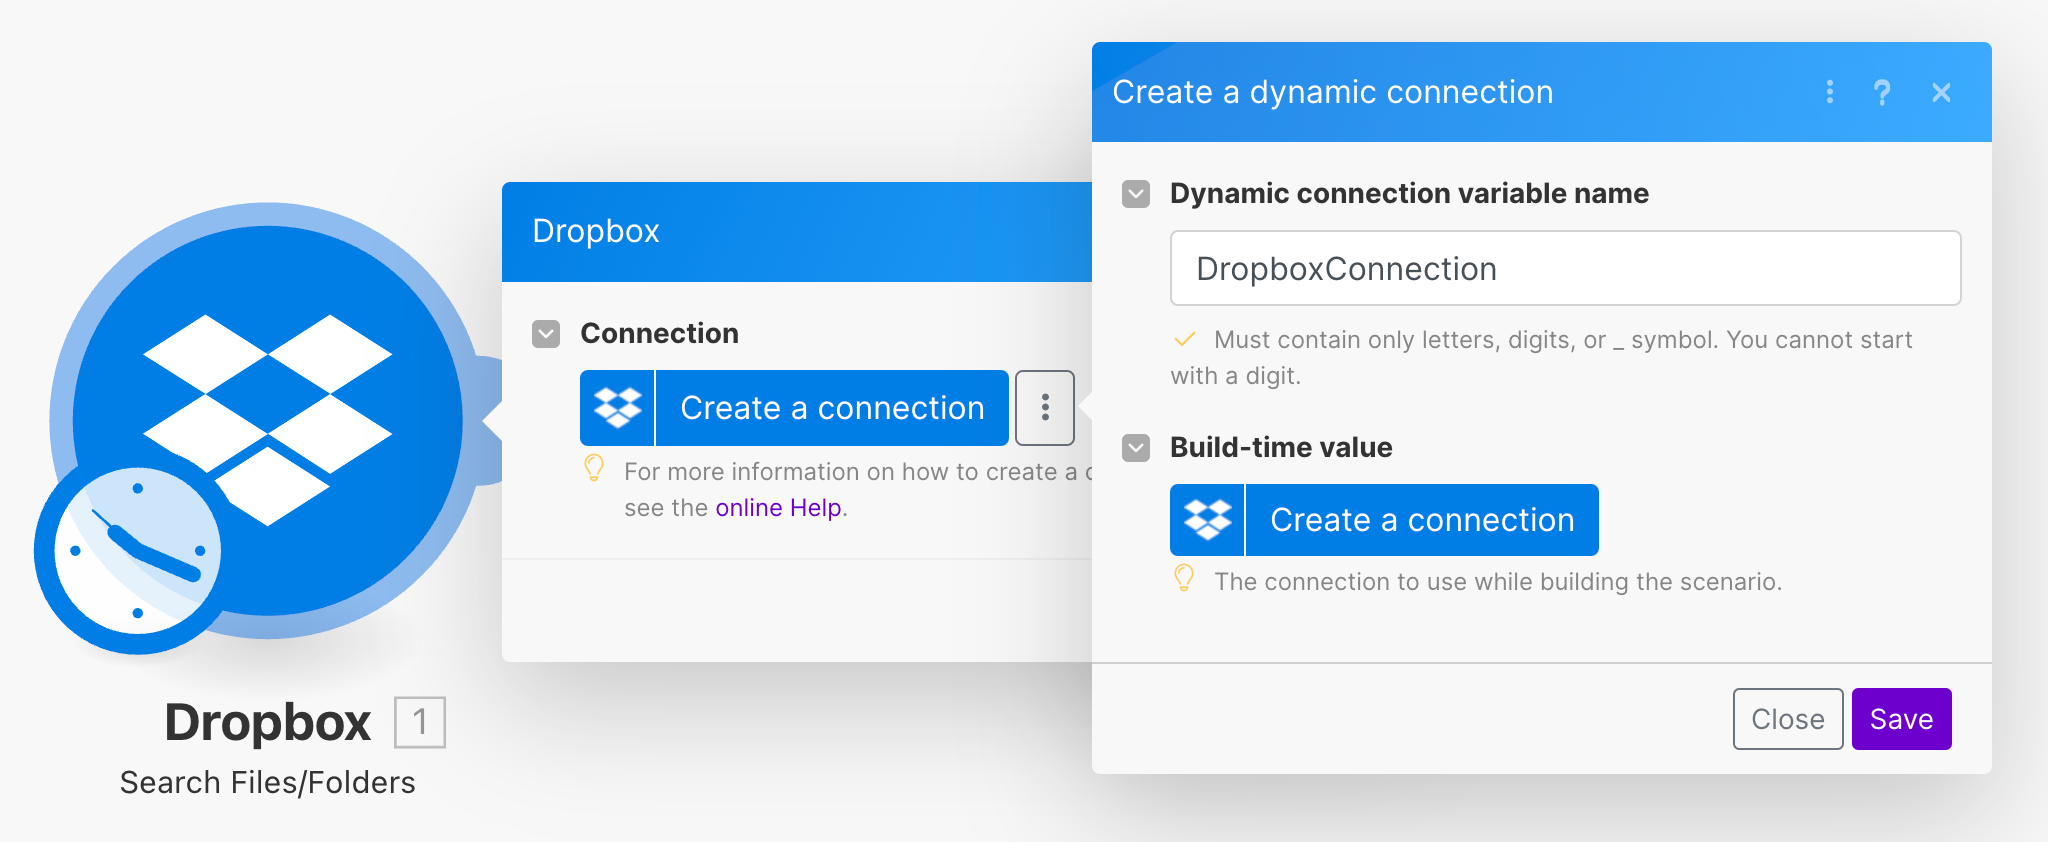
In the Dynamic connection name field, type the name of the connection.
Set the Build-time value for the dynamic connection:
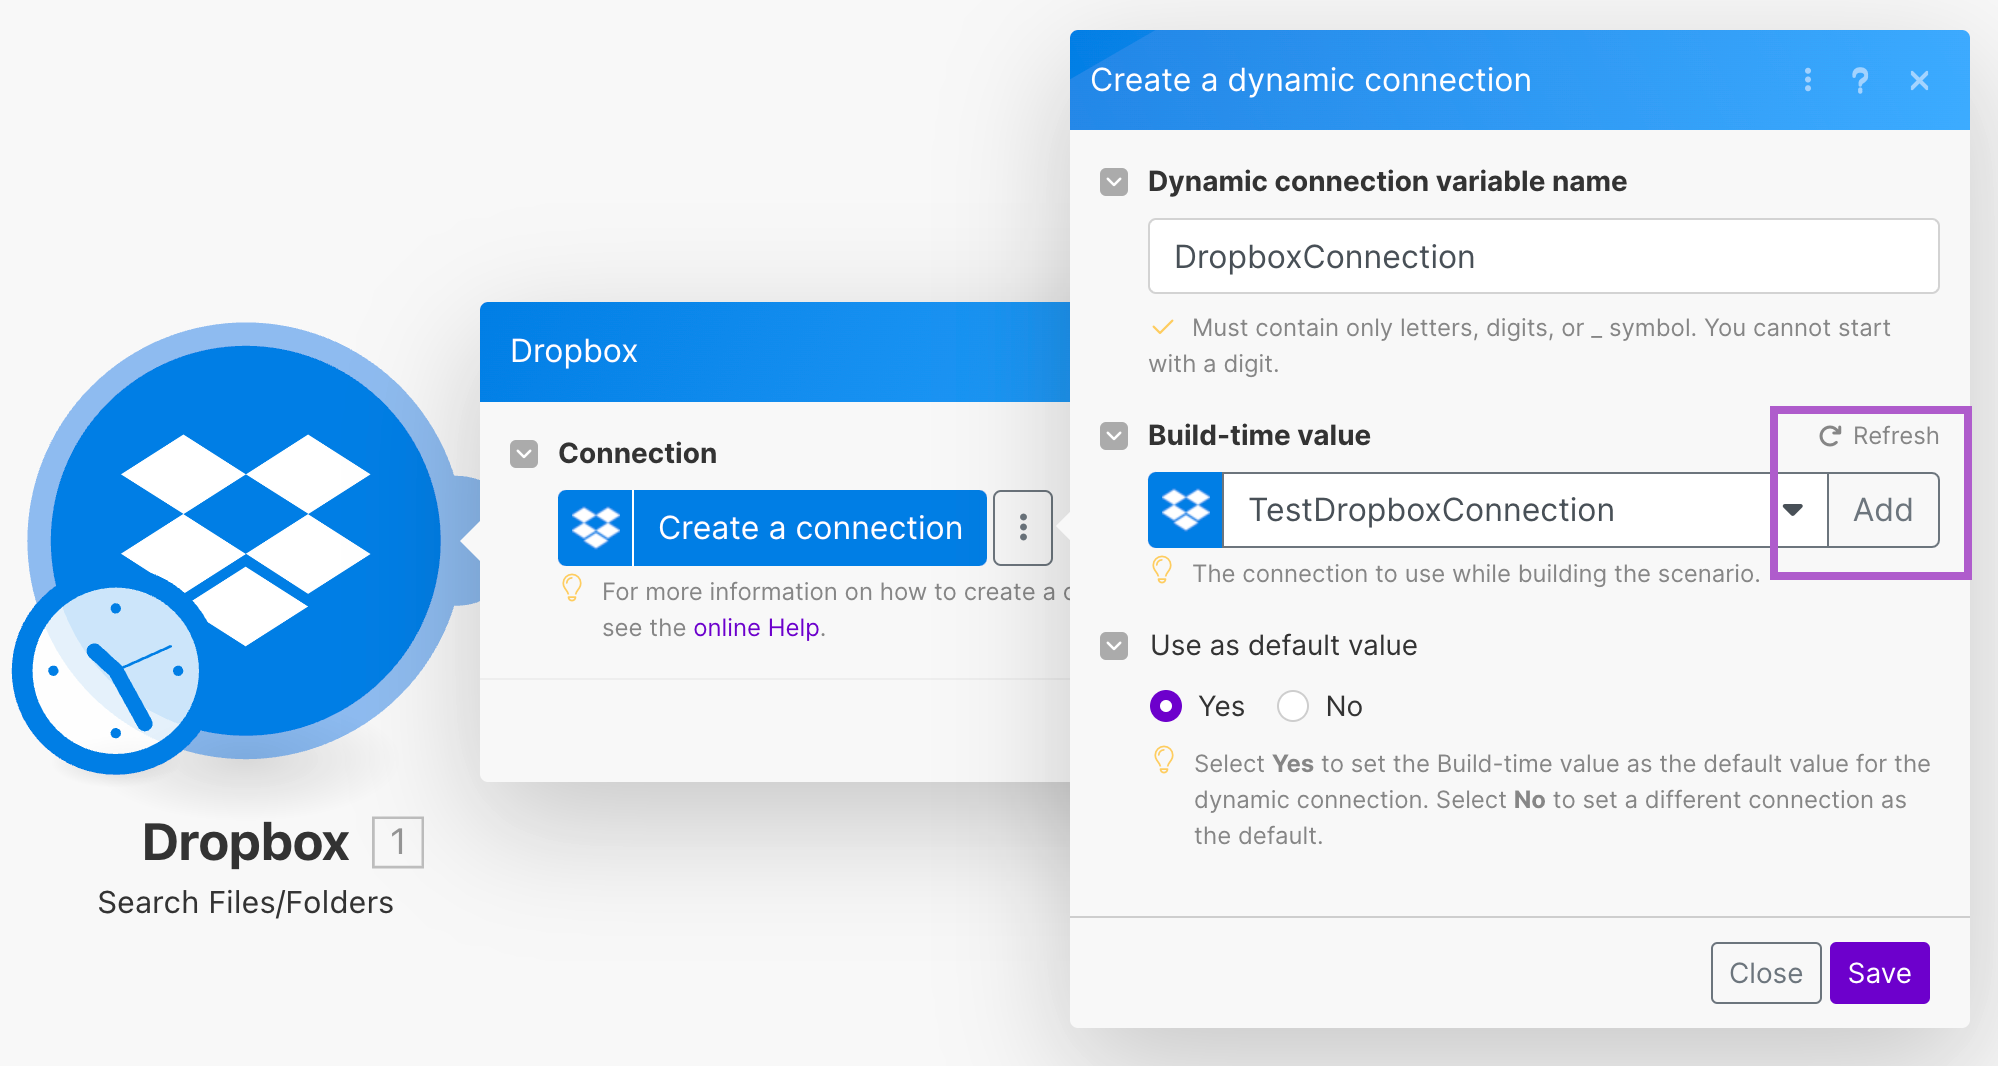
In the Build-time value, choose a connection to use when building the scenario or click Add to create a new connection.
In the Connection name field, enter a name for the connection.

Click Save. Dropbox prompts you to grant Make access to your data.
Grant Make access to your Dropbox account.
Click Save.
You have set the build-time value for the dynamic connection. You can see the connection in the Build-time value field.
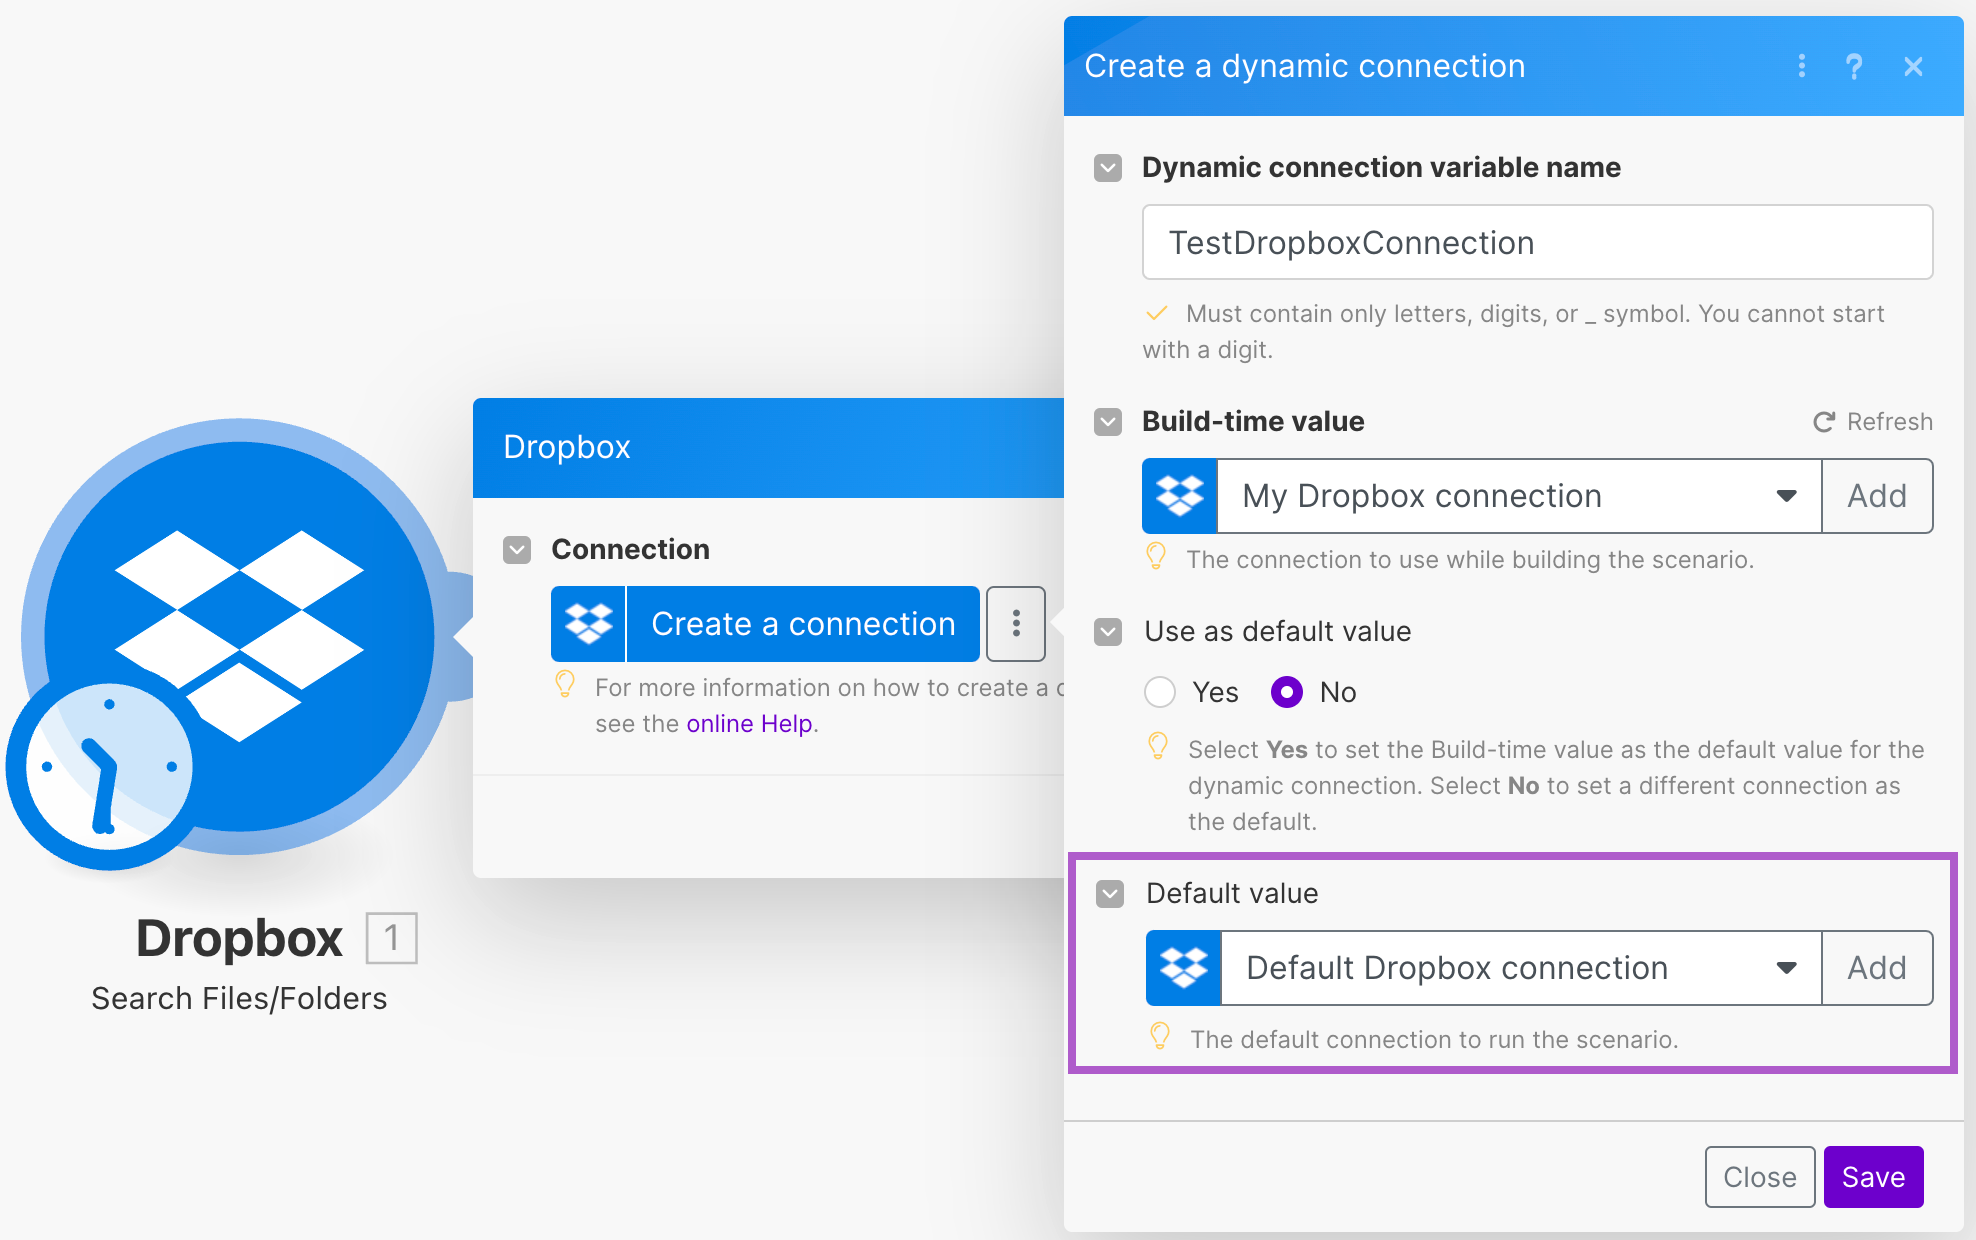
Select whether you want to use the build-time connection as the default or not. Make uses the default value to run the scenario. You can select a different connection when you run the scenario on-demand.
(Optional): You can select the dynamic connection default value in the Default value selection box or create a new connection with the Add button.
Note
If you don't provide a default for the dynamic connection, you can schedule the scenario to On-demand only.
Click Save.
You created a dynamic connection. Now you can continue configuring the module.
Tip
You can set the default for the dynamic connection in the scenario inputs interface as well:
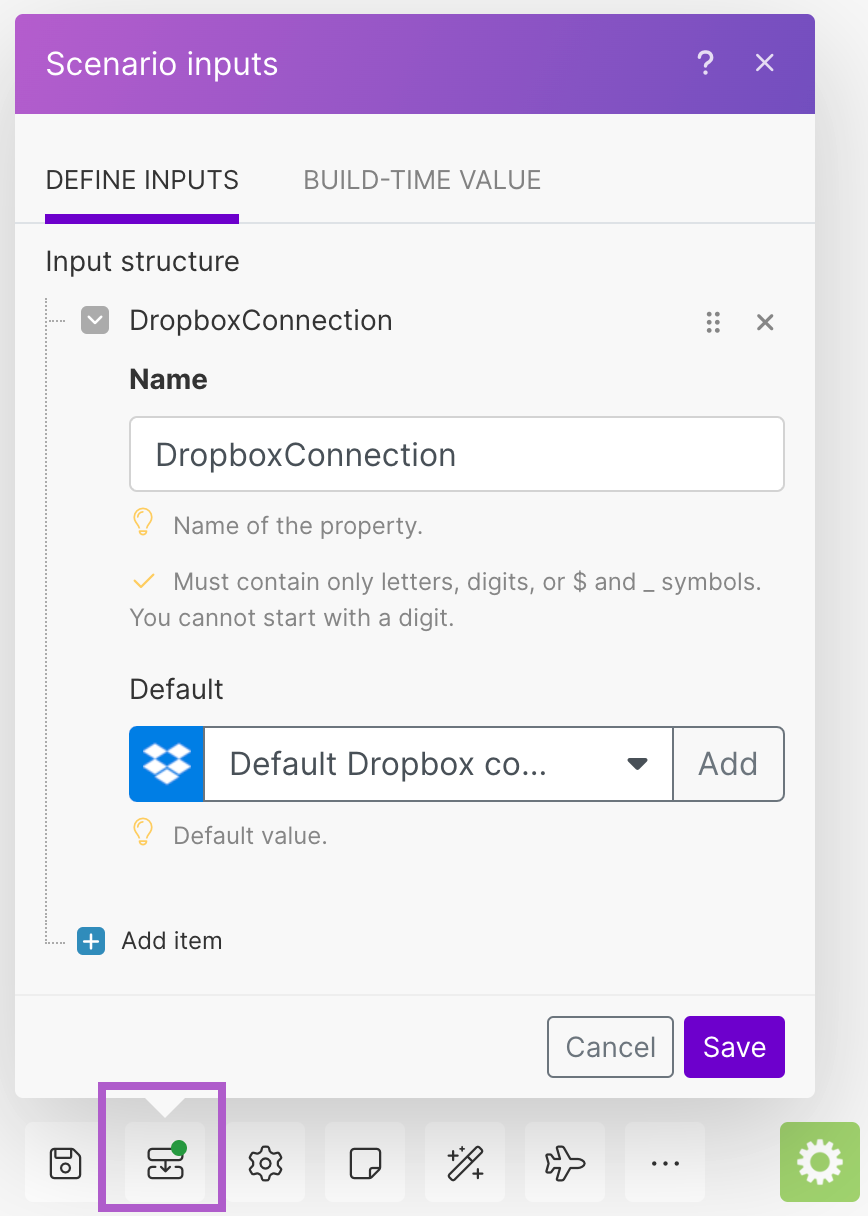
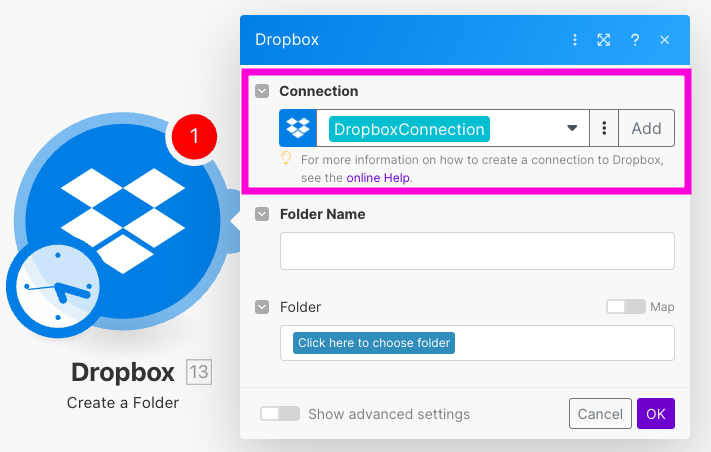
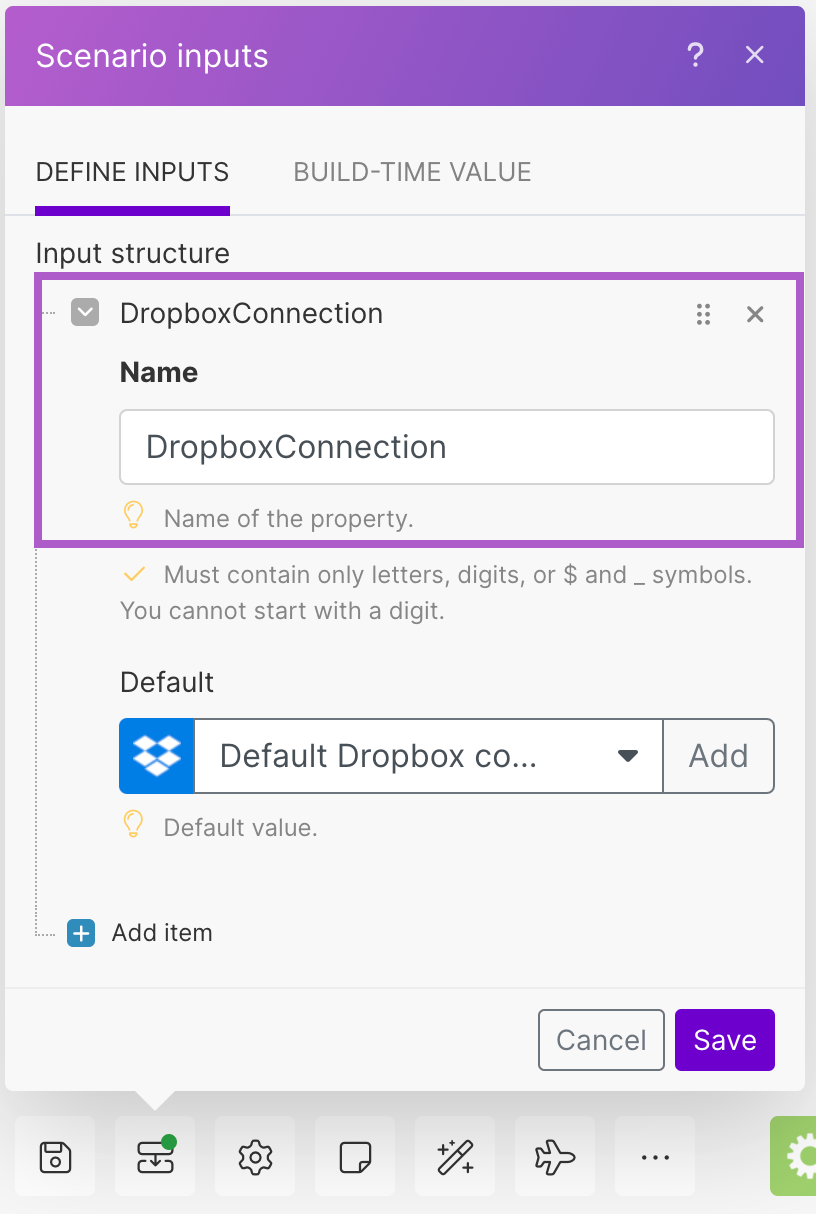
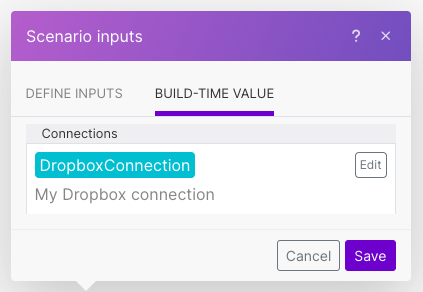
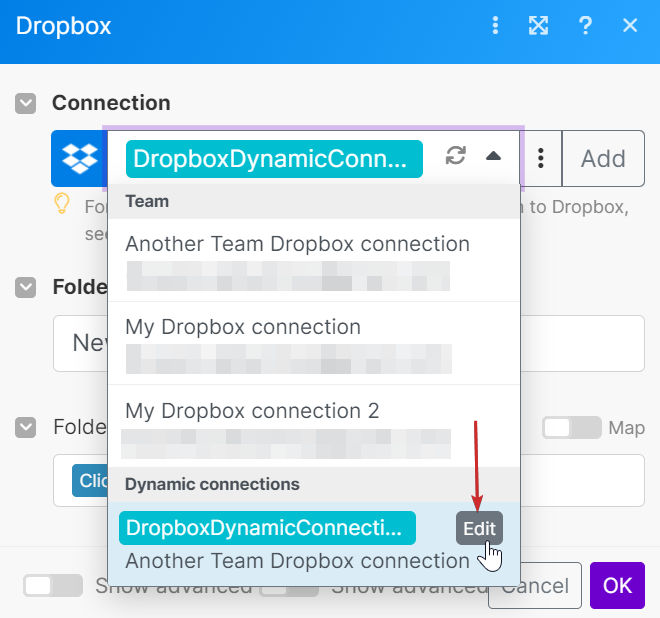
You can find the list of dynamic connections:
In the module:
In the Scenario inputs window:
In the Build-time value tab, the dynamic connection with the connection its using:
Running a scenario with a dynamic connection
A dynamic connection is like a variable or a container for connections, which is empty until you assign a connection to it. To run a scenario with a dynamic connection, you have to assign a connection to it or use a default. You can either create a new dynamic connection or use an existing one.
Using an existing dynamic connection
To run a scenario with a dynamic connection, use the scenario inputs. In scenario inputs, assign a connection to the dynamic connection for your scenario run or use the default.
Note
To run your scenario on schedule, you have to provide a default for your dynamic connections. Make uses the default connection in scheduled scenario runs.
Go to your scenario.
Click Run once. A scenario inputs window appears.
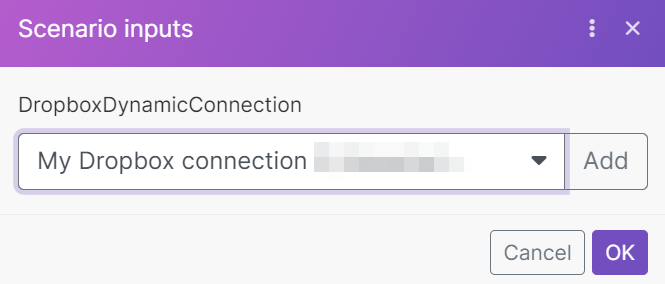
You can either set up a new connection or use an existing connection.
To set up a new connection, click Add. The app prompts you to grant Make access to your account.
To use a connection that already exists, select the connection from the dropdown list.
Note
The dropdown list shows only connections available for the app.
Click OK.
Make runs the scenario with the selected connections.
Updating a dynamic connection
Compared to other connections, dynamic connections are flexible and can change the value they contain. For example, you might want to assign a different connection to the dynamic connection with each scenario run. This might be practical when you want to frequently use different credentials in the scenario.
Another option is to update just the default for the dynamic connection for scheduled scenario runs.
You can update a dynamic connection:
in the app module
in scenario inputs
Updating dynamic connections in the app module
Open the Connections dropdown list in the app module and find the dynamic connection you want to edit.
Click Edit.
Optional: You can change the dynamic connection name as well.
In the Build-time value dropdown list, select the connection you want to assign to the dynamic connection. Click Add, if you want to create a new connection.
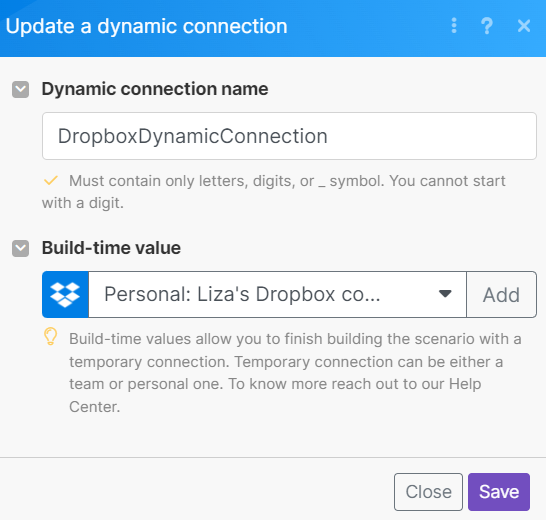
Click Save.
You have updated the dynamic connection. When the scenario runs, the dynamic connection will use the connection you assigned.
Updating dynamic connections in the scenario inputs
Go to the scenario in which you want to update the dynamic connection.
Click scenario inputs.
Go to the Build-time value tab.
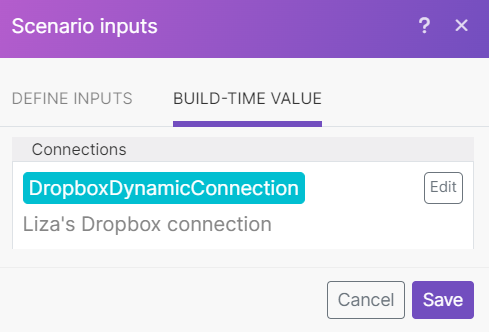
Click Edit.
In the dropdown list, select another connection you want to assign to the dynamic connection. Click Add if you want to create a new connection.
Click Save.
You have updated the dynamic connection. When the scenario runs, the dynamic connection will use the connection you assigned.