Custom scenario properties
Note
Only Enterprise customers have access to the Custom scenario properties feature.
To help organize and sort scenarios, you can use custom scenario properties to add customizable metadata to your scenarios. The properties you create appear on the scenario detail page and also in sortable columns in a table view of your scenarios. You can add as many custom properties as you like and edit which properties appear in your table view.
All organization members can view and use custom scenario properties. This includes using custom properties to filter the table view of scenarios.
For all properties, you can define the following:
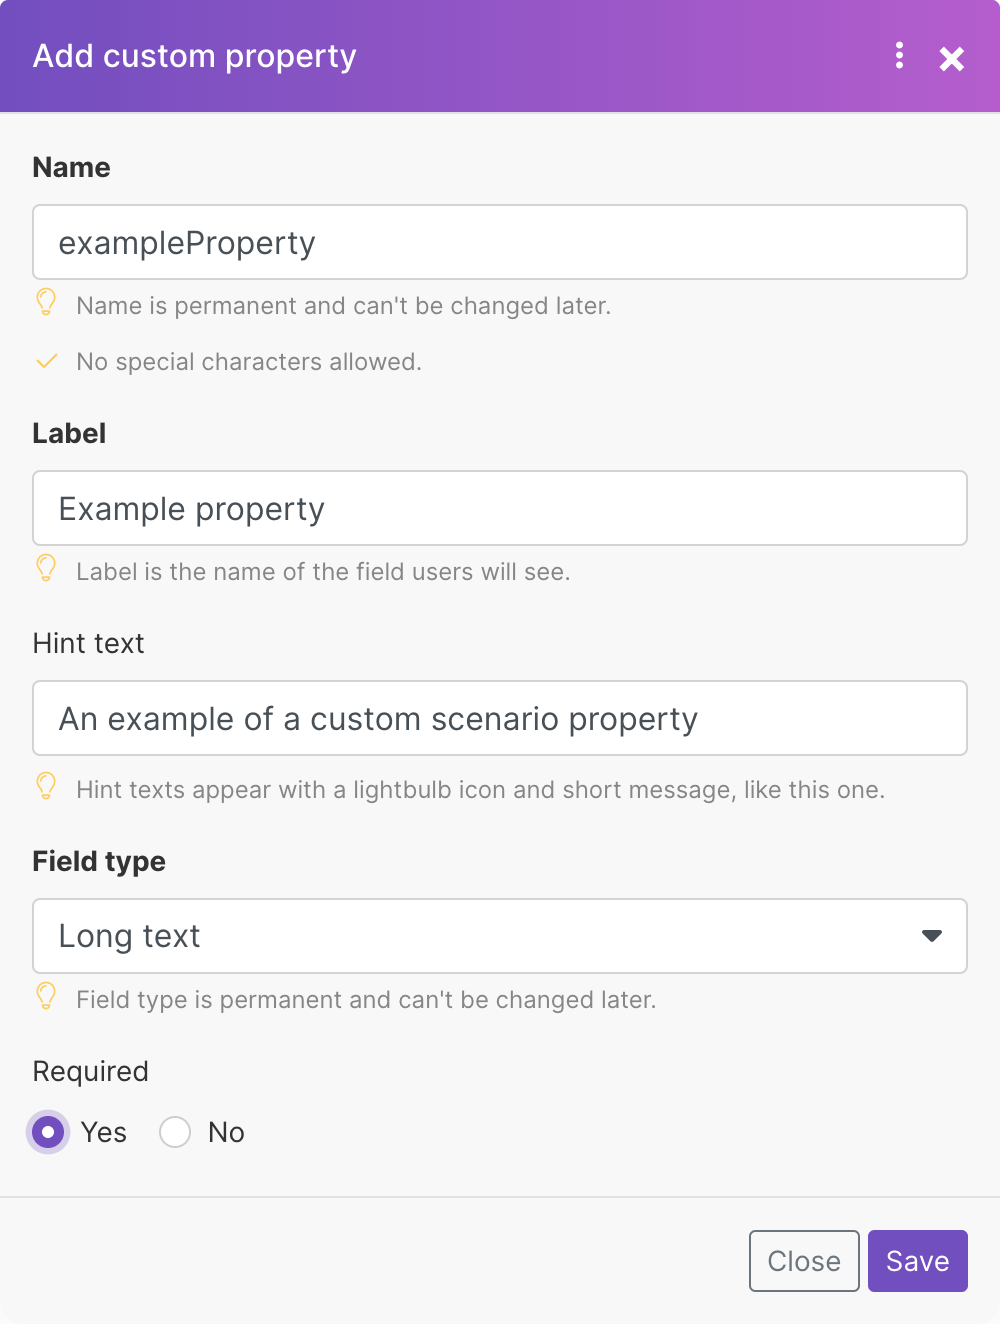
Name - a descriptive name used like a unique identifier that only appears when you manage your custom properties
Label - the name visible on the table view and detail page
Hint text - a short message you add to help your organization members use your custom property
Field type - the kind of property, for example, dropdown or boolean
Required - select yes to make a property mandatory to include when applying custom properties to a scenario
Custom scenario properties support the following field types:
Short text - up to 200 characters; useful for email addresses, URLs
Long text - up to 1,000 characters; supports multiple lines
Number - supports integers
Boolean - a yes/no value that appears as radio buttons
Date - date and time according to ISO 8601
Dropdown - a list of items where users can select only one
Multichoice - a list of items where users can select multiple values
Create custom properties
Your organization dashboard has a Scenario properties tab where you can create and manage your custom properties.
Note
Only organization owners and admins can create and manage custom properties.
In the left sidebar, click Organization.
Click Scenario properties.
Click Add property.

In the Add custom property dialog, enter and select your information. See descriptions above for details of each field. Click Save to create your custom property.
Your custom property appears on the list on the Scenario properties tab.
Use custom scenario properties
All organization members can:
Apply and edit custom scenario properties
In the left sidebar, click Scenarios.
Click
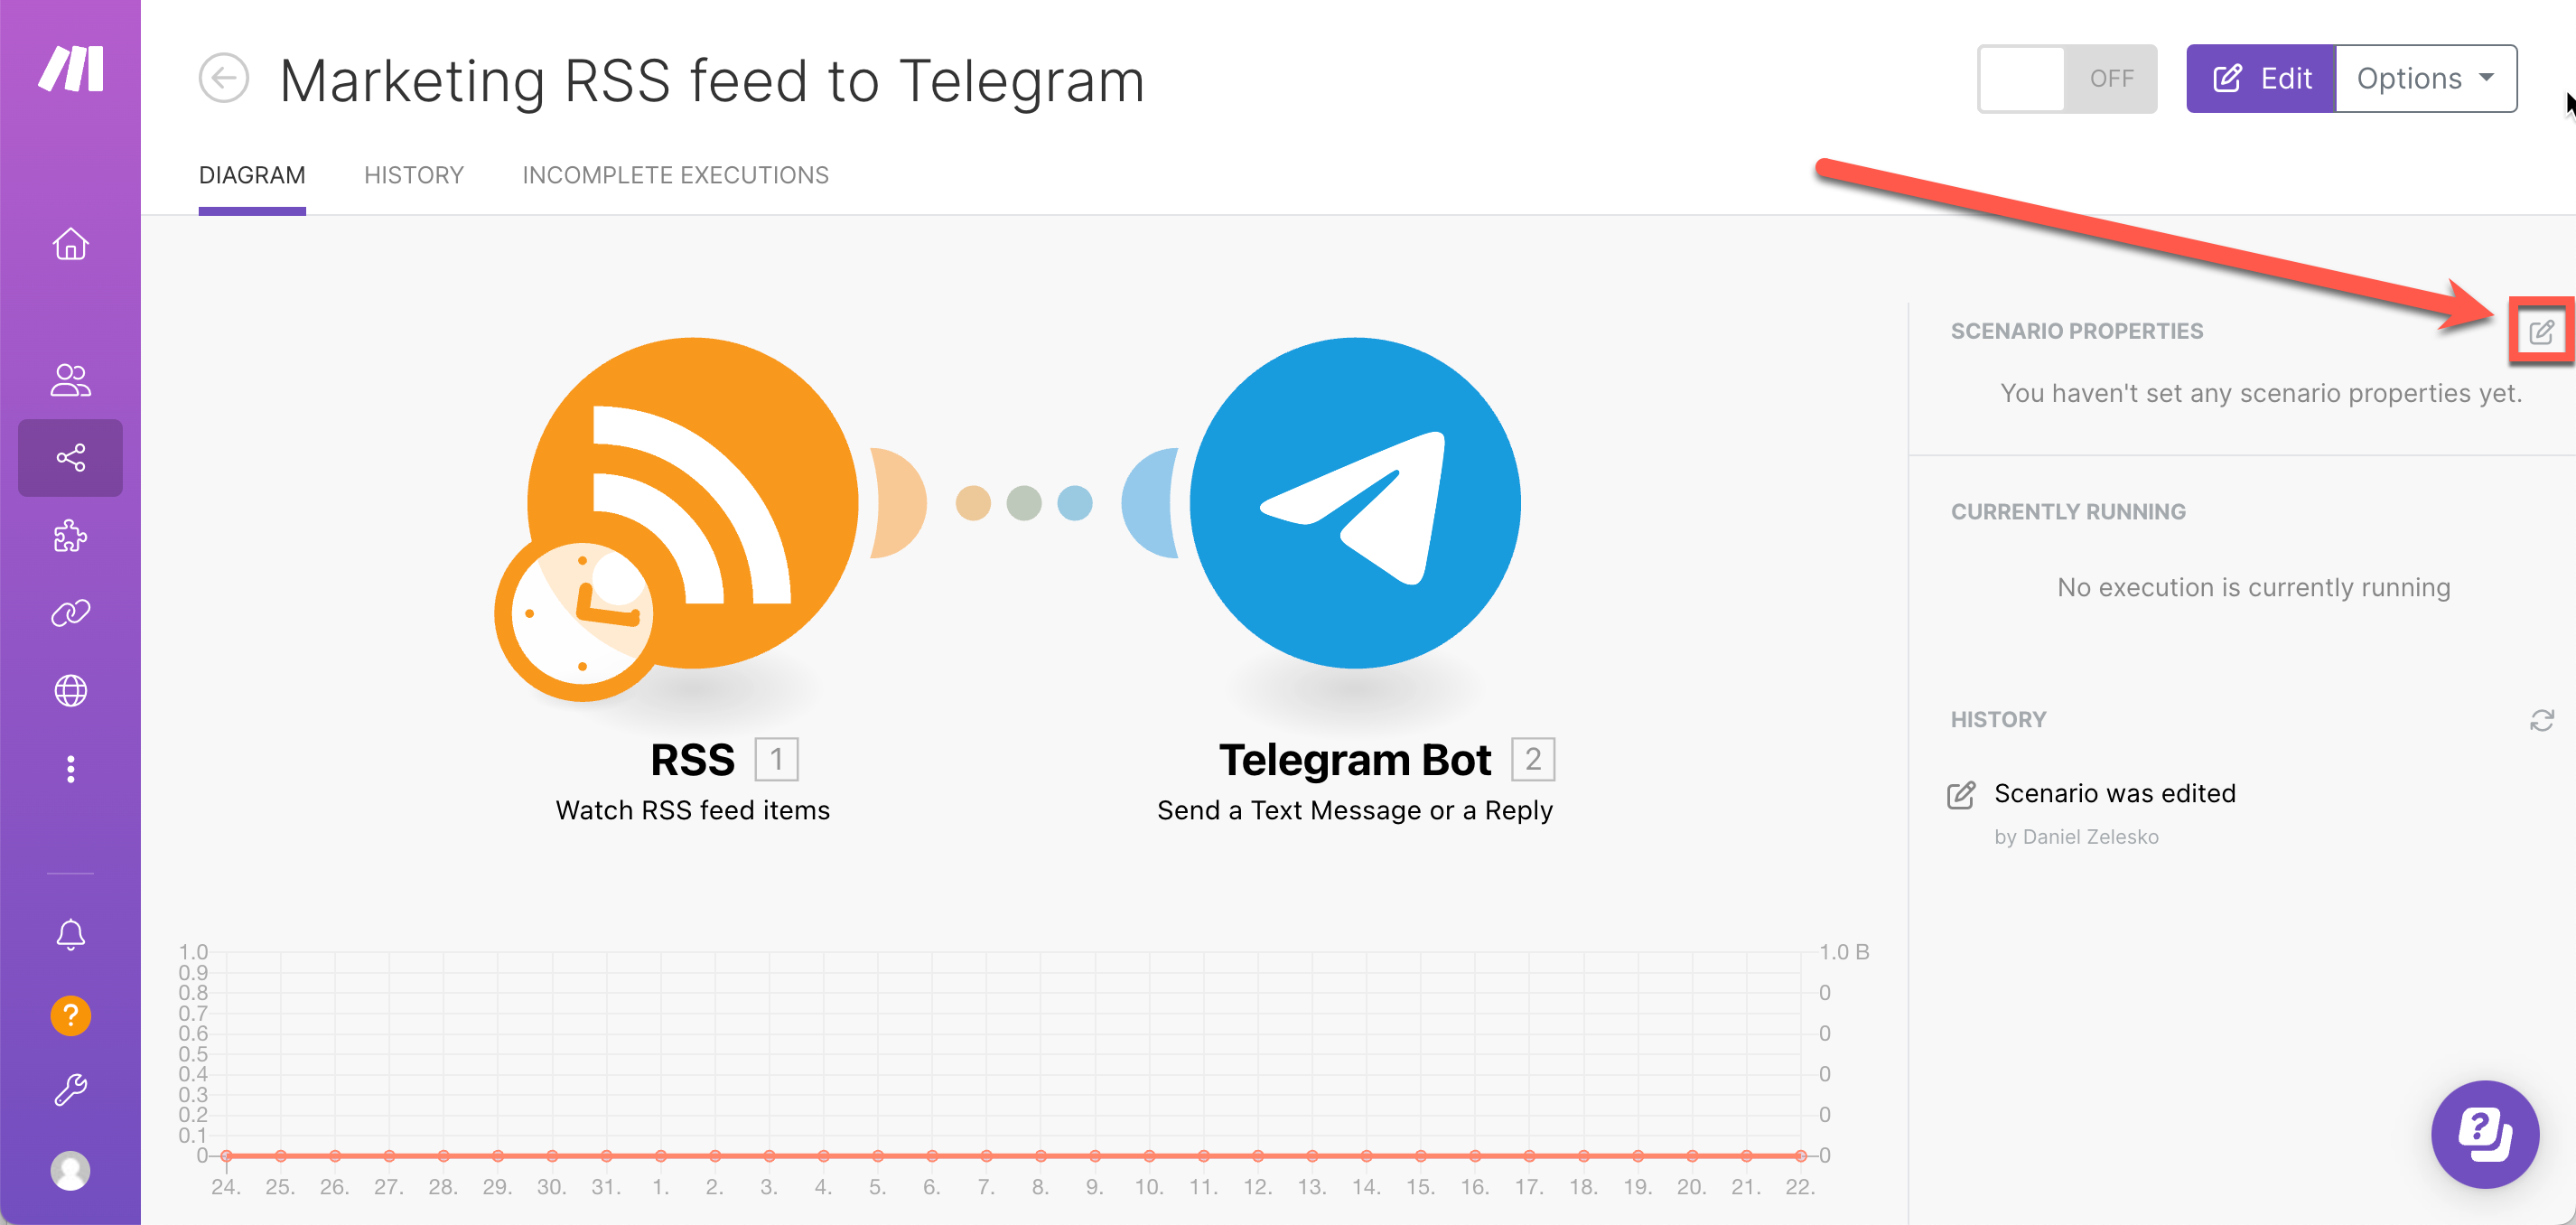
 next to the scenario whose custom properties you want to edit.
Click Edit custom properties.
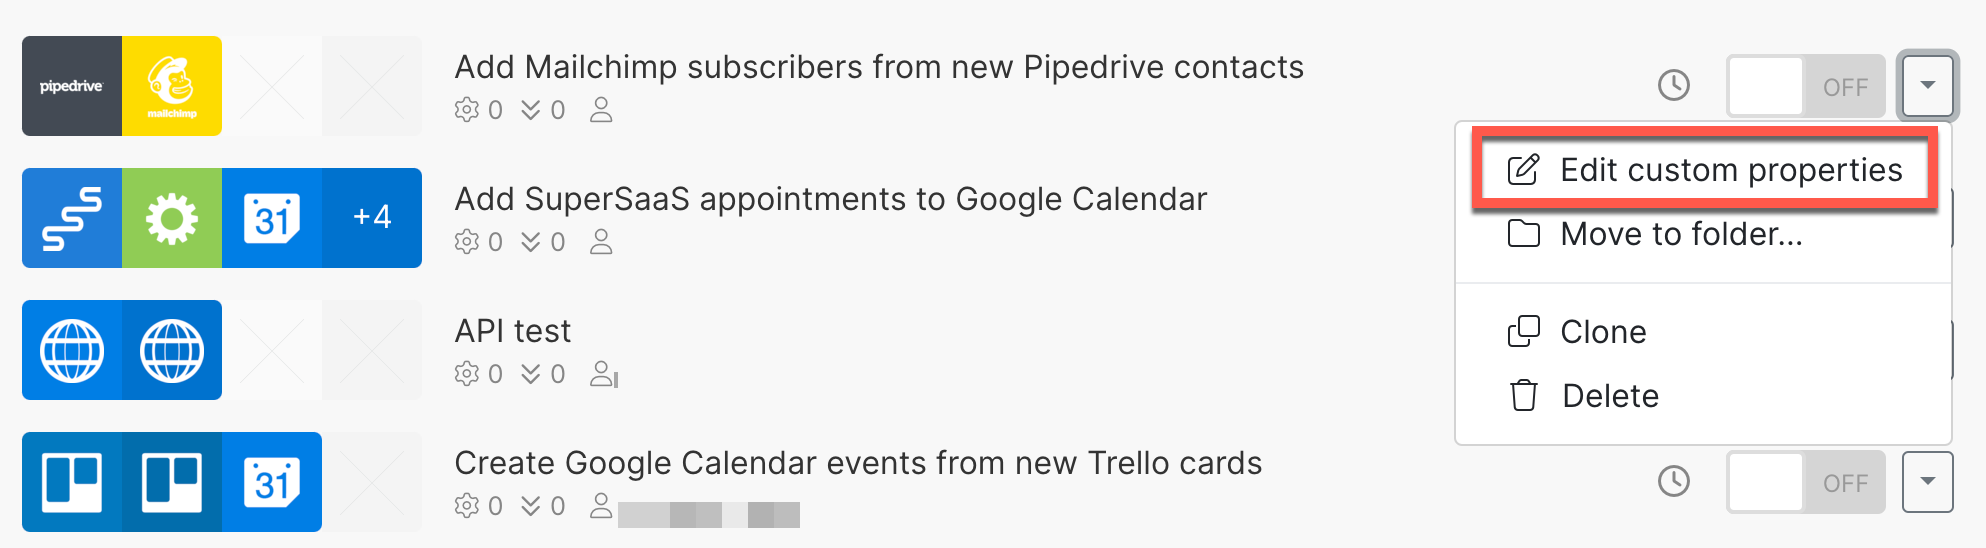
In the dialog, edit your scenario properties.
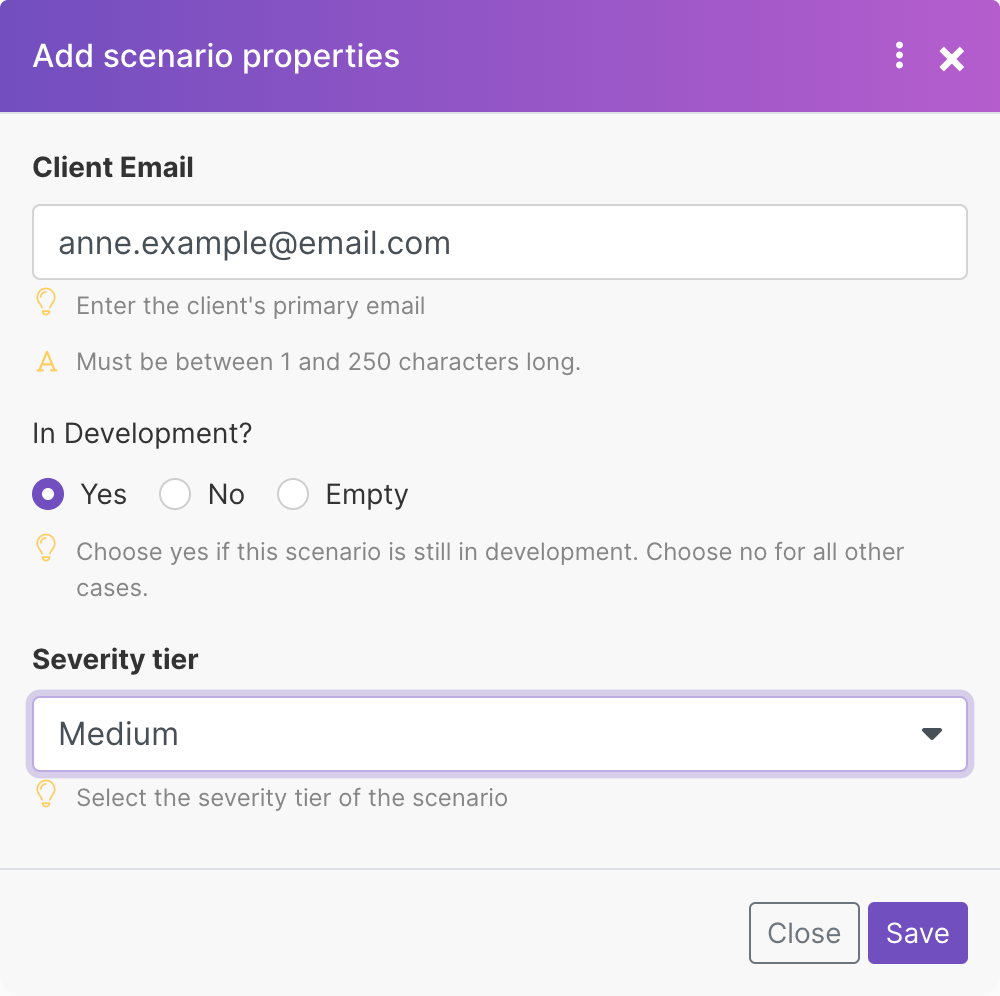
Click Save.
The dialog closes and your properties appear on the scenario table view.
Tip
You can also apply and edit properties from the Scenario detail page.
 |
Filter the Scenario list
In the left sidebar, click Scenarios.
Click the toggle to enter Table view.

Click
 .
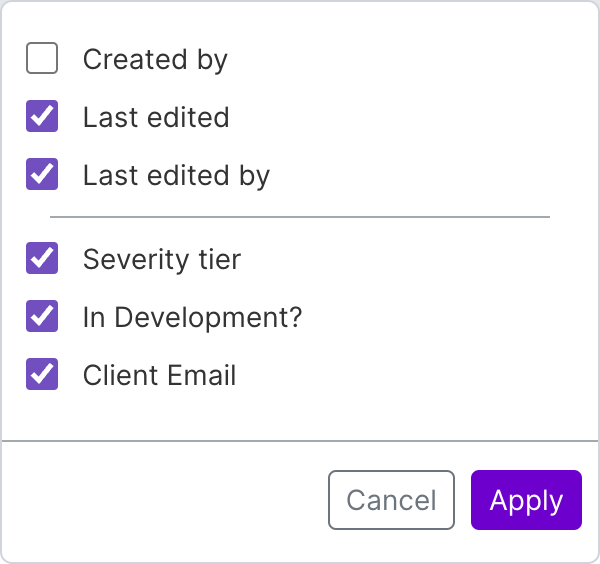
.In the dialog, select the properties you want to see in the table.
Click Apply.
Use
 next to the property you want to filter your scenarios by.
Only scenarios that match your filter criteria appear in the list.
Sort the scenario list
In the left sidebar, click Scenarios.
Click the toggle to enter Table view.
Click the title header of a column to sort the list by that property. Click again to see a descending sorted list.
The table appears with your scenarios sorted by the property you clicked.
Manage custom properties
You can edit or delete your custom scenario properties from the Scenario properties of your organization dashboard.
Edit custom properties
In the left sidebar, click Organization.
Click Scenario properties.
Find the custom property you want to edit and click Edit.
In the dialog, change the information as needed.
Click Save.
A confirmation message appears at the bottom of the screen and your changes appear in the table.
Delete a custom property
In the left sidebar, click Organization.
Click Scenario properties.
Find the custom property you want to delete and click
.Click Delete.
The property disappears from the table.