SigParser
The SigParser modules allow you to watch, create, update, list, and/or delete contacts, and parse emails, in your SigParser account.
Prerequisites
A SigParser account
In order to use SigParser with Make, it is necessary to have a SigParser account. If you do not have one, you can create a SigParser account at https://sigparser.com/.
Note
The module dialog fields that are displayed in bold (in the Make scenario, not in this documentation article) are mandatory!
Connecting SigParser to Make
You can connect SigParser to Make in two ways:
Connecting SigParser to Make using API Key
To connect your SigParser account to Make, you need to obtain your organization ID and region.
Log into your SigParser Account.
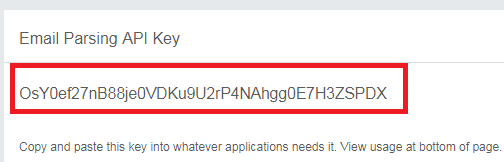
Click Settings-->Email Parsing API-->Generate API Key.
Copy the API Key to your clipboard.
Go to Make, open the SigParser module's Create a connection dialog, and select the Connection Type as SigParser Key.
In the Connection name field, enter a name for the connection.
In the API Key field, enter the API Key copied in step 2 and click Continue.
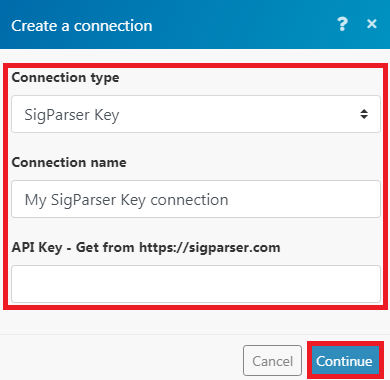
The connection has been established.
Connecting SigParser to Make using OAuth
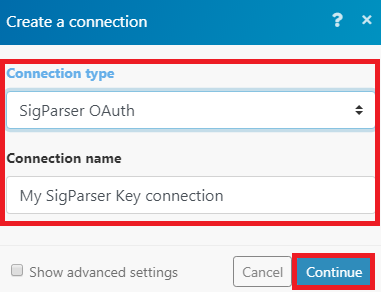
Go to Make, open the SigParser module's Create a connection dialog, and select the Connection Type as SigParser OAuth.

In the Connection name field, enter a connection name and click Continue.
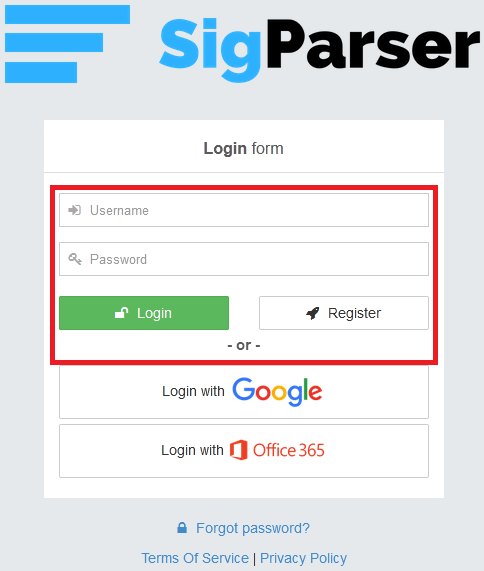
Enter your Sigparser user login credentials and click Login.
Confirm the next dialogue by clicking Yes.
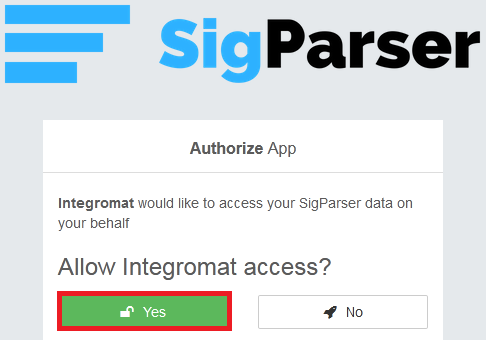
The connection has been established.
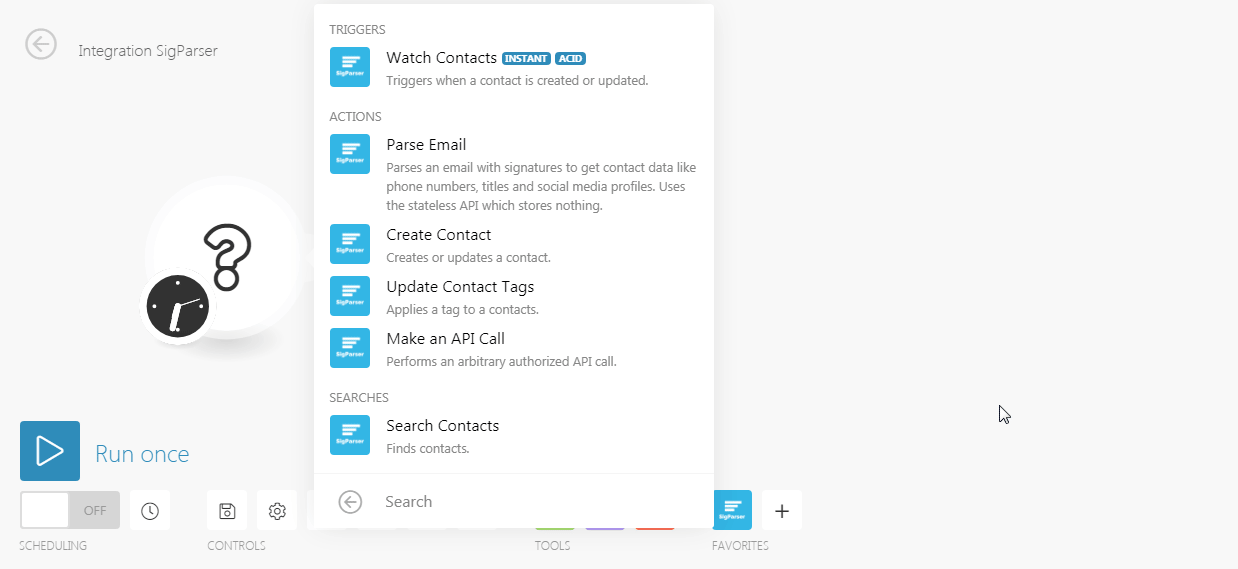
Triggers
Triggers when a contact is created or updated.
Webhook Name | Enter a webhook connection name. |
Connection | |
Has Phone Numbers | When selected, triggers only the contacts having a phone number. |
Has Outbound Emails | When selected, triggers only the contacts who have received emails from someone in your organization. |
Has Inbound Emails | When selected, triggers only the contacts who have sent emails to someone in your organization. |
Actions
Parses an email with a signature to get contact data like phone numbers, titles, and social media profiles. Uses the stateless API which stores nothing.
Connection | |
Email Subject | Enter the email subject details of the whose email you want to parse. |
Sender Email Address | Enter the email address from whom you want to send. |
Sender Name | Enter the name with which the email is sent. |
Email Body Type | Enter the body message format:
|
HTML Email Body | Enter the HTML email body text |
Plain Text Email Body | Enter the email body message in the plain text format. |
Email Date | Enter the date when the email is sent. |
Creates or updates a contact.
Connection | |
Email Address | Enter the email address of the contact you want to create. |
Name | Enter a name for the contact. |
First Name | Enter the first name of the contact. |
Last Name | Enter the last name of the contact. |
Job Title | Enter the position of the contact. |
Work Phone | Enter the work phone number of the contact. |
Mobile Phone | Enter the mobile number of the contact. |
Phone | Enter the phone number of the contact. |
Home Phone | Enter the home phone number of the contact. |
VOIP Phone | Enter the VOIP phone details of the contact. |
Fax Number | Enter the fax number of the contact. |
Address Street | Enter the street name where the contact resides. |
Address City | Enter the city name where the contact resides. |
Address State | Enter the state name where the contact resides. |
Address Postal Code | Enter the postal code where the contact resides. |
Address Country | Enter the country name where the contact resides. |
Website URL for Business | Enter the website URL for the business the contact belongs to. |
LinkedIn URL | Enter the LinkedIn profile URL of the contact. |
LinkedIn ID | Enter the LinkedIn ID of the contact. |
Twitter URL | Enter the Twitter URL of the contact. |
Twitter Handle | Enter the Twitter handle of the contact. |
Email Bounced Date | Enter the date when the email to the contact has bounced back for the first time. |
Applies a tag to a contact.
Connection | |
Tag | Select the tag you want to apply to the contacts:
|
Email Address | Add the email address of the contacts to apply the tag. |
Operation | Select the action you want to perform:
|
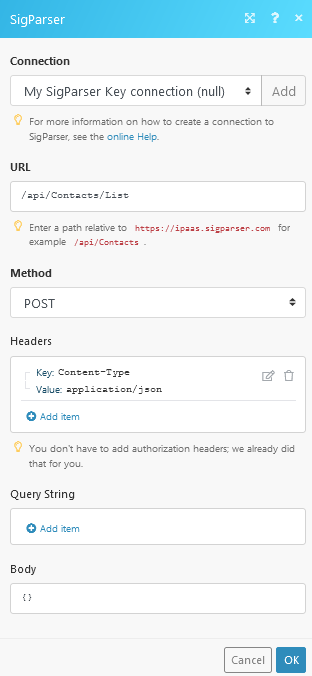
Performs an arbitrary authorized API call.
Connection | |
URL | Enter a path relative to NoteFor the list of available endpoints, refer to the SigParser API Documentation. |
Method | Select the HTTP method you want to use: GET to retrieve information for an entry. POST to create a new entry. PUT to update/replace an existing entry. PATCH to make a partial entry update. DELETE to delete an entry. |
Headers | Enter the desired request headers. You don't have to add authorization headers; we already did that for you. |
Query String | Enter the request query string. |
Body | Enter the body content for your API call. |
Refer to the SigParser API documentation for choosing correct API details and HTTP requests.
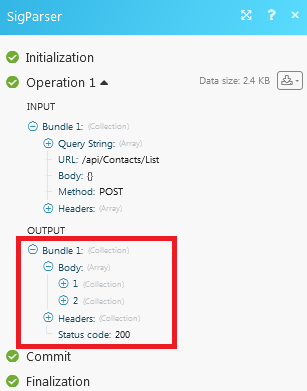
Following API call returns all contacts:
URL:
api/Contacts/List
Method:
POST
Body:
{}
The result can be found in the module's Output under Bundle > Body > contacts.
In our example, 2 contacts were returned:
Searches
Finds contacts.
Connection | |
Order By | Select the option to sort the search results:
|
Order By Ascending | Select if you want to display the results based on the date in ascending order. |
Tag | Select the tag of the contacts you want to search:
|
Email Address | Enter the email address of the contact you want to search for. |
Last Modified After | Enter a date to search the contacts modified on or after the specified date. |
Number of contacts to return | The maximum number of contacts Make should return during one scenario execution cycle. |