Google Cloud Print
Google Cloud Print, Google’s cloud-based printing solution that has been in beta since 2010, will no longer be supported as of December 31, 2020. For more details, refer to https://support.google.com/chrome/a/answer/9633006.
The Google Cloud Print modules enable you to retrieve or delete print jobs and print in your Google Cloud Print account.
Getting Started with Google Cloud Print
Prerequisites
A Google account
In order to use Google Cloud Print with Make, it is necessary to have a Google Cloud Print account. If you do not have one, you can create a Google account at the Google Cloud Print website.
Obtain client credentials for your custom app
To obtain the client credentials, you must have access to Google Cloud Console and be able to create or edit the project.
Sign in to Google Cloud console using your Google credentials.
In the upper-left corner, click Select a project > NEW PROJECT. Enter the desired project name, and click the CREATE button.
Select the project you have created.
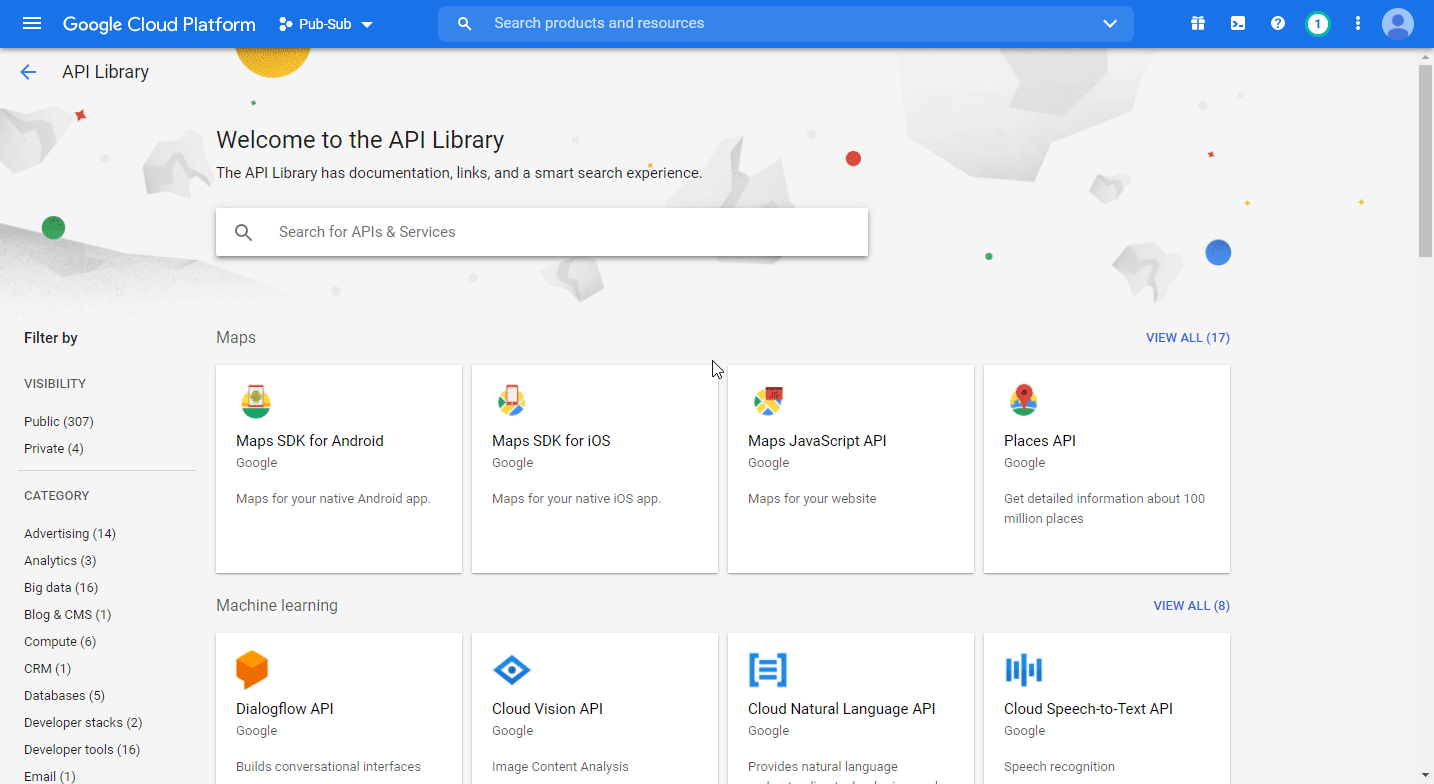
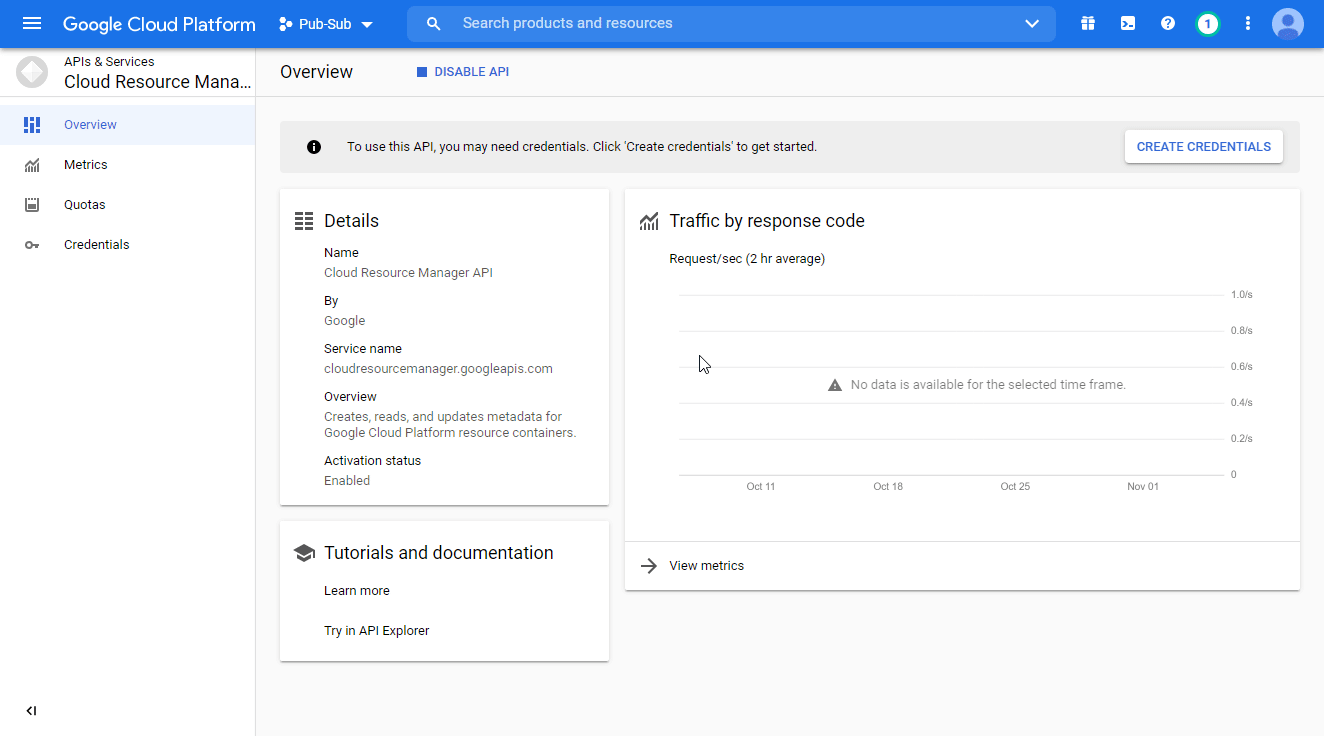
Go to APIs & Services > Library.
Search and enable the following required APIs:
Cloud Resource Manager API
Google Drive API
The desired service option should display as you type. Select the API/service you want to connect to Make.
Click the ENABLE button to enable the selected API.
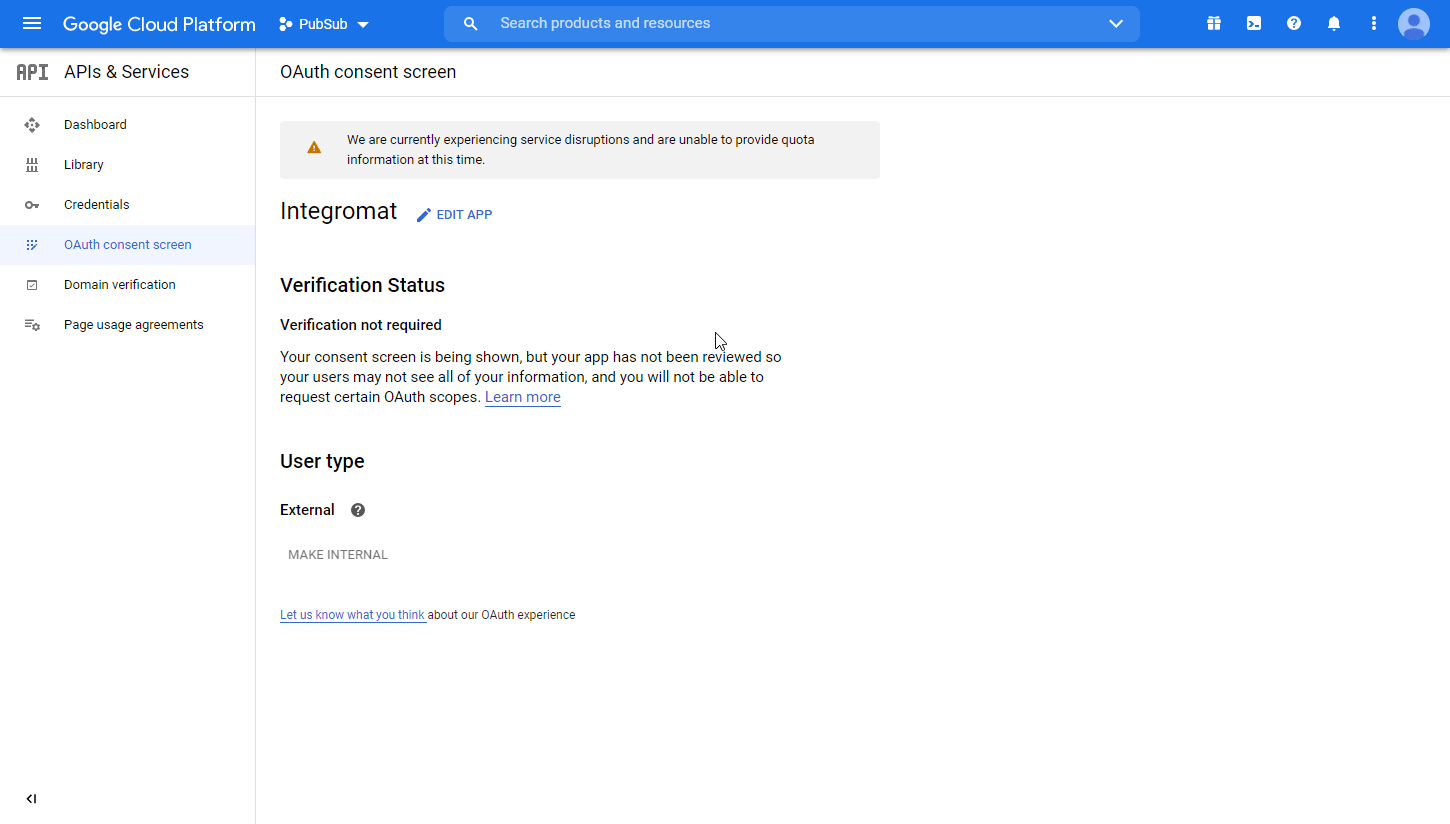
In the left sidebar, click APIs & Services > OAuth consent screen.
Choose the External option, and click the CREATE button.
Note
You will not be charged when selecting this option! For more details, please refer to Google's Exceptions to verification requirements.
Fill in the required fields as follows, and then click Save and Continue:
App name
Enter the name of the app asking for consent. For example,
Make.User support email
Developer contact info
Authorized domains
make.com
On the Scopes page, click Add or Remove Scopes. Under Manually Add Scopes, add the following scopes if they are not listed above.
https://mail.google.com
https://www.googleapis.com/auth/drive
Click Add to Table then click Update.
Click the X in the upper-left corner to close the Scopes box.
Click Save and Continue.
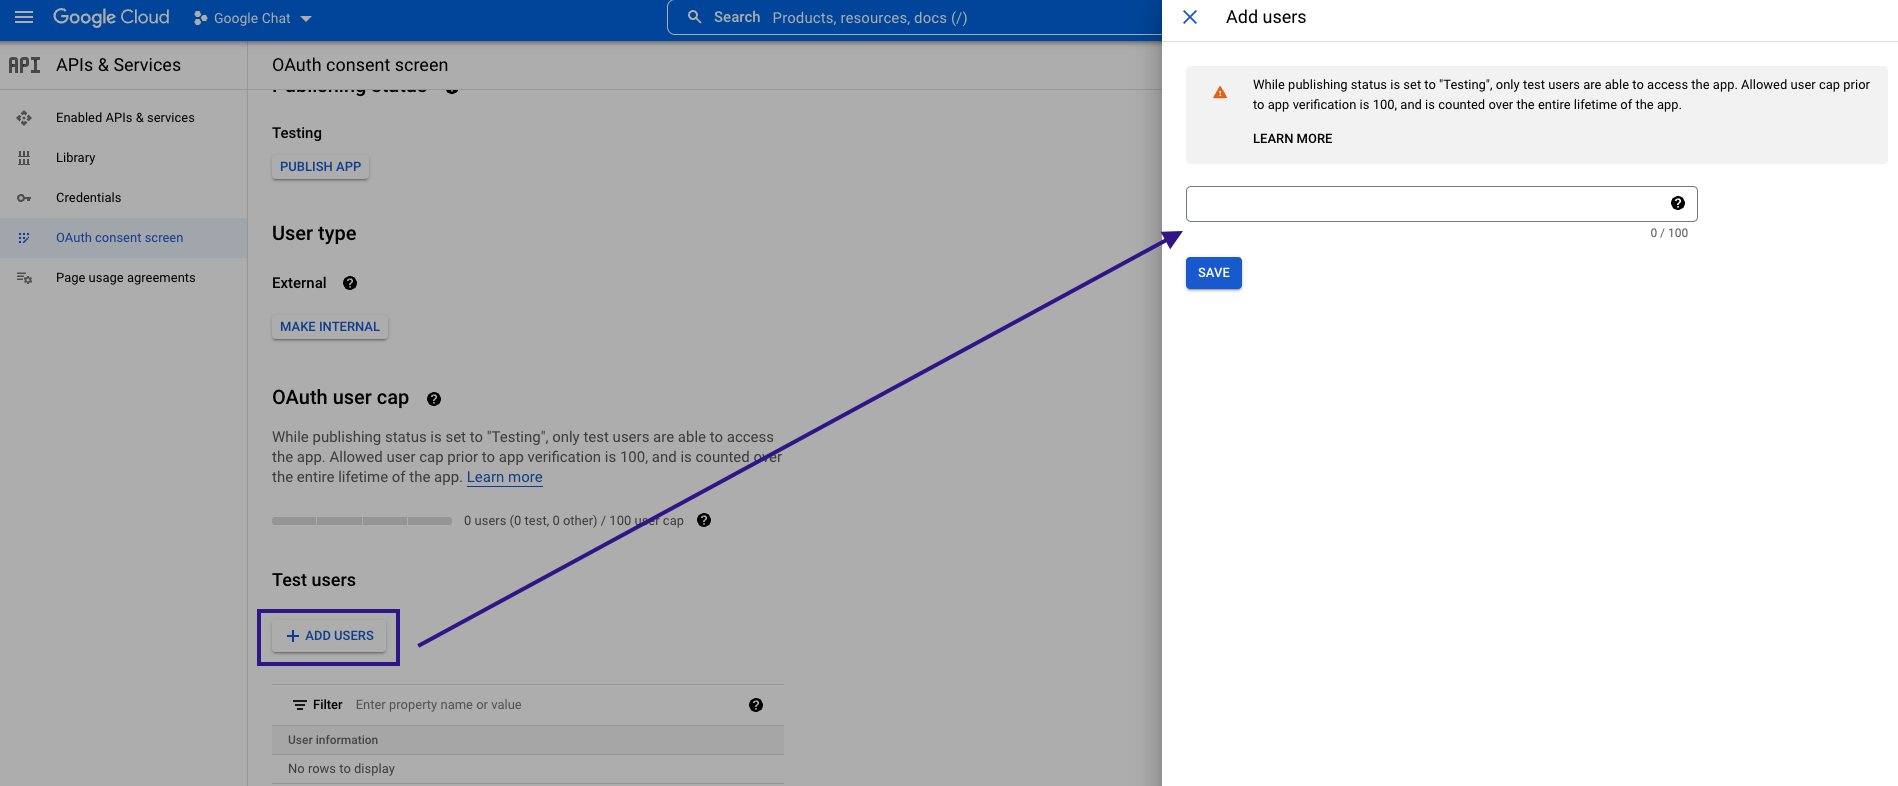
In the Test Users section, click ADD USERS and enter the testing user email address to access the app.
Review the Summary page. Click Back to Dashboard.
In the left sidebar, click Credentials. Click the +CREATE CREDENTIALS and select the OAuth Client ID option.
Fill in the required fields as follows, and then click the Create button to create the application:
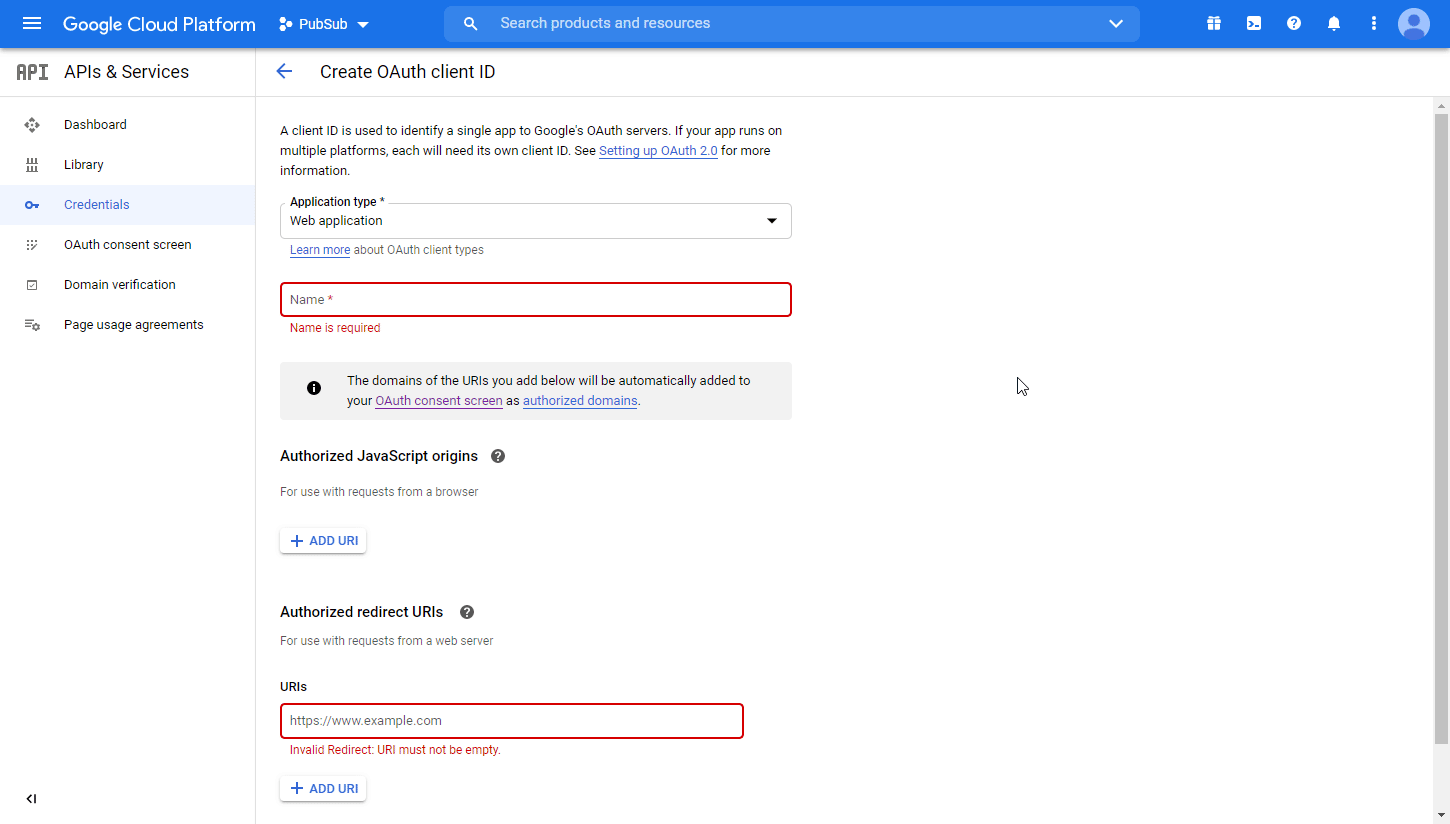
Application type
web applicationName
Name of the application. For example,
Make.Authorized redirect URIs
https://www.integromat.com/oauth/cb/google-restrictedA dialog containing the app's Client ID and Client Secret is displayed. Save them in a safe place for later use.
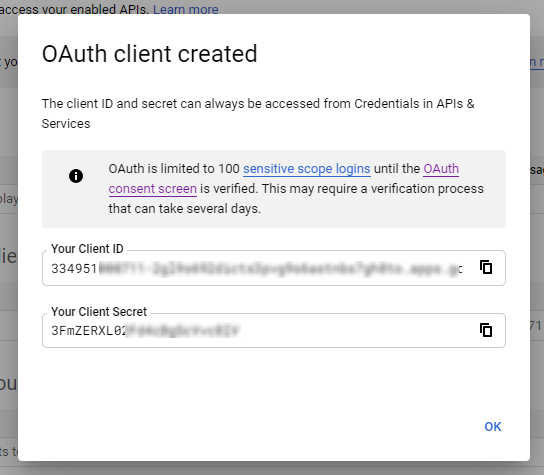
You have successfully created the client credentials.
Publishing statuses
Testing: If you keep your project in the Testing status, you will be required to reauthorize your connection in Make every week. To avoid weekly reauthorization, update the project status to In production.
In production: If you update your project to the In production status, you will not be required to reauthorize the connection weekly. To update your project's status, go to the OAuth consent screen and click Publish app. If you see the notice Needs verification, you can choose whether to go through the Google verification process for the app or to connect to your unverified app. Currently connecting to unverified apps works in Make, but we cannot guarantee the Google will allow connections to unverified apps for an indefinite period.
For more information regarding publishing statuses, refer to the Publishing status section of Google's Setting up your OAuth consent screen help.
Connecting Google Cloud Print to Make
To connect Google Cloud Print app:
Log in to your Make account, insert a Google Cloud Print module in your scenario, and click the Add button next to the Connection field.
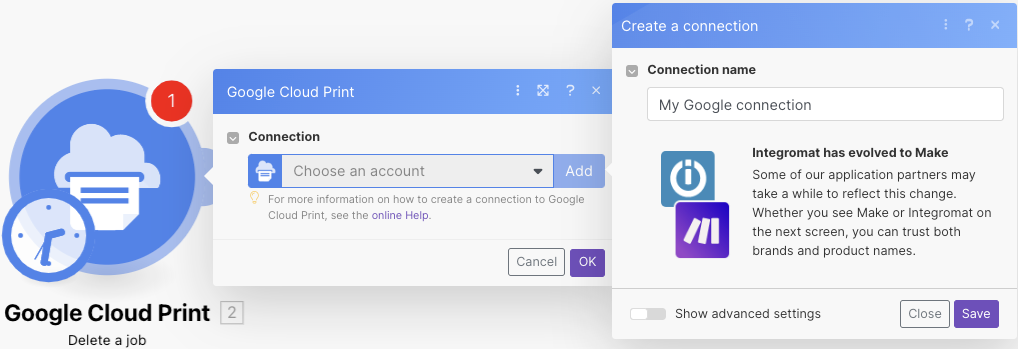
Optional: In the Connection name field, enter a name for the connection.
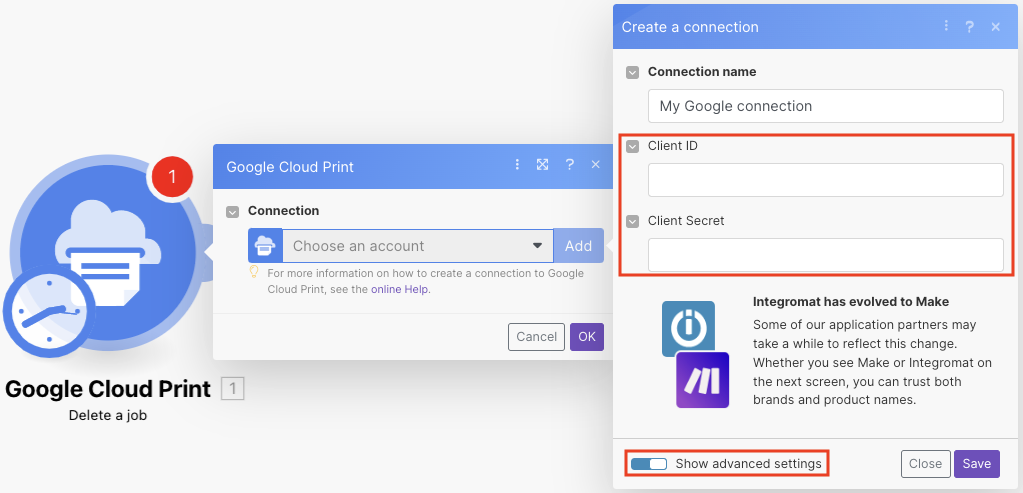
Optional: Click Show advanced settings and enter the client credentials.
Click Save.
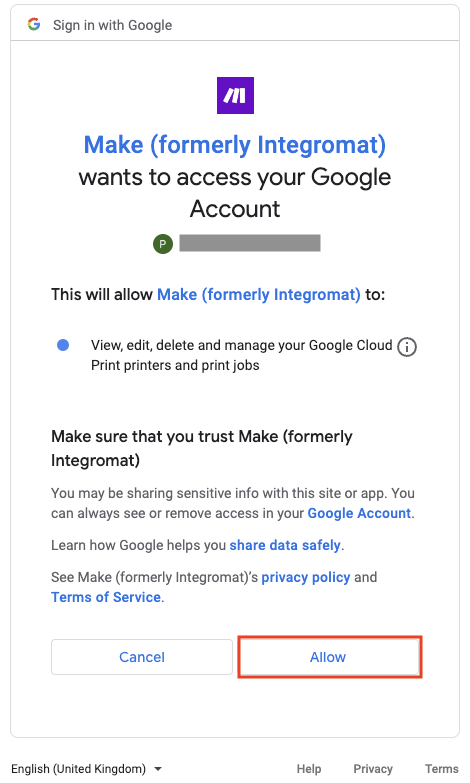
Confirm the permissions dialog by clicking the Allow button.
You have successfully established the connection. You can now begin editing your scenario and adding more Google Cloud Print modules. If your connection needs reauthorization at any point, follow the connection renewal steps here.
Actions
Deletes a print job.
Connection | |
Job ID | Enter the ID of the print job you want to delete. |
Sends a print job to the Google Cloud Print service.
Connection | |
Printer | Select the printer you want to use with Google Cloud Print. |
Title | Enter the title of the print job to be used within GCP. |
Source File | Map the file you want to print from the previous module (e.g. HTTP > Get a File or Google Drive > Get a file), or enter the file name and file data manually. |
Tag | Add one or more tags to the print job. You can attach a set of unique tags to a print job, and these will be available to the printer to which the print job is submitted. |
Retrieves print jobs from your Google Cloud Print account.
Connection | |
Printer | Select the printer you want to retrieve the print jobs from. |
Status | Select the status to restrict the search results.
|
Sort Order | Select the sort order of the returned print jobs. The supported values are:
|
Number of returned jobs | Set the maximum number of results Make will return during one execution cycle. |