RabbitMQ
Getting Started with RabbitMQ
The Make RabbitMQ modules let you publish messages into your message queues.
Prerequisites:
A configured RabbitMQ server
Make IP range
Make will make connections to your database from its IP addresses.
Enabling access on your firewall
Enable incoming TCP connections to port 5672 from source IP addresses.
Connect RabbitMQ to Make
To establish the connection, you must:
Create a user in RabbitMQ dashboard
Note
If you already have user credentials different then the default ones, you can skip to the next section.
To create a new user in RabbitMQ dashboard:
Log in to your configured RabbitMQ server with default credentials.
In the dashboard, click Admin.
In the Users section, click Add a user.
In the Username and Password fields, enter credentials for the user.
Note
If you want to allow the user to log in without password, switch Password field to No password.
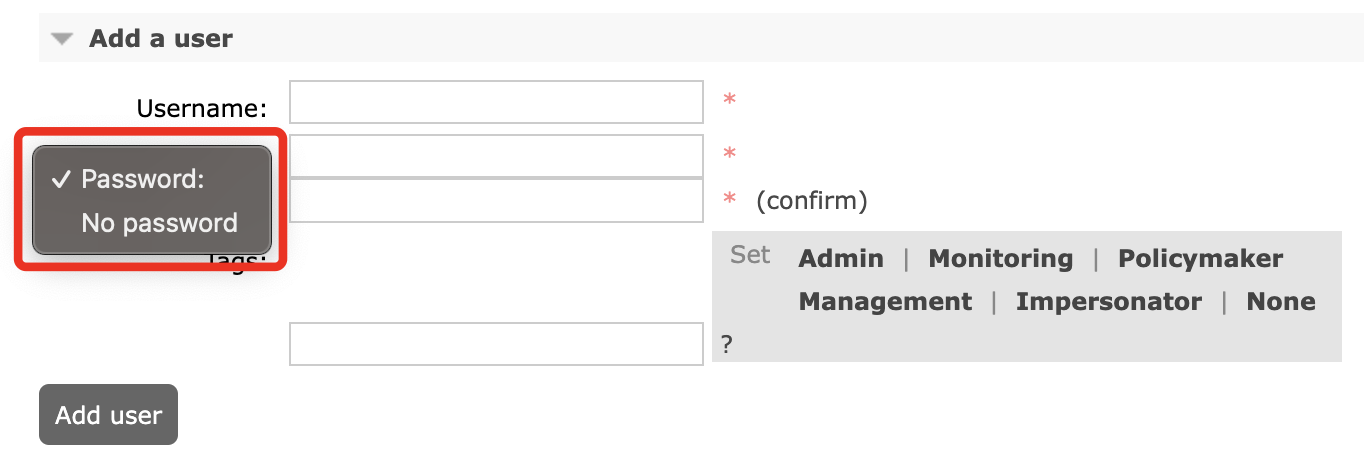
In the Tags section, select the user's access level.
Note
You can set the Admin role for full user privileges.
Click Add user.
You will use these values in the Username and Password fields in Make.
Establish the connection with RabbitMQ in Make
To establish the connection in Make:
Log in to your Make account, add a RabbitMQ module to your scenario, and click Create a connection.
Optional: In the Connection name field, enter a name for the connection.
In the Hostname and Port fields, enter the hostname and port number of your server.
Note
If you want to use the database hosted on your local server, you'll need to specify your public IP address, and set the port forwarding on your router. Do not enter "localhost" or "127.0.0.1" in this field, as it will not work.
In the Username and Password fields, enter your user credentials.
Click Save.
If prompted, authenticate your account and confirm access.
You have successfully established the connection. You can now edit your scenario and add more RabbitMQ modules. If your connection requires reauthorization at any point, follow the connection renewal steps here.