Wix
The Wix modules enable you to monitor, create, update, search, and delete the contacts, cart, collections, products, orders, fulfillment, messages, and form submissions in your Wix account.
To get started with Wix, create an account at wix.com.
For the list of available endpoints, refer to the Wix's REST API Reference.
Connect Wix to Make
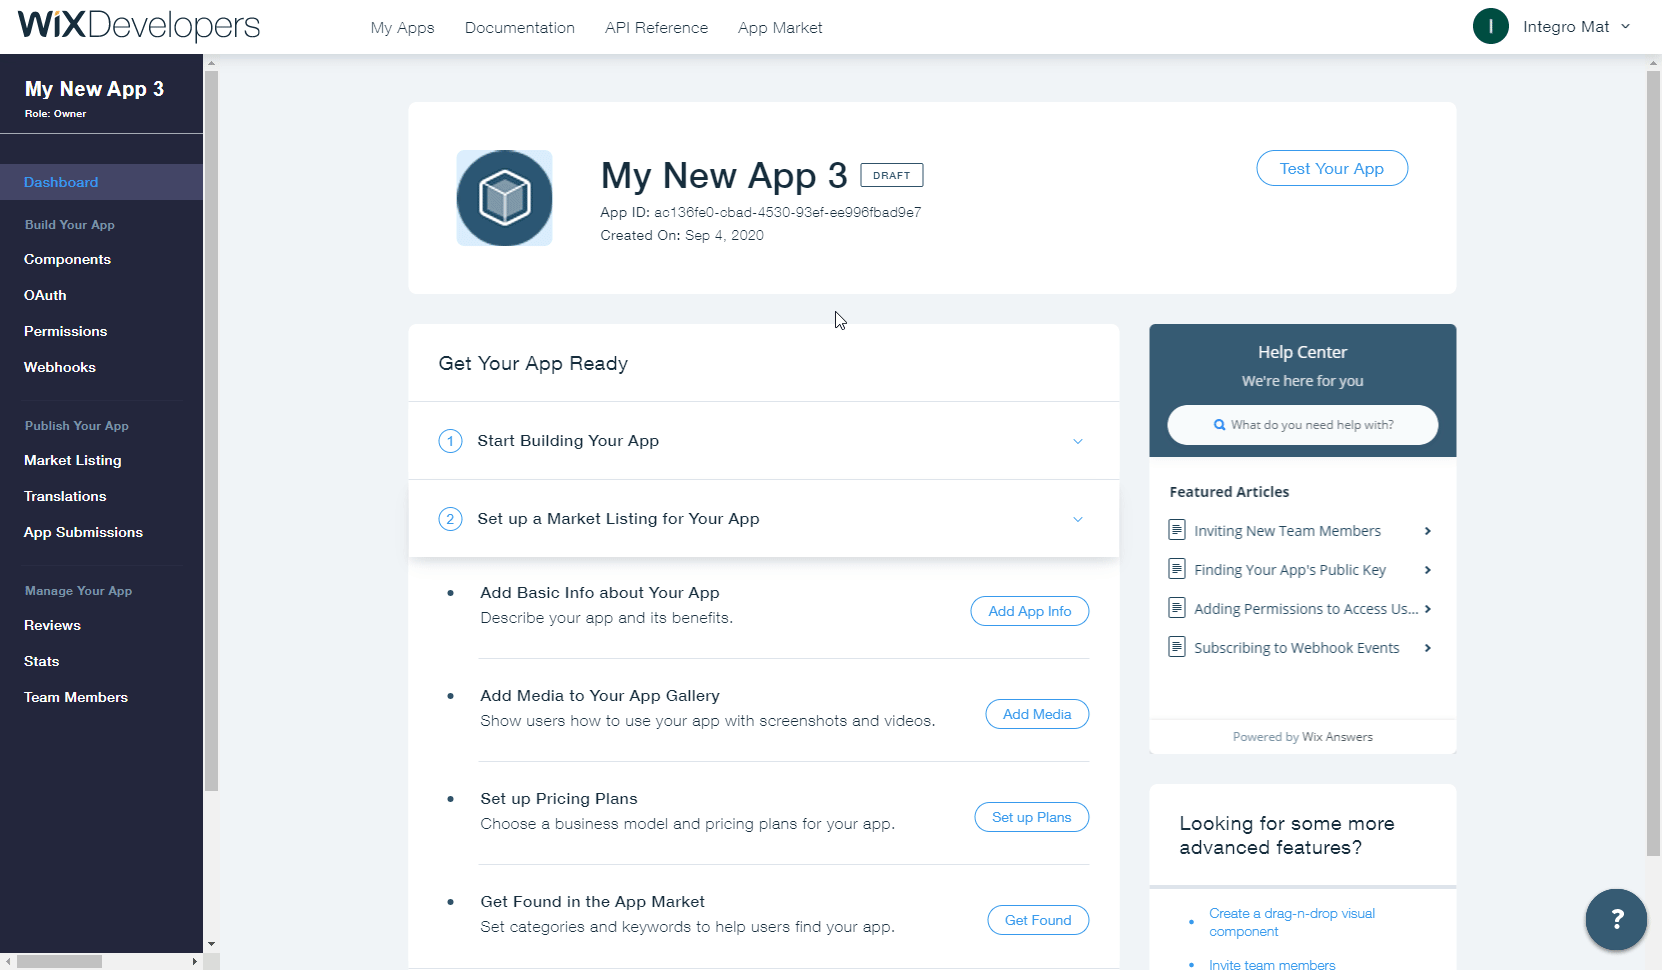
To connect your Wix account to Make you need to create an app in the Wix Developers Center to obtain the App ID and App Secret.
Log in to the Wix Developer Center using your Wix credentials.
Click on the Start Building button.

In the left sidebar, click on the Permissions tab, then click + Add Permissions.
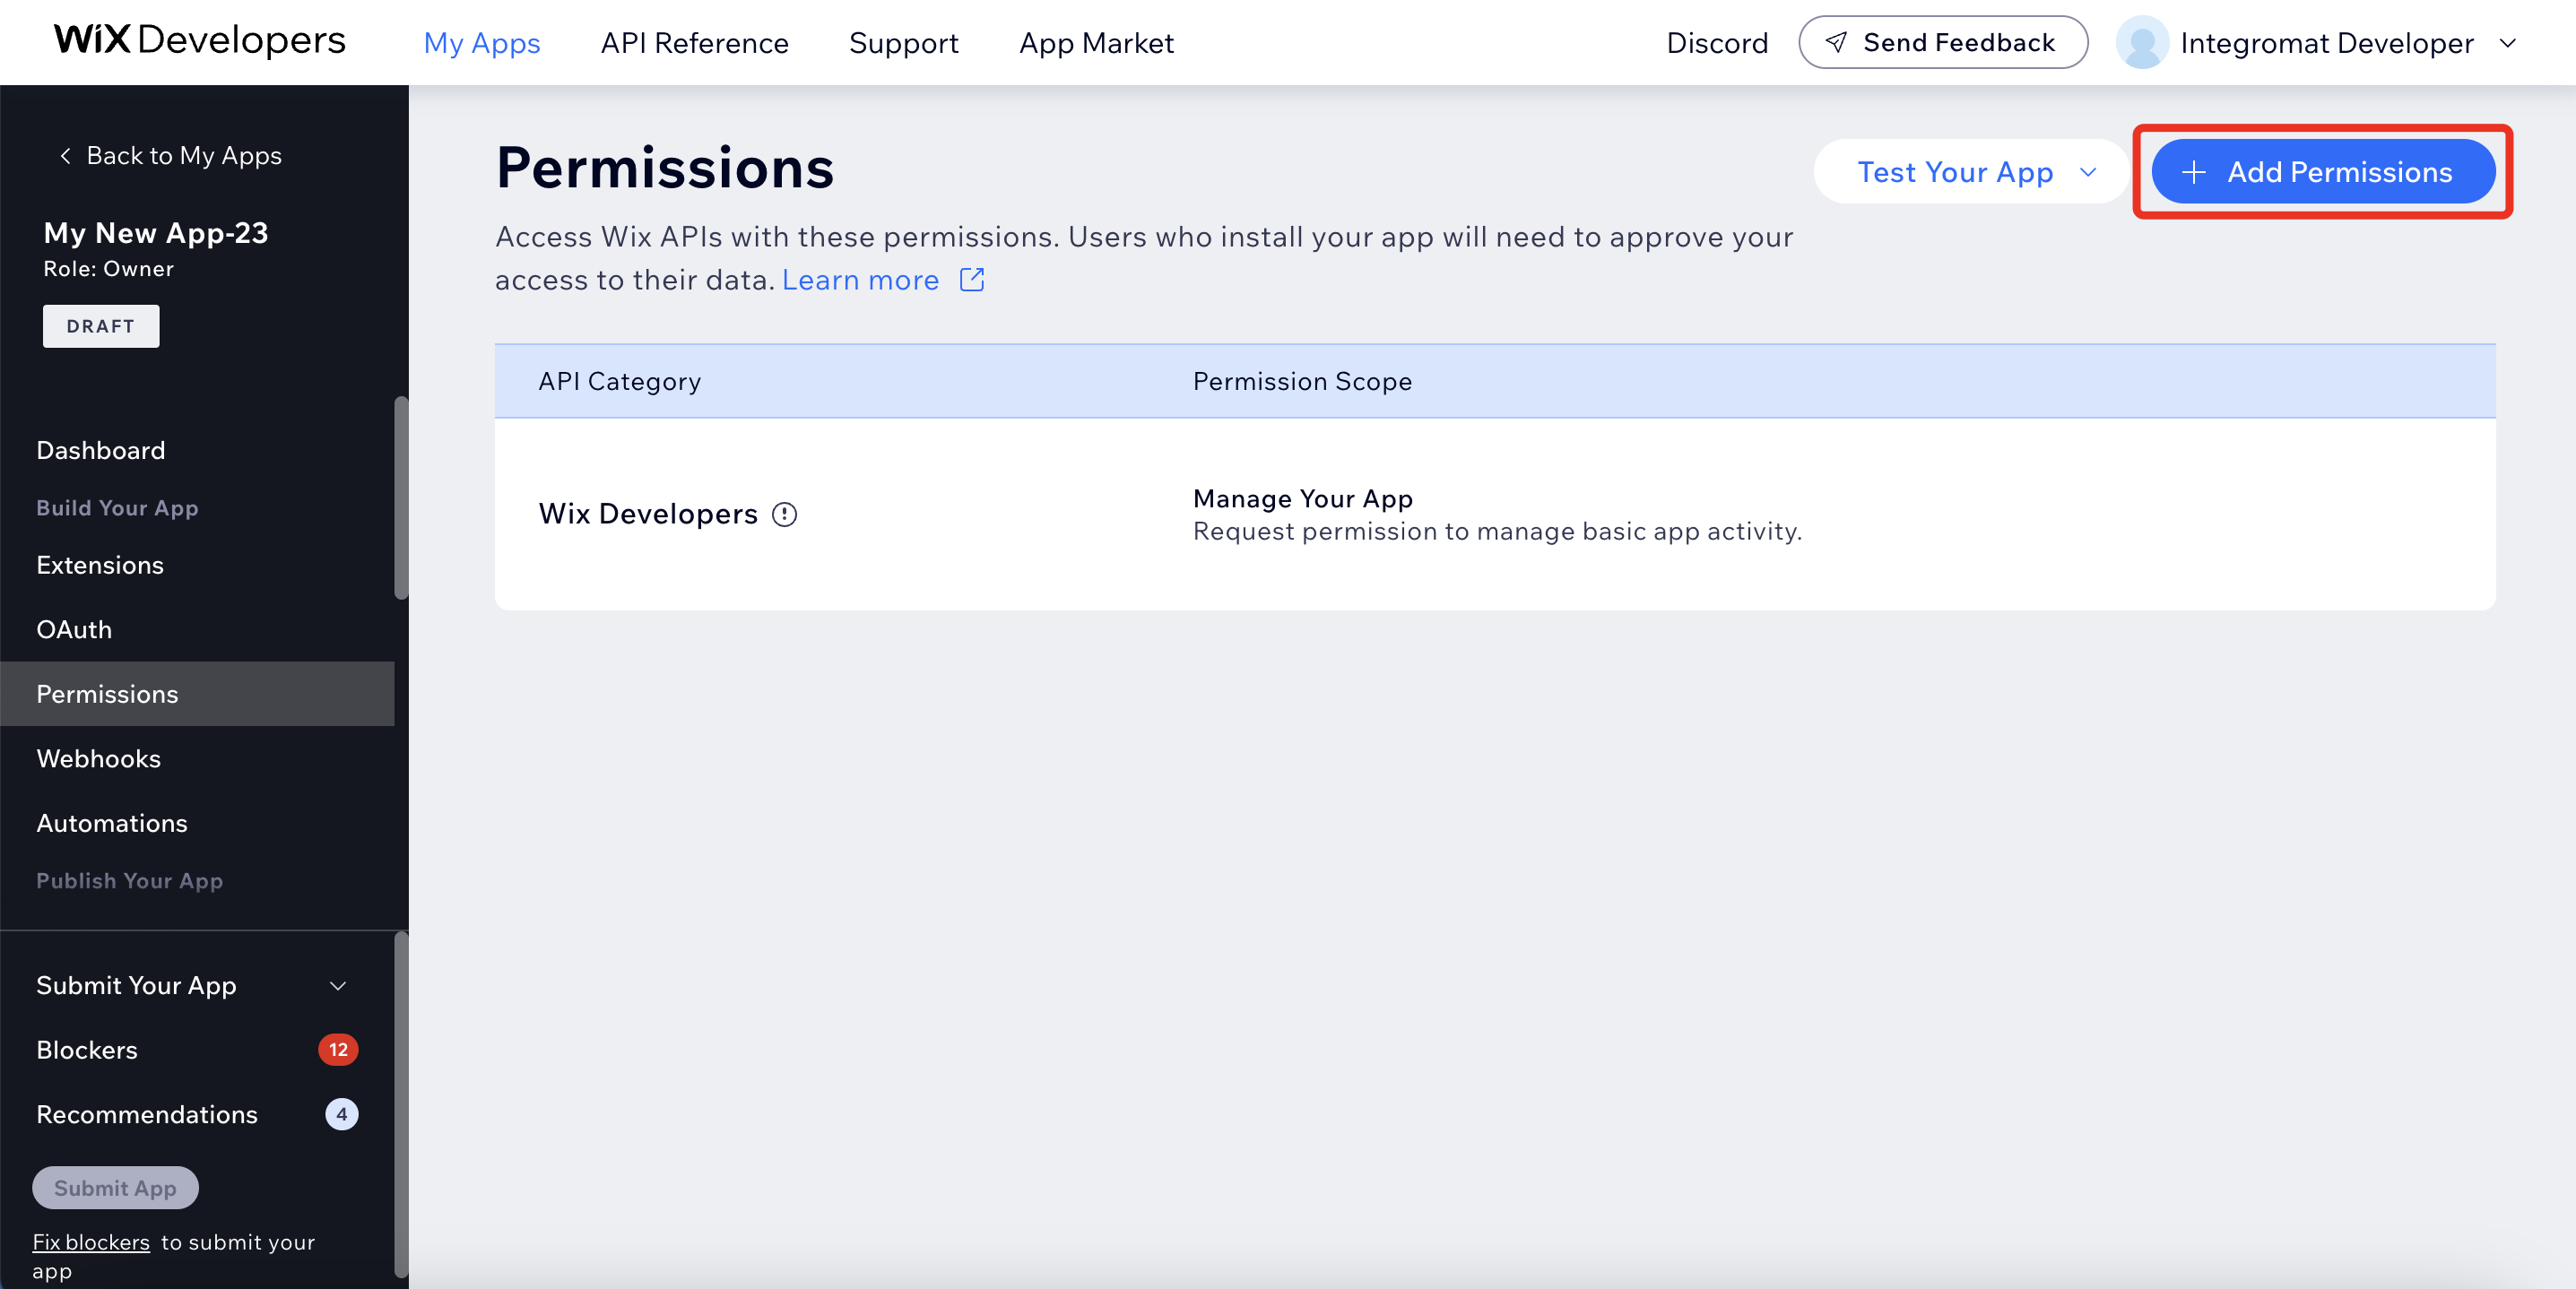
Add the following scopes:
Wix Developers
Manage Your App
Wix Stores
Manage Products, Manage Orders
Marketing
Read Form Submissions
Coupons
Manage Coupons
Wix Chat
Manage Chats
Wix Cashier
Read Payments
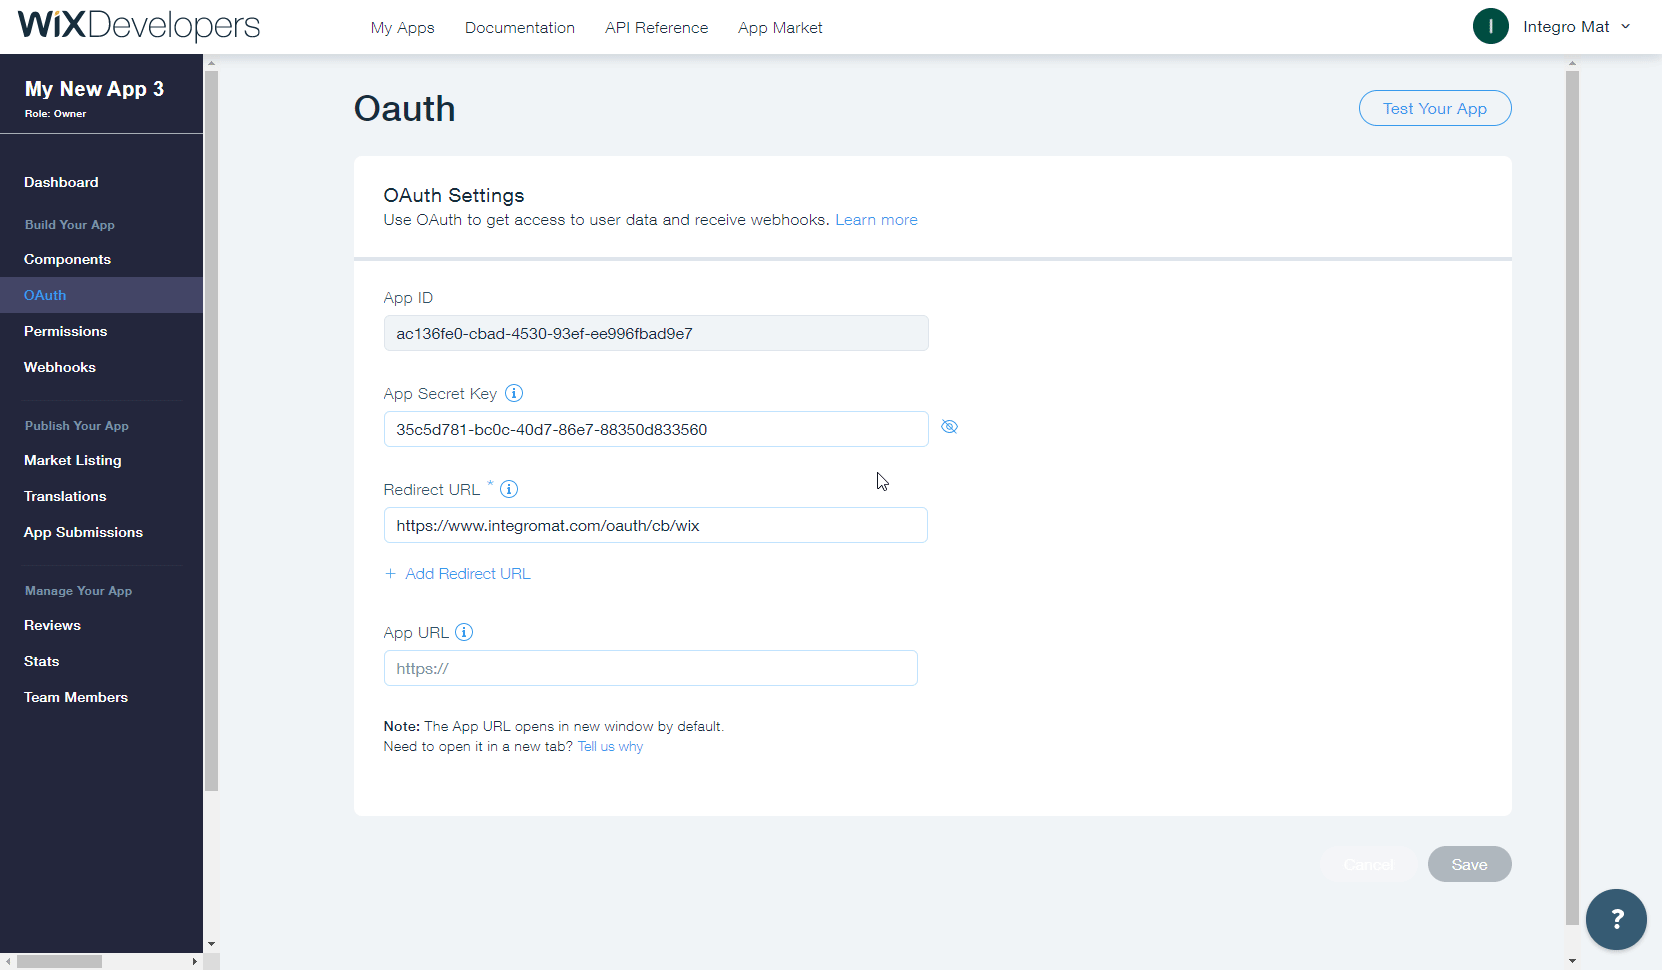
Go to the OAuth tab in the left menu and copy the App ID and App Secret values.
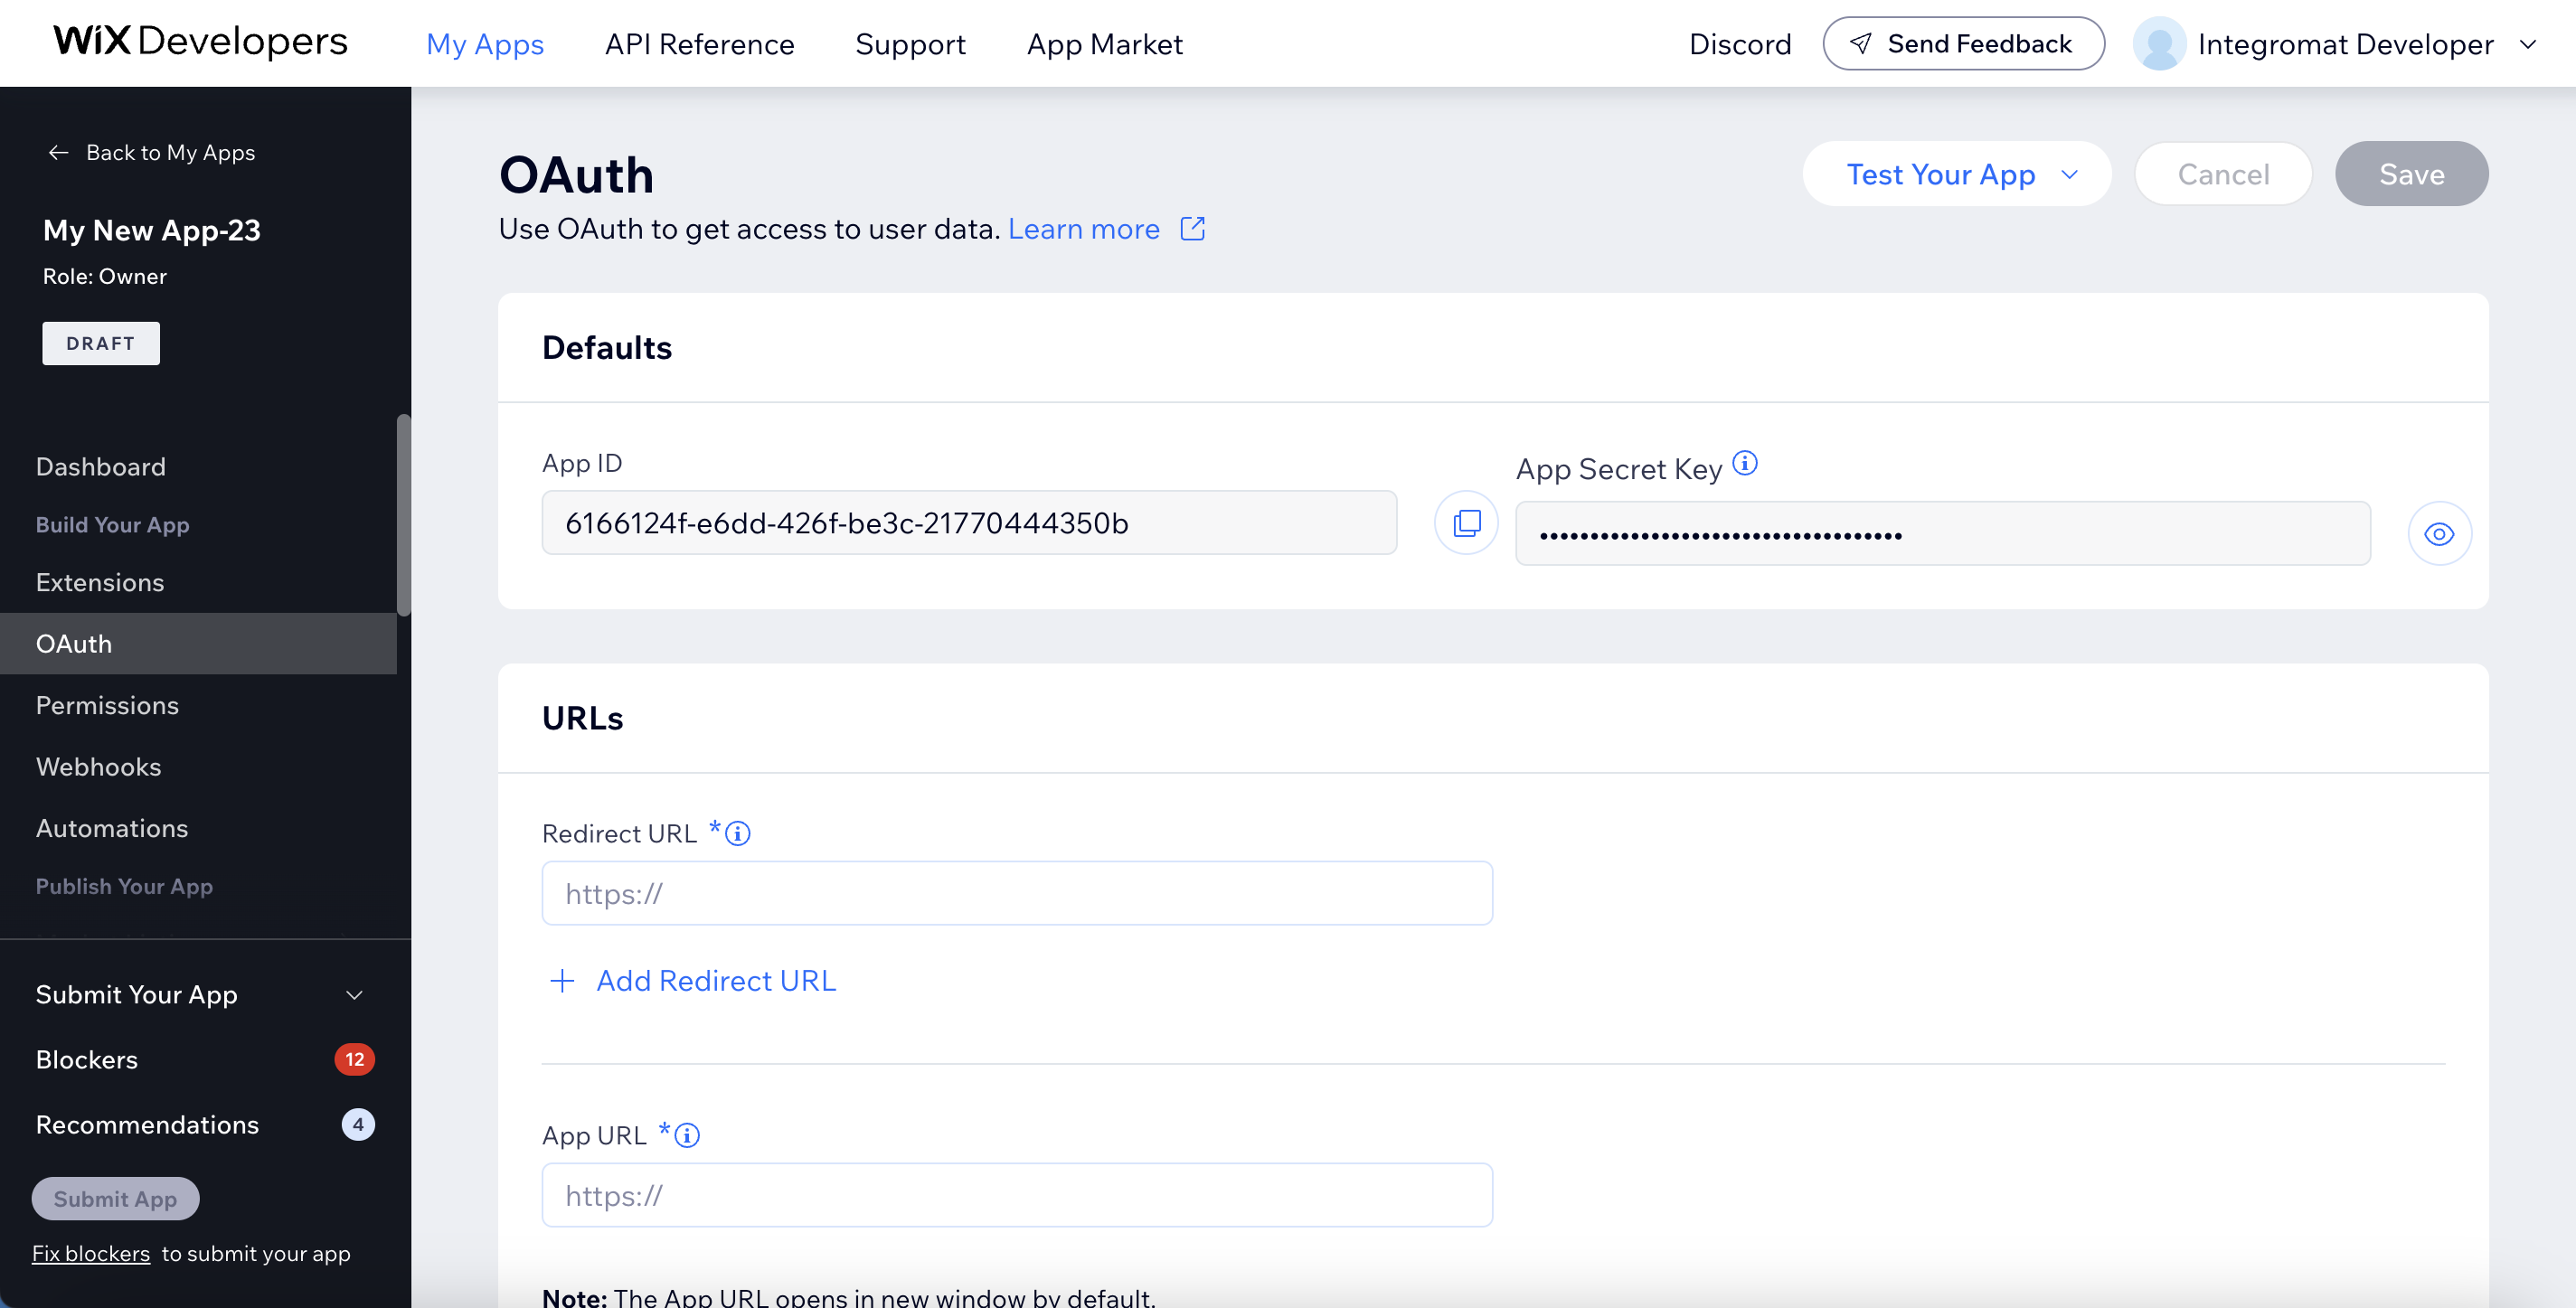
In the Redirect URL field, enter
https://www.integromat.com/oauth/cb/wix.In the App URL field, enter
https://www.make.com/en/integrations/wix.Note: If you receive an error when saving the connection, update the App URL to
https://www.integromat.com/oauth/cb/wix.Click Save.
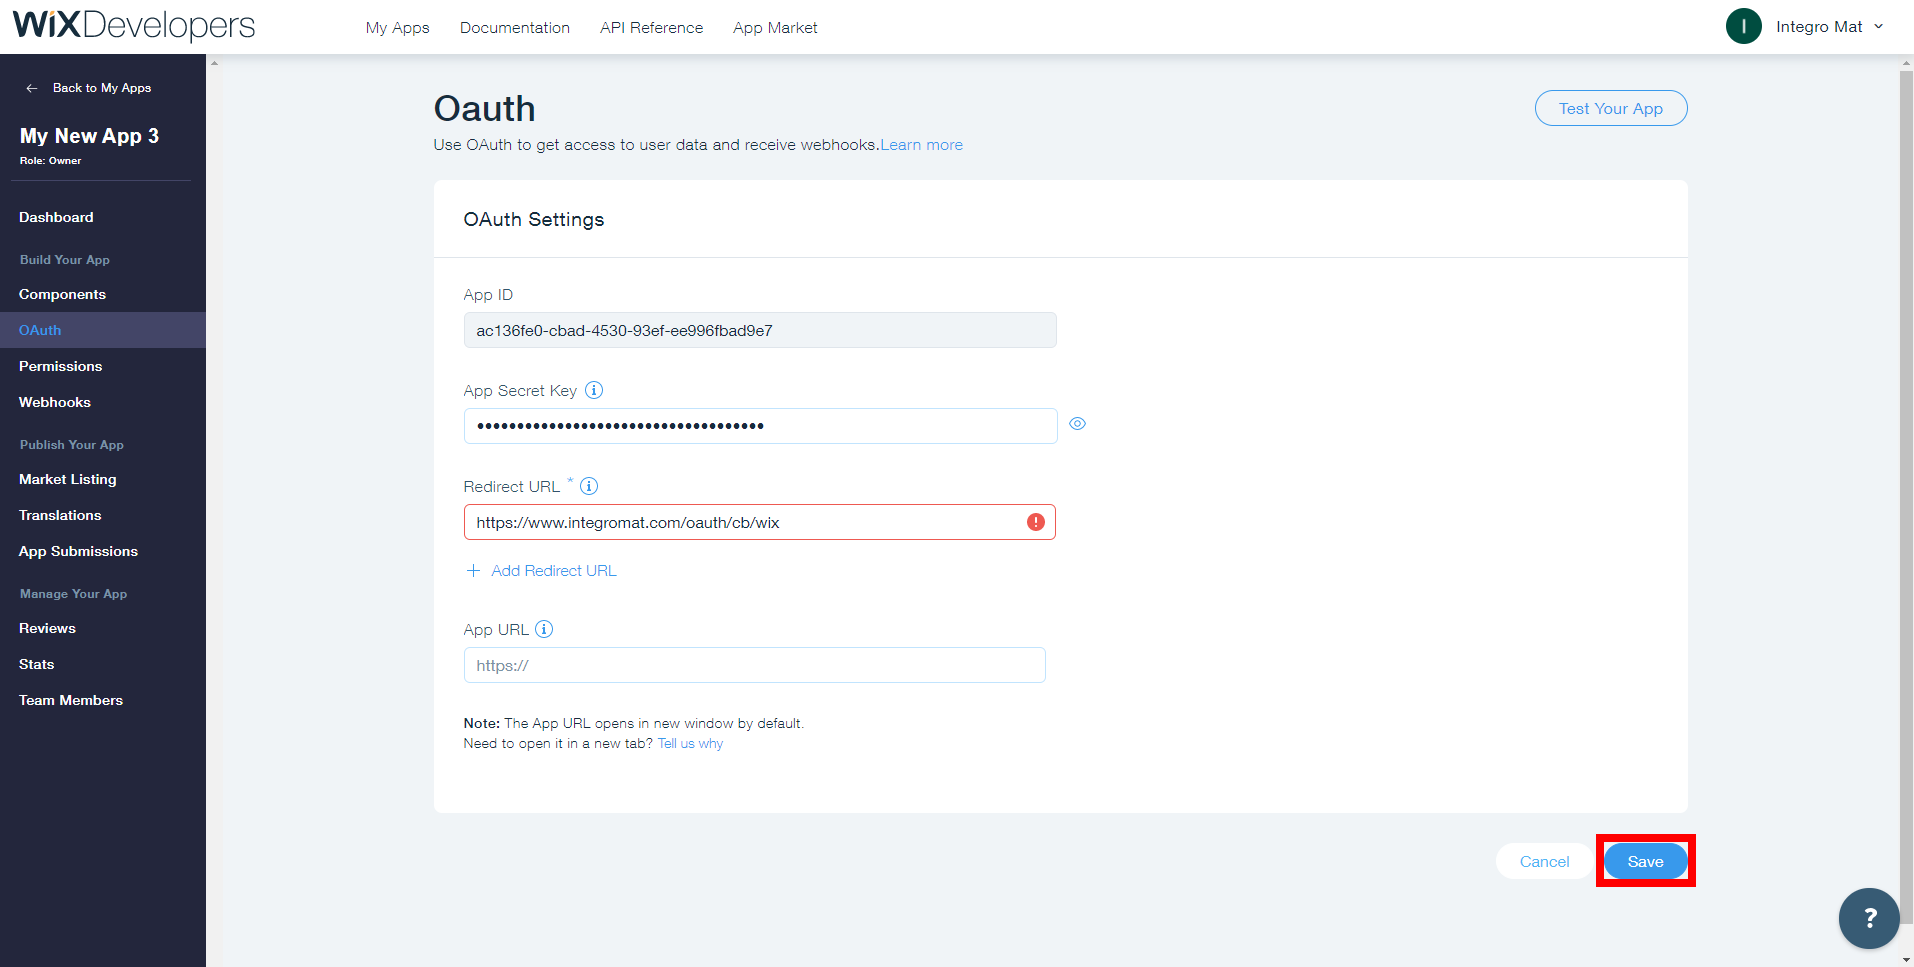
Click on the Test Your App button in the top-right corner, choose a starting point and then click Test App.
Return to the OAuth page and click the Save button again.
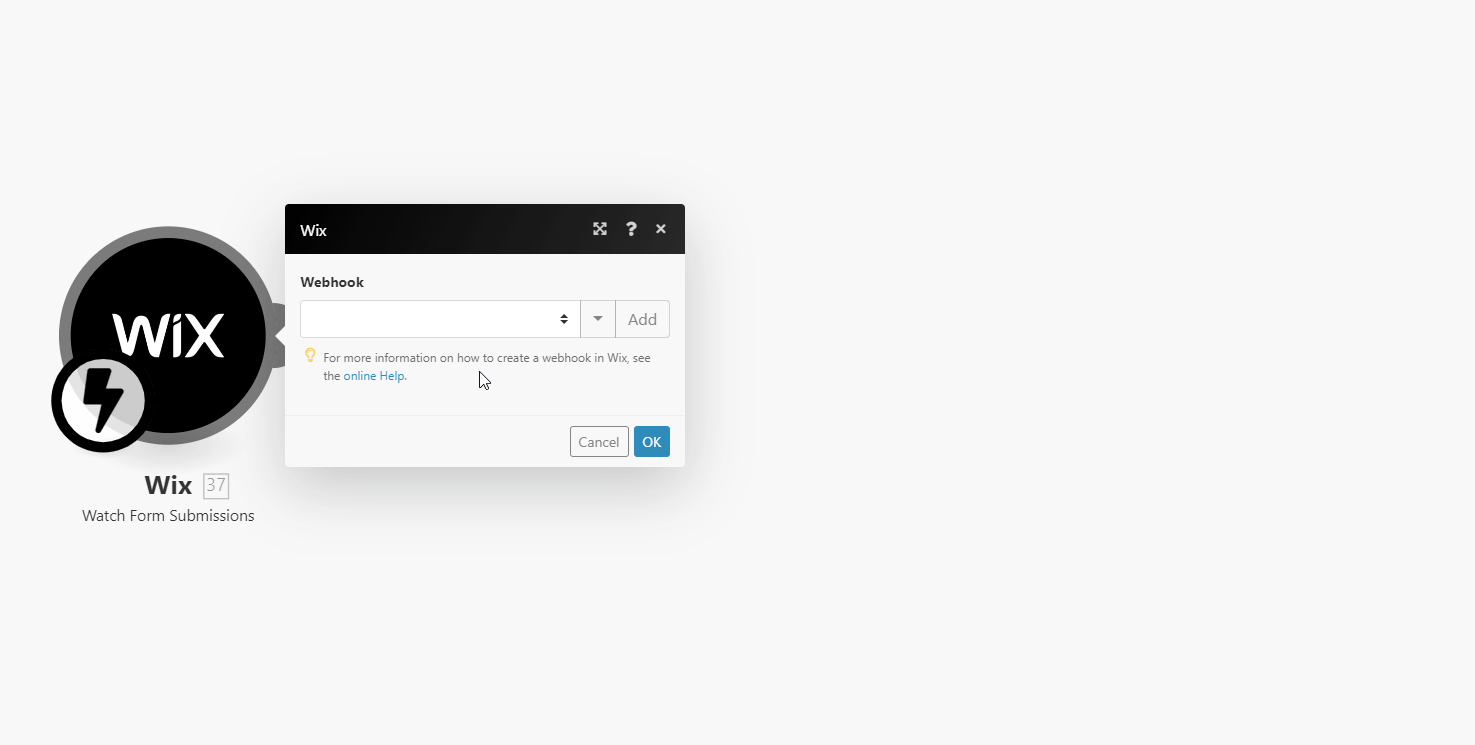
Log in to your Make account, add a Wix module to your scenario, and click Create a connection.
Note: If you add a module with an
instanttag, click Create a webhook, then Create a connection.In the App ID and App Secret fields, enter the credentials copied in Step 5.
After you click the Save button, Makewill redirect you to the Wix website where you will select a site to install your app.
Click Save.
If prompted, authenticate your account, select the site to install your app on, and click Agree & Add.
You have successfully established the connection. You can now edit your scenario and add more Wix modules. If your connection requires reauthorization at any point, follow the connection renewal steps here.
CRM: Contact
Retrieves a list of all contacts.
Connection | |
Sort by | Select or map the field name to sort the contacts. |
Order | Select the order in which you want to sort the results. For example, ascending order. |
Limit | Set the maximum number of contacts Makewill return during one execution cycle. |
Returns the data of a specified contact.
Connection | |
Contact ID | Select or map the Contact ID whose details you want to retrieve. |
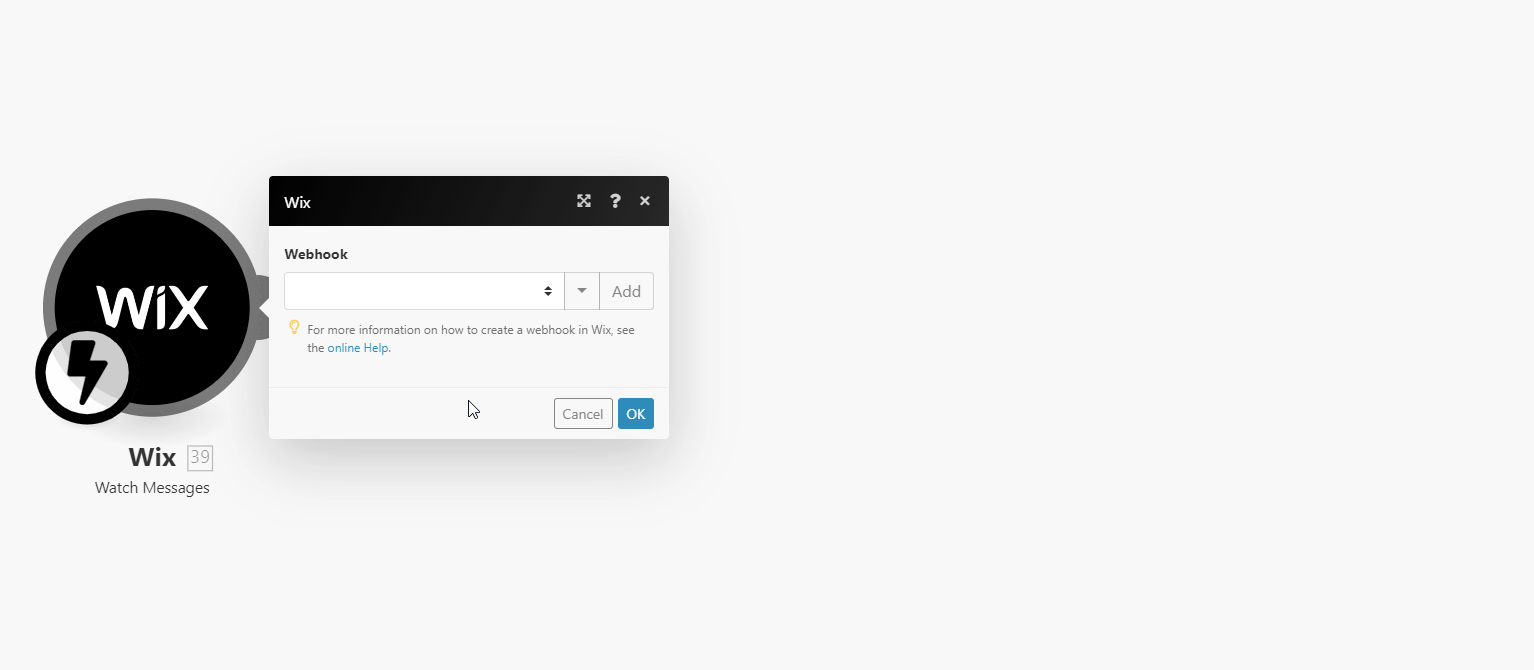
Stores: Cart
Triggers when a cart is created, completed, abandoned or recovered in a store web.
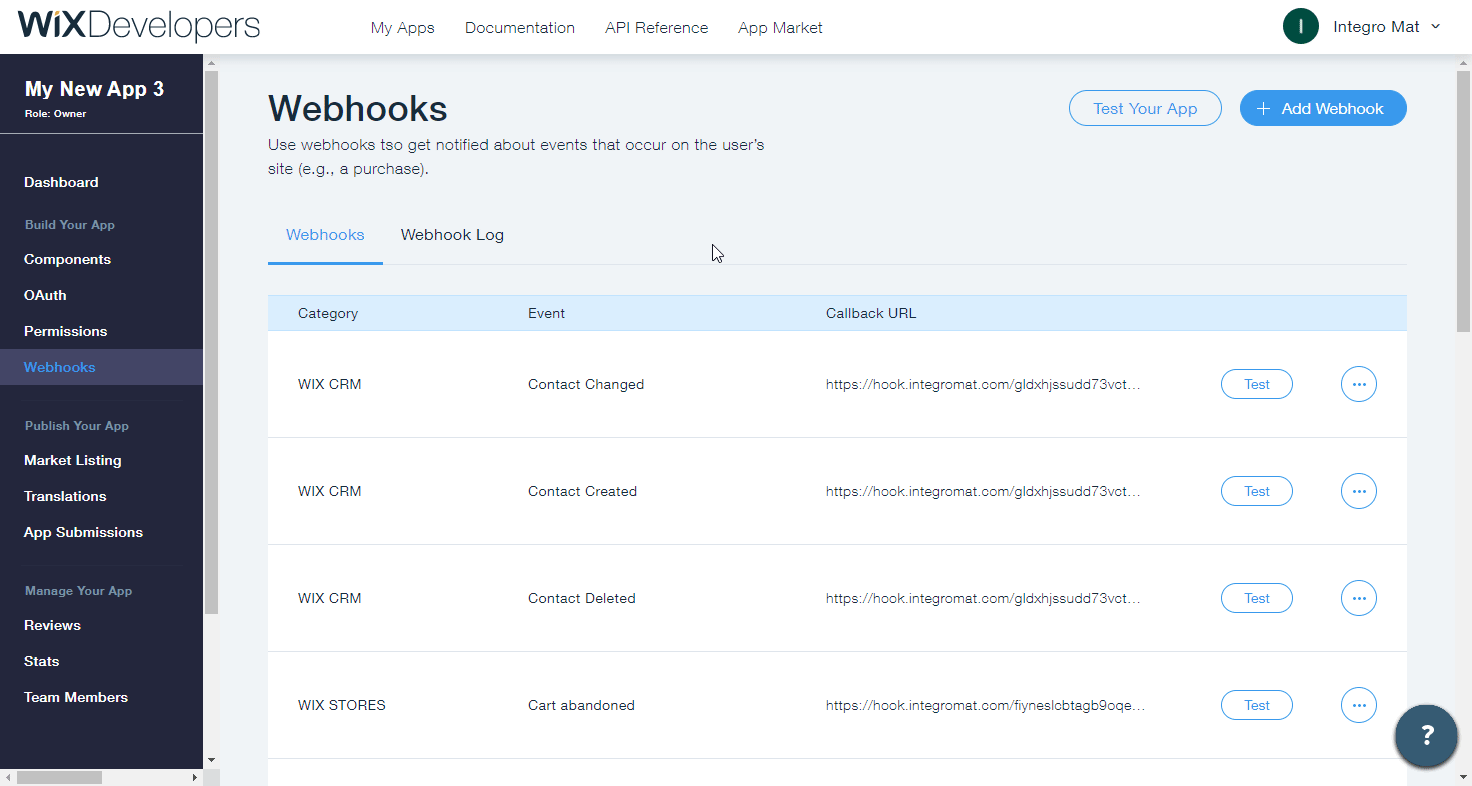
The webhook URL needs to be generated in Makeand then added to Wix's Webhooks settings.
Add the Watch Carts module to your Makescenario.
Generate and copy the webhook URL.
Log in to Wix Developer Center.
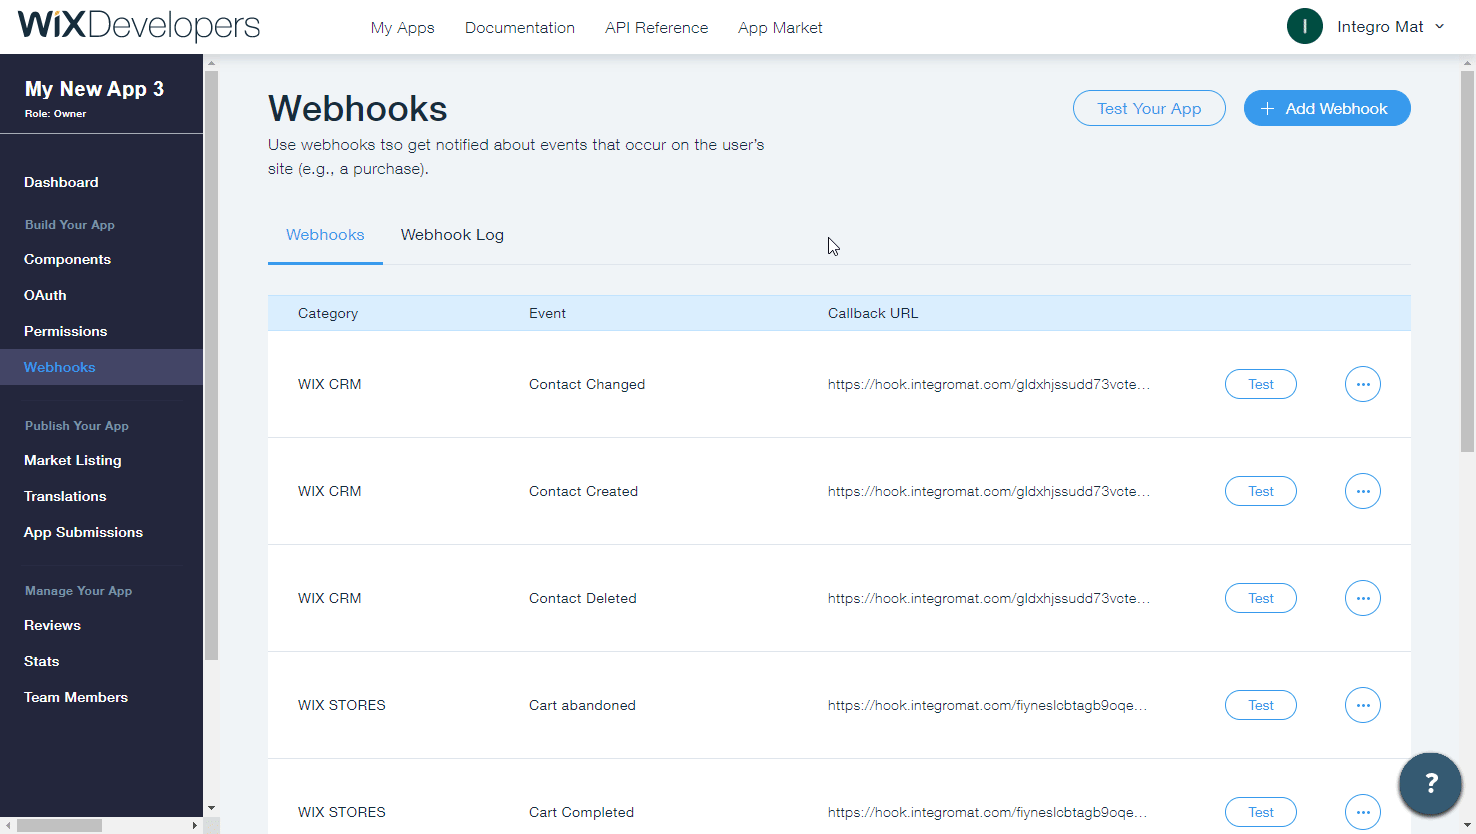
Navigate to Webhooks > click +Add Webhook.

Select the Wix Stores option from the API Category drop-down menu.
Select the events that will trigger the Watch Carts module and enter the webhook URL you generated in step 2 above to the Callback URL field.
Click Save and confirm the dialog.

Now, every time the specified event in the store's cart occurs, the Watch Carts module in your Makescenariois triggered.
Retrieves cart details.
Connection | |
Contact ID | Select or map the Cart ID whose details you want to retrieve. |
Stores: Collection
Triggers when a collection is created, updated or deleted.
The webhook URL needs to be generated in Makeand then added to Wix's Webhook settings.
Add the Watch Collections module to your Makescenario.
Generate and copy the webhook URL.
Log in to Wix Developer Center.
Navigate to Webhooks > click +Add Webhook.

Select the Wix Stores option from the API Category drop-down menu.
Select the events that will trigger the Watch Collections module and enter the webhook URL you generated in step 2 above to the Callback URL field.
Click Save and confirm the dialog.

Now, every time the specified collection event occurs, the Watch Collections module in your Makescenariois triggered.
Searches for collections by filter parameter.
Connection | |
Filter | Specify the parameter to filter the collections. |
Limit | Set the maximum number of collections Makewill return during one execution cycle. |
Returns the data of a specified collection.
Connection | |
Collection ID | Select or map the Collection ID whose details you want to retrieve. |
Creates a new collection.
Connection | |
Collection Name | Enter (map) a name for the collection. |
Updates an existing collection.
Connection | |
Collection ID | Select or map the collection whose details you want to update. |
Collection Name | Enter (map) a new name for the collection. |
Deletes a collection.
Connection | |
Collection ID | Select or map the Collection ID you want to delete. |
Adds products to a specified collection.
Connection | |
Collection ID | Enter (map) the ID or select the collection to which you want to add products to. |
Product IDs | Select or map the Product IDs you want to add to the collection. |
Deletes products from a specified collection.
Connection | |
Collection ID | Select or map Collection ID whose products you want to delete. |
Product IDs | Select or map the Product IDs you want to add to the collection. |
Stores: Product
Triggers when a product is created, updated, or deleted.
The webhook URL needs to be generated in Makeand then added to Wix's Webhooks settings.
1. Add the Watch Products module to your Makescenario.
2. Generate and copy the webhook URL.
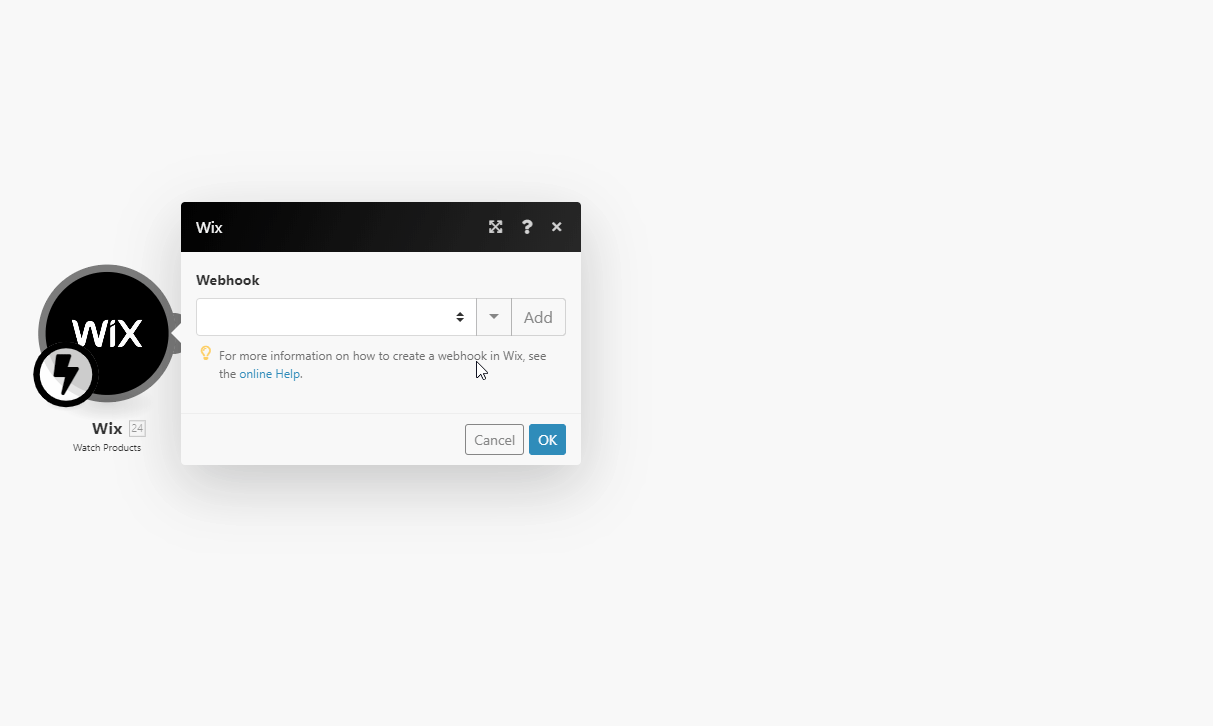
Log in to Wix Developer Center.
Navigate to Webhooks > click +Add Webhook.

Select the Wix Stores option from the API Category drop-down menu.
Select the events that will trigger the Watch Products module and enter the webhook URL you generated in step 2 above to the Callback URL field.
Click Save and confirm the dialog.
Now, every time the specified product event occurs, the Watch Products module in your Makescenariois triggered.
Searches for products by filter parameter.
Connection | |
Filter | Specify the filter settings to filter returned products by. |
Limit | Set the maximum number of products Makewill return during one execution cycle. |
Returns the data of a specified product.
Connection | |
Product ID | Enter (map) the ID or select the product you want to retrieve details for. |
Creates a new product.
Connection | Establish a connection to your Wix account.#connecting-wordpress-to-make | ||||
Name | Enter the name of the new product. | ||||
Price | Enter the product price. | ||||
SKU | Enter the Stock Keeping Unit (if variant management is enabled, SKUs will be set per variant, and this field will be empty). | ||||
Description | Enter the product description. Accepts rich text. | ||||
Weight | Enter the product weight (if variant management is enabled, the weight will be set per variant, and this field will be empty). | ||||
Discount |
| ||||
Manage Variants | Enable this option to manage variants for this product - enables unique SKU, price, and weight per variant. Also affects inventory data. | ||||
Product Options | Add the product variants.
| ||||
Add Medias | Enable this option to add images or videos to the product. | ||||
Visible | Enable to make the product visible to site visitors. |
Updates an existing product.
Connection | |
Product ID | Enter (map) the product ID or select the product you want to update. |
Please find the descriptions of the fields in the Create a Product section above.
Deletes a product.
Connection | |
Product ID | Enter (map) the product ID or select the product you want to delete. |
Stores: Order
Triggers when an order is created.
The webhook URL needs to be generated in Makeand then added to Wix's Webhooks settings.
Add the Watch Orders module to your Makescenario.
Generate and copy the webhook URL.
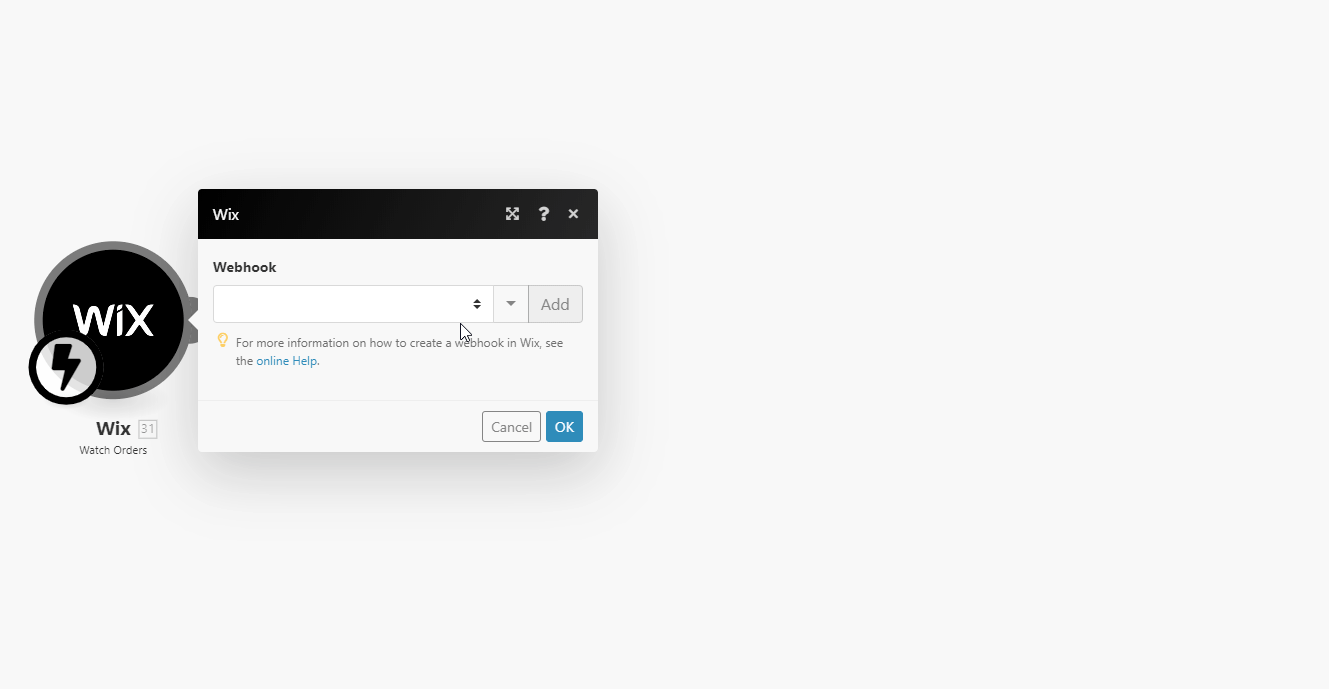
Log in to Wix Developer Center.
Navigate to Webhooks > click +Add Webhook.

Select the Wix Stores option from the API Category drop-down menu.
Select the events that will trigger the Watch Products module and enter the webhook URL you generated in step 2 above to the Callback URL field.
Click Save and confirm the dialog.

Now, every time the specified order event occurs, the Watch Orders module in your Makescenariois triggered.
Searches for orders by filter parameter.
Connection | |
Filter | Specify the filter settings to filter the orders. |
Limit | Set the maximum number of orders Makewill return during one execution cycle. |
Returns the data of a specified order.
Connection | |
Order ID | Enter (map) the ID or select the order you want to retrieve details. |
Generates a link to a PDF file for given orders.
Connection | |
Order IDs | Select or map the Order IDs for which you want to generate a PDF link. |
Stores: Fulfillment
Triggers when a fulfillment is created, updated or deleted.
The webhook URL needs to be generated in Makeand then added to Wix's Webhooks settings.
Add the Watch Fulfillments module to your Makescenario.
Generate and copy the webhook URL.
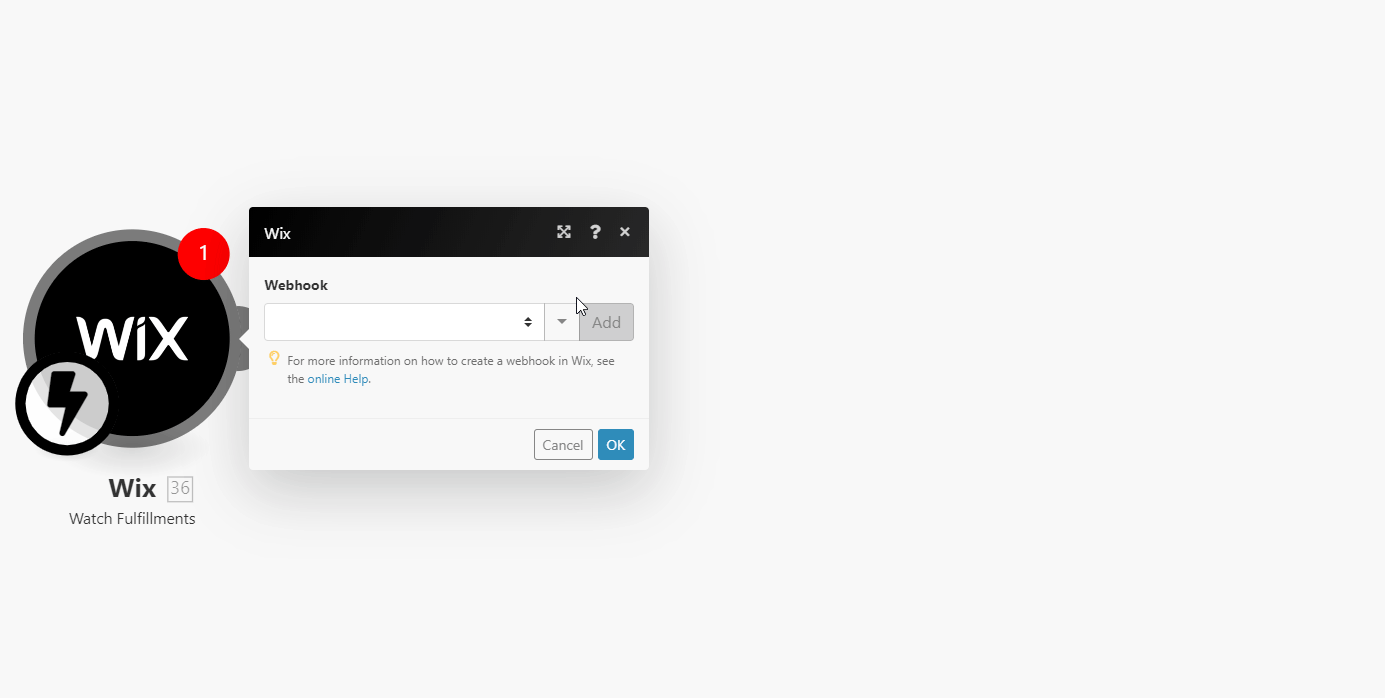
Log in to Wix Developer Center.
Navigate to Webhooks > click +Add Webhook.
Select the Wix Stores option from the API Category drop-down menu.
Select the events that will trigger the Watch Fulfillments module and enter the webhook URL you generated in step 2 above to the Callback URL field.
Click Save and confirm the dialog.
Now, every time the specified fulfillment events occurs, the Watch Fulfillments module in your Makescenariois triggered.
Form
Triggers when a form is submitted.
The webhook URL needs to be generated in Make and then added to Wix's Webhooks settings.
Add the Watch Form Submissions module to your Make scenario.
Generate and copy the webhook URL.
Log in to Wix Developer Center.
Navigate to Webhooks > click +Add Webhook.

Select the Wix CRM option from the API Category drop-down menu.
Select the event that will trigger the Watch Form Submissions module and enter the webhook URL you generated in step 2 above to the Callback URL field.
Click Save and confirm the dialog.
Now, every time the form is submitted on your site, the Watch Form Submissions module in your Make scenario is triggered.
Chat: Message
Sends a text message to a specific channel on behalf of the site owner.
Connection | |
Channel ID | Enter (map) the ID of the channel you want to send the message to. |
Text | Enter the message text content. |
Triggers when a chat message is received.
The webhook URL needs to be generated in Makeand then added to Wix's Webhooks settings.
Add the Watch Messages module to your Makescenario.
Generate and copy the webhook URL.
Log in to Wix Developer Center.
Navigate to Webhooks > click +Add Webhook.
Select the Wix CRM option from the API Category drop-down menu.
Select the event that will trigger the Watch Messages module and enter the webhook URL you generated in step 2 above to the Callback URL field.
Click Save and confirm the dialog.

Now, every time the message is received, the Watch Messages module in your Makescenariois triggered.
Other
Performs an arbitrary authorized API call.
Connection | |
URL | Enter a path relative to
NoteFor the list of available endpoints, refer to the Wix API Reference. |
Method | Select the HTTP method you want to use: GET to retrieve information for an entry. POST to create a new entry. PUT to update/replace an existing entry. PATCH to make a partial entry update. DELETE to delete an entry. |
Headers | Enter the desired request headers. You don't have to add authorization headers; we already did that for you. |
Query String | Enter the request query string. |
Body | Enter the body content for your API call. |
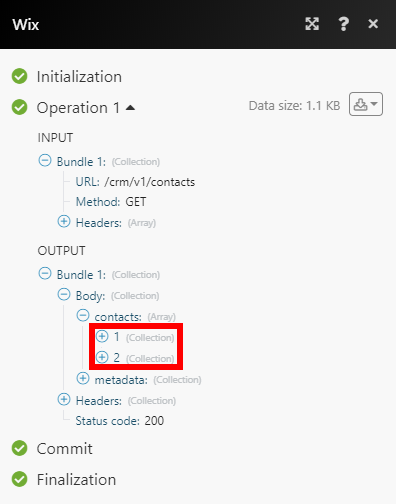
The following API call returns all contacts in your Wix account:
URL:
/crm/v1/contacts/
Method:
GET
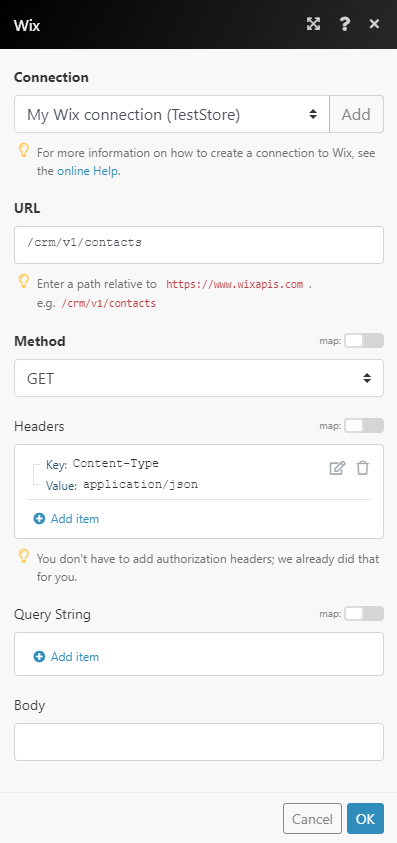 |
The result can be found in the module's Output under Bundle > Body > contacts.
In our example, 2 contacts were returned: