Using Notion with Make
 |
Notion provides an all-in-one workspace for teamwork or individual usage. It is a great tool for managing all your work in one place, but this makes integrating other tools with Notion a significant task. Notion’s popularity among Make users is increasing every day.
Start with this guide to learn how to connect Notion with Make, and how to automate workflows using Notion database items, databases, and pages.
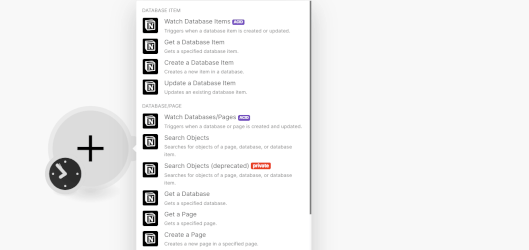
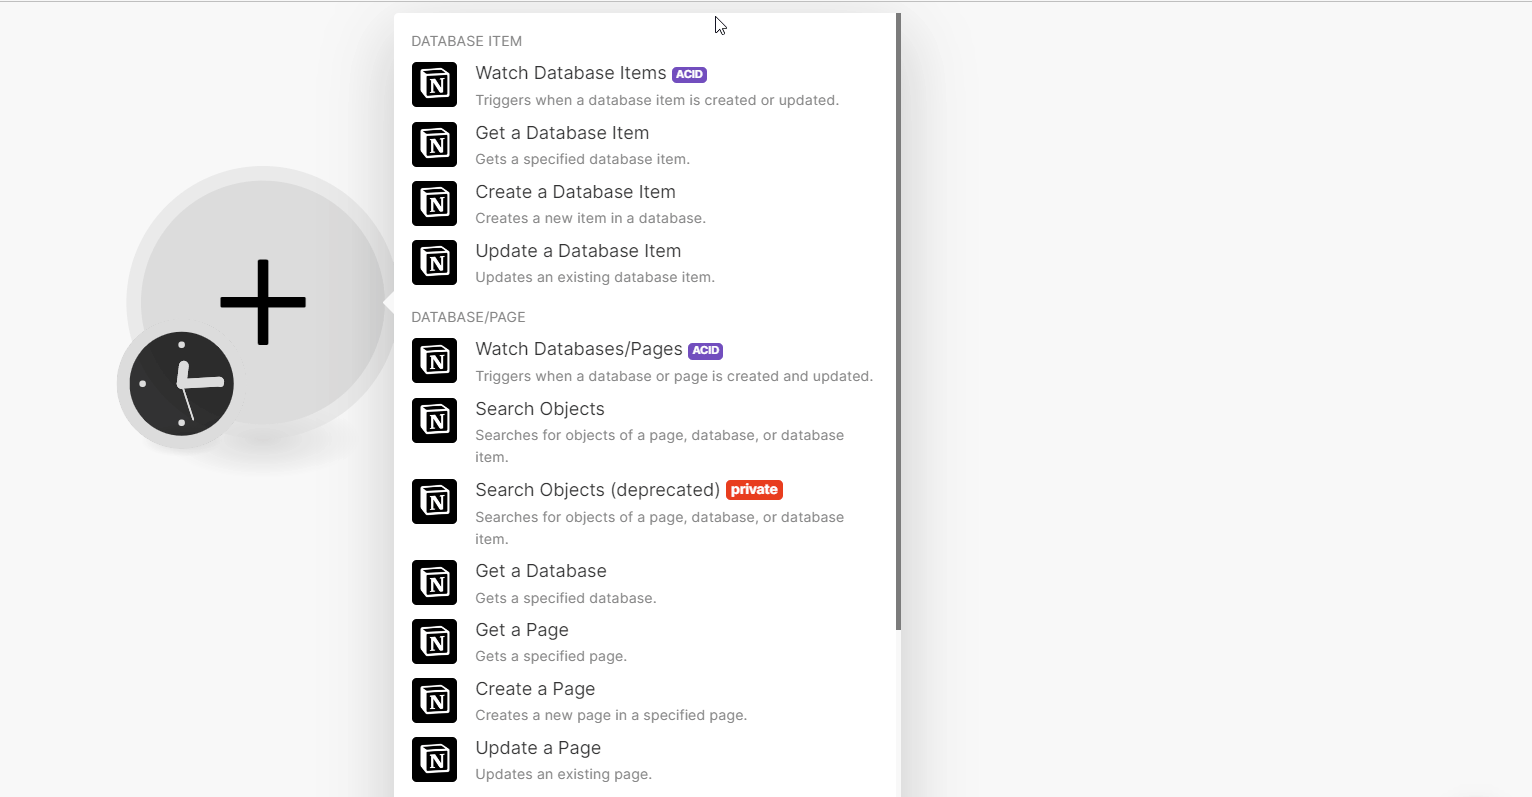
With the Notion modules in Make, you can:
watch newly created or updated database items and send their data to other apps.
retrieve specific database items and use their data in your scenarios.
create or update database items according to the data you get from other apps.
watch newly created or updated databases and pages to trigger a scenario.
create or update databases according to data you get from previous modules.
search and retrieve specific databases or pages to use in your scenario.
watch newly added or updated page content
list the existing content of a specific page.
append content to a page according to data from previous modules.
In this getting started guide, we will focus on the most common way to use Notion with Make; watching, creating, and updating database items.
Connect Notion with Make
You must be a Workspace owner of your Notion workspace to connect it to Make. You can verify your access level on the Notion Settings screen, on the Members tab.
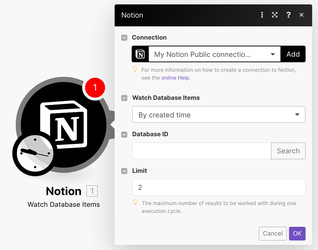
Internal vs. Public Connection
Public Connection lets you use the Single Sign-on (SSO) with your Notion account. You will be able to select the pages you want Make to access. Whenever you want to add a new database or page to the Selected Pages that Make has access to, you will need to reauthorize the connection. Choose a public connection if you want Make to have access your whole workspace, or if you're not planning on adding more pages to the connection.
Internal Connection lets you create your own integration from your Notion account and use an Integration Token to connect Notion to Make. To give Make access to your databases or pages, you will need to configure the integration of those pages manually in your Notion account. Whenever you want to add a new database or page, you will need to invite the integration account into that page from the Invite section. Choose an internal connection if you frequently add new pages that will be processed by your automation.
Public connection (SSO)
Add a Notion module into a scenario. Click Add next to the Connection field.
Select Notion Public from Connection Type. Give your connection a descriptive name, and then click Save.
In the dialog that appears, review the permissions you're giving to Make, then click Select pages.
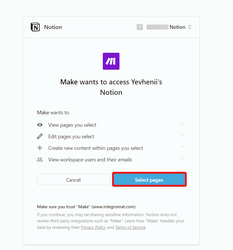
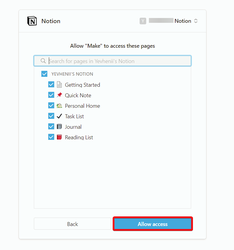
Select pages that Make will have access to and then click Allow access.
If you use the public connection type, and you added new pages to the Notion account, you must revoke the connection in your Notion account and then reauthorize the connection in Make to retrieve the added databases or pages.
To retrieve newly added databases and pages:
Open your Notion account and click Settings & Members > Connections.
Click the three-dots menu next to your Make connection, then click Disconnect all users.
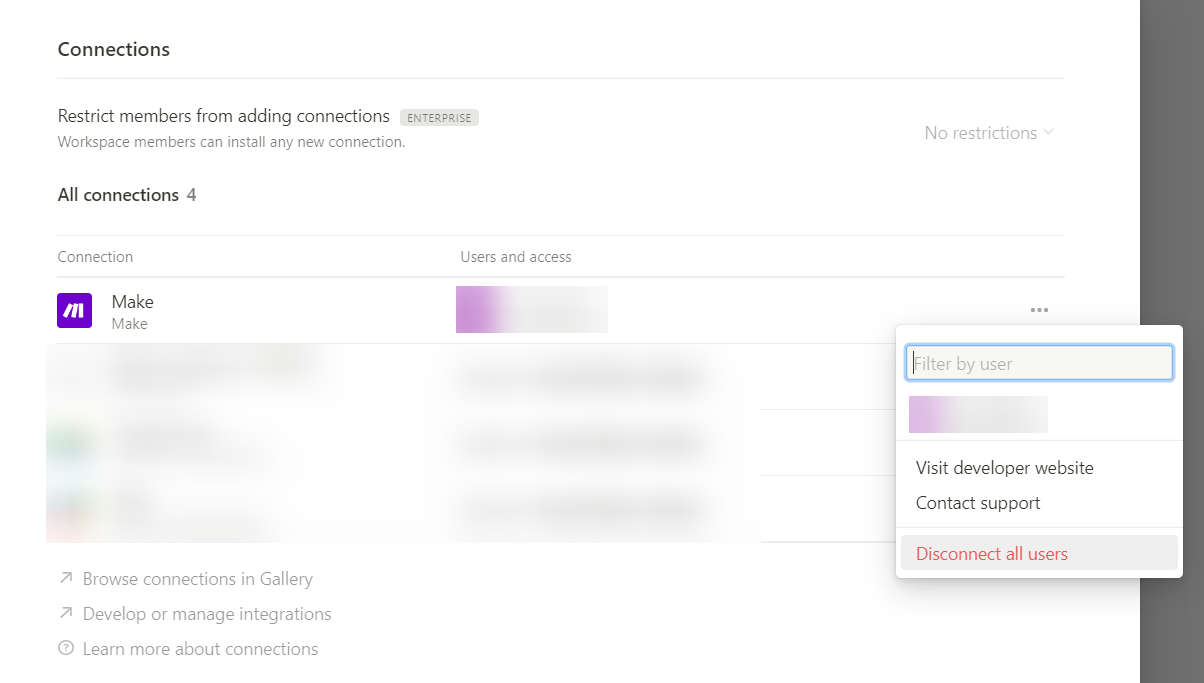
Open Make and go to Connections. Find the connection and then click Reauthorize. Follow the steps on the screen to give Make access to your pages.
You can now see the newly added databases and pages in your Notion Make connection.
Internal connection (Integration token)
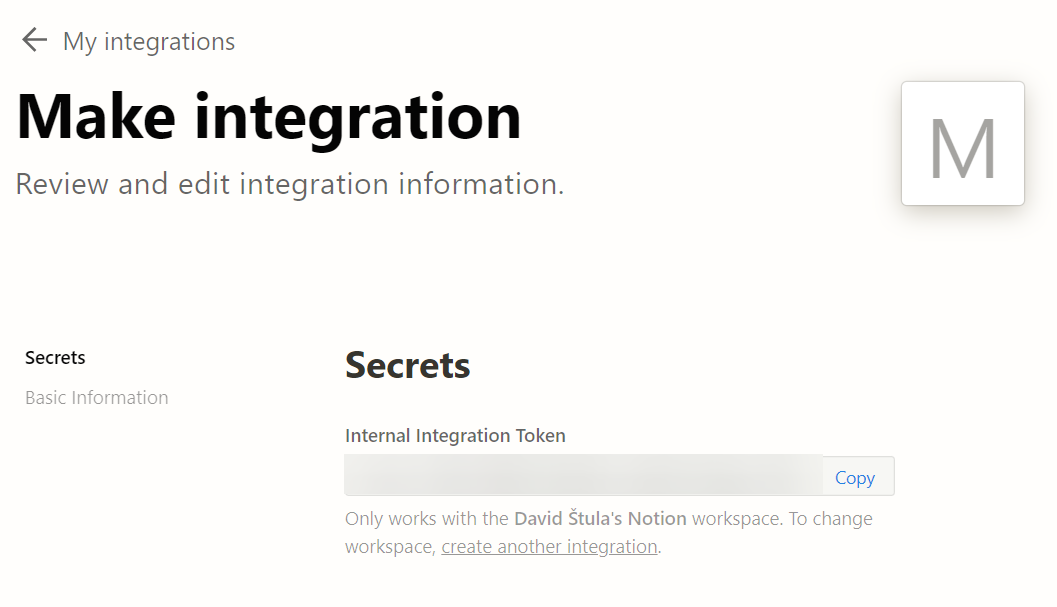
Log in to your Notion account.
Click Settings & Members > My connections > Develop or manage integrations. Alternatively, go to https://www.notion.so/my-integrations to open the integration settings directly.
Click Create a new integration.
Fill in the Basic information, select an Associated workspace, and review the integration's access settings.
Click Save changes.
Copy the Internal Integration Token to your clipboard.
Log in to Make and add a module from Notion into a scenario.
Click Add next to the Connection field.
Select Notion Internal under Connection type. Then enter a descriptive name for your connection.
In the Internal Integration Token field, enter the token you copied in step 6 and click Save.
Add Databases to be visible in Make
For the Notion internal connection, by default, Notion databases do not appear in the Database ID field > Search option. You must manually add them to the Make app from your Notion account.
 |
To add databases from your Notion account to Make app:
Log in to your Notion account.
Enter into the database you want to add to Make , click on ... in the top right corner, click Add connections, search for and click on the integration you previously created, and click Confirm.

The database is successfully shared and you can now see it in a module's Database ID > Search field.
 |
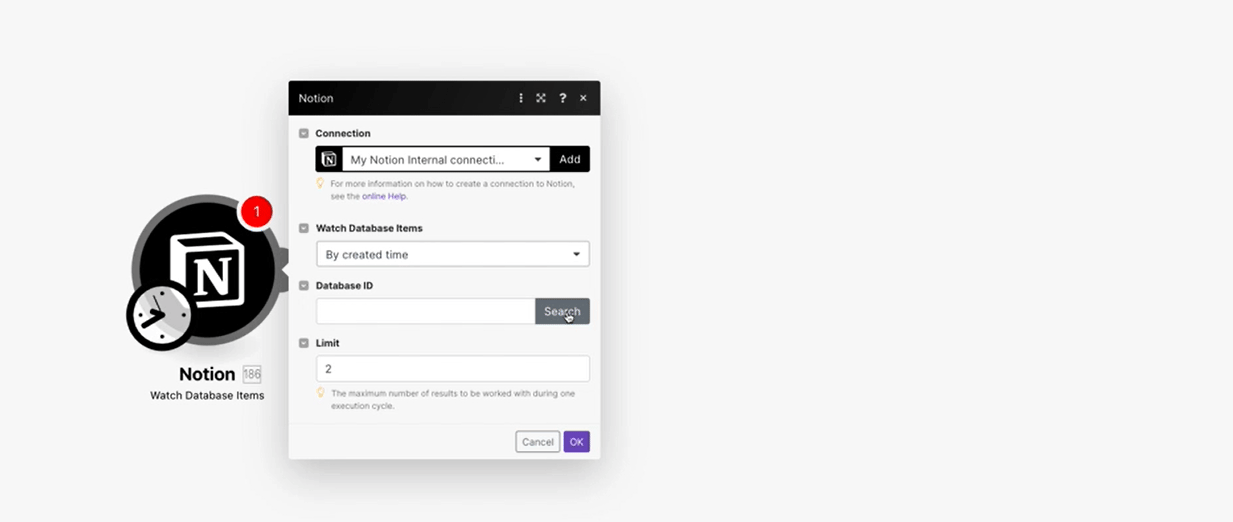
Watch database items
The Watch database items module triggers your scenario when someone creates or updates a database in Notion.
 |
You have two options; watch database items ‘by created time’ or ‘by updated time’.
By created time: If want to trigger the scenario only with new database items but not with updated items.
By updated time: If you want to trigger the scenario both with new items and updated items.
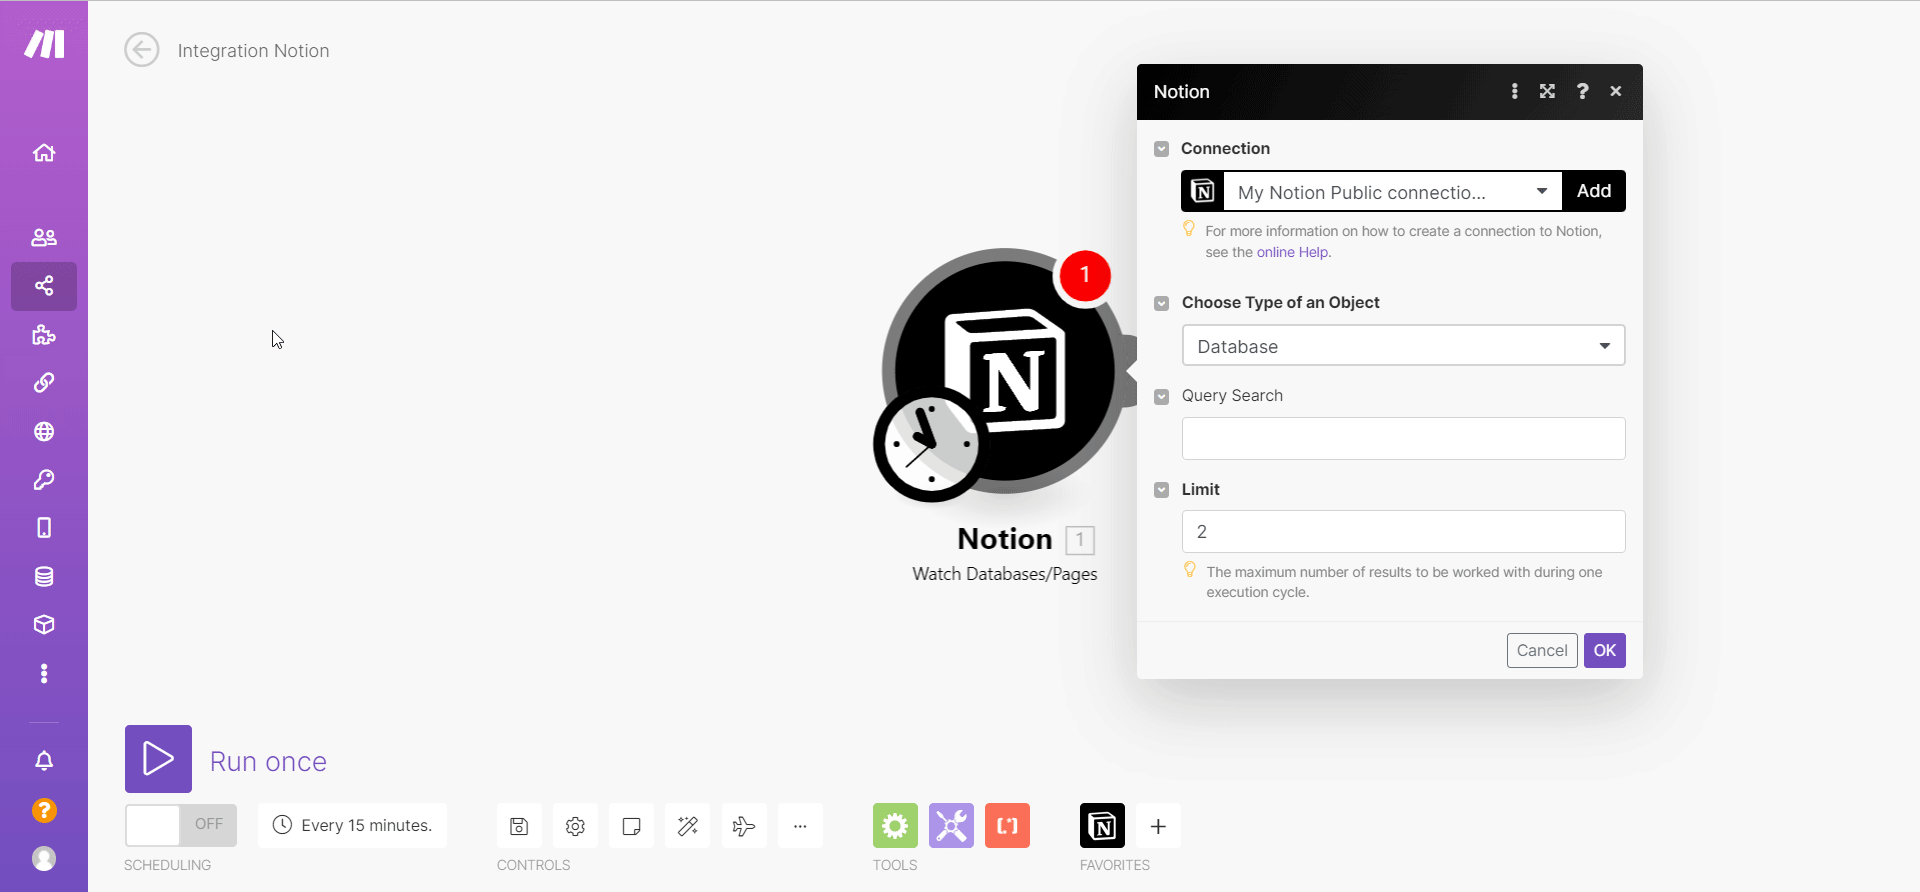
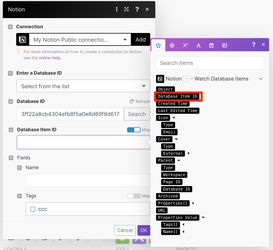
Find the Database ID
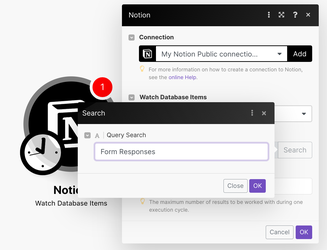
The database that you want to use should have been created before you start automating. To find the database ID, you can check out the URL of the Notion page or you can use the Search function in Make modules:
Database ID in the URL: Database ID is the part of the URL between the first '/' and '?'.

Search by query: Click on the ‘Search’ button, enter the name of the database and click ‘OK’. The database ID will be filled automatically.
Note: If you are creating a new database, check out Retrieve newly added databases or pages
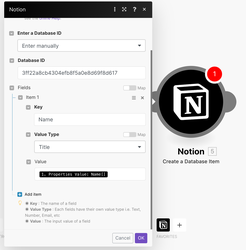
Create database items
The Create a Database item module allows you to create new items in an existing database.
 |
You have two options to enter the database ID and to map the values of the new database items:
Select from the list (Recommended): lets you find the database ID with a query and automatically shows the list of fields available for mapping. Note: if the fields do not show up, try saving the module by clicking ‘OK’ and opening it again to load the database fields.

Enter manually: lets you enter the database ID manually and map the details of the fields manually by selecting Key, Value Type, Value groups. For more information, see the property schema objects.
Update database items
The Update a Database Item module allows you to update an existing database item.
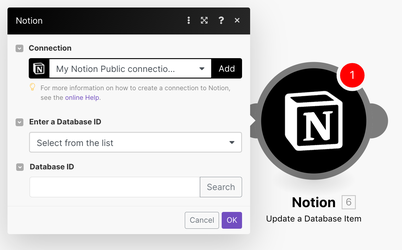 |
Similar to the "Create a Database Item" module, this module offers "Select from list" or "Enter Manually". We recommend using the "Select from the list" option for its simplicity.
Select from the list (Recommended): Click ‘Search’ and enter the name of the database, then click OK. The Database ID is automatically populated with the ID of the selected database. Click on the Database Item ID field to map this ID from previous modules (e.g., Watch Database Items). Then select the field you want to update, either by manually entering a value or by mapping values from previous modules.
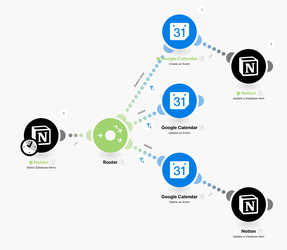
Use case: Sync Notion events database with Google Calendar
One of the most popular use cases for Notion is syncing a database with Google Calendar to help you track your calendar events in one place. To better understand this use case and to show how to use Make to implement it, we will break down a ready-to-use template; Create Google Calendar events from Notion Database Items.
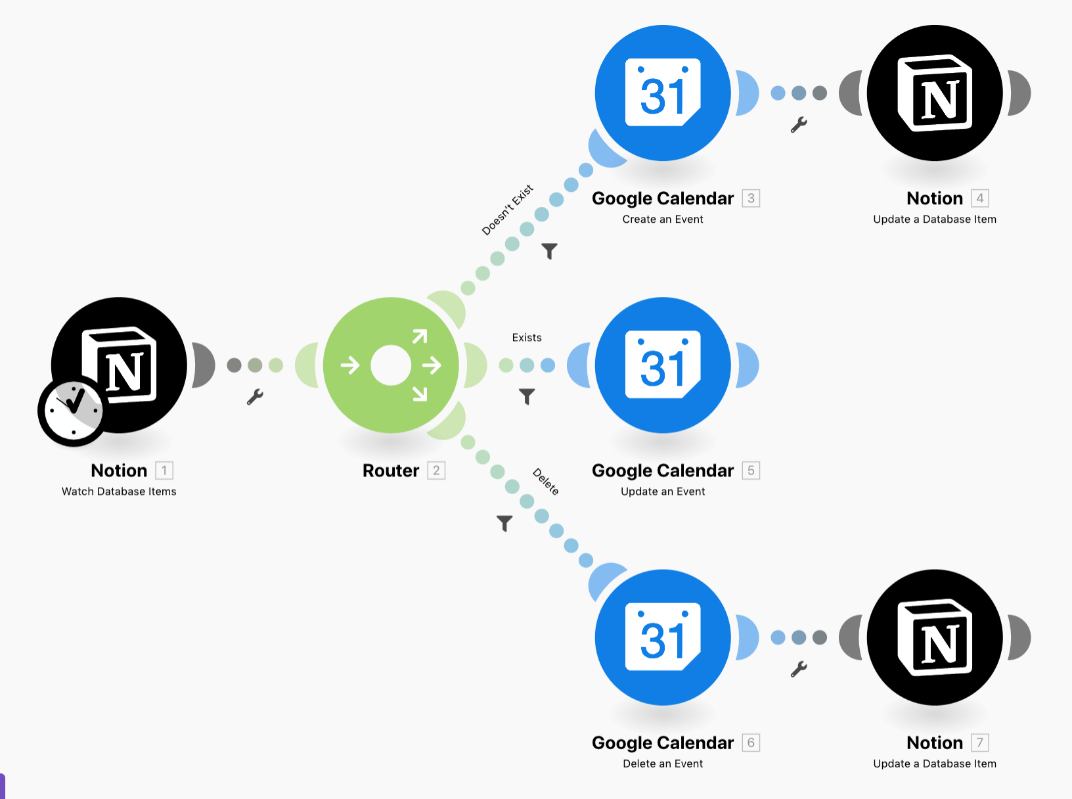 |
This scenario watches database items by updated time. When new database item data arrives, the scenario checks if they are new items, existing items, or deleted/canceled items. Then, the scenario either creates a new Google Calendar event, updates an existing event, or deletes an existing event.
To use this template or to create this use case from scratch, the Notion database that stores the events needs to have these properties:
Title: text field
Status: select the field with two options; “Scheduled” and “Cancelled”
Event ID: text field that will store Google Calendar event IDs
Meeting Time: date field that will store the start and end times of the meetings
If you prefer to use an empty Notion database with these properties, you can duplicate this example database into your Notion account.
Note: This template expects the user to manually change the status of the event in Notion; “Scheduled” or “Cancelled” to create or delete events in Google Calendar.
Note: If you decide to use the template itself, make sure the setup is matching the screenshots in this guide. There might be some parts where you need to change the Mapping switch or add field mappings by yourself.
Step 1 - Watch Database Items
Start with the first module, which is the trigger module: Watch Database Items.
 |
After you connect your Notion account, find the database ID of the Notion database which stores your events. Set up the scenario to watch database items ‘By updated time’. You want to trigger this scenario any time an event is updated, not only when an event is created.
Step 2 - Router
The Router module with 3 routes allows you to perform 3 different actions depending on filter conditions.
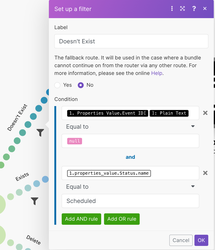
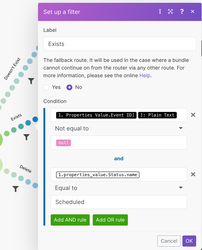
First route (New event) checks if the event is a newly created event (meaning the event doesn’t exist in Google Calendar yet). The filter in this route checks if the Event ID is empty (null) and if the status of the event is “Scheduled”.
Second route (Updated event) checks if the event was already created on Google Calendar (Event ID is not null) and if the status of the event is “Scheduled” (meaning it was not canceled).
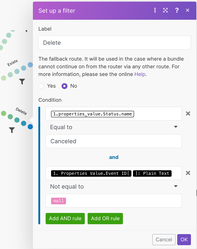
Third route (Deleted event) checks if the event exists on Google Calendar (Event ID is not null) and if the status of the event is “Cancelled”.
Step 3 - Google Calendar modules
Google Calendar modules create, update or delete events.
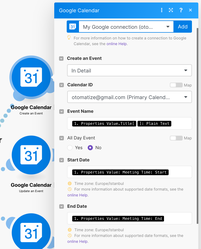
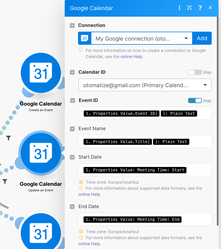
Create an Event (first route); creates a new event by mapping the title, start date and end date.
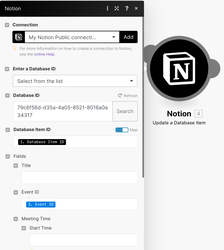
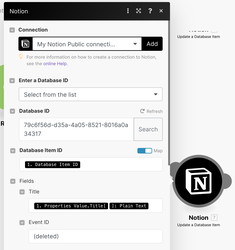
Since this is the route that handles a new Google Calendar event, add a Notion module at the end to reference the Google Calendar Event ID in the Notion database.
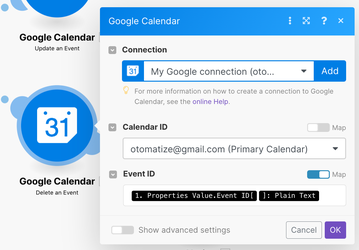
Update an Event (second route): Finds the Google Calendar event by Event ID and updates the Google Calendar event details (title, start date, end date) for it to reflect the changes in Notion database.
Delete an Event (third route): finds the Google Calendar event by Event ID and deleted it.
Use the additional Notion module at the end to remove the Event ID from the Notion database and add a note saying that the event was deleted.
Test and schedule the scenario
Once the scenario is complete, you can test if it works as expected.
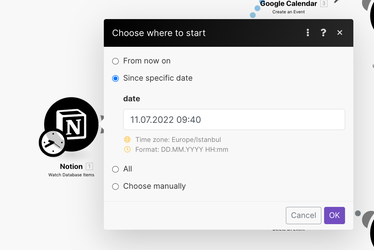
Right-click Watch Database Items module and select Choose where to start.

You can choose ‘From now on’ or ‘Since specific date’ to trigger the scenario with a new event.
Click Run once and see if the data bundles were transferred as shown below.