Google Analytics
With Google Analytics modules in Make, you can retrieve analytics reports from your Google Analytics account.
To use the Google Analytics modules, you must have a Google Analytics account and an existing property in your Google Analytics account. You can create an account at https://analytics.google.com.
Refer to the Google Analytics API documentation for a list of available endpoints.
Note
Make's use and transfer of information received from Google APIs to any other app will adhere to Google API Services User Data Policy.
Connect Google Analytics to Make
To establish the connection in Make:
Log in to your Make account, add a Google Analytics module to your scenario, and click Create a connection.
Optional: In the Connection name field, enter a name for the connection.
Optional: Switch on the Show advanced settings toggle and enter your Google Cloud Console project client credentials. For more information, see the Create and configure a Google Cloud Console project for Google Analytics section below.
Click Sign in with Google.
If prompted, authenticate your account and confirm access.
You have successfully established the connection. You can now edit your scenario and add more Google Analytics modules. If your connection requires reauthorization at any point, follow the connection renewal steps here.
To connect to Make using your own client credentials, you can create and configure a project in the Google Cloud Console.
Create a Google Cloud Console project for Google Analytics
To create a Google Cloud Console project:
Log in to the Google Cloud Console using your Google credentials.
In the top menu, click Select a project > New project.
Enter a Project name and select the Location for your project.
Click Create.
In the top menu, check if your new project is selected in the Select a project dropdown. If not, select the project you just created.
Enable APIs for Google Analytics
To enable the required APIs:
Open the left navigation menu and go to APIs & Services > Library.
Search for and enable the following APIs: Google Analytics Reporting API, Google Analytics API.
Configure your OAuth consent screen for Google Analytics
To configure your OAuth consent screen:
In the left sidebar, click OAuth consent screen.
Under User Type, select External.
For more information regarding user types, refer to Google's Exceptions to verification requirements documentation.
Click Create.
Fill in the required fields with your information.
In the Authorized domains section, add
make.comandintegromat.com.Click Save and continue.
In the Scopes page, click Add or remove scopes, add the following scope, and click Update.
https://www.googleapis.com/auth/analytics.readonly
Click Save and continue.
Optional: If your project will remain in the Testing publishing status, add test user emails on the Test users page, then click Save and continue.
Create your Google Analytics client credentials
To create your client credentials:
In the left sidebar, click Credentials.
Click + Create Credentials > OAuth client ID.
In the Application type dropdown, select Web application.
Update the Name of your OAuth client. This will help you identify it in the console.
In the Authorized redirect URIs section, click + Add URI and enter the following redirect URI:
https://www.integromat.com/oauth/cb/google.Copy your Client ID and Client secret values and store them in a safe place.
You will use these values in the Client ID and Client Secret fields in Make.
Build Google Analytics Scenarios
After connecting the app, you can perform the following actions:
Actions
Make an API Call
Searches
Get Analytics Report
Note: You must have an existing property in your Google Analytics account to use this module. This module requires a View ID. Follow the steps below to locate it in your Google Analytics property.
Log in to your Google Analytics account.
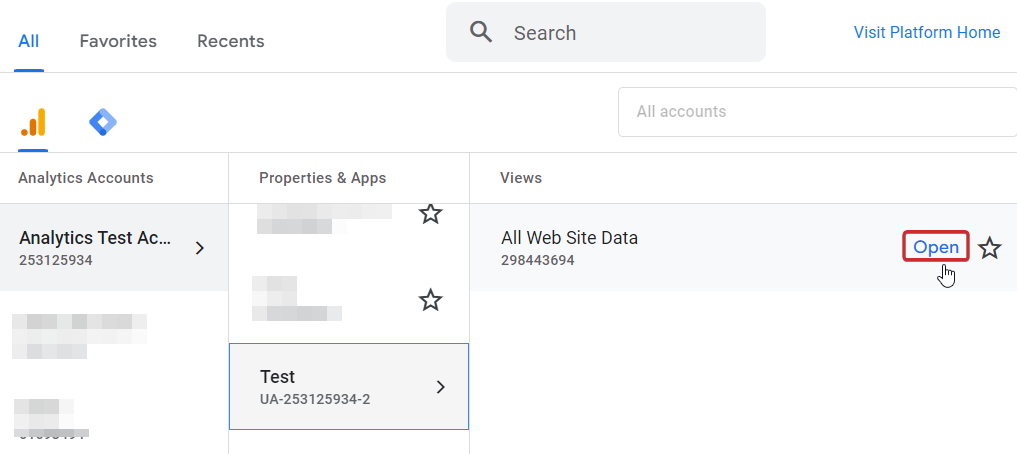
Click All accounts, go to the property you created in the UA-*********-* format, select the view, and click Open.

In the left menu, click Admin.
In the View pane, click View Settings. Locate and copy the View ID value.