Creating a scenario
In order for Make to automate your tasks for you, you have to create a scenario. A scenario comprises of a series of modules that indicate how data should be transferred and transformed between apps/services.
There are 4 steps to creating a scenario:
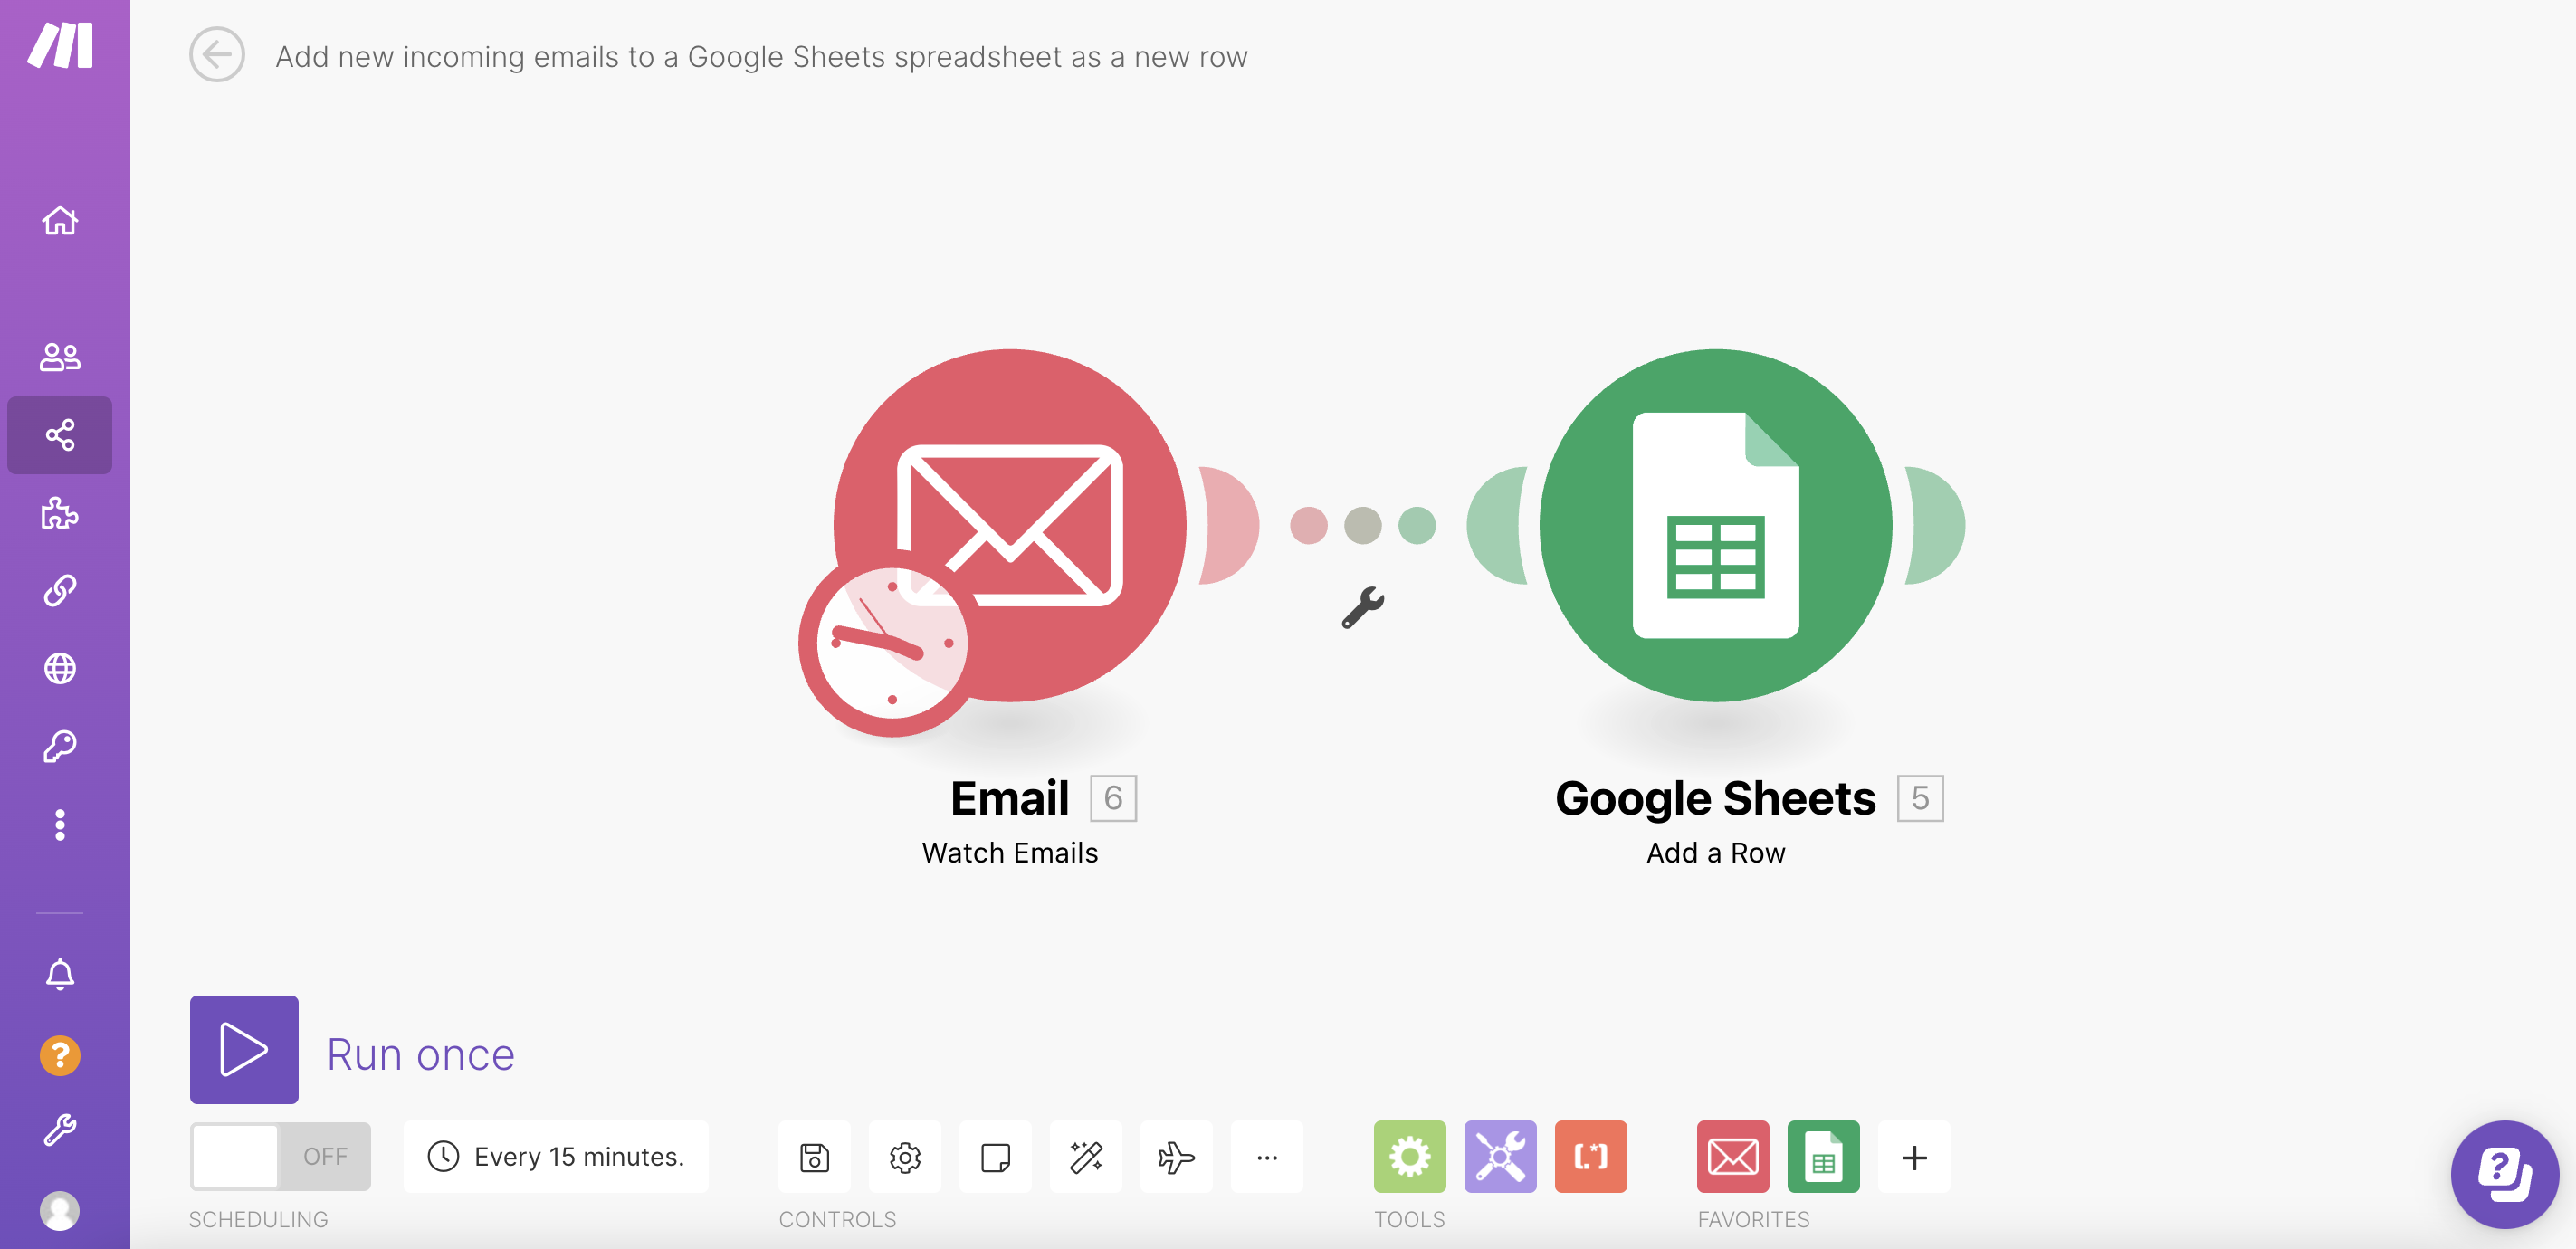
Example: Add new incoming emails to a Google Sheet as a new row
To exemplify how to create a scenario, we will go through the process step-by-step. In our example scenario, we are adding new incoming emails to a Google Sheets spreadsheet as a new row.
Note
Before you begin creating any scenario, ensure you are signed in to your Make account.
Step 1: Choose your apps
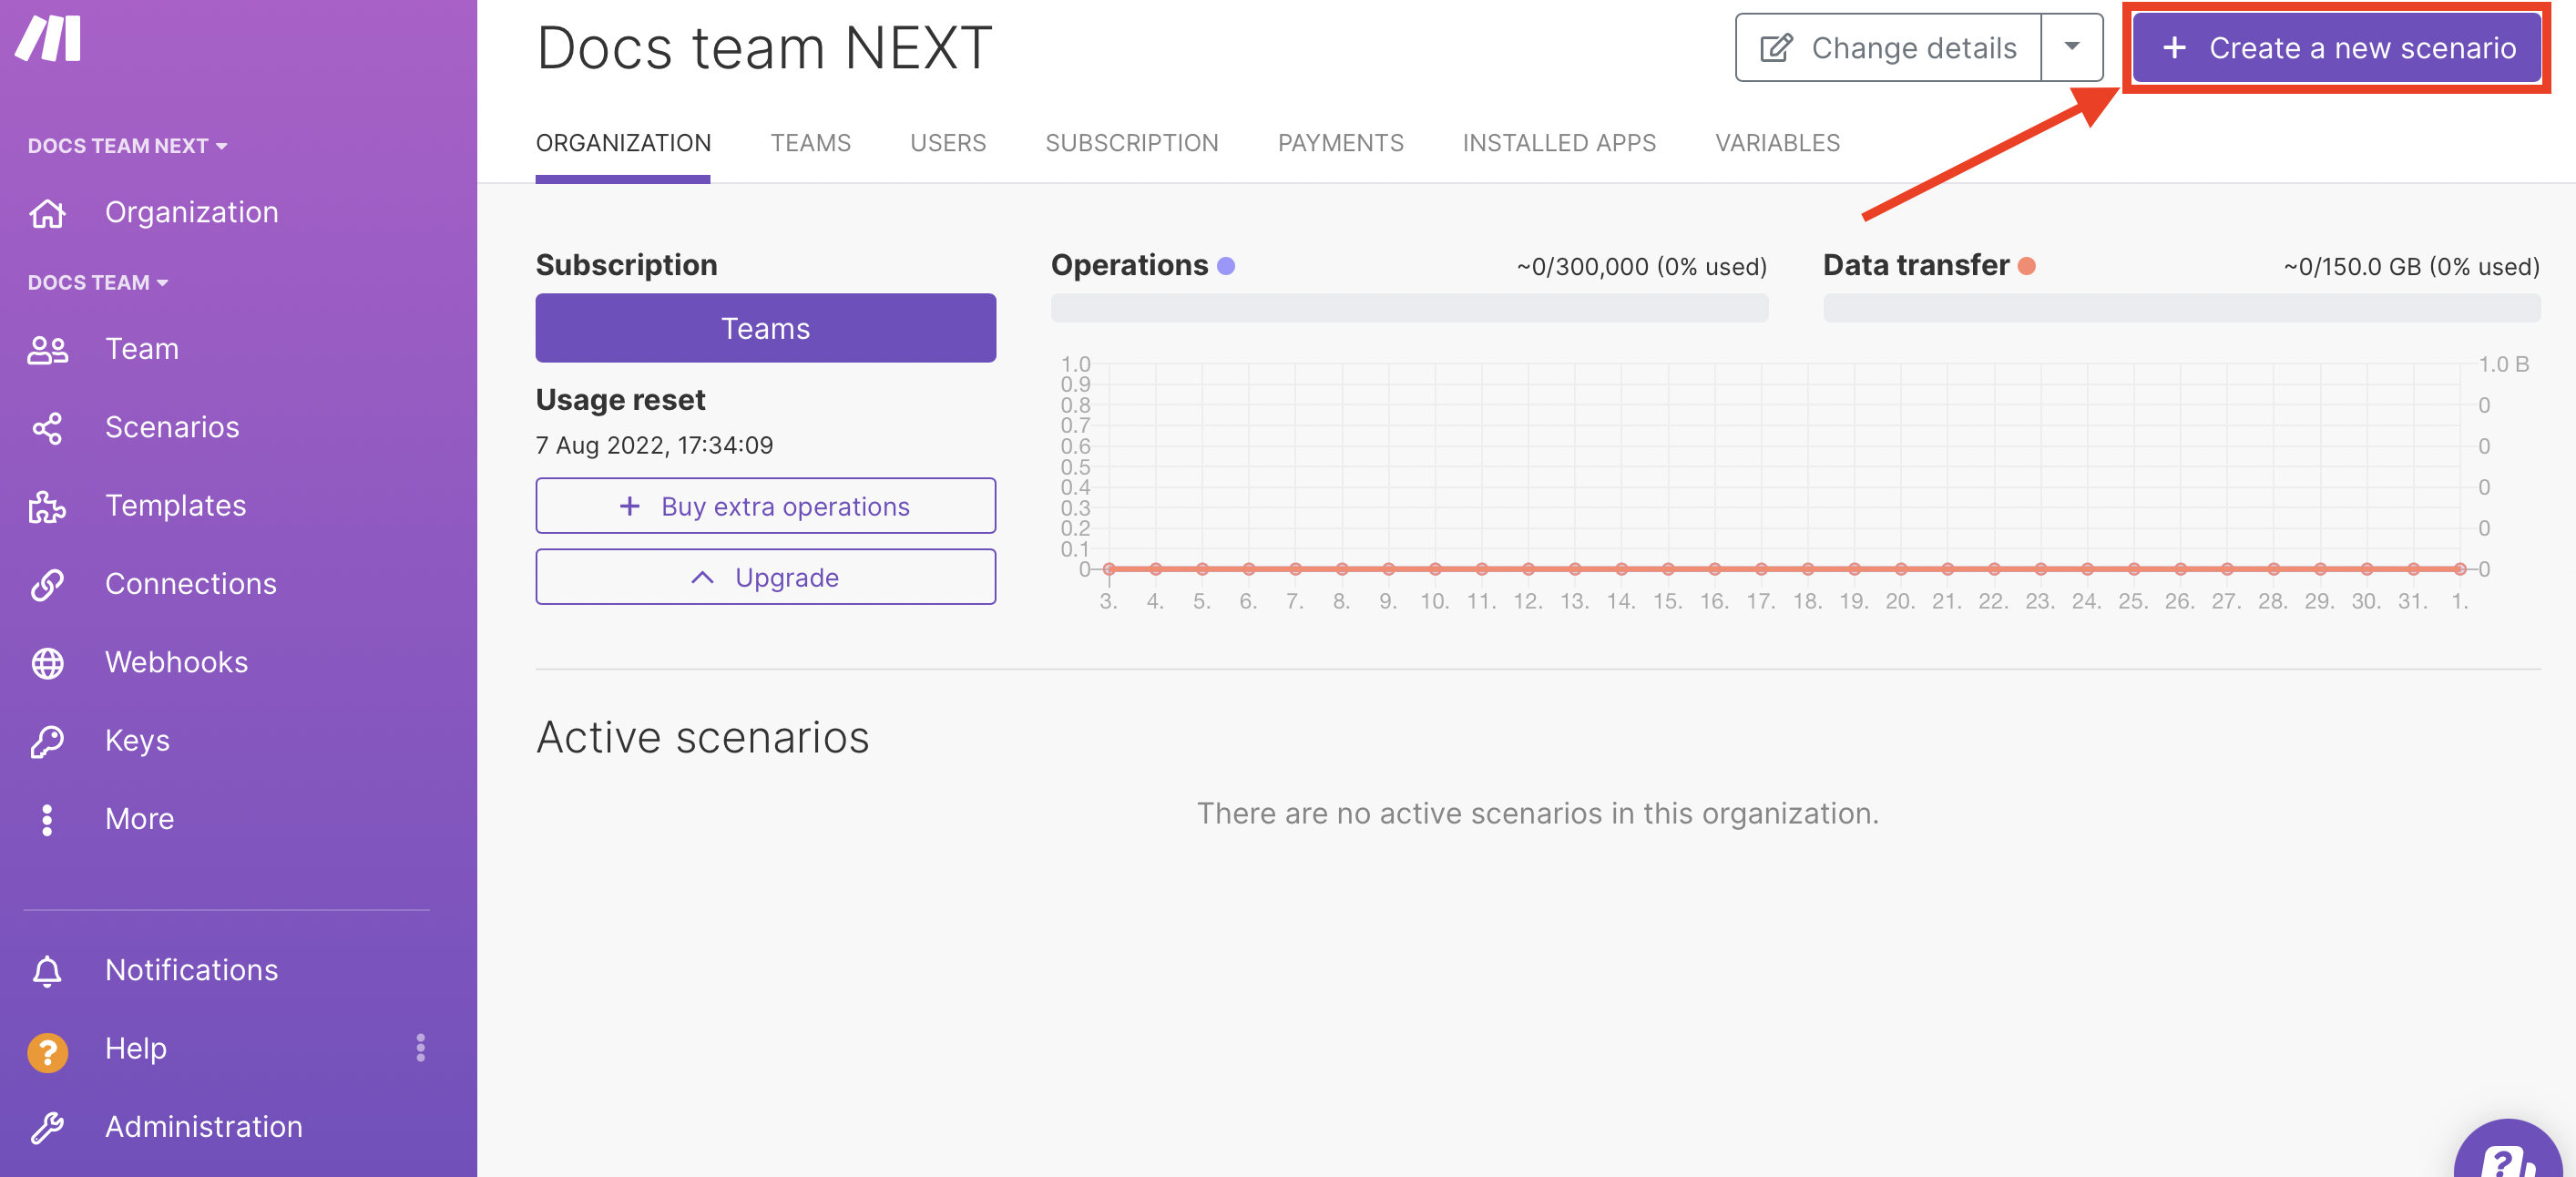
Go to your organization dashboard and click Create a new scenario button.
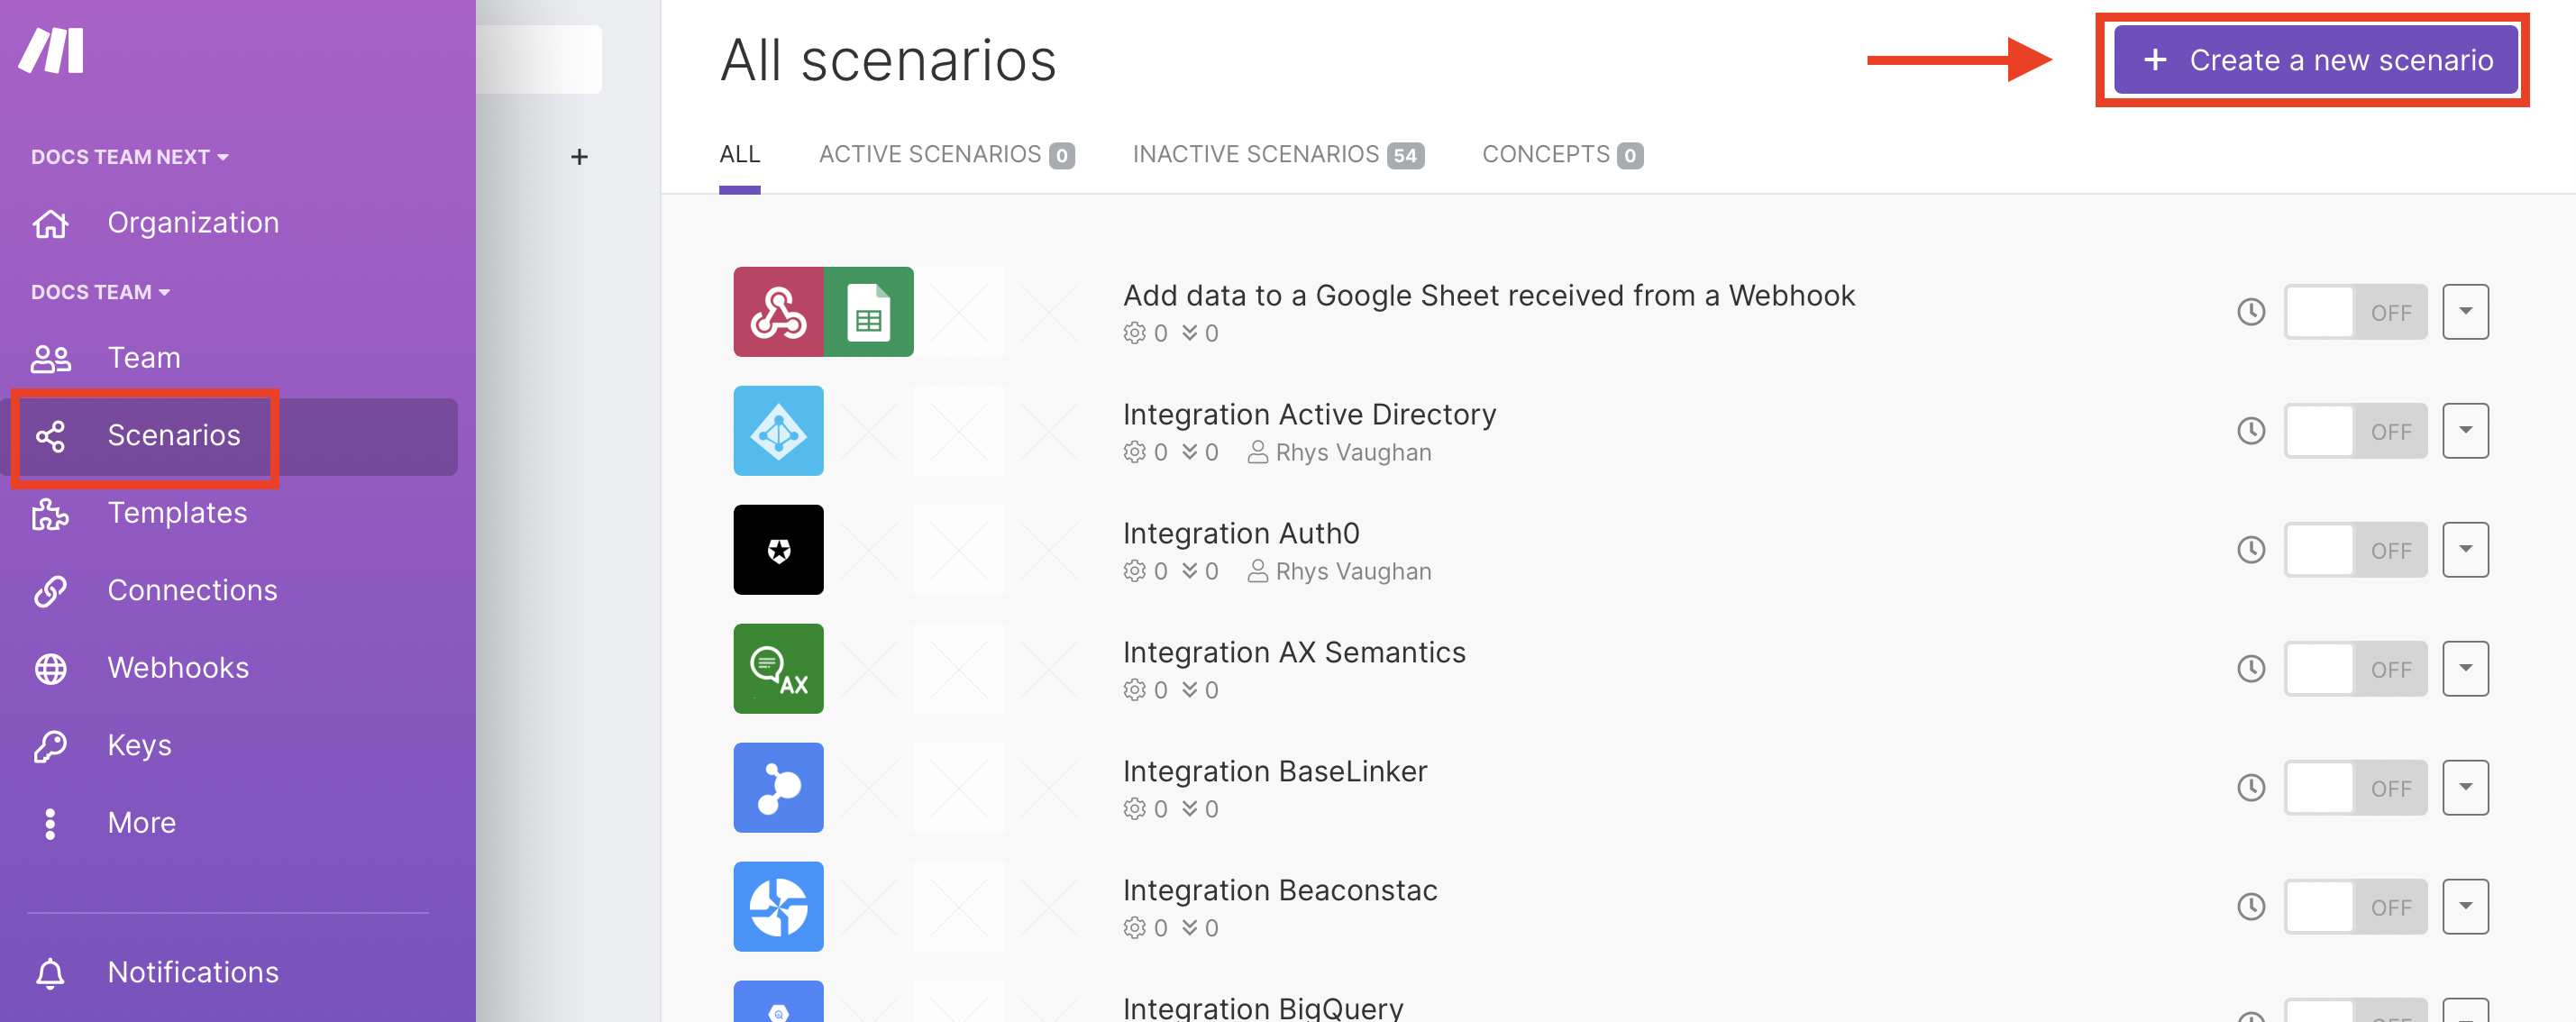
You can also go to Scenarios > Create a new scenario .
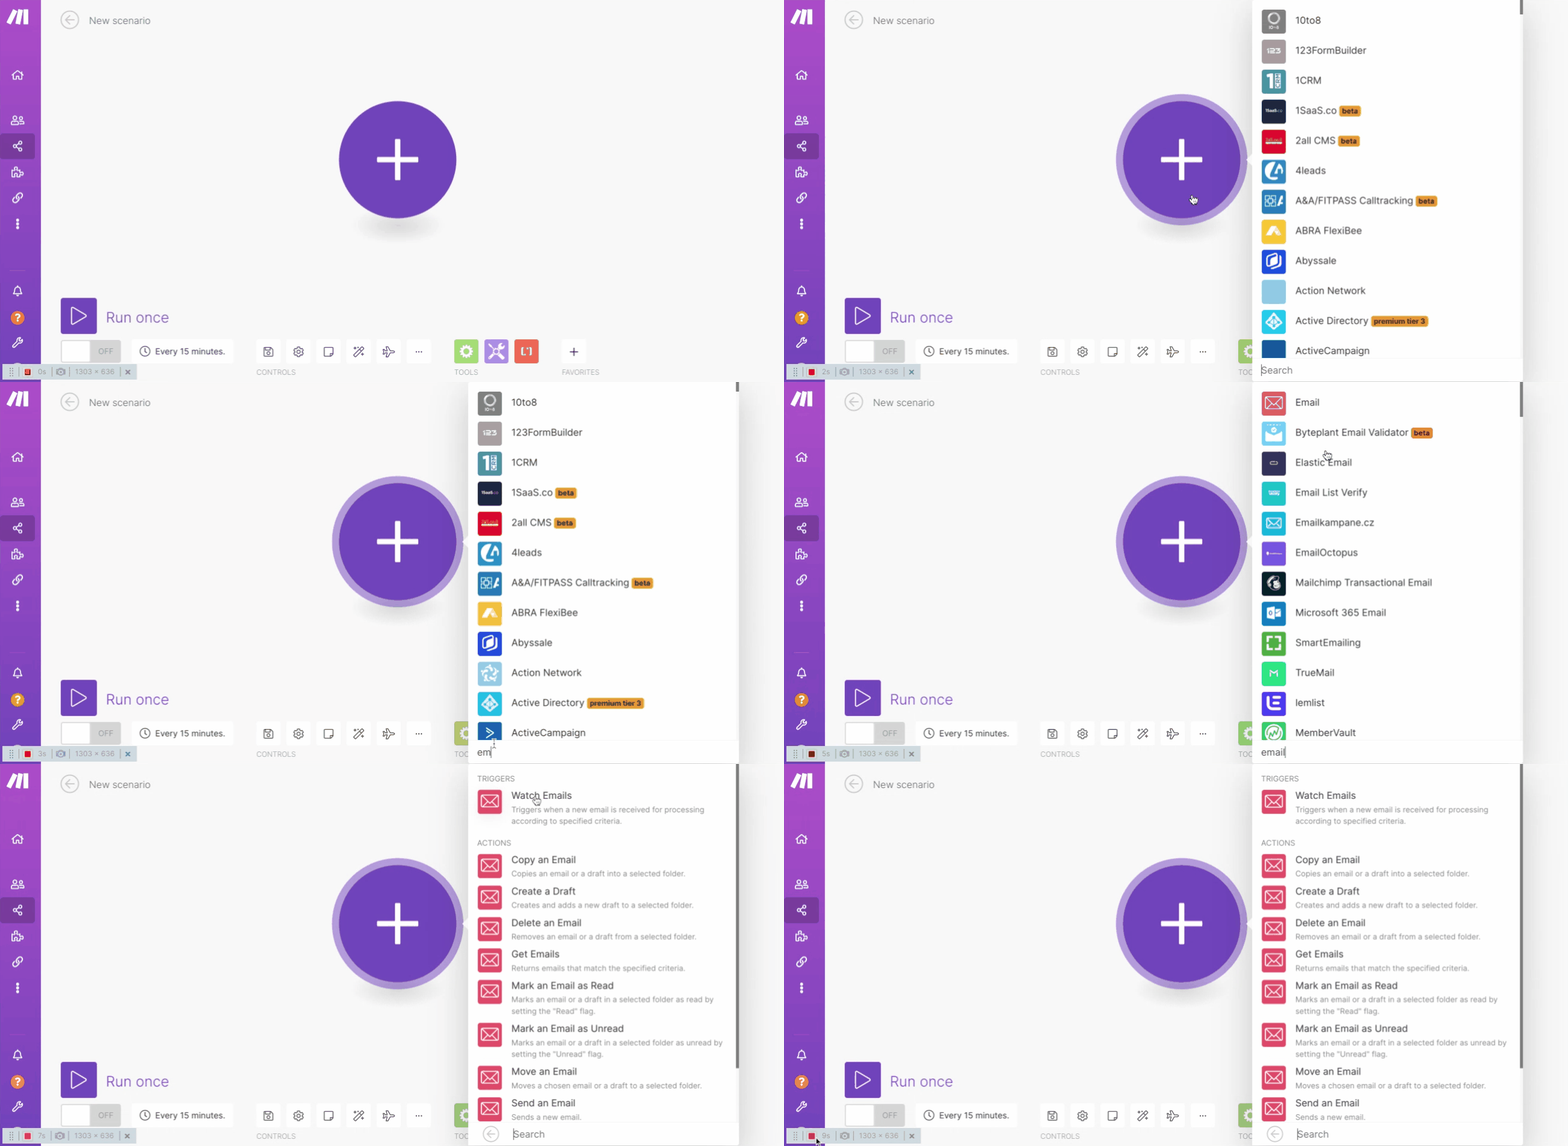
Click the plus icon. A list of apps appears. In the search field, search for the app you want to use. In this case, search for Email.
Step 2: Build your scenario
Add Email module
Select the folder whose emails you want to watch.
Go to Scenarios > Create a new scenario
Add Email > Watch email module.
Create a connection to your email.
Select the folder whose emails you want to watch.
Select the criteria of the emails you want to watch from the dropdown menu.
(optional)
Specify if you want to watch emails from a specific email address, emails that contain a specific phrase, etc.
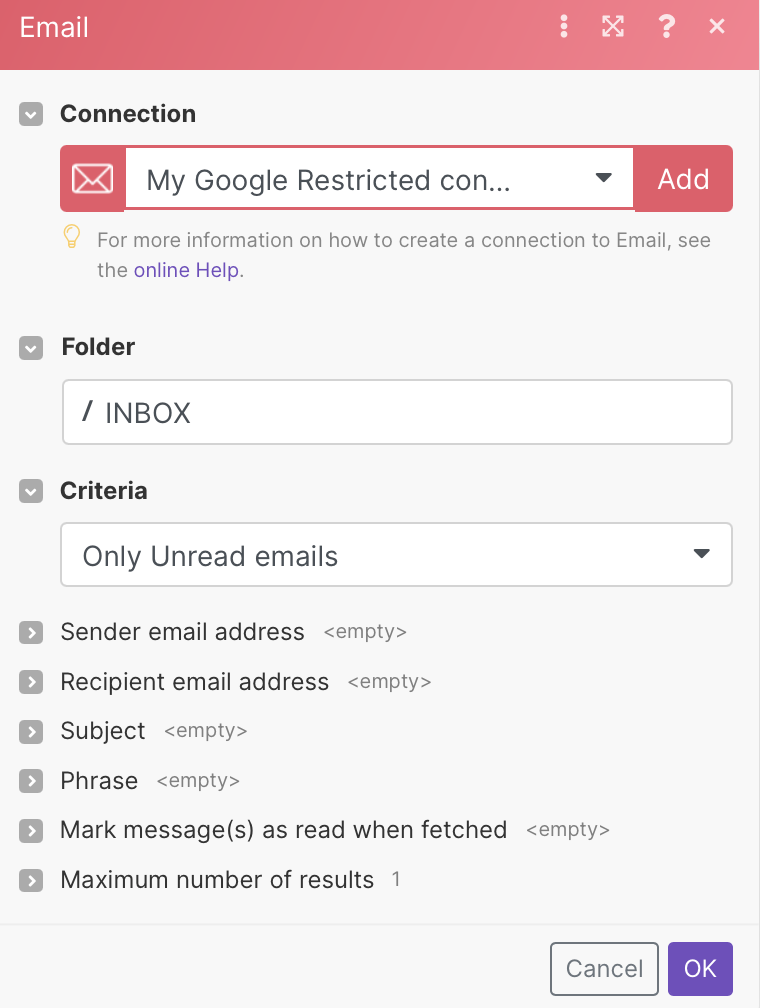
Click OK to save.
A pop-up appears. Choose from when to want to start watching emails.
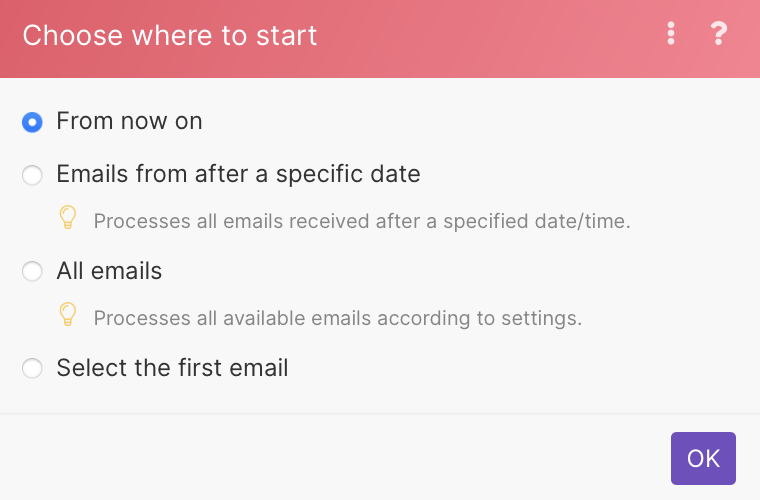
Click OK to save.
Add Google Sheets > Add a row module
Hover over the right part of the Email module. The plus sign appears.
Click Add another module. An empty module appears.
Search for and click the module you want. In this case, select Google Sheets > Add a row module.
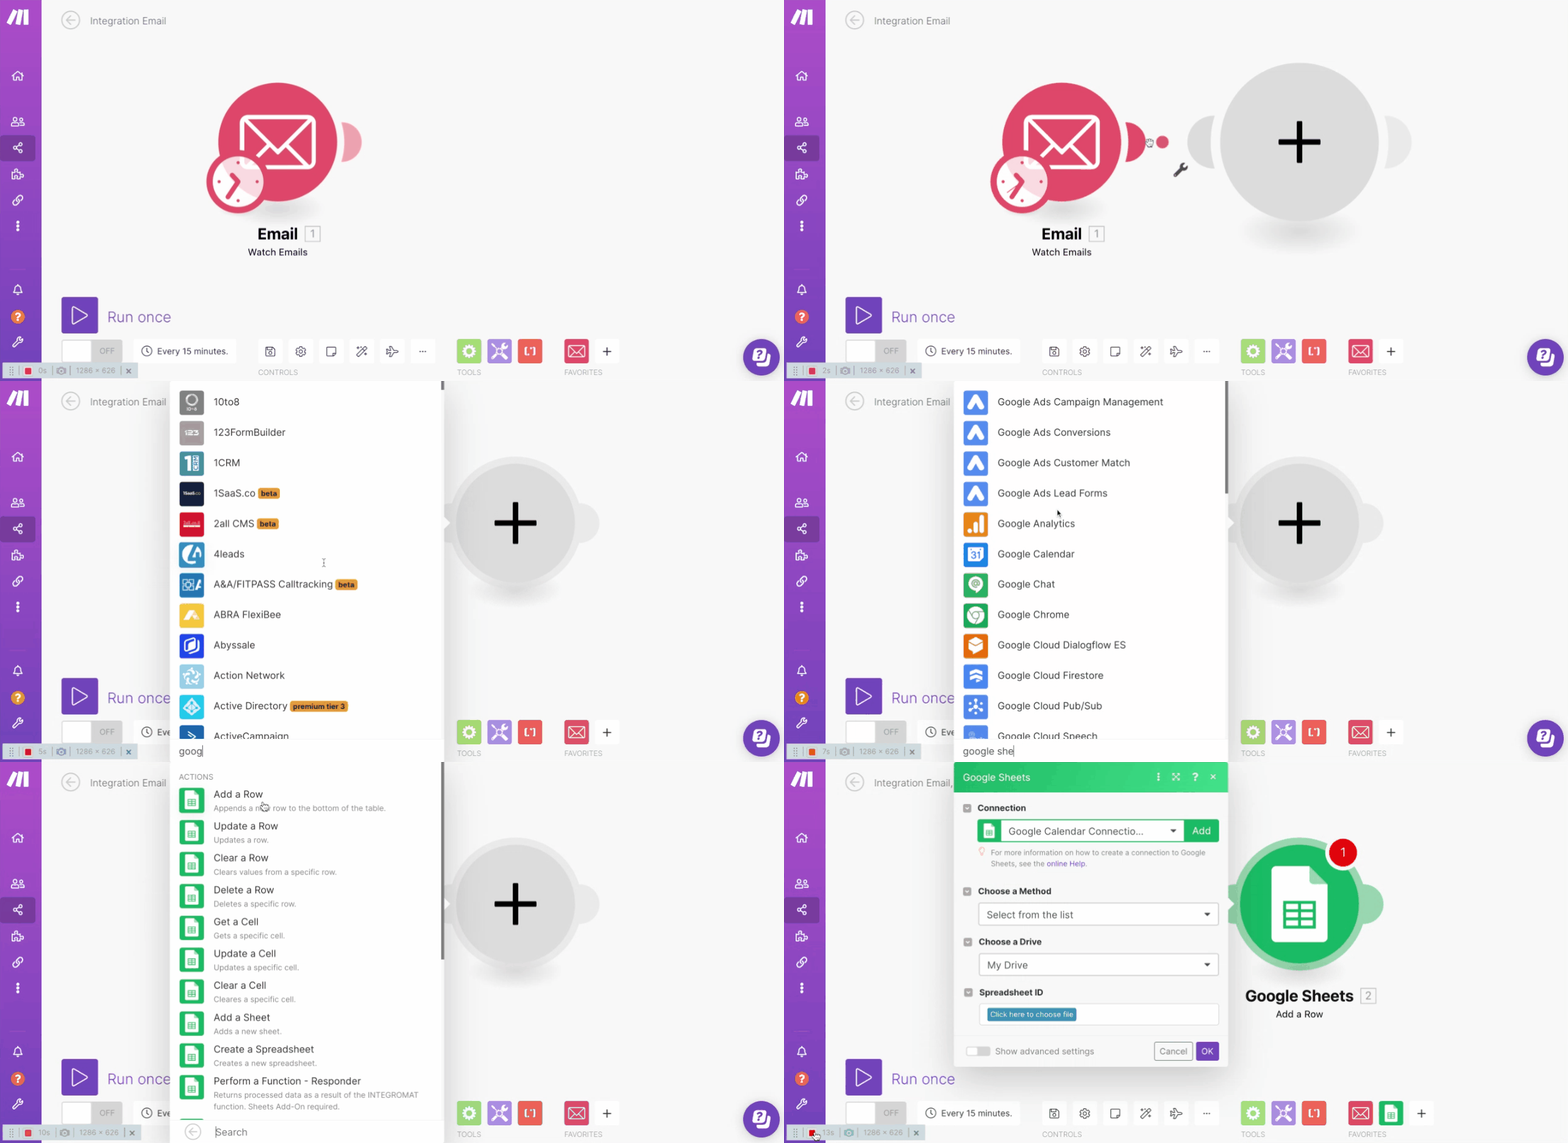
Create a connection to your Google account.
Under Choose a method, select whether you want to select your spreadsheet from the list or manually.
Under Choose a Drive, select your drive.
In Spreadsheet ID, select your spreadsheet.
If your spreadsheet is in the folder, first select the folder. Then, click the plus sign to select the specific spreadsheet in the folder.
Select the sheet name.
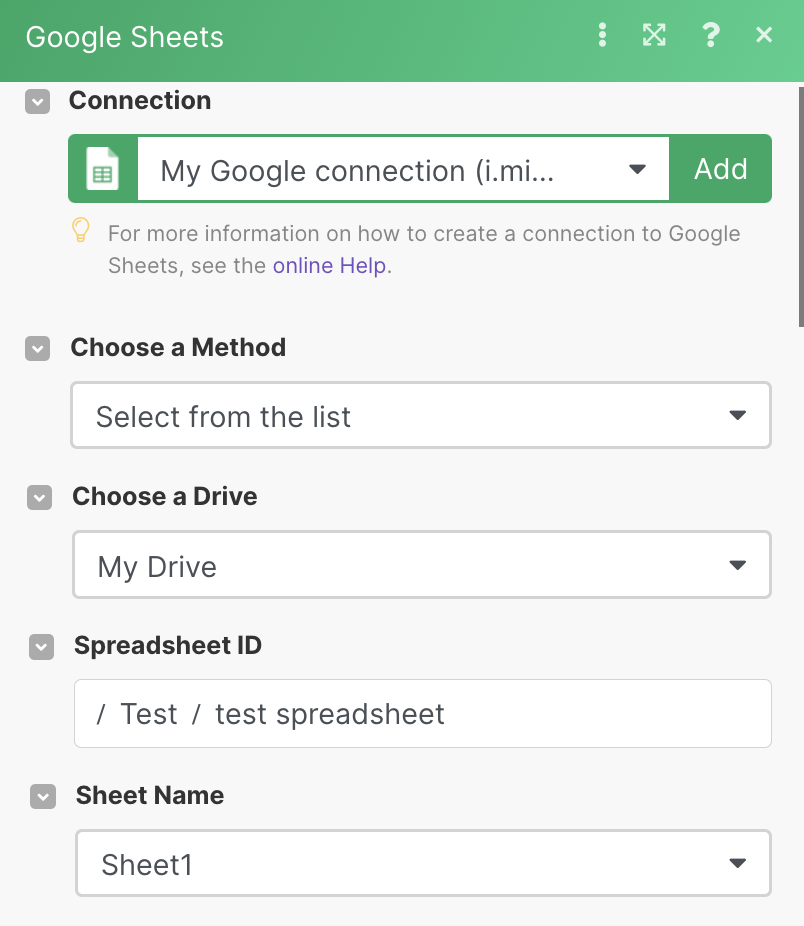
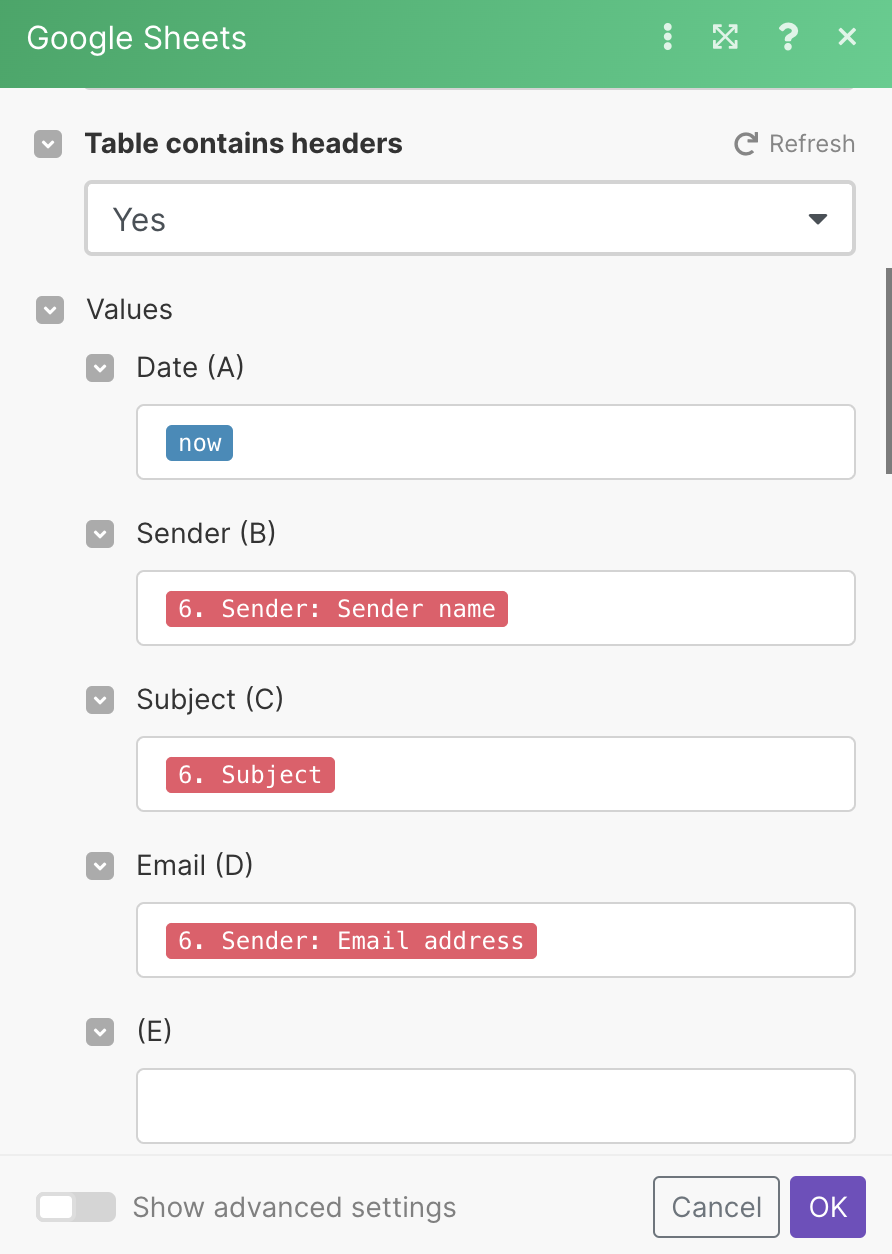
Select whether your table contains headers. Our table contains headers, but yours doesn't have to.
In values, map the data you want to get in your spreadsheet.
If your table has headers you will see the header names before the letter in brackets.
Click OK to save.
Note
For more robust scenarios, repeat the same steps as in Step 2 until you add all the modules you want.
Step 3: Test your scenario
Before you activate and schedule your scenario, you should test your scenario to check if everything is working properly.
Click the Run once button to test your scenario.
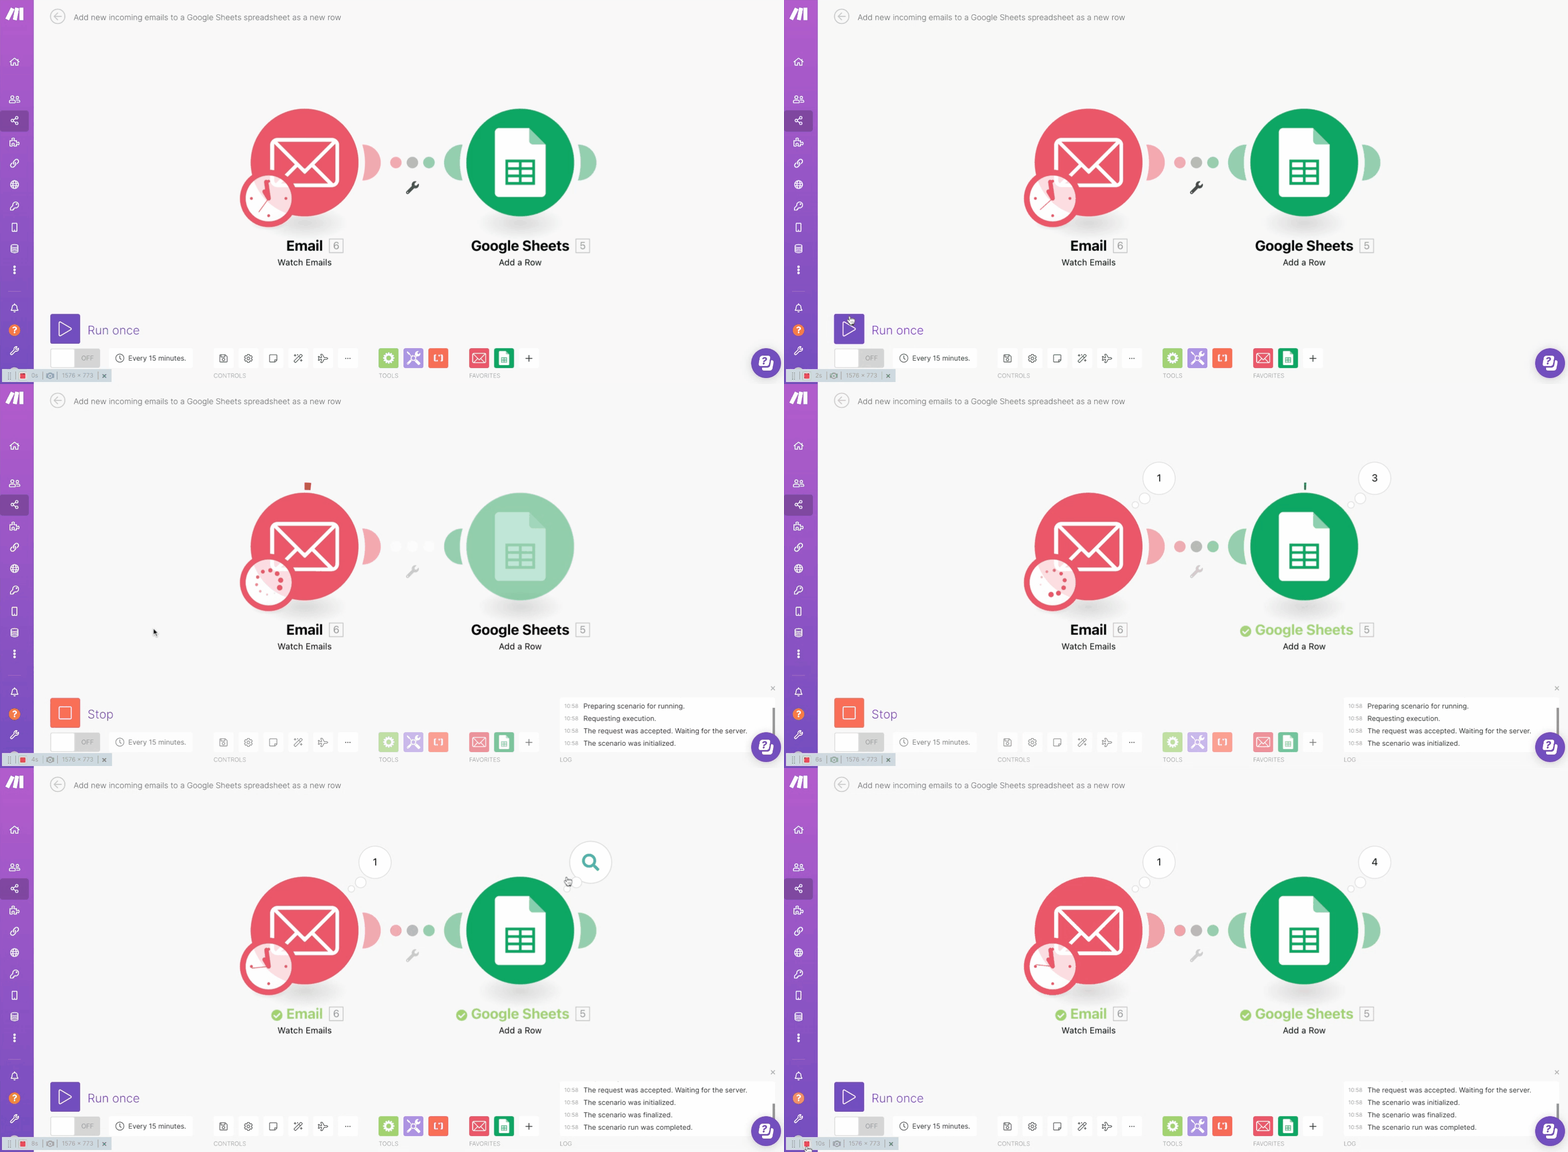
Bubbles appear on top of the modules, which gives you information about the processed data, or what is referred to as bundles.
Click the number to display the information about the processed bundles, including the number of operations. By clicking the individual operations, you can see which module settings were used and which bundles were returned by which module.
For more information, see the Execution flow section.
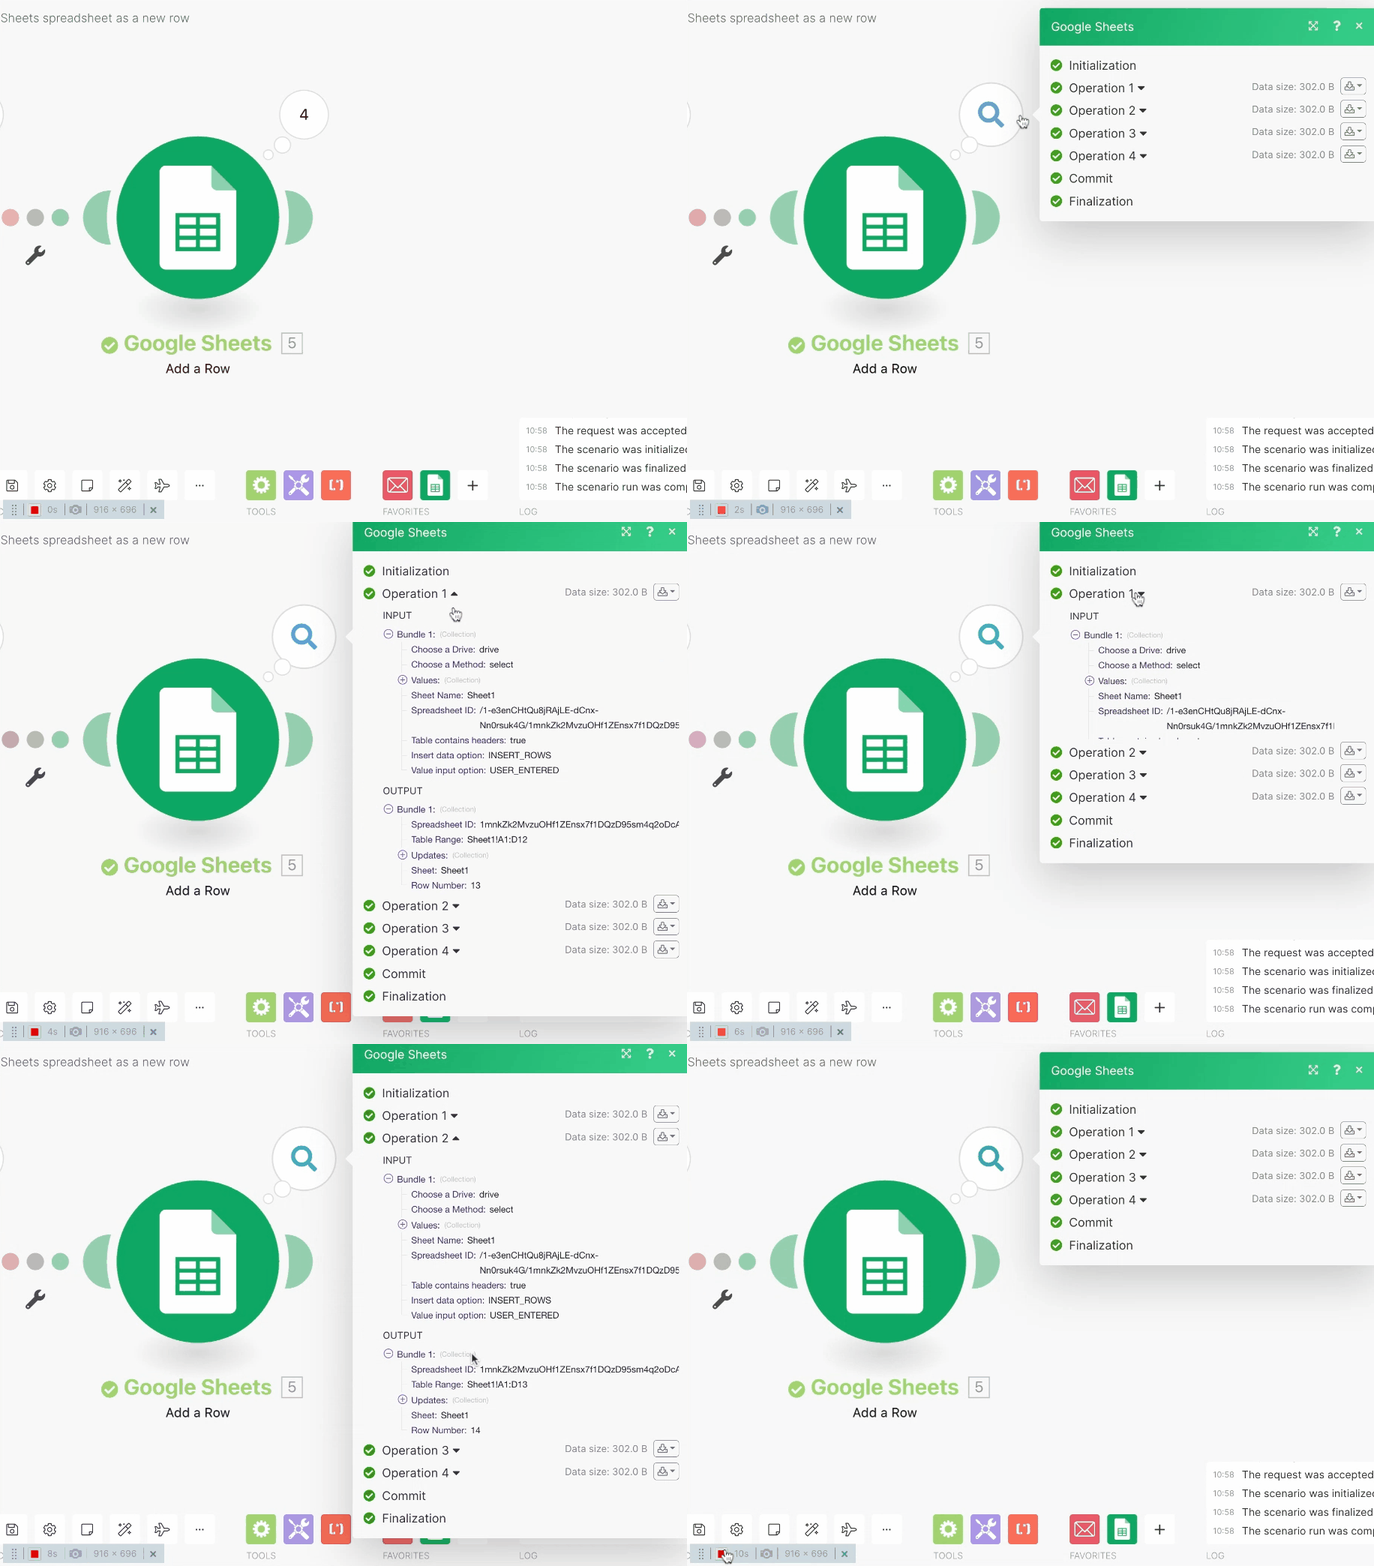
Testing your scenario is vital for seeing how data flows through your scenario. It also helps to show if there are any errors in your scenario.
Note
If you encounter an error for any scenario, see our Error processing section.
Step 4: Schedule and activate your scenario
Your scenario is almost ready to run, but it's still inactive.
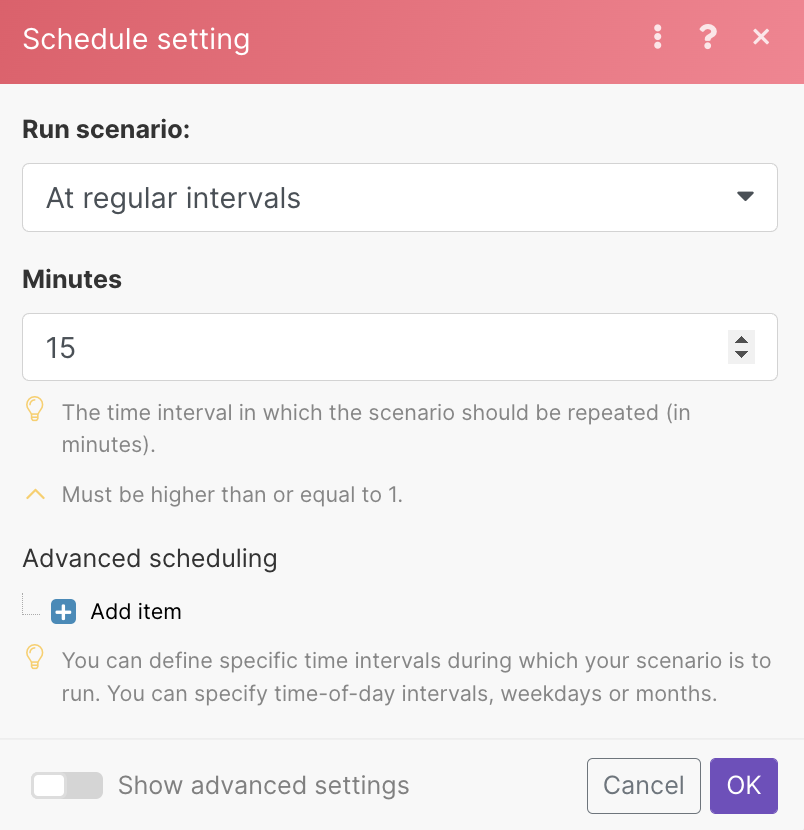
To schedule your scenarios, click on the Schedule setting.
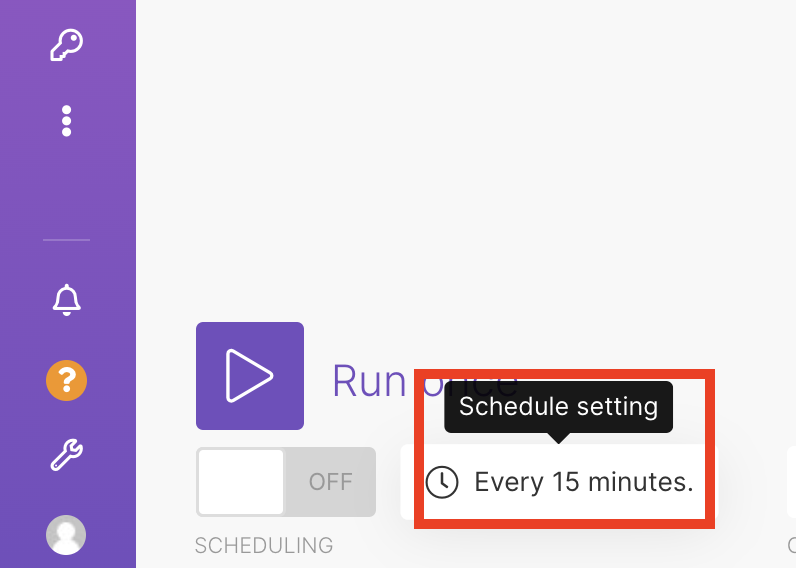
Set how often you want your scenario to run.
Click OK to save.
To activate your scenario, exit the scenario editor by hitting the arrow icon in the top-left corner, as shown in the animation below.
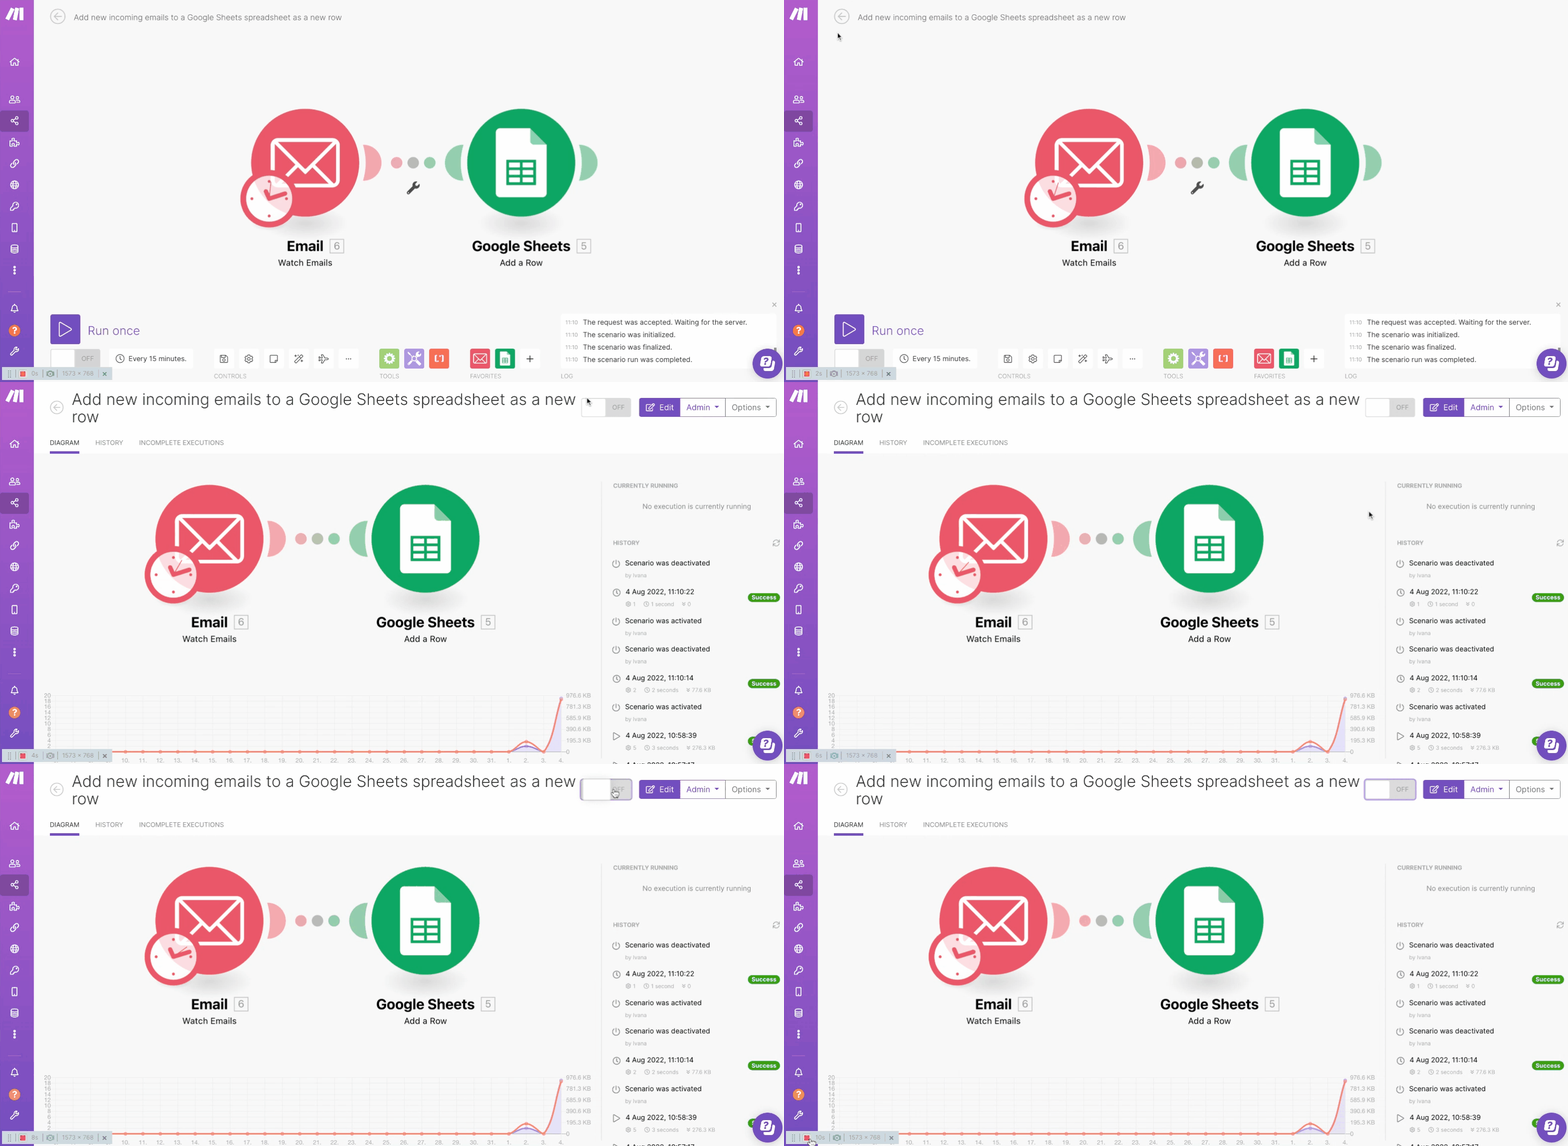
Click the ON/OFF button to activate your scenario and setting up the schedule.
Once activated, your scenario will run according to its schedule.
For further details on Scenario editor, please visit our Scenario editor documentation.
Important terms
Scenario activation
Scenarios are active or inactive. You can change the scenario status by clicking the ON/OFF button in the scenario detail.
Scenario schedule
Active scenarios execute according to a schedule. See Scheduling a scenario.
Scenario name
To rename your scenario, click on the scenario's name in the top left corner. Press ENTER or click outside the edited field to save the new scenario name.

Selecting the first bundle
Triggers allow you to select the first bundle that you want to process in the scenario. See Selecting the first bundle.
Number of returned bundles
Modules, by default, always return only two bundles. You can change this in the module settings field Maximum number of returned bundles.
Advanced scenario settings
Make allows you to configure a number of other advanced settings. See Scenario settings.